
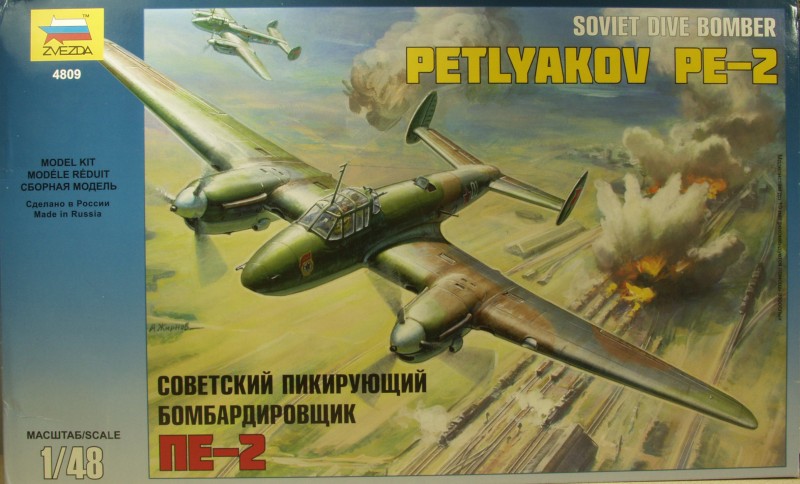
Zvezda Pe-2 Soviet Dive Bomber
History...
The Petlyakov Pe-2 history begins with a requirement for a high altitude bomber interceptor, the result of which was a twin engine monoplane with a pressurized cabin and a crew of two classified as the VI-100. The prototype was completed in early 1939 but before flight-testing could begin a change in policy brought the cancellation of the high altitude fighter requirement. In its place, Petlyakov was called upon to produce a high altitude bomber. Much of the effort put into the VI-100 was used for the high altitude bomber but before the prototype could be completed, yet another policy change, still in 1939, was made to scrap the high altitude bomber in favor of a dive-bomber. Much of the reason for all of these changes was the result of experiences during the Spanish Civil War. Another factor was that following the signing of the non aggression pact between Germany and the Soviet Union representatives from the Soviet Union were allowed to tour some of the German aircraft plants and one thing they took away from this was the Germany had no high altitude bombers in production. This change brought about a change in designation to PB-100. Since there was no longer a requirement for high altitude performance, Petlyakov dispensed with both the turbo-superchargers and pressurized cabin planned for the VI-100. This was made all the more difficult due to Petlyakov being imprisoned at hte time by Stalin for supposedly delaying completion of the Pe-8 four engine bomber. So the changes were made while being incarcerated. Once the plane had flown successfully Petlyakov was released from prison and the designation was changed to Pe-2.
The test program found the Pe-2 to handle satisfactorily and was stable in its dive bombing performance. Dive recovery was initiated by means of an automatic electromechanical operated device. The Pe-2 was also an extremely rugged aircraft with a safety factor of eleven. It also had a good turning radius that rivaled the new fighters then being tested and with a maximum speed of 540km/h the Pe-2 out flew many of the fighters then in service. By the time of the German invasion 458 planes were already in service. The Pe-2 was produced throughout the war and its appearance changed numerous times due to continuous improvement. After the early series of airframes a modernized version replaced the original hand held machine gun with a rotating turret in the rear portion of the cockpit and more powerful engines were installed. Late variants of the Pe-2 took part in all offensive actions during the last phases of the war, including the Battle of Berlin. By wars end somewhere in the neighborhood of 11,400 had been produced.
The Kit...
------------------------------------
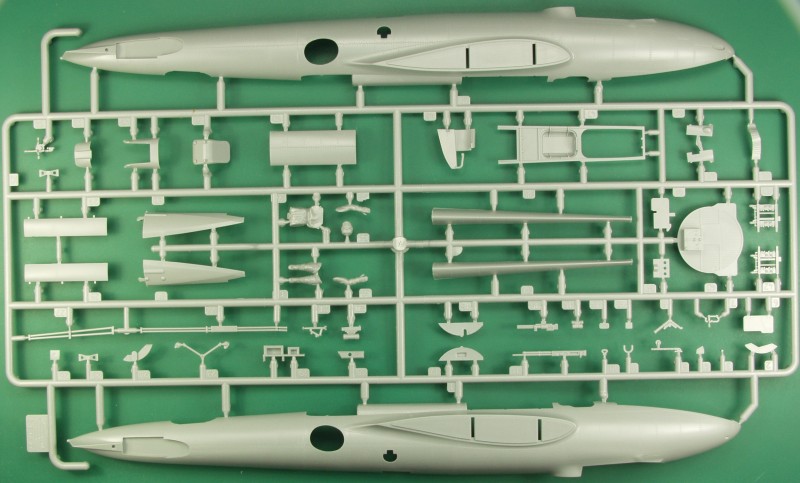
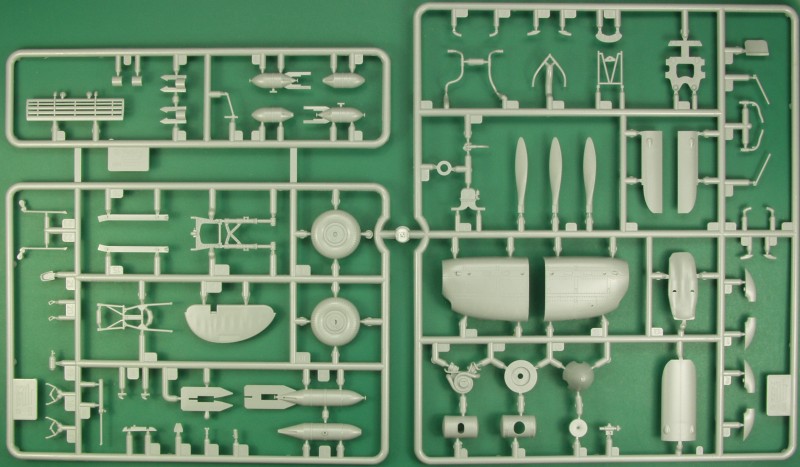
The Zvezda Pe-2 comes in what at first appears to be an end flap open box but when the flap is opened one discovers that it is just a sleeve and inside the sleeve is a tray type box with a hinged lid. Not as handy as a separate lid but way better than an end flap box. The inner box is of thin corrugated cardboard without any exterior markings. Inside the box there is a zip lock bag which contains the decals and the clear parts. The balance of the parts are in three sealed bags. One bag contains two sprues, primarily the fuselage an wing parts. One bag has 2 large sprues and a small sprue and the third has one large and one medium size sprue.
The kit is molded in a light gray plastic with a smooth finish and features really quite lovely recessed panel line and rivet detail. There are a lot of rivets but they are quite small and could easily disappear under a coat of paint. Parts are almost completely flash free and the sprue attachment points seem vary with the size of the part with the smaller parts having smaller attachment points. Looking primary at the airframe parts I found no surface defects. I found that most mold alignment seams to be light and should be easy to clean up. Ejector pin marks are present on the inside of the fuselage but they are light and either won't be seen or will be hidden by interior detail. The box states that the kit contains 435 parts which considering that the Pe-2 was about the same size as a Bf 110, is a lot of parts in the this scale and gives you some idea of the complexity of the detail included. The ailerons, elevators, rudders and leading edge slots are supplied as separate parts, the flaps are molded in the up position. The fabric representation on the control surfaces is very constrained and looks quite nice.
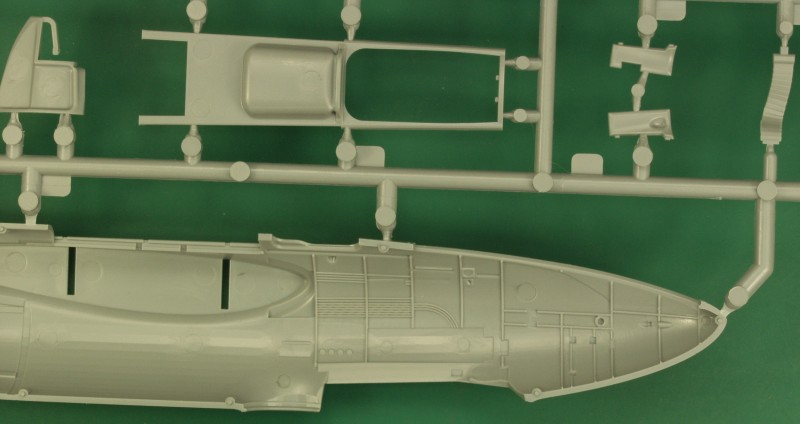
The kit supplies one complete engine which has nearly 50 parts to it for those who like the have open cowlings. The other cowling includes a back plate with the rearmost engine detail on it which can be seen in the gear well. Two of these are supplied if you don't wish to assemble the engine. The interior is also very thoroughly detailed and adding to the parts count are three crew members with separate arms, legs and heads. There are two instrument panels supplied, one blank and one with recesses for the instruments but there is no dial or pointer detail molded in. The decal sheet has the instrument faces on it. Eduard has already released PE sets for this kit for those who don't want to paint or use the instrument decals. There are no seat restraints supplied so you may want the Eduard set for those as well. There are spars that pass through the fuselage making up part of the interior detail and extending out far enough on each side to make for a solid mount for the wings.
The bomb bay is well detailed and bombs are supplied for both internal in the bomb bay and external under the wings depending on which version you chose to build. The instructions refer to version 1 and version 2 throughout the build which is somewhat confusing as there are 3 sets of markings supplied. The most obvious difference between the two concerns the internal and external mounting of the bombs but there are other less obvious differences so some care will need to be taken during assembly. Nothing in the instructions, at least in the English parts, mentions exactly which of the numerous series the model represents. Based of my references it must be a Series 205 or later. Earlier series with the turret had two small balance vanes on the turret and starting with the Series 205 it had a single larger vane which the kit has. These vanes counter acted the wind resistance on the barrel. The wheel assemblies are in halves and not weighted. The tires have nice tread detail and the tire size and Russian writing is molded into the sidewalls. The propeller assemblies have individual blades, spinner and backing plate. The blades are keyed to set the pitch.
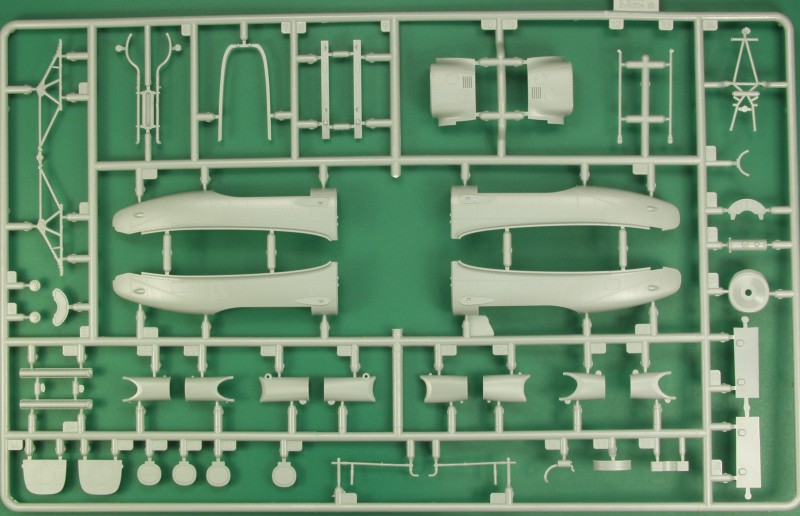
OK, lets look at the sprues.
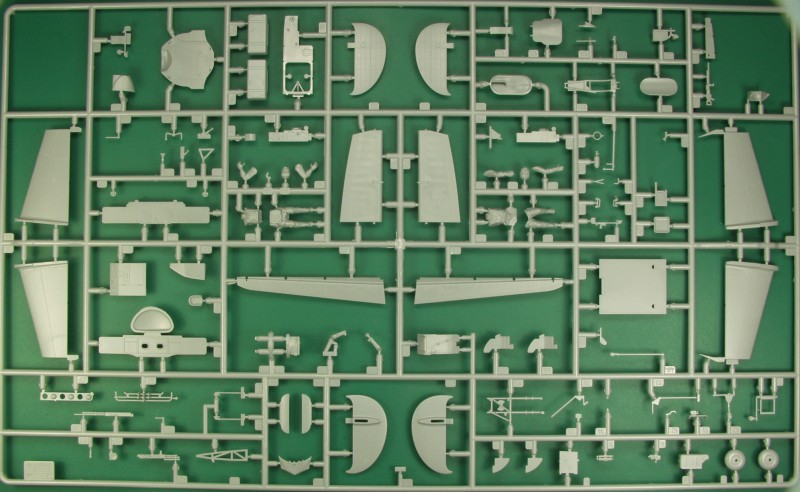
This close up shows the very petite rivet detail, certainly rivaling some of the high end manufacturers.

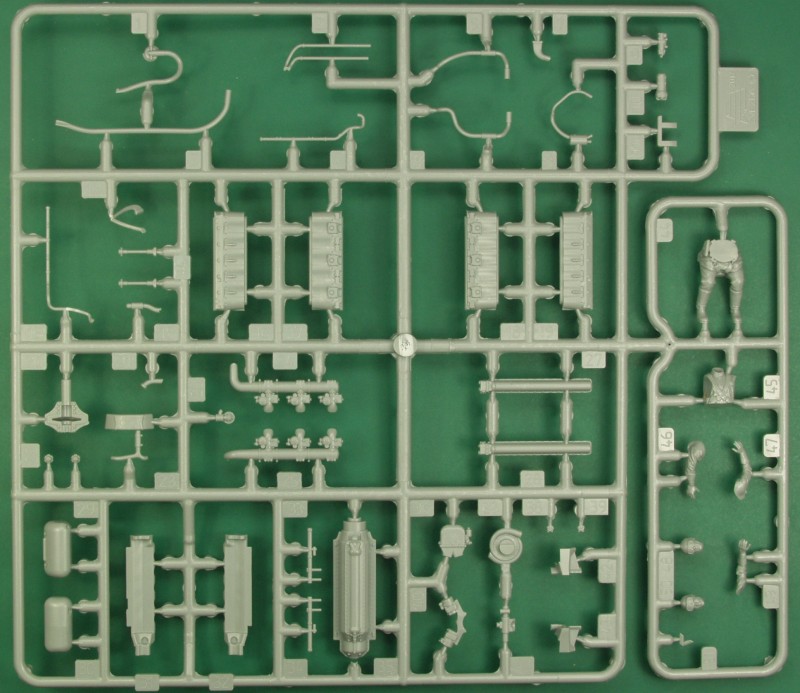
And here you can see some of the interior detail.
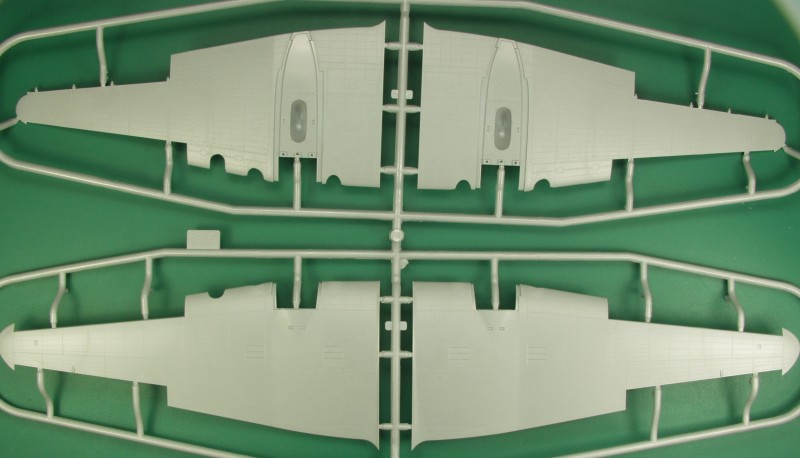
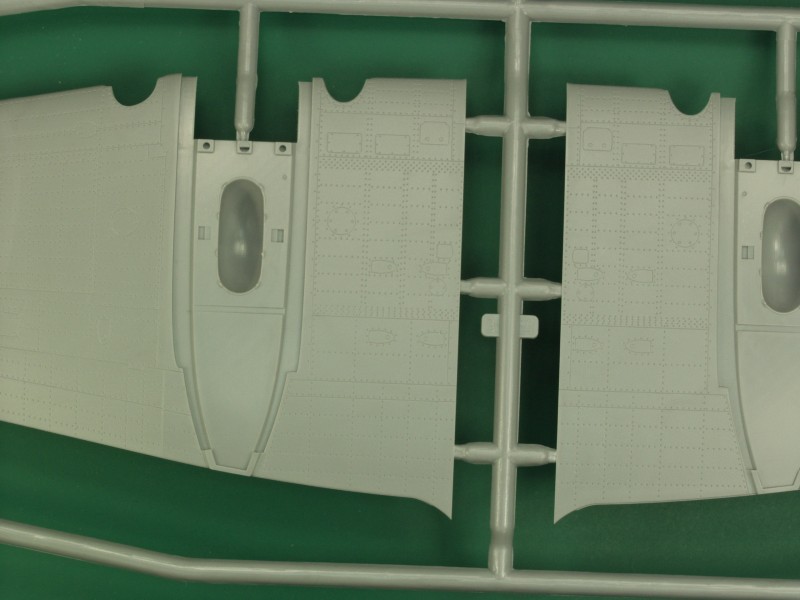
A close up of the wing surface detail. There are recesses in the wings for the nacelles which I find helpful as it eliminates an area that quite often creates a problematic joint that needs filling.
There are two of these sprues.
Clear parts are reasonably clear and probably a good thing as with all the other Zvezda kits I have encountered the clear parts are apparently molded from some sort of vinyl as they are not only quite flexible but Future will not stick to it. On most of them it will just sheet off and even though it may appear to stick on some it will come right off with the application of any sort of masking tape.
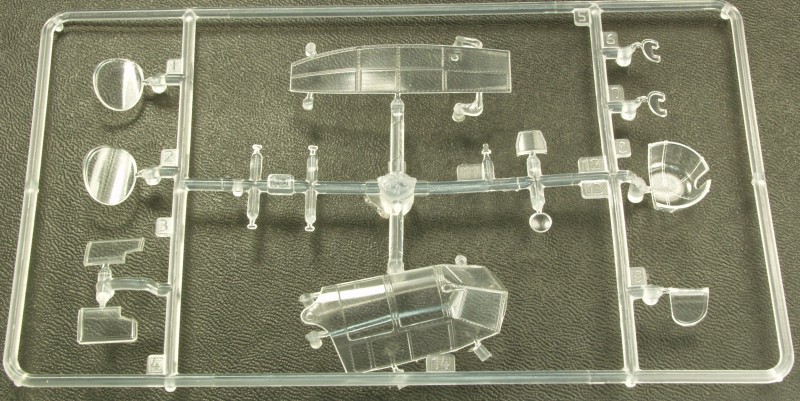
Optical distortion is minimal as seen below.
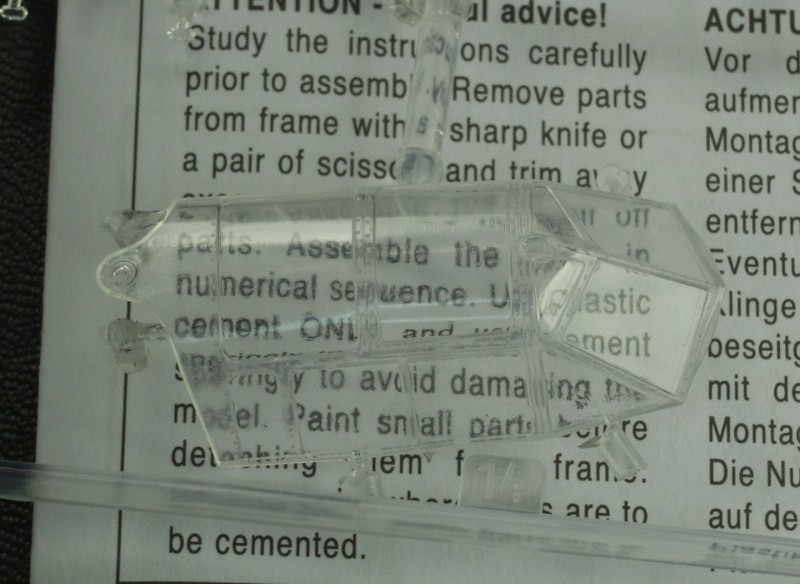
As a demonstration of the clear parts flexibility the photo below is the canopy from their Su-2 kit. One thing you won't need to worry about is cracking. Solvent based paint seemed to stick to it OK and clear parts cement worked as well. I don't use acrylics so I can't speak to those.

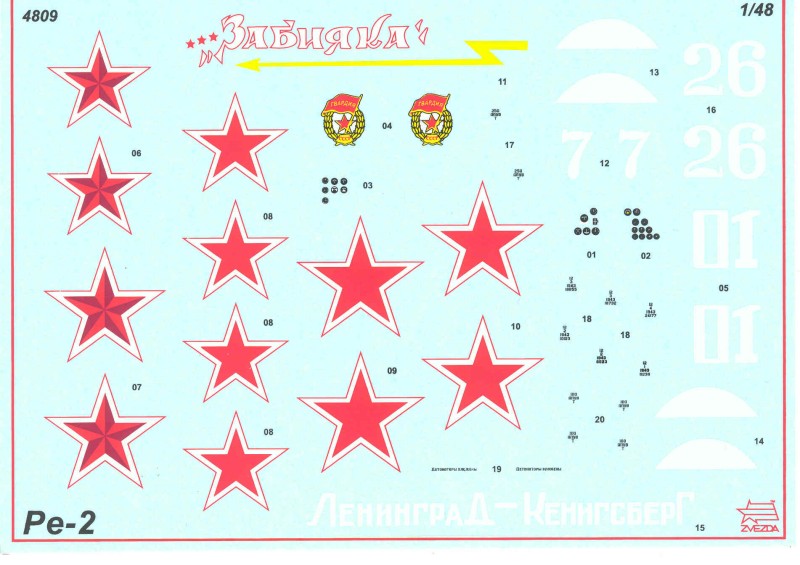
The decals include marking for three aircraft. There are also decals for the instrument panels. There are also a few stencils supplied. The decals have a flat finish and with the exception of the lettering and slogans have minimal clear film. I had mixed success using their decals on my Pe-8. I got them all on but some of them cracked on me during application. I can only hope these are better. The registration is good but it's difficult to tell if the white is opaque enough.
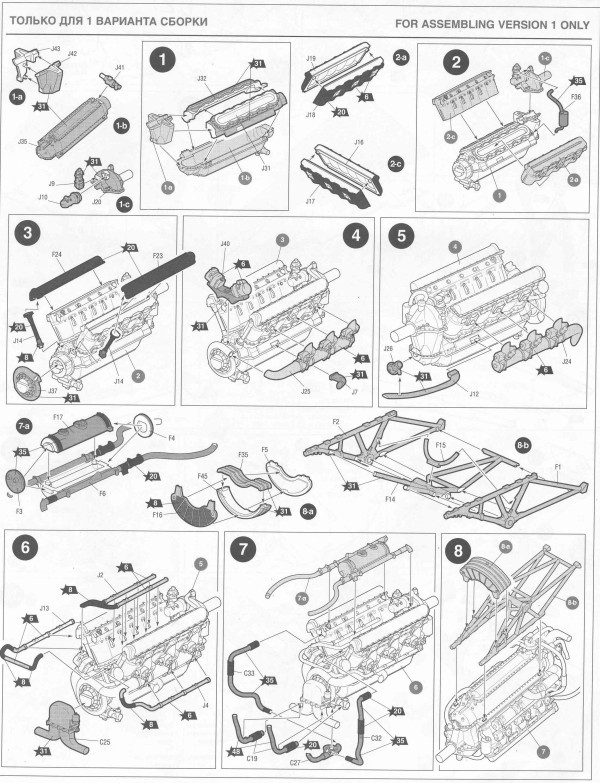
The instructions consist of a twelve page stapled booklet in A4 size and portrait format. Assembly is divided into 42 steps and a parts map is included. Diagrams are easy to follow. As assemblies are built up, new parts to be added are darker in color than the already assembled parts to which you are adding them. Paint colors are shown throughout by Humbrol numbers and a chart gives the generic color names. As I mentioned earlier the detail level is quite high so a lot of parts are involved and it will be wise to pay attention to the assembly diagrams. I have included a couple of excerpts from the instructions to illustrate both the style and detail level included in the kit. The first one is for the engine assembly.
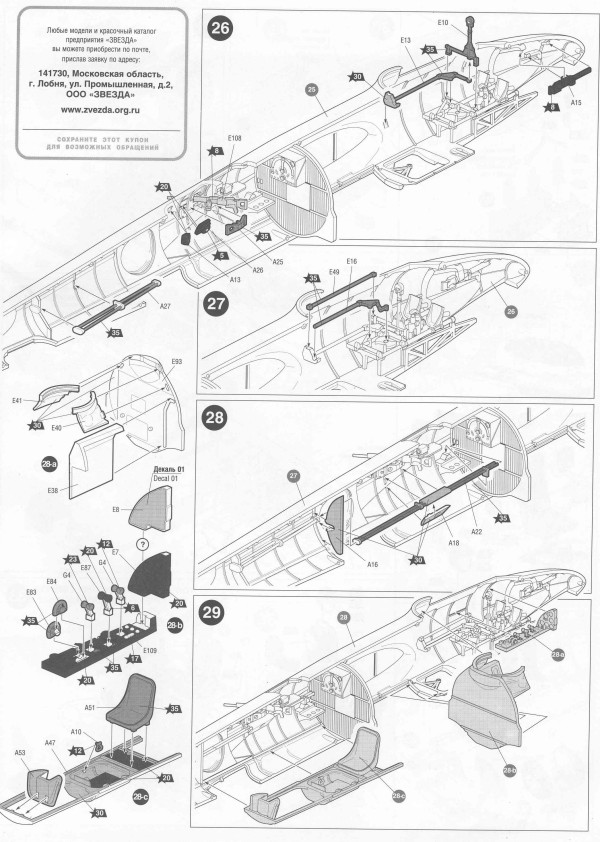
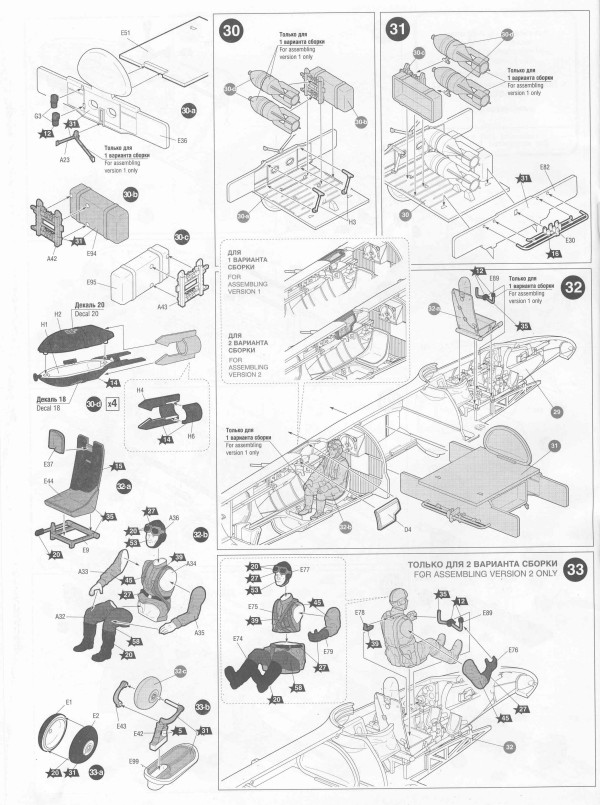
The next two show some of the interior detail.
The last page has the painting and decal locations. All three take up about two thirds of the page with the balance being the color chart and basic decal application instructions. This makes things a bit crowded so the painting diagrams are rather small. One place where another couple of pages would have helped.
My 2¢ worth...
This is an extremely well detailed kit. I did not do a test fitting but based on my experiences with their Pe-8 and Su-2 kits it should fit together well. All of the interior and engine detail will require patience and may be a bit much for new modelers but should produce an excellent finished product for experienced modelers. It easily trumps the MPM and HPM kits of the aircraft not only in detail but ease of assembly as well. Highly recommended.
History...
The Petlyakov Pe-2 history begins with a requirement for a high altitude bomber interceptor, the result of which was a twin engine monoplane with a pressurized cabin and a crew of two classified as the VI-100. The prototype was completed in early 1939 but before flight-testing could begin a change in policy brought the cancellation of the high altitude fighter requirement. In its place, Petlyakov was called upon to produce a high altitude bomber. Much of the effort put into the VI-100 was used for the high altitude bomber but before the prototype could be completed, yet another policy change, still in 1939, was made to scrap the high altitude bomber in favor of a dive-bomber. Much of the reason for all of these changes was the result of experiences during the Spanish Civil War. Another factor was that following the signing of the non aggression pact between Germany and the Soviet Union representatives from the Soviet Union were allowed to tour some of the German aircraft plants and one thing they took away from this was the Germany had no high altitude bombers in production. This change brought about a change in designation to PB-100. Since there was no longer a requirement for high altitude performance, Petlyakov dispensed with both the turbo-superchargers and pressurized cabin planned for the VI-100. This was made all the more difficult due to Petlyakov being imprisoned at hte time by Stalin for supposedly delaying completion of the Pe-8 four engine bomber. So the changes were made while being incarcerated. Once the plane had flown successfully Petlyakov was released from prison and the designation was changed to Pe-2.
The test program found the Pe-2 to handle satisfactorily and was stable in its dive bombing performance. Dive recovery was initiated by means of an automatic electromechanical operated device. The Pe-2 was also an extremely rugged aircraft with a safety factor of eleven. It also had a good turning radius that rivaled the new fighters then being tested and with a maximum speed of 540km/h the Pe-2 out flew many of the fighters then in service. By the time of the German invasion 458 planes were already in service. The Pe-2 was produced throughout the war and its appearance changed numerous times due to continuous improvement. After the early series of airframes a modernized version replaced the original hand held machine gun with a rotating turret in the rear portion of the cockpit and more powerful engines were installed. Late variants of the Pe-2 took part in all offensive actions during the last phases of the war, including the Battle of Berlin. By wars end somewhere in the neighborhood of 11,400 had been produced.
The Kit...
------------------------------------
The Zvezda Pe-2 comes in what at first appears to be an end flap open box but when the flap is opened one discovers that it is just a sleeve and inside the sleeve is a tray type box with a hinged lid. Not as handy as a separate lid but way better than an end flap box. The inner box is of thin corrugated cardboard without any exterior markings. Inside the box there is a zip lock bag which contains the decals and the clear parts. The balance of the parts are in three sealed bags. One bag contains two sprues, primarily the fuselage an wing parts. One bag has 2 large sprues and a small sprue and the third has one large and one medium size sprue.
The kit is molded in a light gray plastic with a smooth finish and features really quite lovely recessed panel line and rivet detail. There are a lot of rivets but they are quite small and could easily disappear under a coat of paint. Parts are almost completely flash free and the sprue attachment points seem vary with the size of the part with the smaller parts having smaller attachment points. Looking primary at the airframe parts I found no surface defects. I found that most mold alignment seams to be light and should be easy to clean up. Ejector pin marks are present on the inside of the fuselage but they are light and either won't be seen or will be hidden by interior detail. The box states that the kit contains 435 parts which considering that the Pe-2 was about the same size as a Bf 110, is a lot of parts in the this scale and gives you some idea of the complexity of the detail included. The ailerons, elevators, rudders and leading edge slots are supplied as separate parts, the flaps are molded in the up position. The fabric representation on the control surfaces is very constrained and looks quite nice.
The kit supplies one complete engine which has nearly 50 parts to it for those who like the have open cowlings. The other cowling includes a back plate with the rearmost engine detail on it which can be seen in the gear well. Two of these are supplied if you don't wish to assemble the engine. The interior is also very thoroughly detailed and adding to the parts count are three crew members with separate arms, legs and heads. There are two instrument panels supplied, one blank and one with recesses for the instruments but there is no dial or pointer detail molded in. The decal sheet has the instrument faces on it. Eduard has already released PE sets for this kit for those who don't want to paint or use the instrument decals. There are no seat restraints supplied so you may want the Eduard set for those as well. There are spars that pass through the fuselage making up part of the interior detail and extending out far enough on each side to make for a solid mount for the wings.
The bomb bay is well detailed and bombs are supplied for both internal in the bomb bay and external under the wings depending on which version you chose to build. The instructions refer to version 1 and version 2 throughout the build which is somewhat confusing as there are 3 sets of markings supplied. The most obvious difference between the two concerns the internal and external mounting of the bombs but there are other less obvious differences so some care will need to be taken during assembly. Nothing in the instructions, at least in the English parts, mentions exactly which of the numerous series the model represents. Based of my references it must be a Series 205 or later. Earlier series with the turret had two small balance vanes on the turret and starting with the Series 205 it had a single larger vane which the kit has. These vanes counter acted the wind resistance on the barrel. The wheel assemblies are in halves and not weighted. The tires have nice tread detail and the tire size and Russian writing is molded into the sidewalls. The propeller assemblies have individual blades, spinner and backing plate. The blades are keyed to set the pitch.
OK, lets look at the sprues.
This close up shows the very petite rivet detail, certainly rivaling some of the high end manufacturers.
And here you can see some of the interior detail.
A close up of the wing surface detail. There are recesses in the wings for the nacelles which I find helpful as it eliminates an area that quite often creates a problematic joint that needs filling.
There are two of these sprues.
Clear parts are reasonably clear and probably a good thing as with all the other Zvezda kits I have encountered the clear parts are apparently molded from some sort of vinyl as they are not only quite flexible but Future will not stick to it. On most of them it will just sheet off and even though it may appear to stick on some it will come right off with the application of any sort of masking tape.
Optical distortion is minimal as seen below.
As a demonstration of the clear parts flexibility the photo below is the canopy from their Su-2 kit. One thing you won't need to worry about is cracking. Solvent based paint seemed to stick to it OK and clear parts cement worked as well. I don't use acrylics so I can't speak to those.
The decals include marking for three aircraft. There are also decals for the instrument panels. There are also a few stencils supplied. The decals have a flat finish and with the exception of the lettering and slogans have minimal clear film. I had mixed success using their decals on my Pe-8. I got them all on but some of them cracked on me during application. I can only hope these are better. The registration is good but it's difficult to tell if the white is opaque enough.
The instructions consist of a twelve page stapled booklet in A4 size and portrait format. Assembly is divided into 42 steps and a parts map is included. Diagrams are easy to follow. As assemblies are built up, new parts to be added are darker in color than the already assembled parts to which you are adding them. Paint colors are shown throughout by Humbrol numbers and a chart gives the generic color names. As I mentioned earlier the detail level is quite high so a lot of parts are involved and it will be wise to pay attention to the assembly diagrams. I have included a couple of excerpts from the instructions to illustrate both the style and detail level included in the kit. The first one is for the engine assembly.
The next two show some of the interior detail.
The last page has the painting and decal locations. All three take up about two thirds of the page with the balance being the color chart and basic decal application instructions. This makes things a bit crowded so the painting diagrams are rather small. One place where another couple of pages would have helped.
My 2¢ worth...
This is an extremely well detailed kit. I did not do a test fitting but based on my experiences with their Pe-8 and Su-2 kits it should fit together well. All of the interior and engine detail will require patience and may be a bit much for new modelers but should produce an excellent finished product for experienced modelers. It easily trumps the MPM and HPM kits of the aircraft not only in detail but ease of assembly as well. Highly recommended.