
This is the first of many techniques I hope to demonstrate on T&T over the coming months. They are the processes I use and certainly are not the only way. I have developed, discovered,or lucked into these techniques over many years of trial and error. I think one of the questions I am most frequently asked is, "How do you create that? "That" being almost always about this or that surface, be it wood, metal, marble, stone, brick, and so on. As to wood, I never use bass wood, balsa or any other "real" wood to simulate wood in miniature. I know others do, but I have never thought my attempts, at least, looked real or believable in scale.
------------------------------------
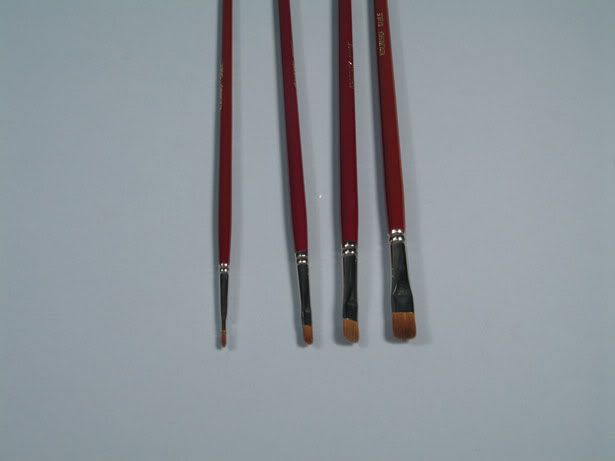
Lets get started. I use "Filbert" brushes almost exclusively except for tiny detailing. I use them for many, many purposes. Only Russian sable will give the right effect. They are pricey, but, there is nothing to replace them as far as I am concerned.
I now order them directly from a German firm, VLS imported them for many years, first as "Verlinden" Brushes and later as "VLS" brushes. You can still find them in better art stores, and I would suggest buying the most expensive they have. These are like wine, you get what you pay for. They came in four sizes.
No. 2, (Smallest), No. 4, (Larger), No. 6, (Even larger), and No.8, (The largest).
I begin by painting the surface of the floor, piece of furniture, architectural item, or whatever shape I wish to simulate a wood grain using various shades of flesh or pink. Tan doesn't work. The pinker, the better. Jenny should agree with that!
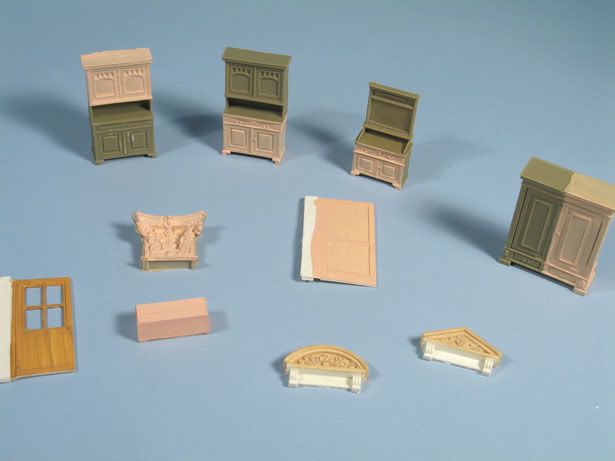
These are some items I found in my spare parts bins. I haven't cleaned them up. I just painted various shades of flesh and pink on a portion of them using Polly Scale, Testors, and Vallejo or any acrylic paints. You can use enamels or lacquers as well, I prefer acrylics as they dry quickly and won't be attacked by Rectified turpentine, used in the process later.
After drying, I use artists oils in the colors, Burnt Sienna, Burnt Umber, Raw Umber, Mars black and Yellow Ochre.
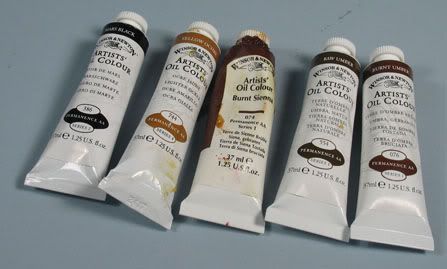
I place them on a pallet, I use some old card stock that has a coated surface, otherwise, the paint leaches into the pallet.
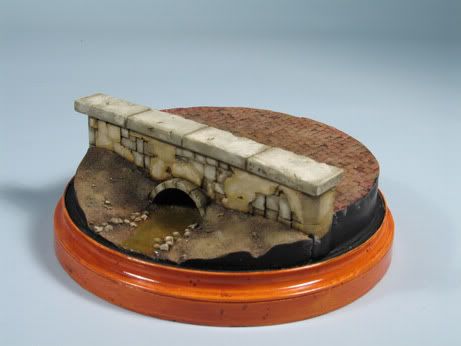
Using Rectified turpentine, (available at art stores only), regular turpentine sold at hardware stores will ruin anything done with oil paint. Mix the dabs of oil paint by dipping the filbert brush into the rectified turpentine and create the consistency of whole milk. Once the mixture has reached that consistency, wipe the brush on a clean cloth, (I have used old T-shirts most of my life). Then take a small amount on the brush and lightly coat the surface painted with flesh or pink. Once it is completely covered, take a clean brush, (Again, I recommend a good quality sable filbert, No. 8 or 6, (depending on the size of the surface), and dip in clean turpentine, dry with the T-shirt to the point of dampness, then, imagining how the wood grain would look that you want to replicate, clean the paint away gently, using the brush strokes to simulate the wood grain. At last, a process where brush strokes are wanted!!!!!! Here is a 10 year old photo of a not so good painting I did of a box art Legends and Lore Bruce Willis figure from Die Hard. The entire piece is made of resin, and if you note the base and lower portion of the wall, it was done using this process. On bases such as this, I apply a coat of polyurethane varnish after the oil paint is completely dry. In miniature, I usually use a semi-gloss varnish.

Here is another product, Custom Dioramics box art piece that I finished the resin base with maple simulation.
Here is a Lynx box art piece I did back in the middle ages using the technique. Note the difference in the oak finish on the right side that had been glossed and the left side as it dried after the process was applied. Big difference!

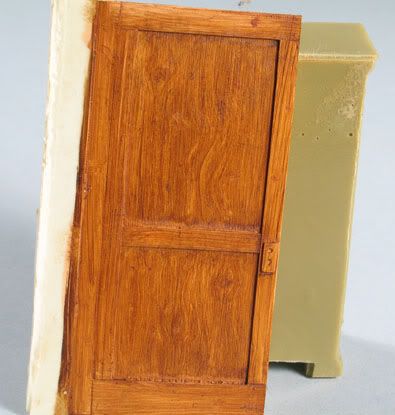
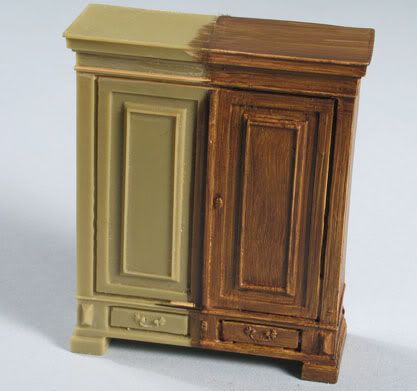
Here are the previously pictured pieces shown using the effect. The first is a door with an redwood finish. ( Burnt sienna)
This is done in a light walnut (1 part Raw umber, 1 part burnt sienna)
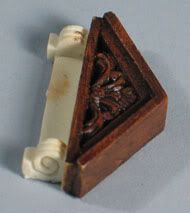
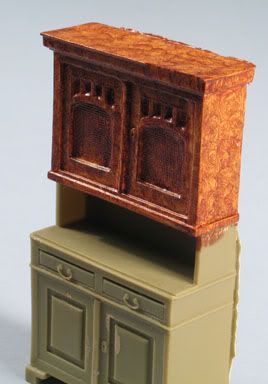
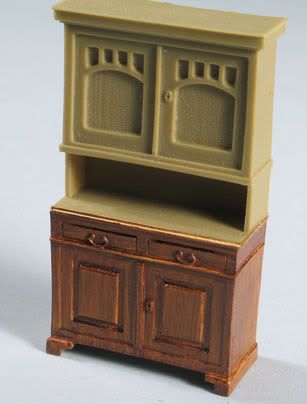
The gabled piece is a dark walnut. (2 parts raw umber, 1 part burnt sienna)
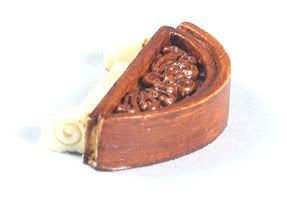
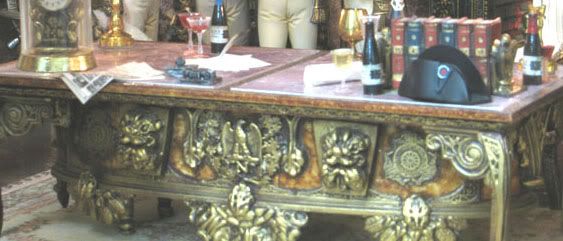
This Burl effect is done using 1 part raw umber, 1 part burnt sienna, then swirling the paint with a No. 2 filbert. Frankly, this process looks better in larger scales.
I used this in the 120mm shadow box, "Limits of Glory" for Napoleon's desk.
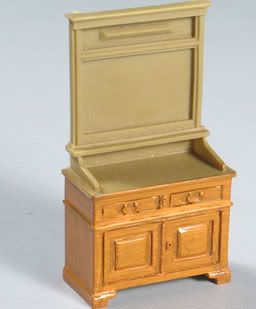
A medium walnut, (1 part raw umber, 1 part burnt sienna)
This is a simulated maple, (1 part raw umber, 1 part burnt sienna, 1 part yellow ochre).
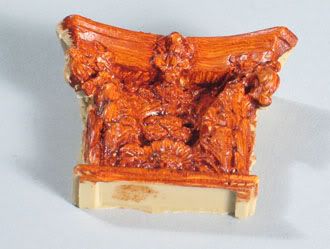
The corinthian cap uses only burnt sienna.
This is a lighter shade of cherry, (2 parts burnt sienna, 1 part burnt umber)
Here is another Custom Dioramics box art piece using the same technique.
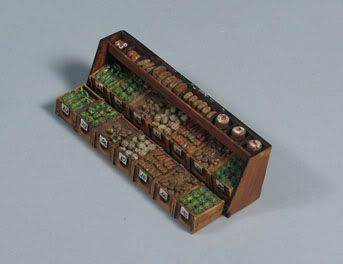
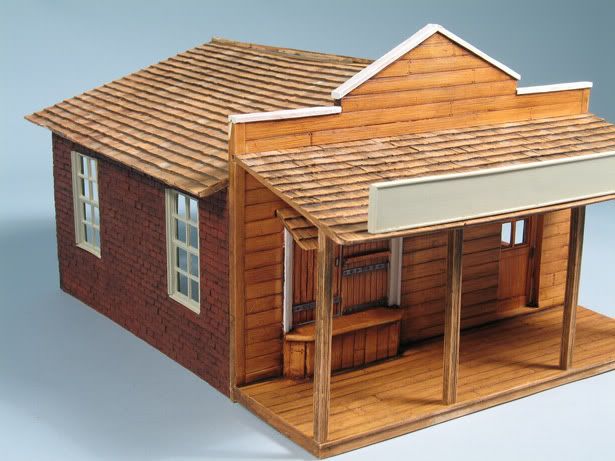
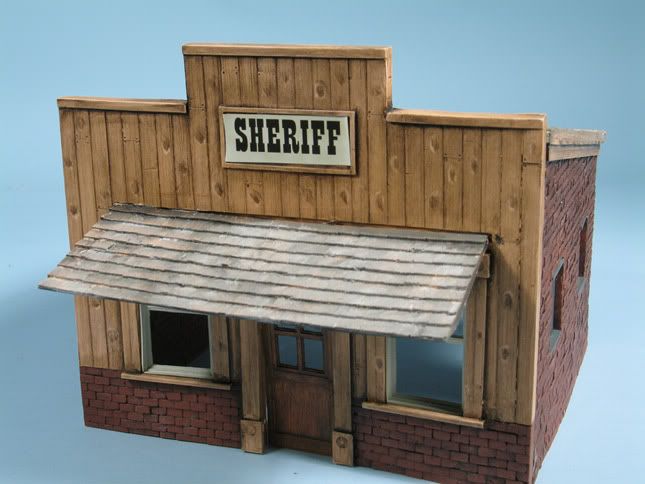
Here is a selection of wood finishes from the box art of, "Streets of Laredo". I would have some better ones to illustrate, but in 2007, a major American company borrowed some of my best ones to promote the kits at Nuremburg Germany's Toy show. I was promised their safe return, but they later advised me the models were literally destroyed in transit. Believe that I will never do that again! This wells Fargo building represents a newer, recently built wild west building.
This represents an unpainted pine facade. Knotts made using the No. 2 filbert swirls.
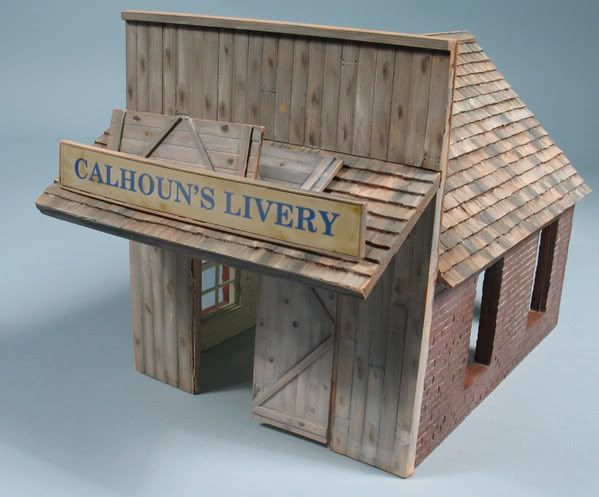
This simulates a natural wood with a slight age, slowing turning to a grey shade.
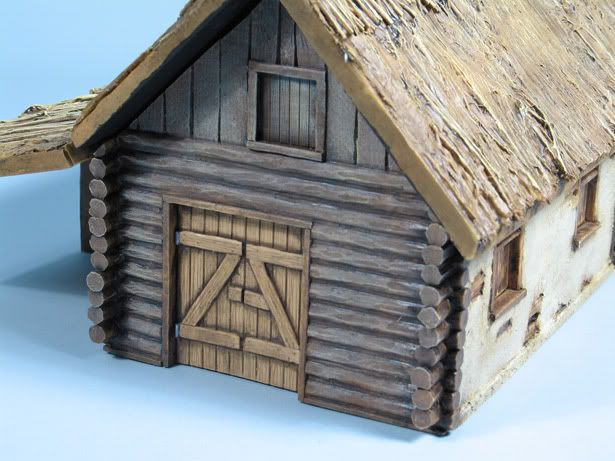
This is a box art piece I did for Custom Dioramics of a Russian Barn, part log/part stucco building.
A good friend and pattern maker from Portugal, Carles Elias, an associate of Miguel Jeminez, did patterns for me for years.
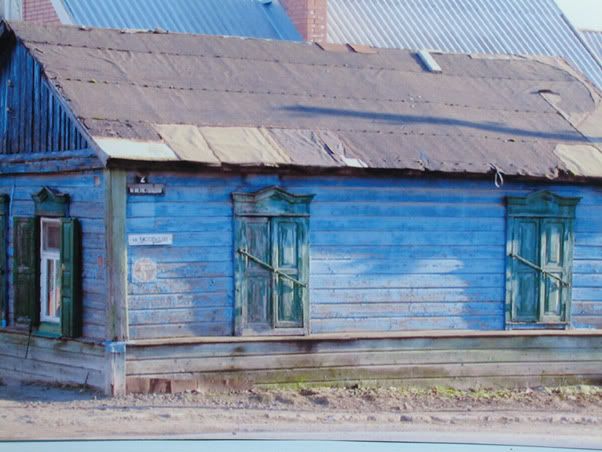
He had found a photograph of a dilapidated Russian house, fell in love with it and told me he would pattern a building like it and challenged me to weather the box art as close as I could to the original. I finally agreed. He created the master, and I took one of the first we produced and started to work.. One of the tools I chose was a real sponge, not the fake kind.
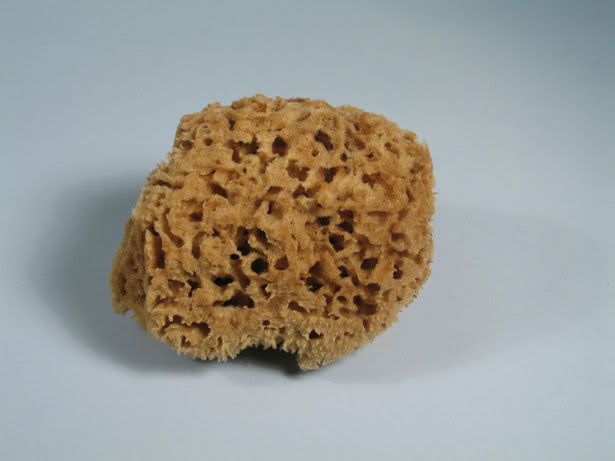
After I had painted and weathered the siding, I took some contrasting paint and, using a small piece torn from the sponge, dipped it into the contrasting paint, blotted it onto a palette until it emitted only a faint amout of paint, then blotted it on the surface of the siding, simulating the chipping effect. I used several colors, then came back with a tiny brush, (No. 00 or 0) and shaded the undersides of the lap boards. The first pic is a photograph of the original, (real), house.
This is the finish I achieved through washes, Filters and, finally the sponge technique. The wooden slats on the roof were added by the pattern maker because he felt it added detail to the model and was a common practice in Russia. The boards were painted using this technique as well.
We altered the original pattern Carles made and released another building that I painted white. White is much more difficult to simulate then even the blue. Here is the result.
One last thing. Never jump from one technique because another sounds cool. This works for me, it may not work for you. If you can use it, do, if you can change it to suit yourself, do, If you try it and it sucks, pitch it.
O.K., that's my trick for the week, hope it is interesting enough for you to want me to do another. As the comics say, I got a million of 'em!
bedebedebede, That's all, folks!
Bob
{discuss forum:14}
------------------------------------
Lets get started. I use "Filbert" brushes almost exclusively except for tiny detailing. I use them for many, many purposes. Only Russian sable will give the right effect. They are pricey, but, there is nothing to replace them as far as I am concerned.
I now order them directly from a German firm, VLS imported them for many years, first as "Verlinden" Brushes and later as "VLS" brushes. You can still find them in better art stores, and I would suggest buying the most expensive they have. These are like wine, you get what you pay for. They came in four sizes.
No. 2, (Smallest), No. 4, (Larger), No. 6, (Even larger), and No.8, (The largest).
I begin by painting the surface of the floor, piece of furniture, architectural item, or whatever shape I wish to simulate a wood grain using various shades of flesh or pink. Tan doesn't work. The pinker, the better. Jenny should agree with that!
These are some items I found in my spare parts bins. I haven't cleaned them up. I just painted various shades of flesh and pink on a portion of them using Polly Scale, Testors, and Vallejo or any acrylic paints. You can use enamels or lacquers as well, I prefer acrylics as they dry quickly and won't be attacked by Rectified turpentine, used in the process later.
After drying, I use artists oils in the colors, Burnt Sienna, Burnt Umber, Raw Umber, Mars black and Yellow Ochre.
I place them on a pallet, I use some old card stock that has a coated surface, otherwise, the paint leaches into the pallet.
Using Rectified turpentine, (available at art stores only), regular turpentine sold at hardware stores will ruin anything done with oil paint. Mix the dabs of oil paint by dipping the filbert brush into the rectified turpentine and create the consistency of whole milk. Once the mixture has reached that consistency, wipe the brush on a clean cloth, (I have used old T-shirts most of my life). Then take a small amount on the brush and lightly coat the surface painted with flesh or pink. Once it is completely covered, take a clean brush, (Again, I recommend a good quality sable filbert, No. 8 or 6, (depending on the size of the surface), and dip in clean turpentine, dry with the T-shirt to the point of dampness, then, imagining how the wood grain would look that you want to replicate, clean the paint away gently, using the brush strokes to simulate the wood grain. At last, a process where brush strokes are wanted!!!!!! Here is a 10 year old photo of a not so good painting I did of a box art Legends and Lore Bruce Willis figure from Die Hard. The entire piece is made of resin, and if you note the base and lower portion of the wall, it was done using this process. On bases such as this, I apply a coat of polyurethane varnish after the oil paint is completely dry. In miniature, I usually use a semi-gloss varnish.
Here is another product, Custom Dioramics box art piece that I finished the resin base with maple simulation.
Here is a Lynx box art piece I did back in the middle ages using the technique. Note the difference in the oak finish on the right side that had been glossed and the left side as it dried after the process was applied. Big difference!
Here are the previously pictured pieces shown using the effect. The first is a door with an redwood finish. ( Burnt sienna)
This is done in a light walnut (1 part Raw umber, 1 part burnt sienna)
The gabled piece is a dark walnut. (2 parts raw umber, 1 part burnt sienna)
This Burl effect is done using 1 part raw umber, 1 part burnt sienna, then swirling the paint with a No. 2 filbert. Frankly, this process looks better in larger scales.
I used this in the 120mm shadow box, "Limits of Glory" for Napoleon's desk.
A medium walnut, (1 part raw umber, 1 part burnt sienna)
This is a simulated maple, (1 part raw umber, 1 part burnt sienna, 1 part yellow ochre).
The corinthian cap uses only burnt sienna.
This is a lighter shade of cherry, (2 parts burnt sienna, 1 part burnt umber)
Here is another Custom Dioramics box art piece using the same technique.
Here is a selection of wood finishes from the box art of, "Streets of Laredo". I would have some better ones to illustrate, but in 2007, a major American company borrowed some of my best ones to promote the kits at Nuremburg Germany's Toy show. I was promised their safe return, but they later advised me the models were literally destroyed in transit. Believe that I will never do that again! This wells Fargo building represents a newer, recently built wild west building.
This represents an unpainted pine facade. Knotts made using the No. 2 filbert swirls.
This simulates a natural wood with a slight age, slowing turning to a grey shade.
This is a box art piece I did for Custom Dioramics of a Russian Barn, part log/part stucco building.
A good friend and pattern maker from Portugal, Carles Elias, an associate of Miguel Jeminez, did patterns for me for years.
He had found a photograph of a dilapidated Russian house, fell in love with it and told me he would pattern a building like it and challenged me to weather the box art as close as I could to the original. I finally agreed. He created the master, and I took one of the first we produced and started to work.. One of the tools I chose was a real sponge, not the fake kind.
After I had painted and weathered the siding, I took some contrasting paint and, using a small piece torn from the sponge, dipped it into the contrasting paint, blotted it onto a palette until it emitted only a faint amout of paint, then blotted it on the surface of the siding, simulating the chipping effect. I used several colors, then came back with a tiny brush, (No. 00 or 0) and shaded the undersides of the lap boards. The first pic is a photograph of the original, (real), house.
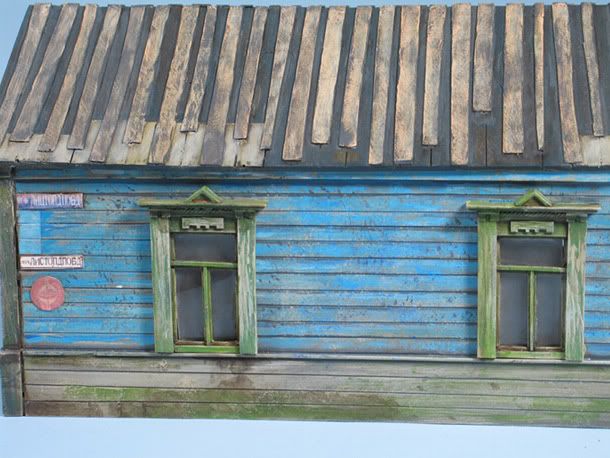
This is the finish I achieved through washes, Filters and, finally the sponge technique. The wooden slats on the roof were added by the pattern maker because he felt it added detail to the model and was a common practice in Russia. The boards were painted using this technique as well.
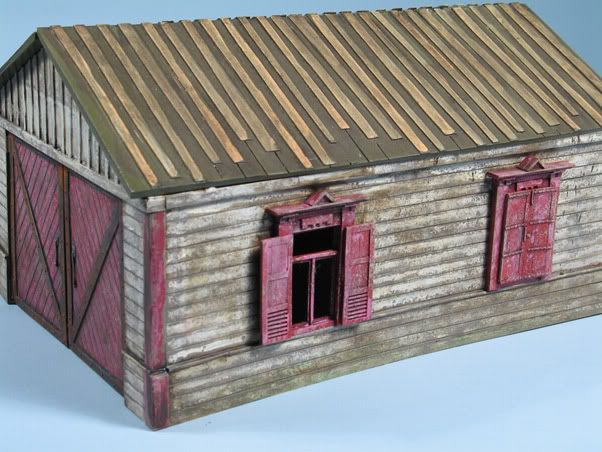
We altered the original pattern Carles made and released another building that I painted white. White is much more difficult to simulate then even the blue. Here is the result.
One last thing. Never jump from one technique because another sounds cool. This works for me, it may not work for you. If you can use it, do, if you can change it to suit yourself, do, If you try it and it sucks, pitch it.
O.K., that's my trick for the week, hope it is interesting enough for you to want me to do another. As the comics say, I got a million of 'em!
bedebedebede, That's all, folks!
Bob
{discuss forum:14}