

This new tool from Roden should prove popular. The Roden kit comes in an overly large box considering the size of the kit, the box could have been a full 1/3 smaller and the parts would have still had plenty of room. Inside the box all of the parts are contained in a single sealed cellophane bag including the clear parts. Add to that the fact that the plastic is quite soft and you have a recipe for damage. The canopy had broken off the clear parts sprue and was rattling around inside the bag but appears to have escaped any serious damage and I found some abrasions on some of the other parts. I did not do a parts count nor was one provided on the box. There are ten sprues altogether with two of them being duplicates and one being the clear parts. The parts are for the most part cleanly molded with recessed panel lines. These are a bit heavy in my opinion but will only be real noticeable on bare metal finishes. The parts have a matte finish as though the molds were sand blasted rather than polished. Again it think I would only worry about it if doing a BMF. As I mentioned previously the plastic seems quite soft and that combined with rather heavy sprue attachment points will result in care needed when removing and cleaning up these. I would recommend using a razor saw then filing rather than using a knife. Some of the parts do have some flash. It seemed to related to the sprues as some seemed to have more than other but none looks that difficult to clean up. Mold parting seams appeared to be worse on the sprues with the most flash indicating it might just have been a mold alignment problem. Ejector pin marks were also found in a lot of the usual places and strangely the main gear doors had marks on both sides. Some sink marks were found, these will be noted later.
------------------------------------
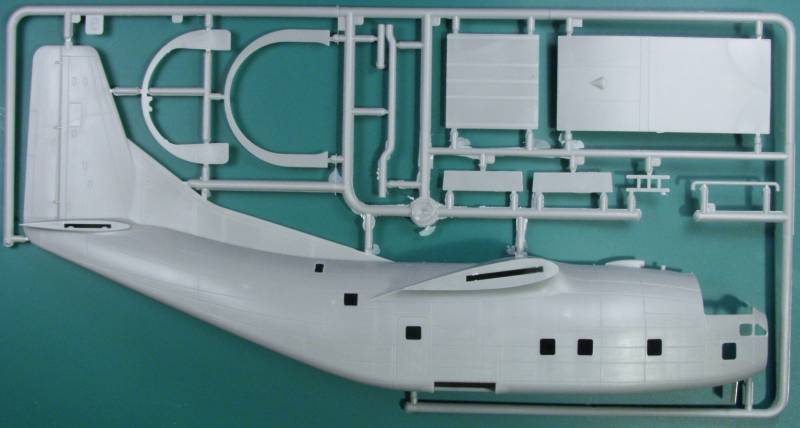
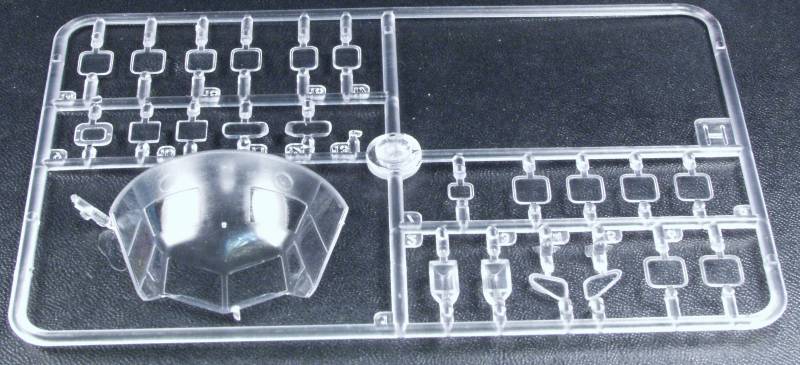
From a detail stand point the cockpit is well appointed for the scale with seats, consoles, side panels and various other details. The inside of the fuselage has rib detail molded in but is otherwise relatively spartan with a floor some bulkheads and duct work and what appears to jump seats. No effort was made to model the navigators station which was just behind the cockpit. There are also a few ejector pin marks that will need to be fixed if you want to leave the rear cargo door open. The wheel wells and landing gear are nicely detailed and the engines are fairly complete for the scale and include both rows of the R2800's cylinders but it's doubtful you'll ever see much of the rear jugs. There are separate cowl flaps for the cowlings. All the window glazings are separate. I did not try fitting them but if they don't fit well it's going to add a lot of work to the kit. The kit comes with under wing tanks and a lot of antennas and other fiddly bits to stick on the outside. OK lets take a look at the sprues. Note duplicate sprues are not shown.
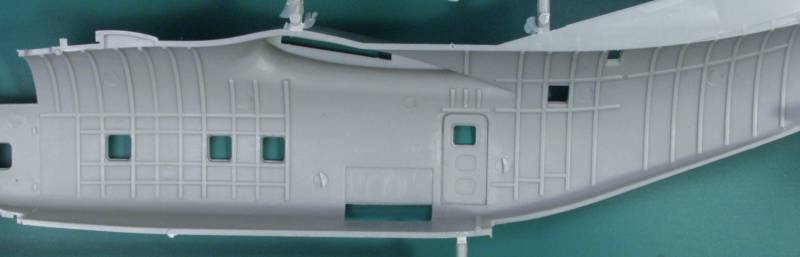
The next photo shows the interior rib detail and yes there are few ejector pin marks but I have seen worse.
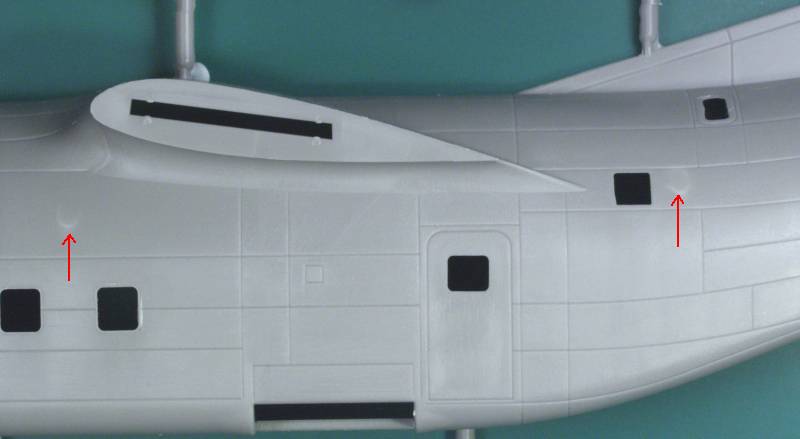
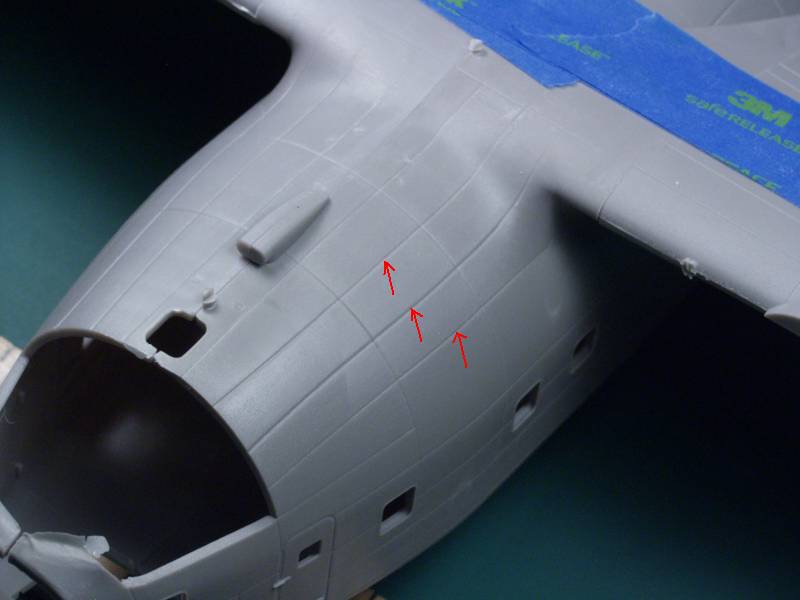
This photo gives you a good idea what the panel line detail is like, the two arrows denote stress marks from where two of the ejector pin marks were on the inside.
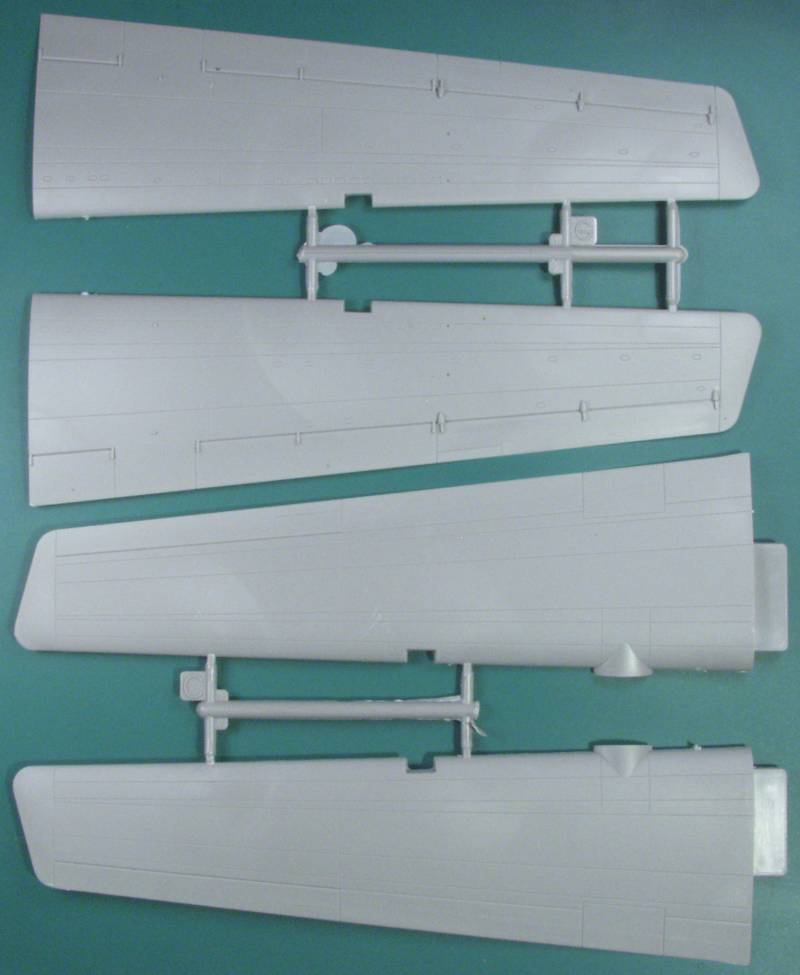
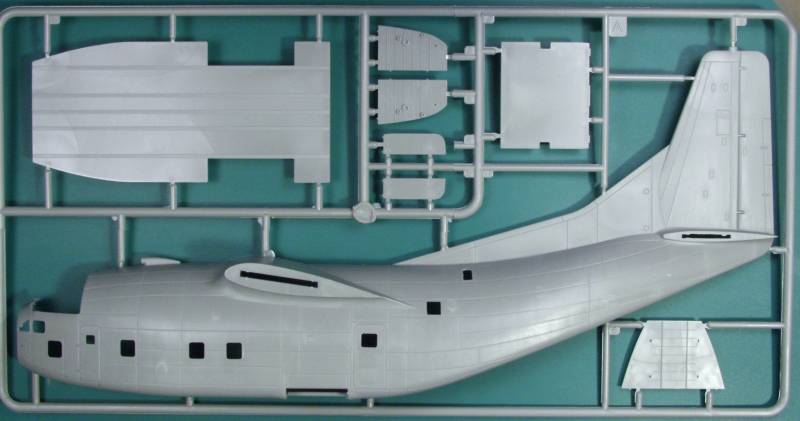
There are two of these sprues.

There are also two of the engine parts sprues.

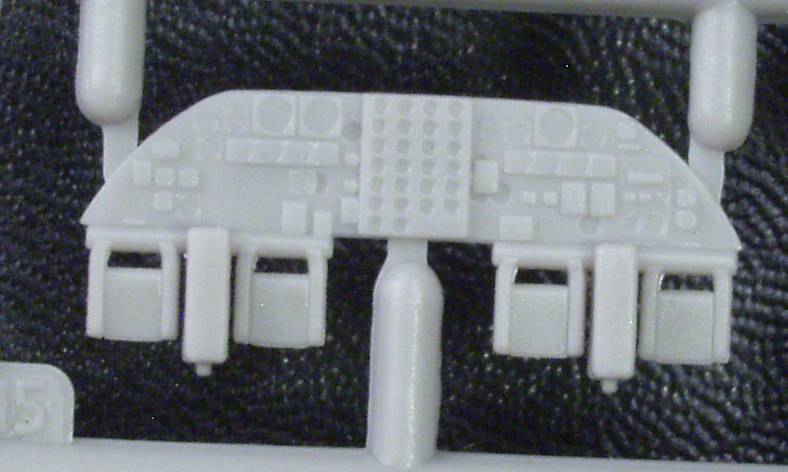
The instrument panel, no decal supplied, hopefully for those of us with shaky hands Eduard will come to the rescue. The panel does sit back under a cowl so it may not be all that visible.
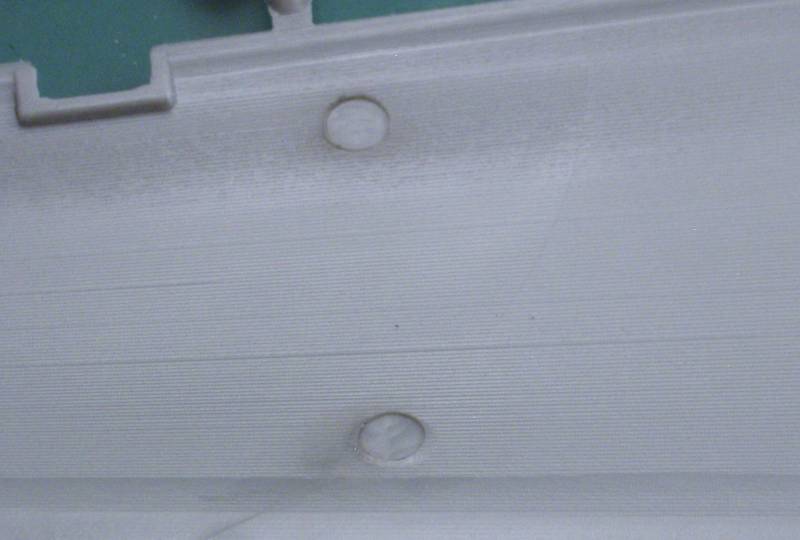
A little difficult to see but it appears that at least some of the masters were 3D printed as you can see the layer lines on the inside of the wings.
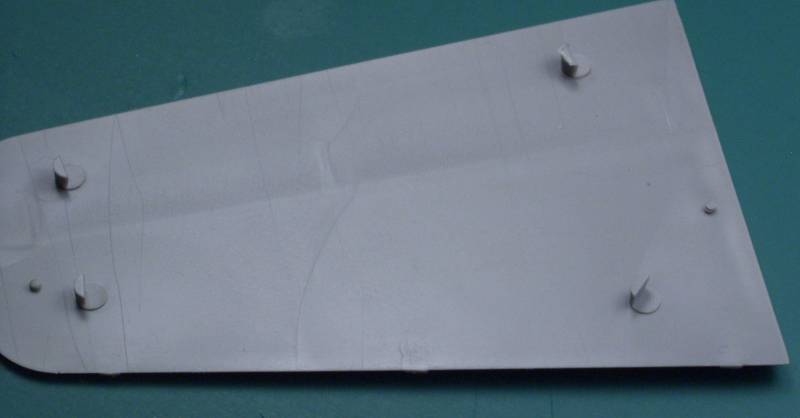
Many of the parts do have alignment pins but a few also have some knockout towers that need to be removed, these come off quite easily with a chisel blade due to the softness of the plastic. I'm not a big fan of alignment pins as it seems more often than not they do more harm than good but these seemed to line up OK.
Since I was curious about the fit I did some test fitting of the major parts. Due to the softness of the plastic I did not spend time cleaning up the sprue attachment points unless they interfered with the fit. The fit of the wing halves could have been better in my opinion and some filler will no doubt be needed but it may be a quick lick on some sandpaper on a flat surface may be all they need. The wing to fuselage join was excellent. The fuselage halves fit OK but were a bit fiddly due to the big hole in the bottom and may be more solid with the interior parts installed. A few added alignment tabs would probably help as well.
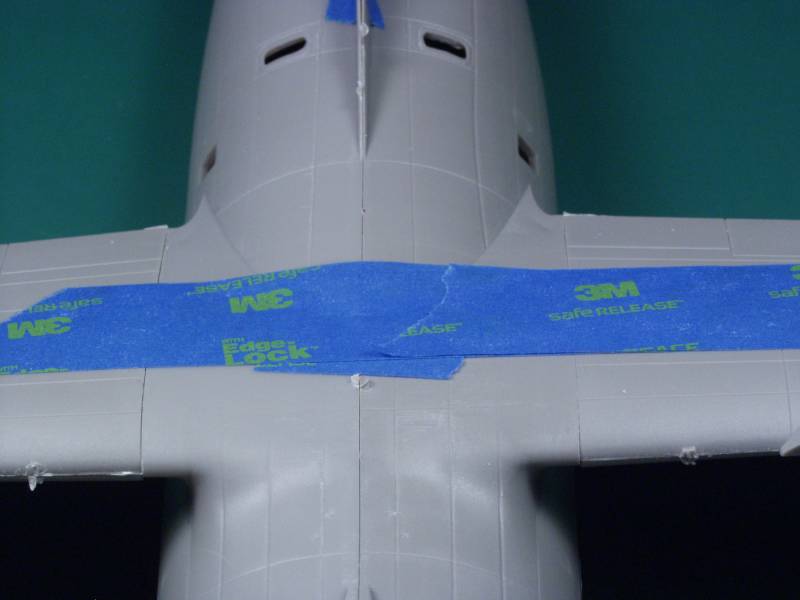
The next photo shows some of the variations in the panel line widths where they go around the edge of the mold.
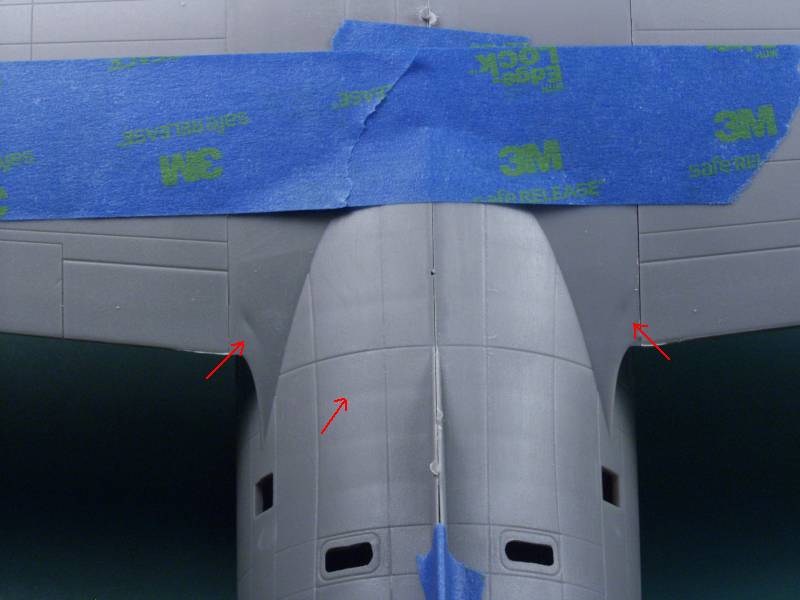
The next photo shows two sink marks at the wing roots that will need to be filled, also note the very slight indentations that circle the fuselage where the ribs are molded on the inside. while technically a minor defect there would most likely be a rivet line there on the outside and to me this looks almost like what one might see where a rivet seam creates sort of an oil can effect.
The horizontal tail surfaces fit really tight in their slots and once these are glued I think they will need very little filler.

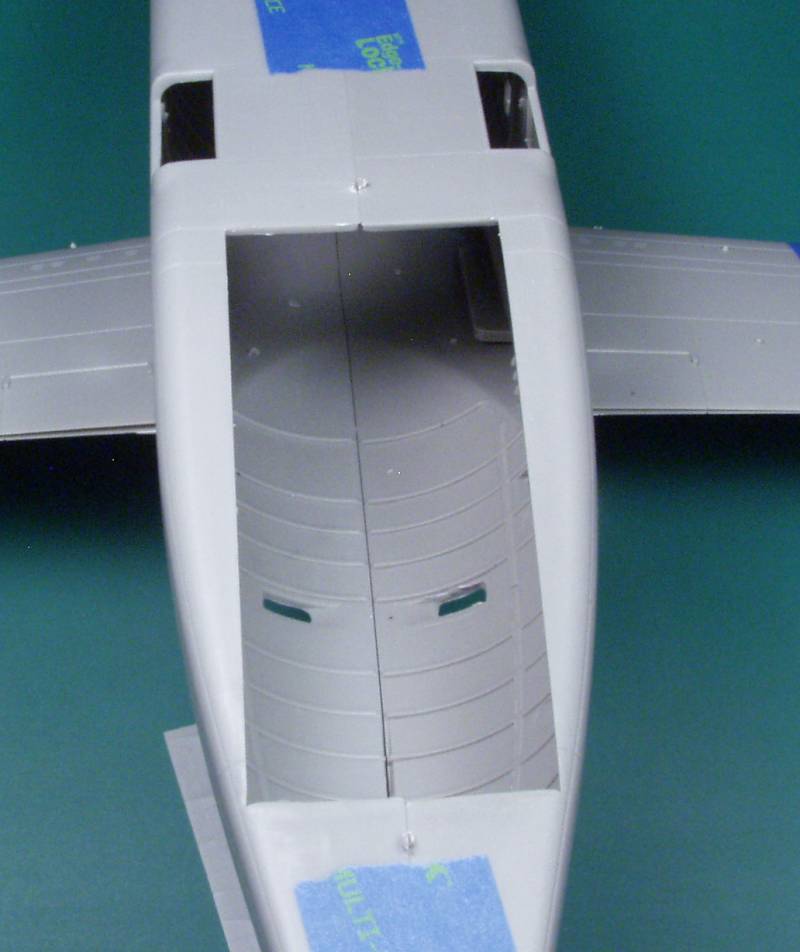
The big hole in the bottom for the cargo ramp and door.
The clear parts are reasonably thin and clear but a few of the panes in the cockpit glass had some distortion. The frame line are well delineated and the areas to be painted are frosted.
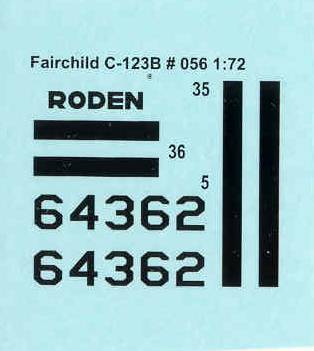
The decals are thin, glossy, opaque and pretty well registered but the two US flags are not all that well printed. The sheet has markings for three aircraft, all three in natural metal, the first a USAF from Vietnam early 1964, the second from the VNAF from 1964 and the third an Air America aircraft serving in Thailand during 1966. The sheet has a fair number of stencils. I have no experience with Roden decals but have read a number of not so favorable comments about them. I suspect we'll see some after market decals for these as I would prefer to do one in SEA camo anyway.

These apparently were an omission or after thought.
The instructions are three sheets folded to create 12 pages. They contain a brief multilingual history, a parts map, the usual warnings, icon chart, paint list, six and one half pages of assembly diagrams and three pages of marking instructions.
While I may have sounded rather critical of the kit, I'm actually quite pleased with it. Not my scale of choice, but probably a good compromise for the size of the kit as it has an 18 1/2" wing span in 1/72. The only other injection kit in this scale is the horrible Mach 2 kit and while I don't have that one I do have several of their other kits and they are all very laborious builds, this one is way better than those. It just needs to be treated like a limited run kit. I did not spend any time doing accuracy or shape comparisons and I hope no one was traumatized by my use of red lines in the photos.

I got mine from Sprue Brothers for $56 but it appears that their first shipment has already sold out.
