
Hello everybody,
today we will discuss the painting of an knocked out and rusty vehicle. Over the past few years these subjects have become more and more popular and the following step by step pictuires will illustrate my attempt to paint a knocked out Hetzer.
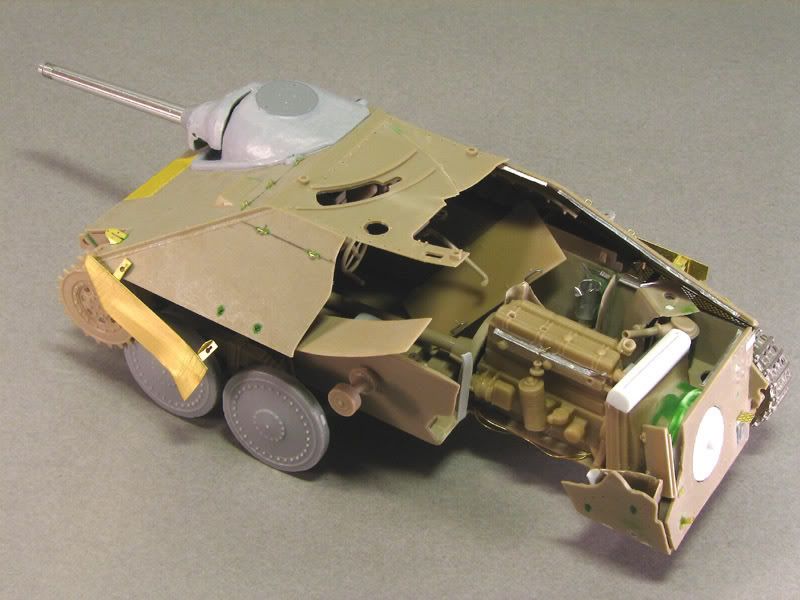
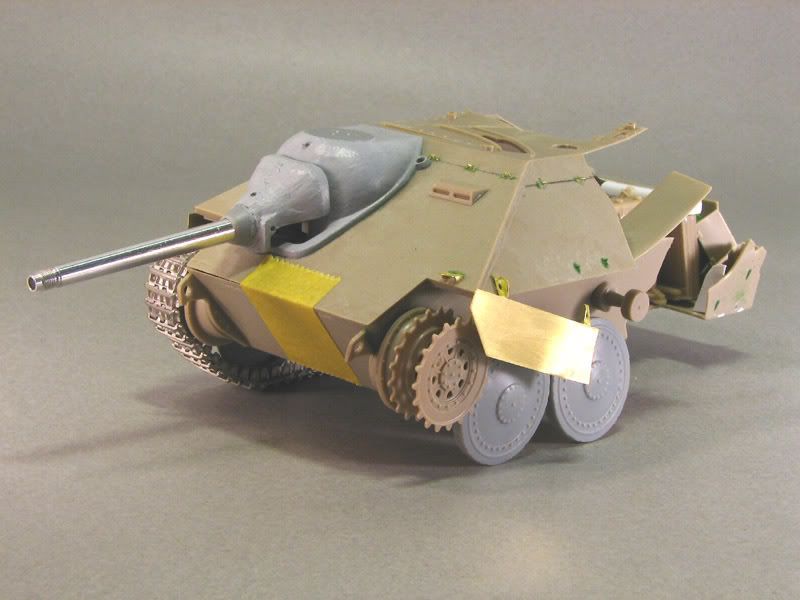
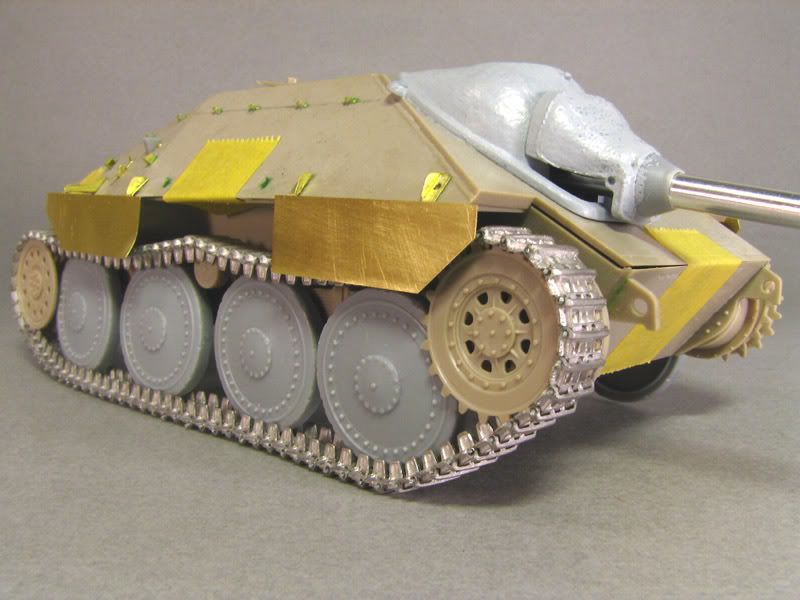
So let's get started ! Here's the unpainted model again:
I used the Eduard Hetzer mixed with some bits and pieces from DML and Verlinden.
------------------------------------
Painting:
Picture 1: Priming
As always the painting stage starts with a few thin coats of Mr. Surfacer 1200. It is very important to have a good adherent base, as there are many weathering steps with lots of thinner to follow.

Picture 2: Base Coat

Now we apply the base coat of Dark Yellow using a mixture of Tamiya XF-60, XF-57 and XF-2. Yet the shade of yellow is very bright, but it will tone down during the next painting steps.
Picture 3: Camouflage
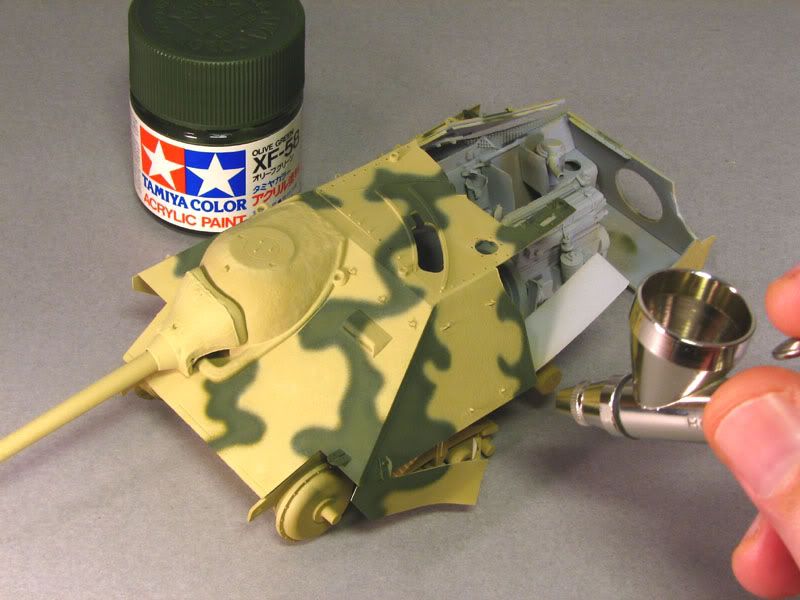
Next I painted the camouflage with Tamiya XF-58. I was after a different style, because there are many Hetzer models around these days and I wanted something beyond the ordinary.
Picture 4: Markings
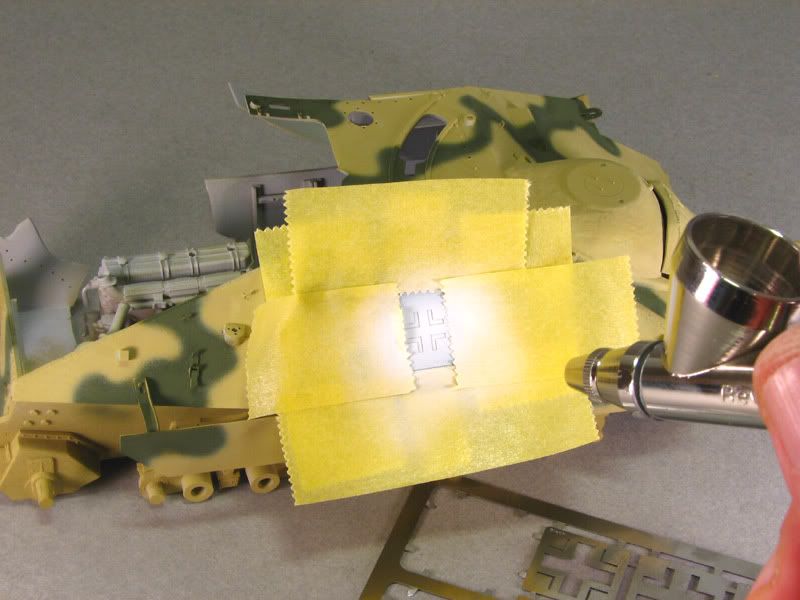
With the aid of photo etched stencils from Lion Roar I applied the markings, again using Tamiya paints. Also beyond the ordinary: I accidentally used Luftwaffe markings. Even though there were Hetzers in Luftwaffe ground units at the end of the war, I have to admit: a rather odd feature.
Picture 5: Clear Coat
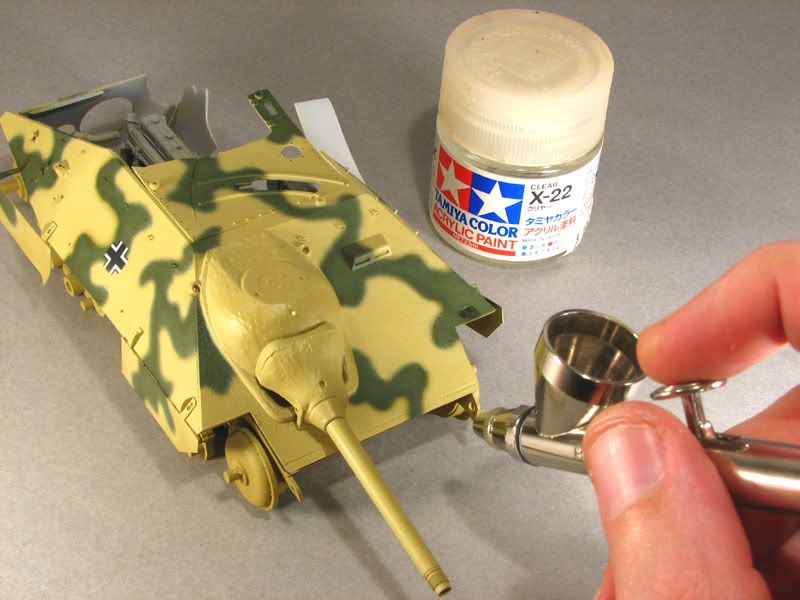
In the next step a thin coat of Tamiya Clear was applied. While protecting the base coat it will also give the model the satin look of painted steel.
Picture 6: Base Finished
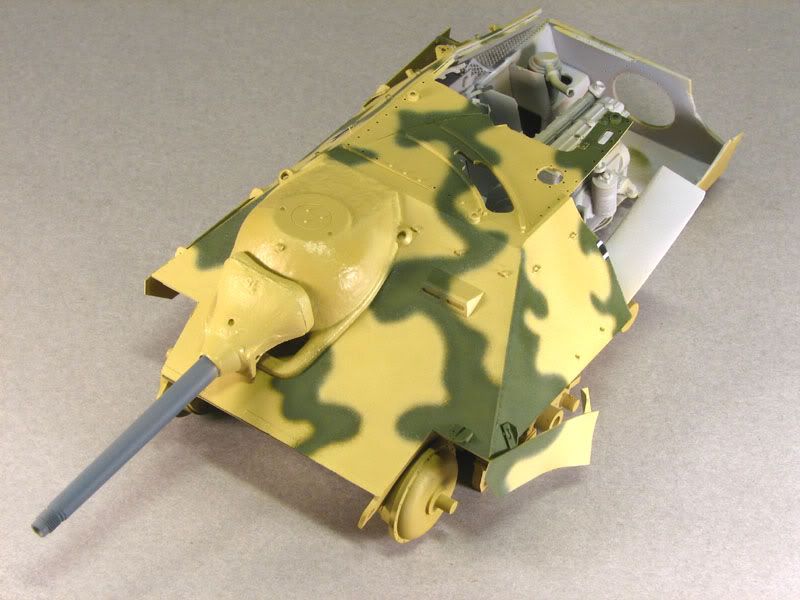
The base coat has now been finished. Not too much of it will be visible on the finished model. The upper and lower hull were not glued together yet.
Interior
The next pictures will display my approach on painting the burnt out interior. My goal was to achieve a rather random look with many different effects, created from the use of different techniques and media. Before I got started I masked the outer areas to protect them from overspray.
Picture 7: Rust tones
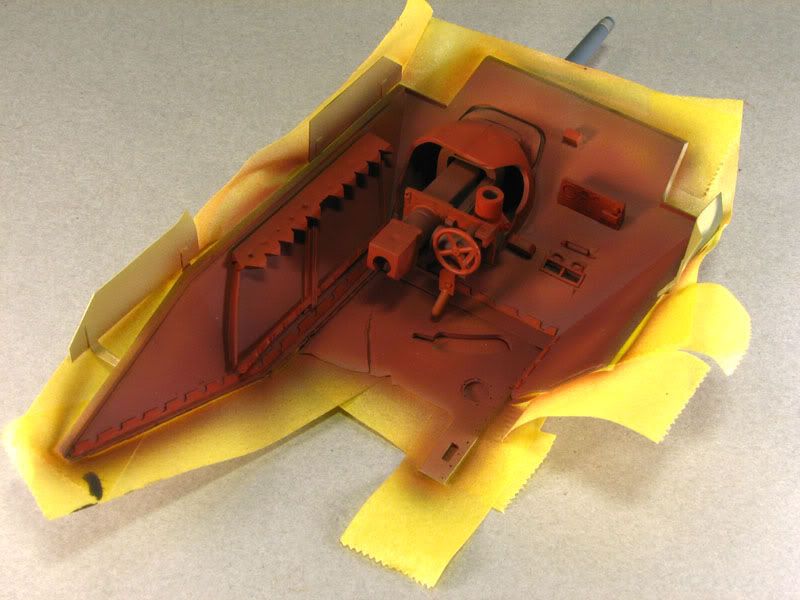
At first the interior components received a reddish base coat with Tamiya acrylics. In majority I used random mixtures from the paints XF-9, XF-7 and XF-64. For the smaller parts I used different mixtures from Vallejo acrylic paints.
Picture 8: White interior paint
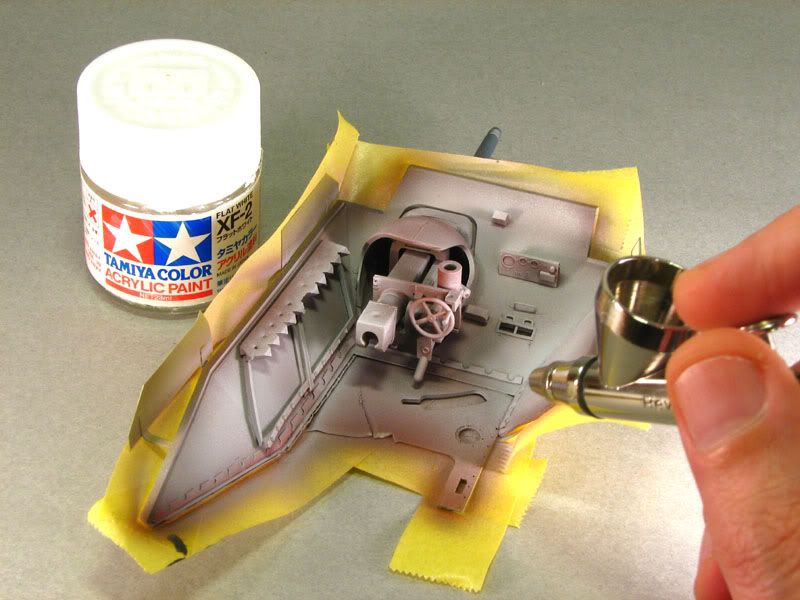
With the paint fully dry, I applied a few good coats of hairspray onto the red before airbrushing a thin coat of Tamiya XF-2.
Picture 9: Removal of white paint
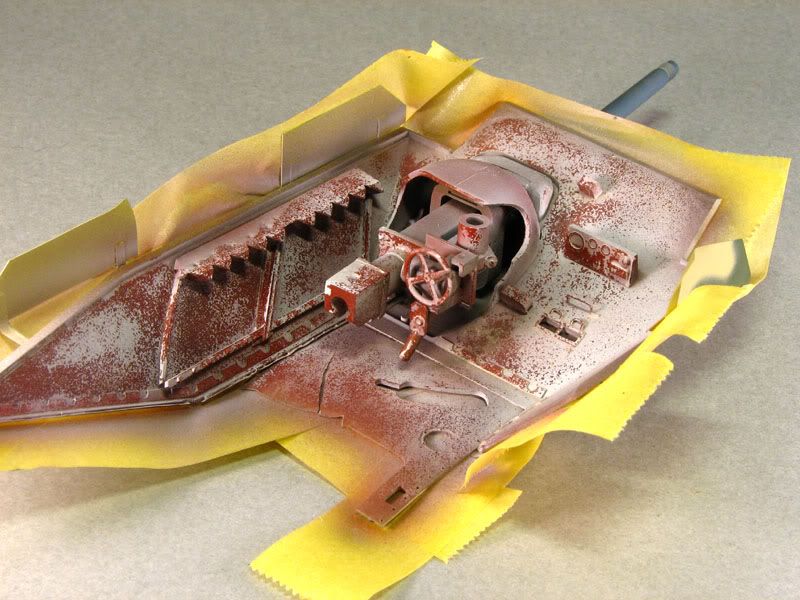
Then most of the white paint was removed again with the aid of a stiff brush and warm water. The water will solve the hairspray below the white paint and it can be easily removed in a random manner.
Picture 10: Washing
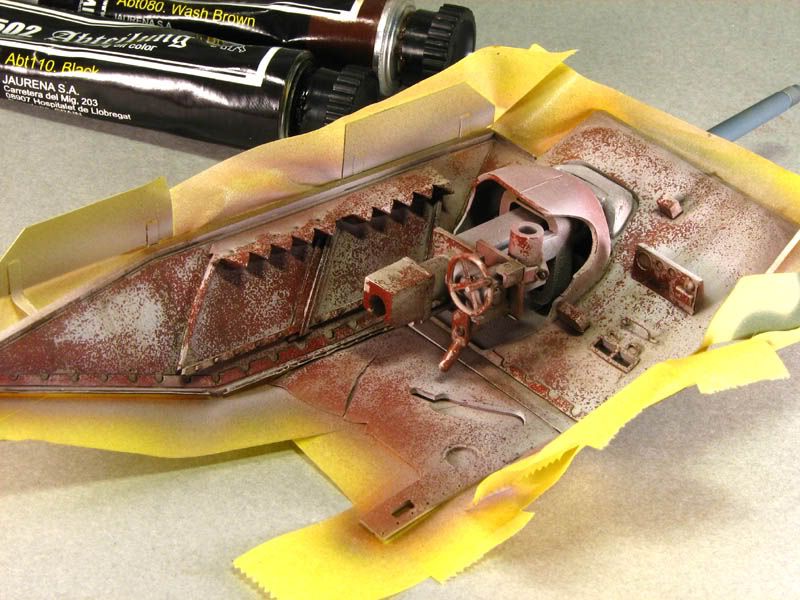
A washing made from 502 Abteilung oils mixed was next to bring out the details and to add a sense of depth to the interior.
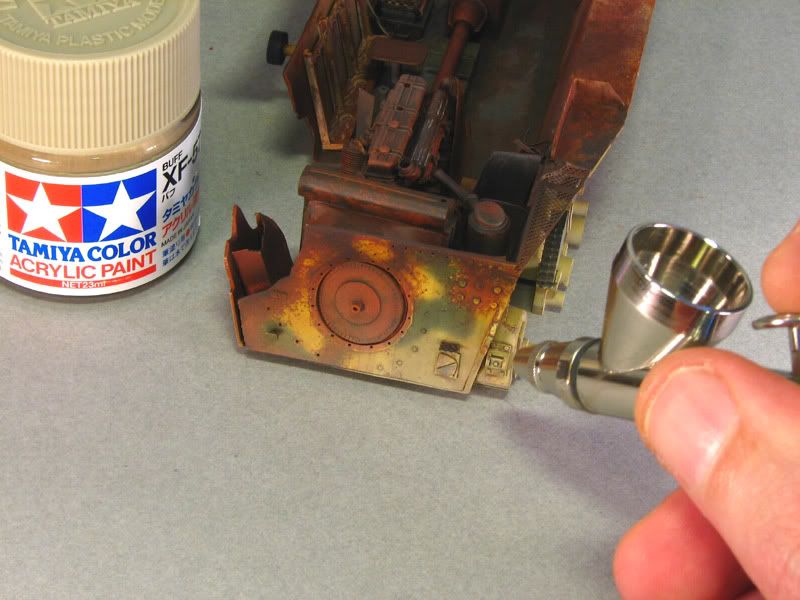
Picture 11: Clear Orange
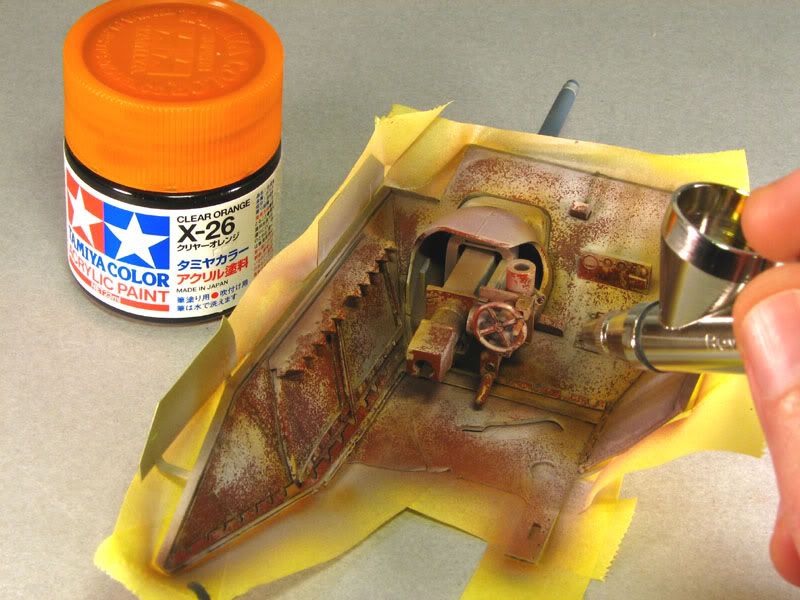
To blend in the remaining white areas, Tamiya X-26 was applied with the airbrush again.
Picture 12: Rust
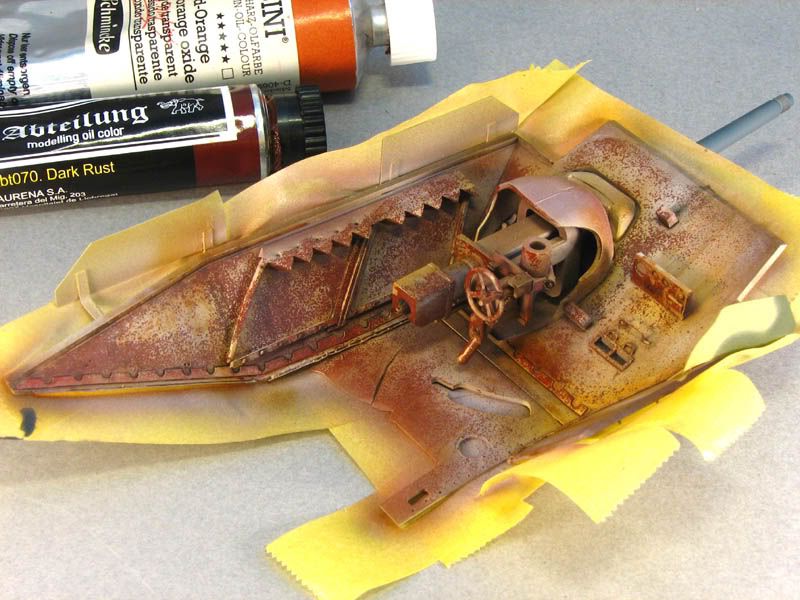
More oils were used in the next step. This time I used rusty tones which were randomly applied to enhance the rusty appearance.
Picture 13: Mapping
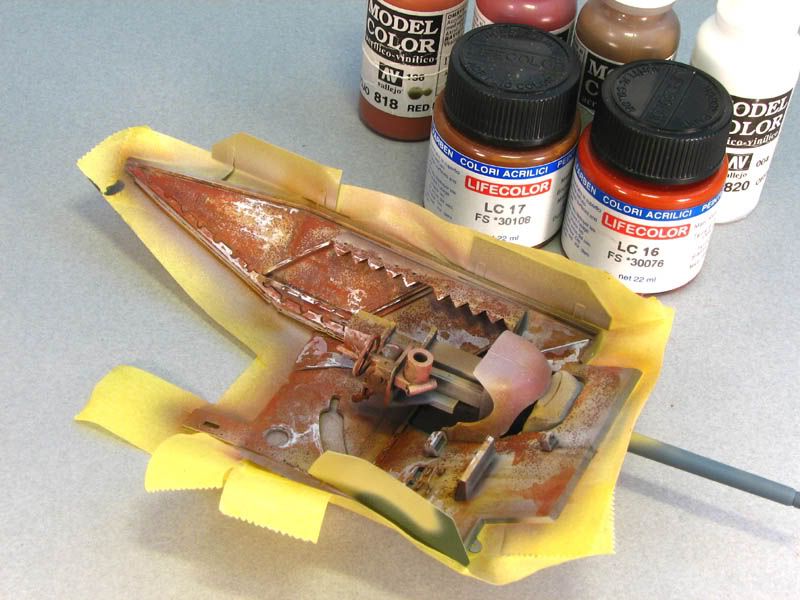
To get tonal variations I applied some mapping with thinned acrylic paint. Yet the contrast may look very harsh, but it will be toned down in the next steps.
Picture 14: More rust
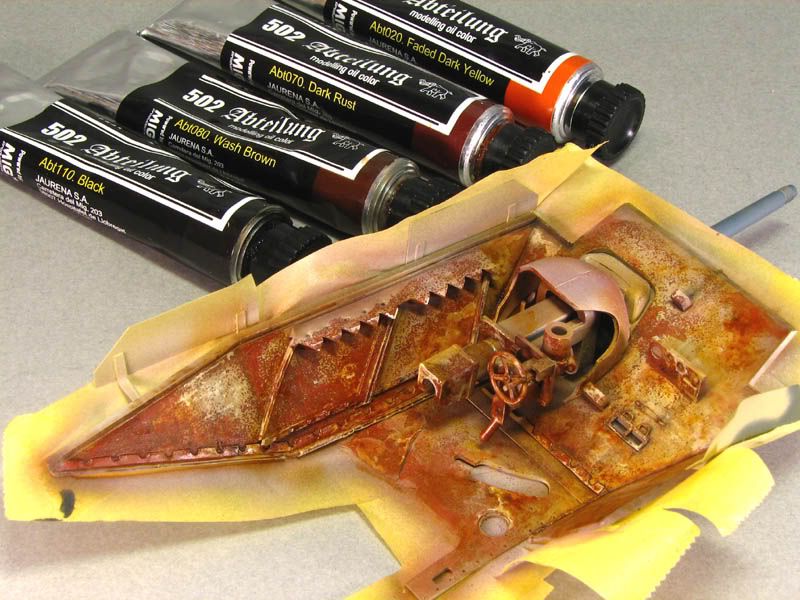
Again oils were used to get even more tonal variations and to blend in the mapping from the previous step.
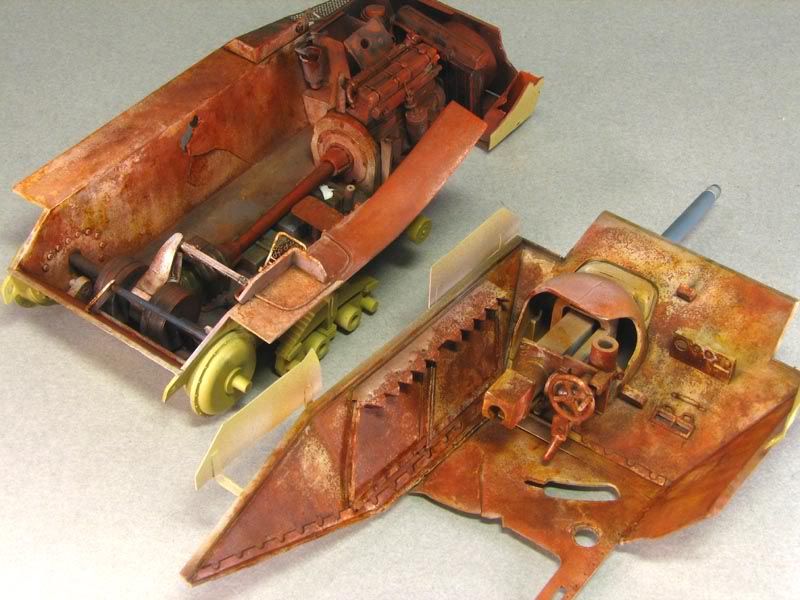
Picture 15: Pigments

Finally I applied rust colored pigments. They will adhere very well while the oil paint is still wet and will create a subtle texturing as well. Now the interior is finished.
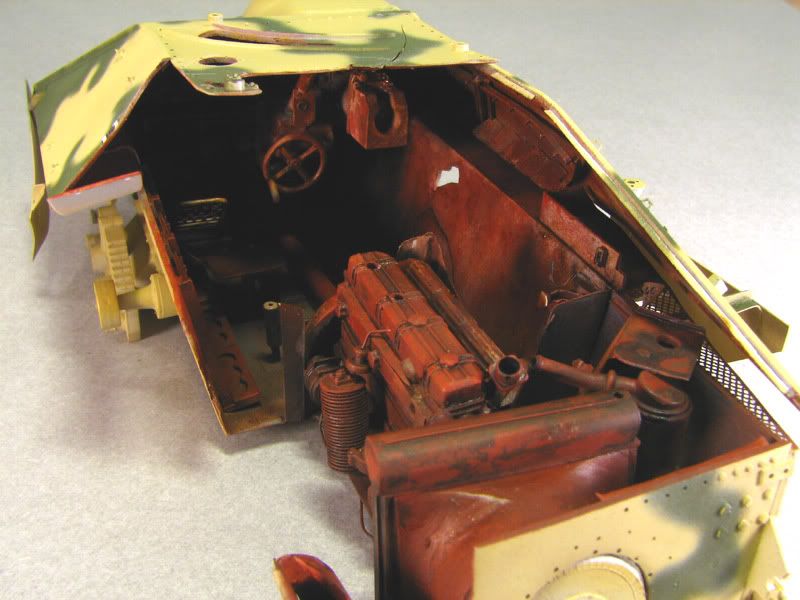
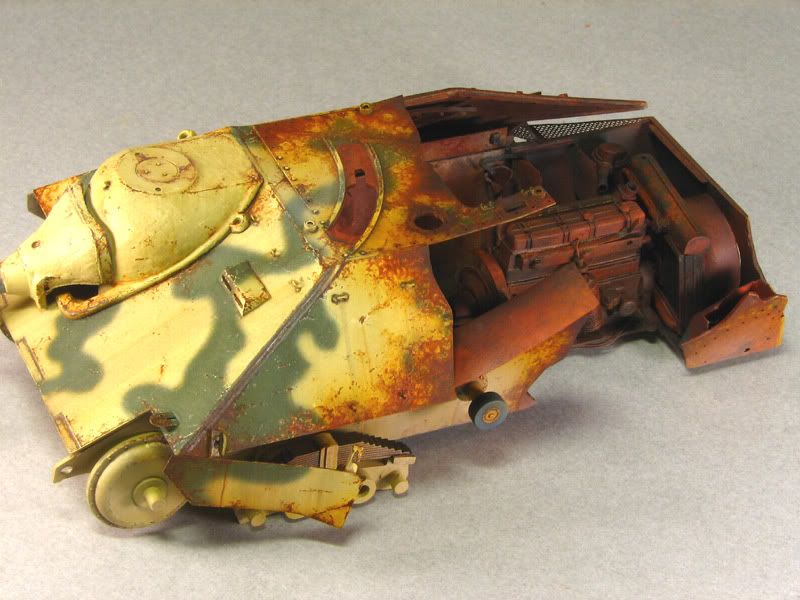
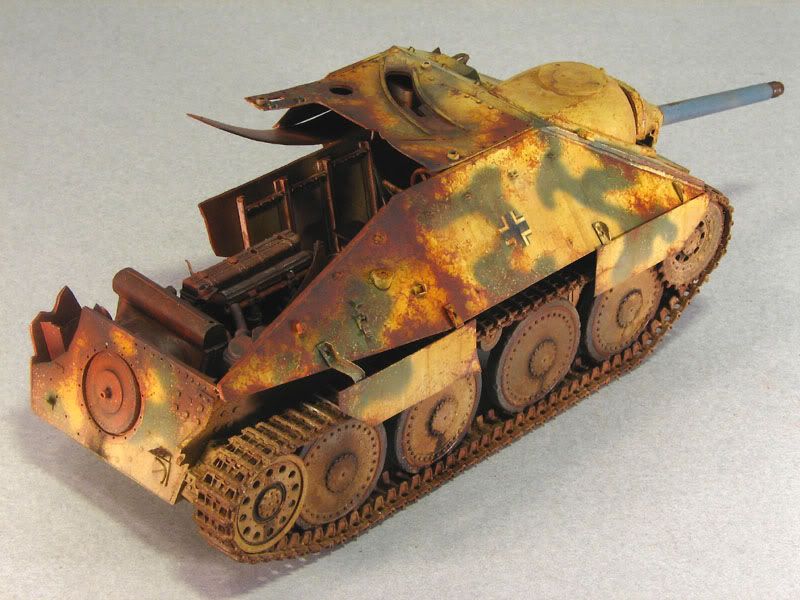
Pictures 16-19 show the different effects achieved. The lower hull has been finished in the same manner as seen before, but some components received additional attention with all the techniques explained above. It was now time to move back to the exterior again.

Exterior
Picture 20: Acrylic chipping
Assuming that the Hetzer in question must have burnt which would have affected the paint job significantly, I started with a widespread paint chipping using Vallejo acrylic paints.
Picture 21: Filter
Now a Filter from Sin Industries was applied to blend in the paint chipping.
Picture 22: Washing
Next a pin washing was performed with the aid of the dark wash from Mig Productions to bring out the details and to add fake shadows.
Picture 23: Rust
In the next step I applied many overlapping layers of rust colored oil paints from 502 Abteilung. Tiny dots of oil paints were applied in very random manner. It is important to give the oils a couple of days to dry. To reduce the glossy appearance, mate varnish can be airbrushed over these areas.
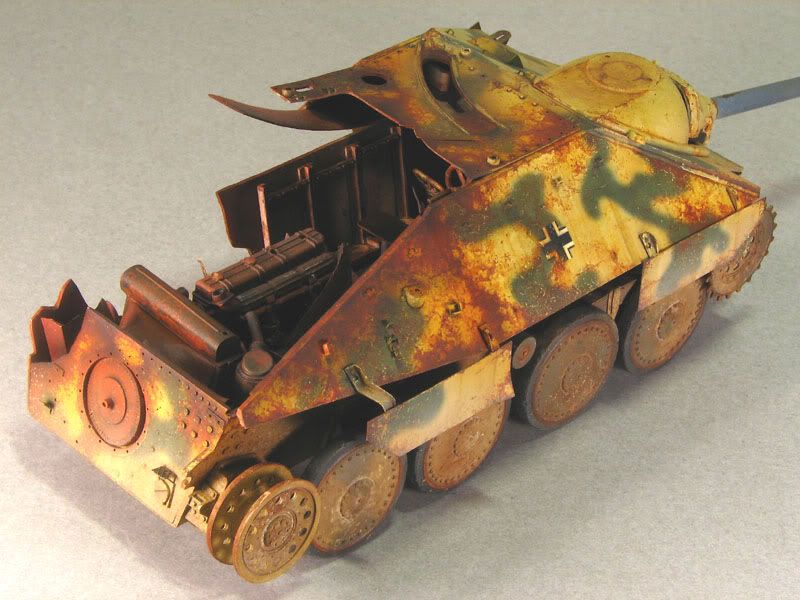
Pictures 24-25 show the model with the rusting complete. As you can see the chipped paint effect was enhanced with the aid of yellow Vallejo acrylic paint, applied with a 10/0 brush.
Picture 26: Soot
Tamiya XF-1 was used to create subtle areas of soot around the rusted areas.
Picture 27: Orange Clear
More Tamiya Orange Clear was applied to blend in all the effects applied before.
Picture 28: Predusting
The lower areas and the running gear received a thin coat of Tamiya XF-57. The pigments applied in the next step will adhere very well on such a matt surface.
Picture 29: Pigments
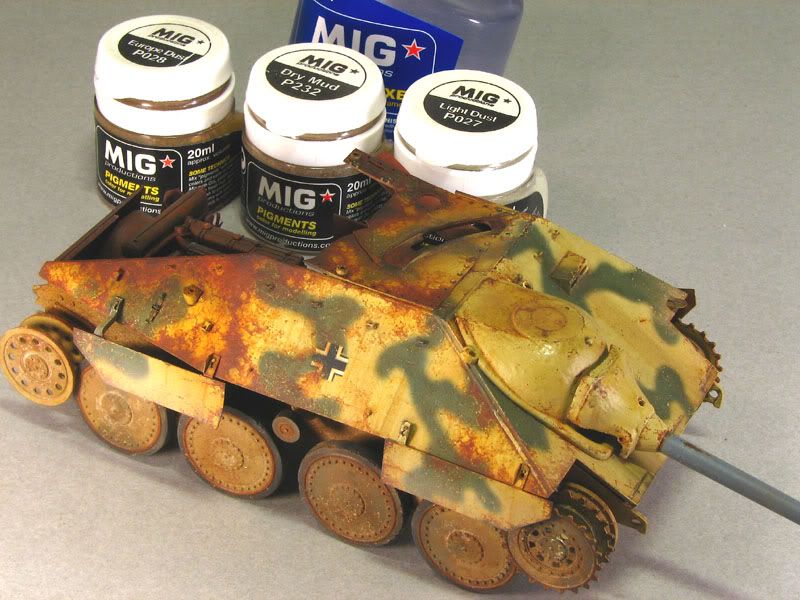
Now various pigments from Mig Productions were added and fixed onto the surface with the aid of their pigment fixer.
Picture 30: Dusting
This picture shows the dusting complete. I often try to get tonal variations in the dust, to make the effect more interesting.
Picture 31: Oil and grease
Finally I created some oil streaks mixed from black and brown oil paints and gloss enamel varnish.
Picture 32:
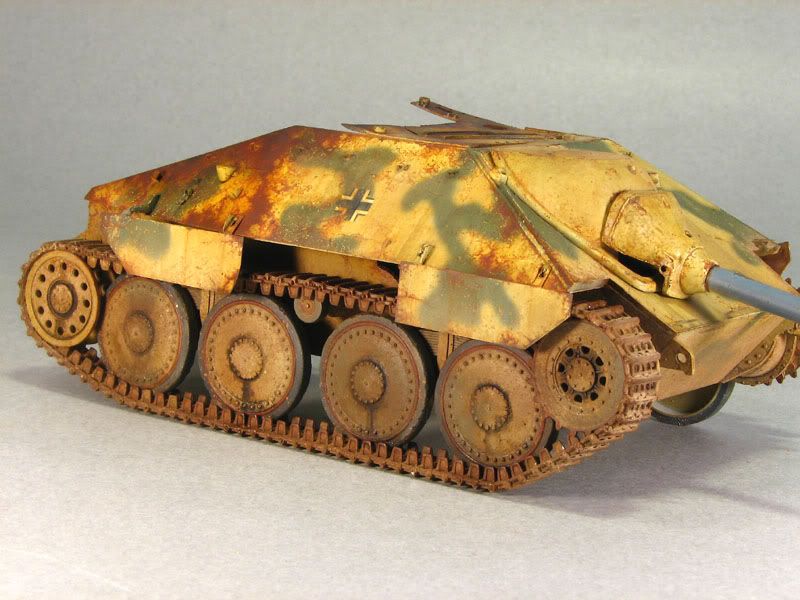
The tracks received a base coat from Tamiya XF 52 Flat Earth and also received different shades of pigments. With the tracks attached to the running gear the painting stage was complete.
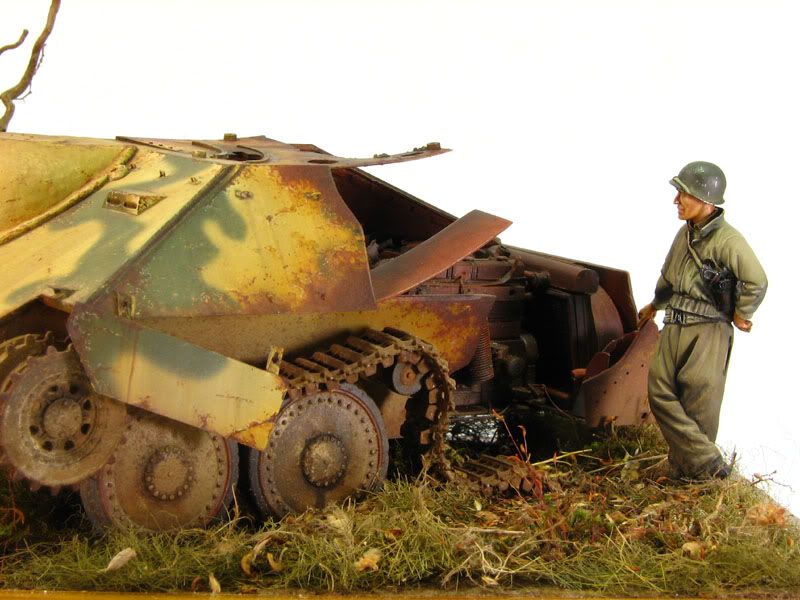
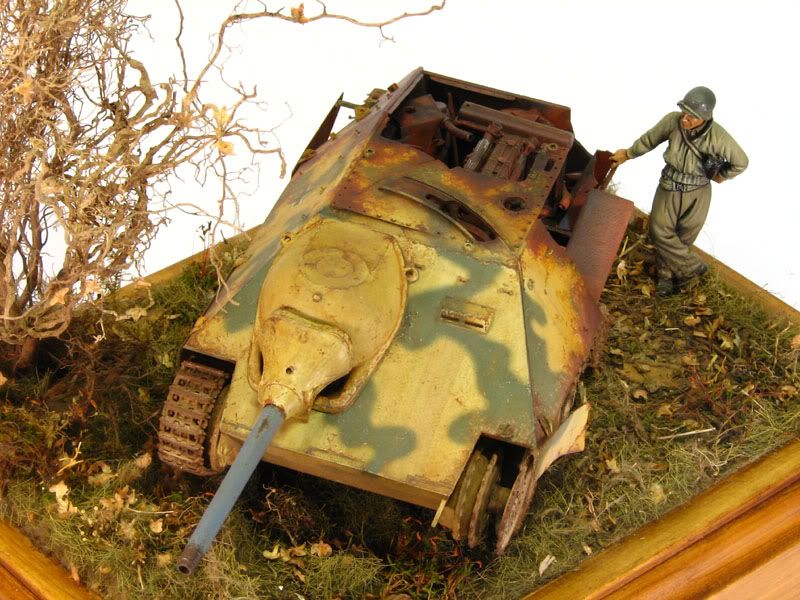
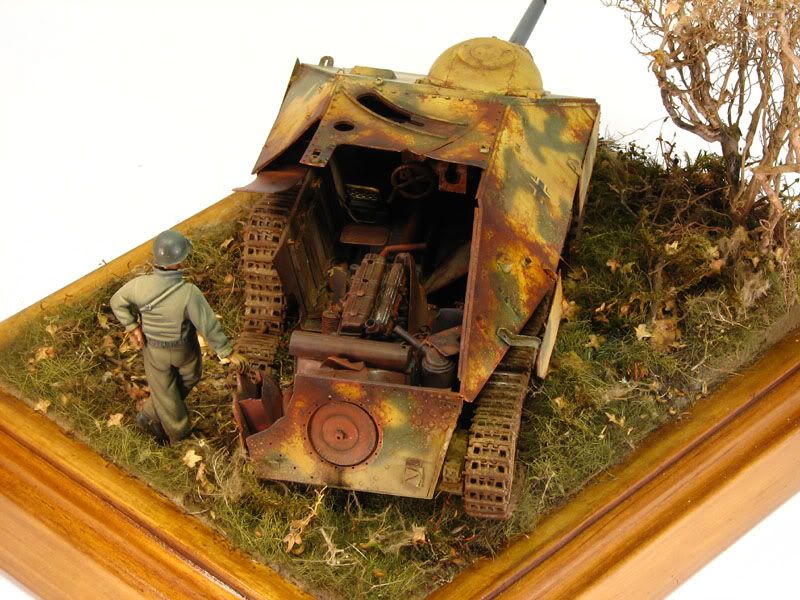
Well....that was basically it. Now here are a few pictures of the finished piece on a base.
Thanks for looking and feel free to ask if you have any questions
Cheers
Sven
today we will discuss the painting of an knocked out and rusty vehicle. Over the past few years these subjects have become more and more popular and the following step by step pictuires will illustrate my attempt to paint a knocked out Hetzer.
So let's get started ! Here's the unpainted model again:
I used the Eduard Hetzer mixed with some bits and pieces from DML and Verlinden.
------------------------------------
Painting:
Picture 1: Priming
As always the painting stage starts with a few thin coats of Mr. Surfacer 1200. It is very important to have a good adherent base, as there are many weathering steps with lots of thinner to follow.
Picture 2: Base Coat
Now we apply the base coat of Dark Yellow using a mixture of Tamiya XF-60, XF-57 and XF-2. Yet the shade of yellow is very bright, but it will tone down during the next painting steps.
Picture 3: Camouflage
Next I painted the camouflage with Tamiya XF-58. I was after a different style, because there are many Hetzer models around these days and I wanted something beyond the ordinary.
Picture 4: Markings
With the aid of photo etched stencils from Lion Roar I applied the markings, again using Tamiya paints. Also beyond the ordinary: I accidentally used Luftwaffe markings. Even though there were Hetzers in Luftwaffe ground units at the end of the war, I have to admit: a rather odd feature.
Picture 5: Clear Coat
In the next step a thin coat of Tamiya Clear was applied. While protecting the base coat it will also give the model the satin look of painted steel.
Picture 6: Base Finished
The base coat has now been finished. Not too much of it will be visible on the finished model. The upper and lower hull were not glued together yet.
Interior
The next pictures will display my approach on painting the burnt out interior. My goal was to achieve a rather random look with many different effects, created from the use of different techniques and media. Before I got started I masked the outer areas to protect them from overspray.
Picture 7: Rust tones
At first the interior components received a reddish base coat with Tamiya acrylics. In majority I used random mixtures from the paints XF-9, XF-7 and XF-64. For the smaller parts I used different mixtures from Vallejo acrylic paints.
Picture 8: White interior paint
With the paint fully dry, I applied a few good coats of hairspray onto the red before airbrushing a thin coat of Tamiya XF-2.
Picture 9: Removal of white paint
Then most of the white paint was removed again with the aid of a stiff brush and warm water. The water will solve the hairspray below the white paint and it can be easily removed in a random manner.
Picture 10: Washing
A washing made from 502 Abteilung oils mixed was next to bring out the details and to add a sense of depth to the interior.
Picture 11: Clear Orange
To blend in the remaining white areas, Tamiya X-26 was applied with the airbrush again.
Picture 12: Rust
More oils were used in the next step. This time I used rusty tones which were randomly applied to enhance the rusty appearance.
Picture 13: Mapping
To get tonal variations I applied some mapping with thinned acrylic paint. Yet the contrast may look very harsh, but it will be toned down in the next steps.
Picture 14: More rust
Again oils were used to get even more tonal variations and to blend in the mapping from the previous step.
Picture 15: Pigments
Finally I applied rust colored pigments. They will adhere very well while the oil paint is still wet and will create a subtle texturing as well. Now the interior is finished.
Pictures 16-19 show the different effects achieved. The lower hull has been finished in the same manner as seen before, but some components received additional attention with all the techniques explained above. It was now time to move back to the exterior again.
Exterior
Picture 20: Acrylic chipping
Assuming that the Hetzer in question must have burnt which would have affected the paint job significantly, I started with a widespread paint chipping using Vallejo acrylic paints.
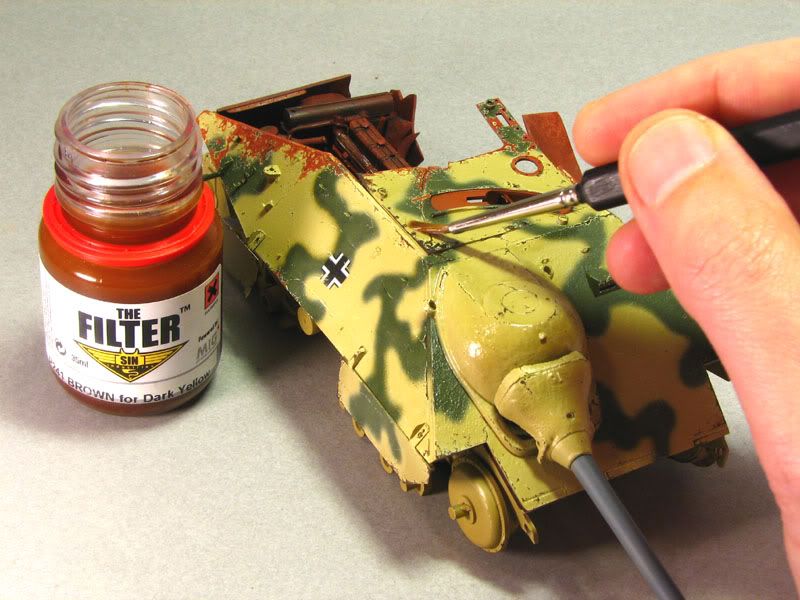
Picture 21: Filter
Now a Filter from Sin Industries was applied to blend in the paint chipping.
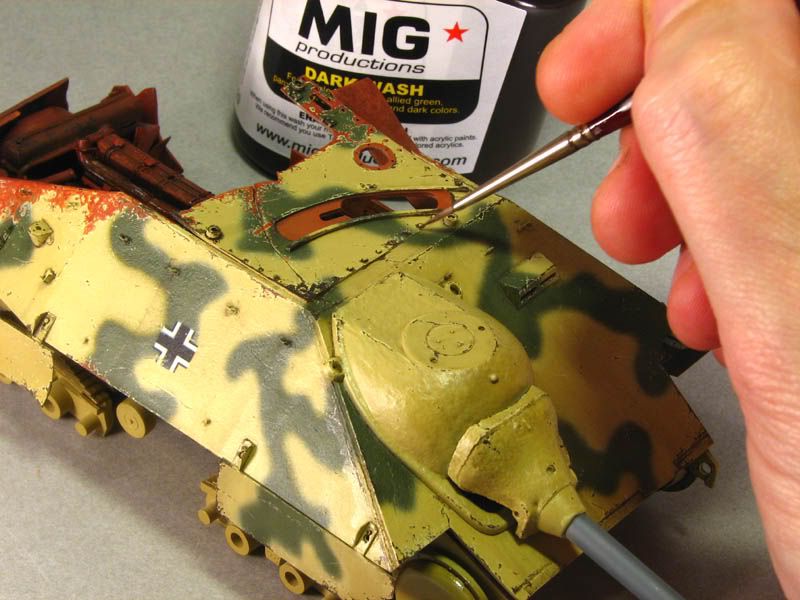
Picture 22: Washing
Next a pin washing was performed with the aid of the dark wash from Mig Productions to bring out the details and to add fake shadows.
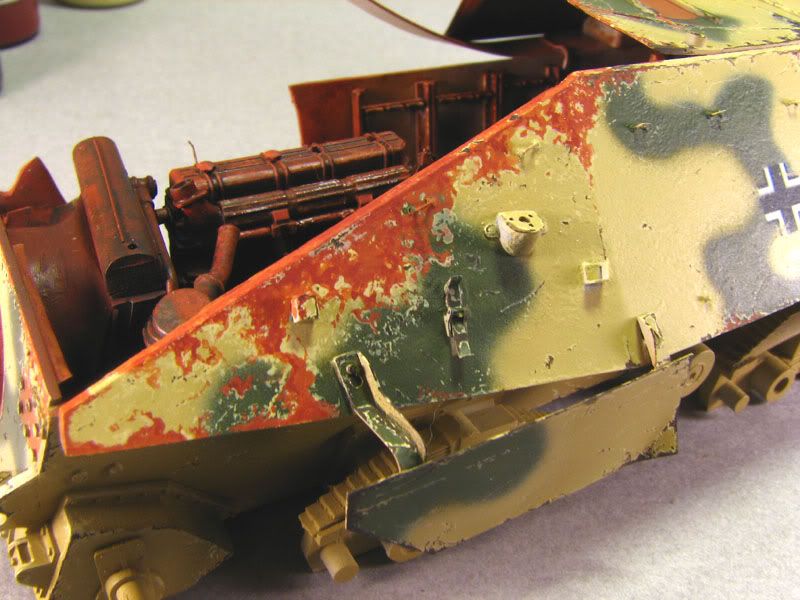
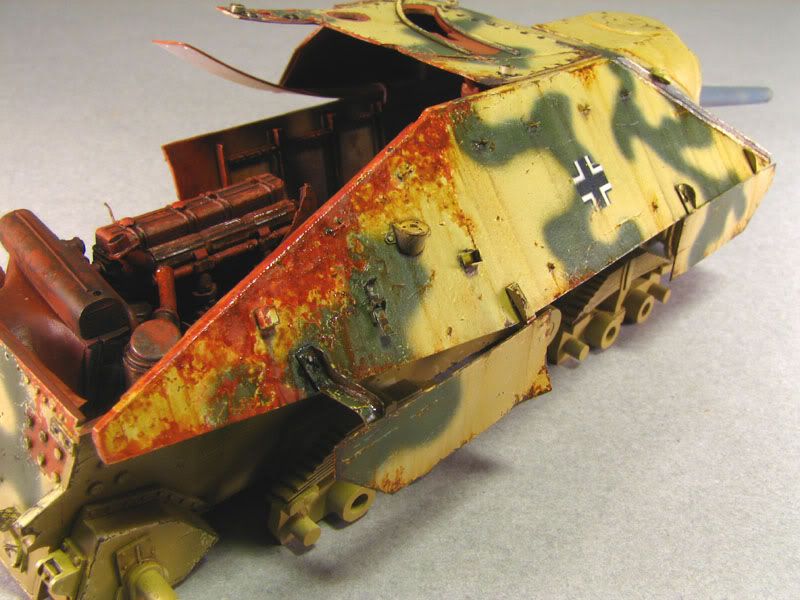
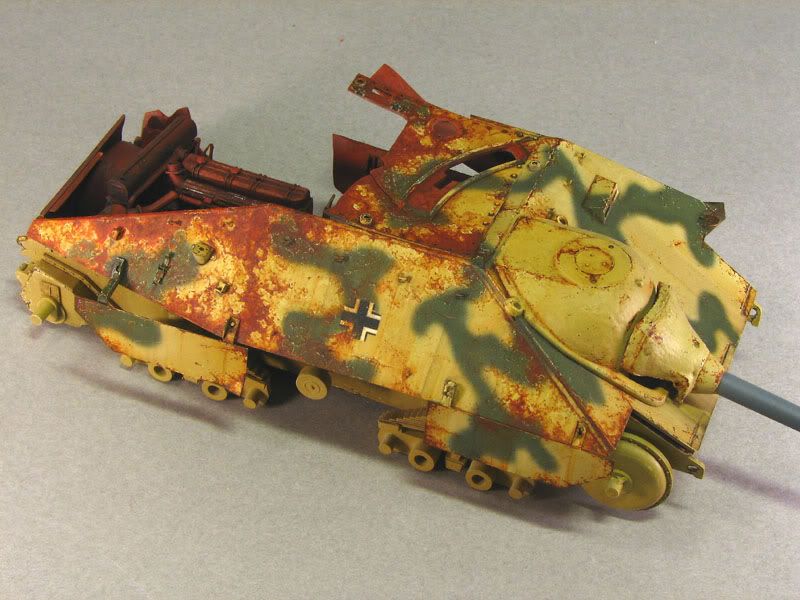
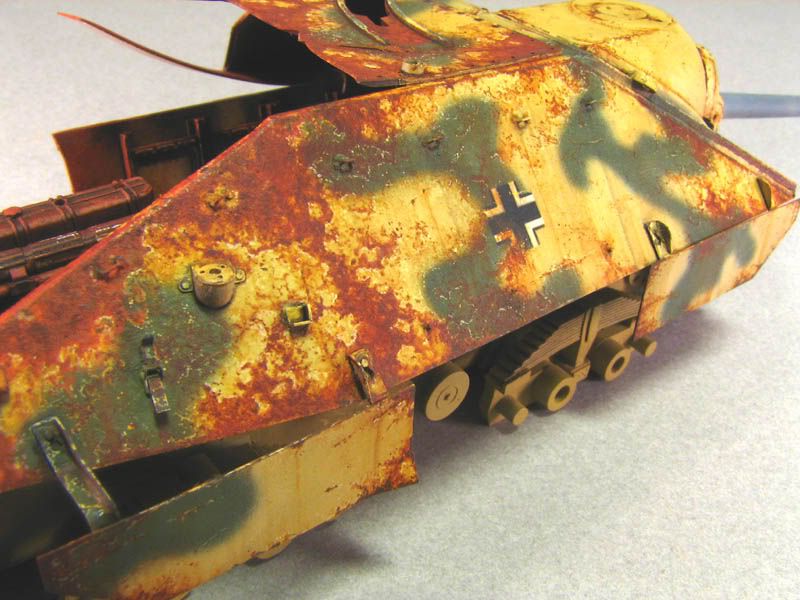
Picture 23: Rust
In the next step I applied many overlapping layers of rust colored oil paints from 502 Abteilung. Tiny dots of oil paints were applied in very random manner. It is important to give the oils a couple of days to dry. To reduce the glossy appearance, mate varnish can be airbrushed over these areas.
Pictures 24-25 show the model with the rusting complete. As you can see the chipped paint effect was enhanced with the aid of yellow Vallejo acrylic paint, applied with a 10/0 brush.
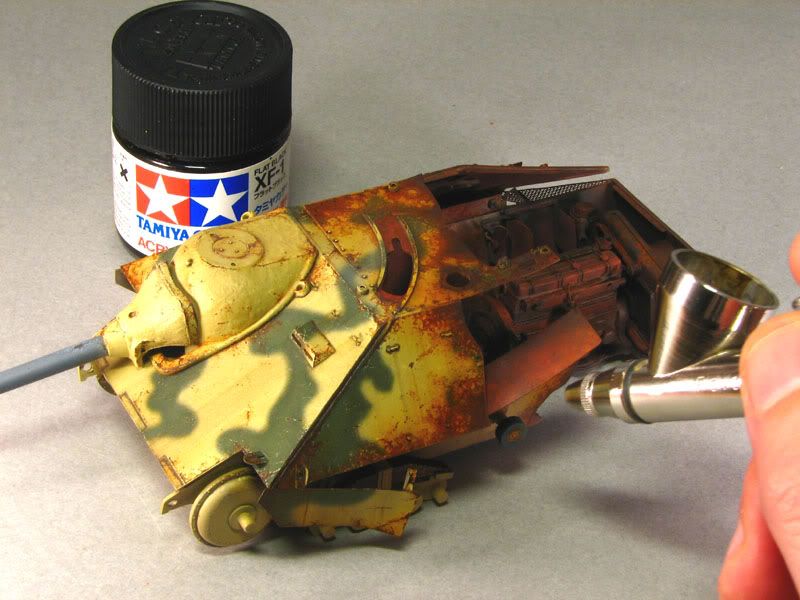
Picture 26: Soot
Tamiya XF-1 was used to create subtle areas of soot around the rusted areas.
Picture 27: Orange Clear
More Tamiya Orange Clear was applied to blend in all the effects applied before.
Picture 28: Predusting
The lower areas and the running gear received a thin coat of Tamiya XF-57. The pigments applied in the next step will adhere very well on such a matt surface.
Picture 29: Pigments
Now various pigments from Mig Productions were added and fixed onto the surface with the aid of their pigment fixer.
Picture 30: Dusting
This picture shows the dusting complete. I often try to get tonal variations in the dust, to make the effect more interesting.
Picture 31: Oil and grease
Finally I created some oil streaks mixed from black and brown oil paints and gloss enamel varnish.
Picture 32:
The tracks received a base coat from Tamiya XF 52 Flat Earth and also received different shades of pigments. With the tracks attached to the running gear the painting stage was complete.
Well....that was basically it. Now here are a few pictures of the finished piece on a base.
Thanks for looking and feel free to ask if you have any questions
Cheers
Sven