• Modelers Alliance has updated the forum software on our website. We have migrated all post, content and user accounts but we could not migrate the passwords.
    This requires that you manually reset your password.
    Please click here, http://modelersalliance.org/forums/login to go to logon page and use the "Forgot your Password" option.

Revell P-51D-5

jeaton01

Well-known member
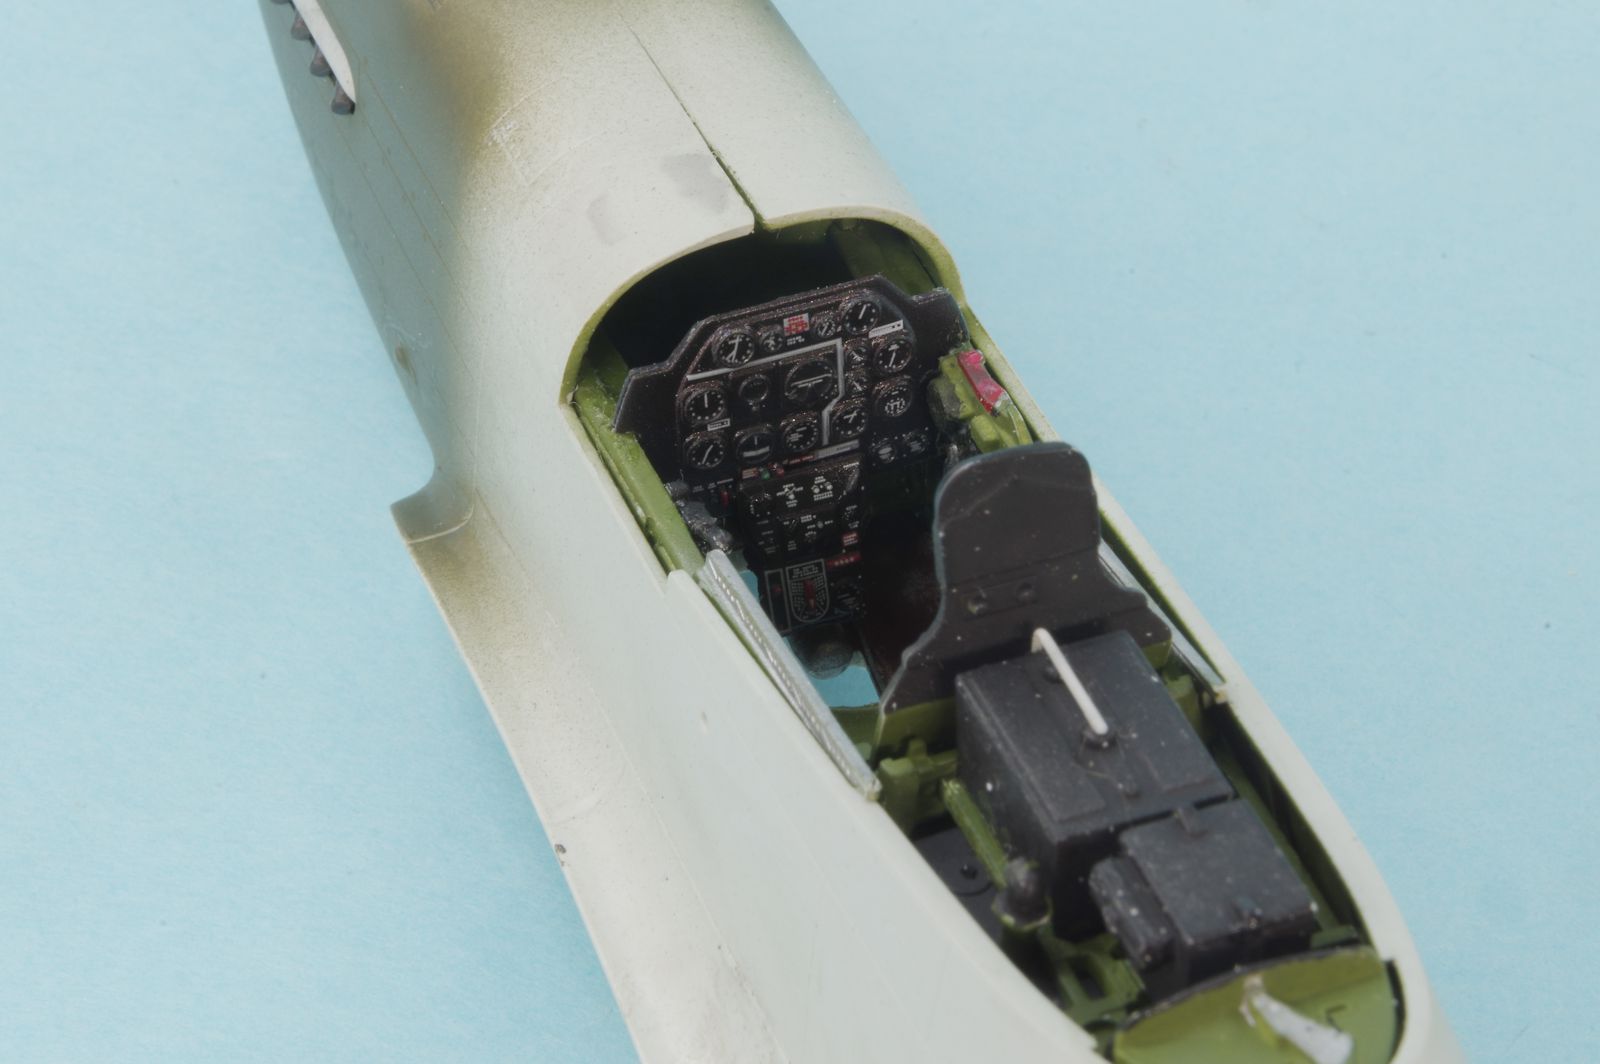
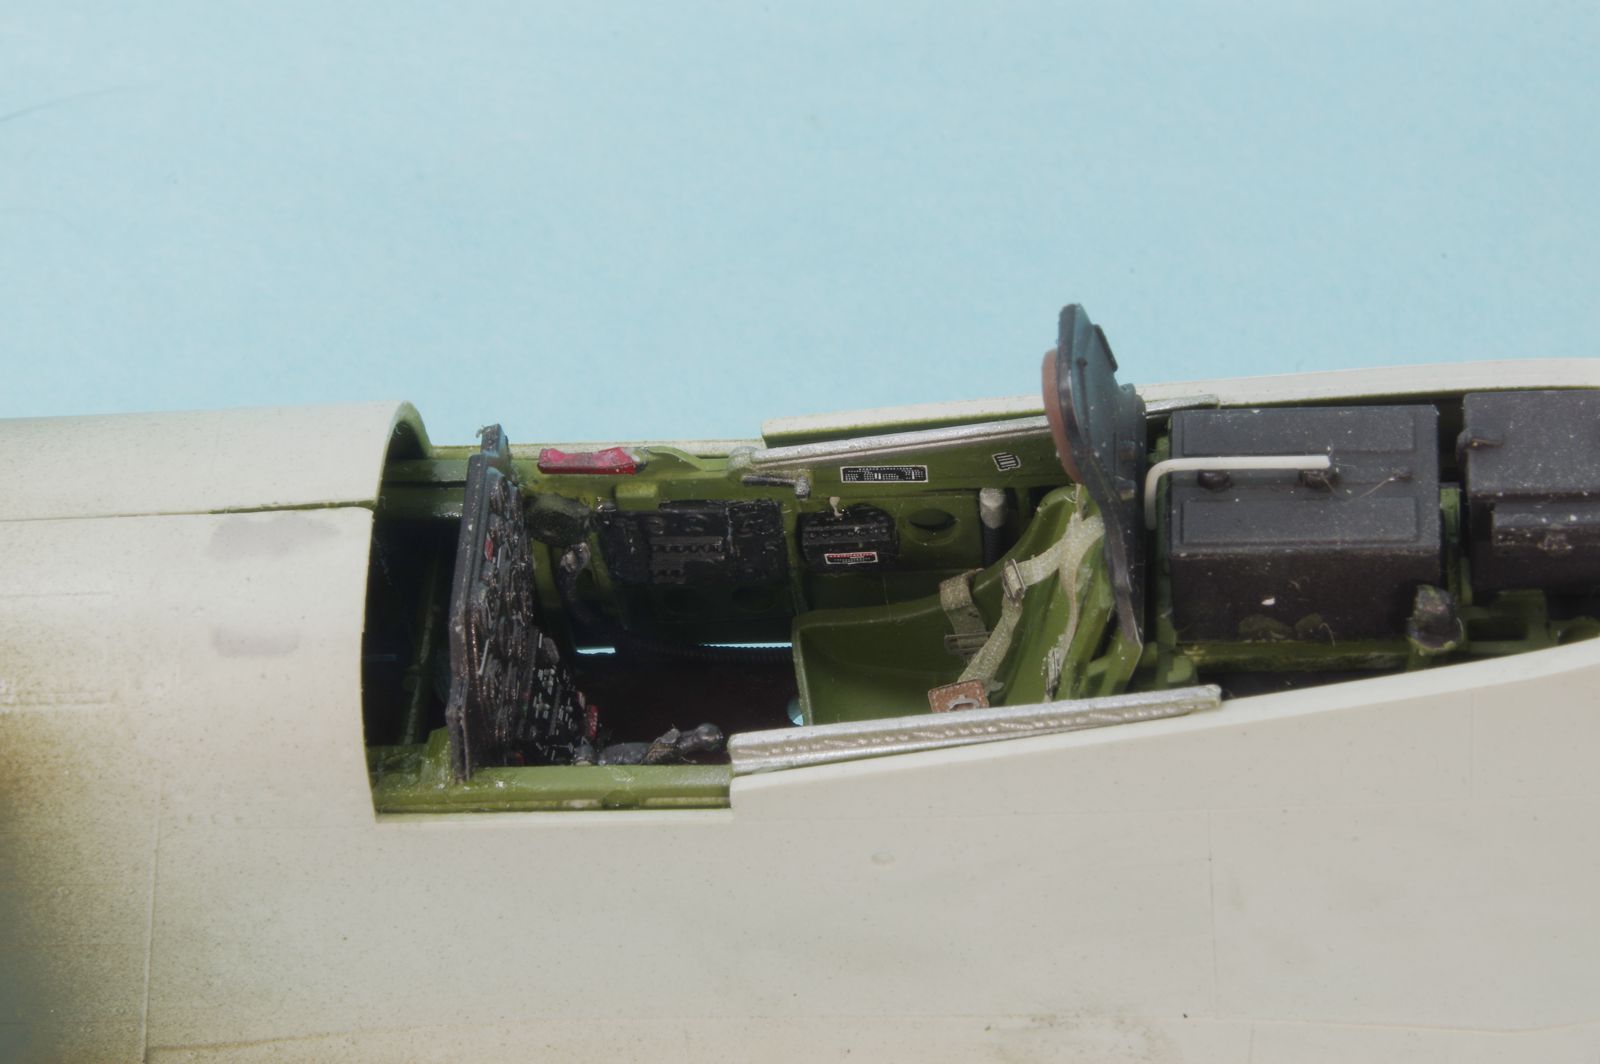
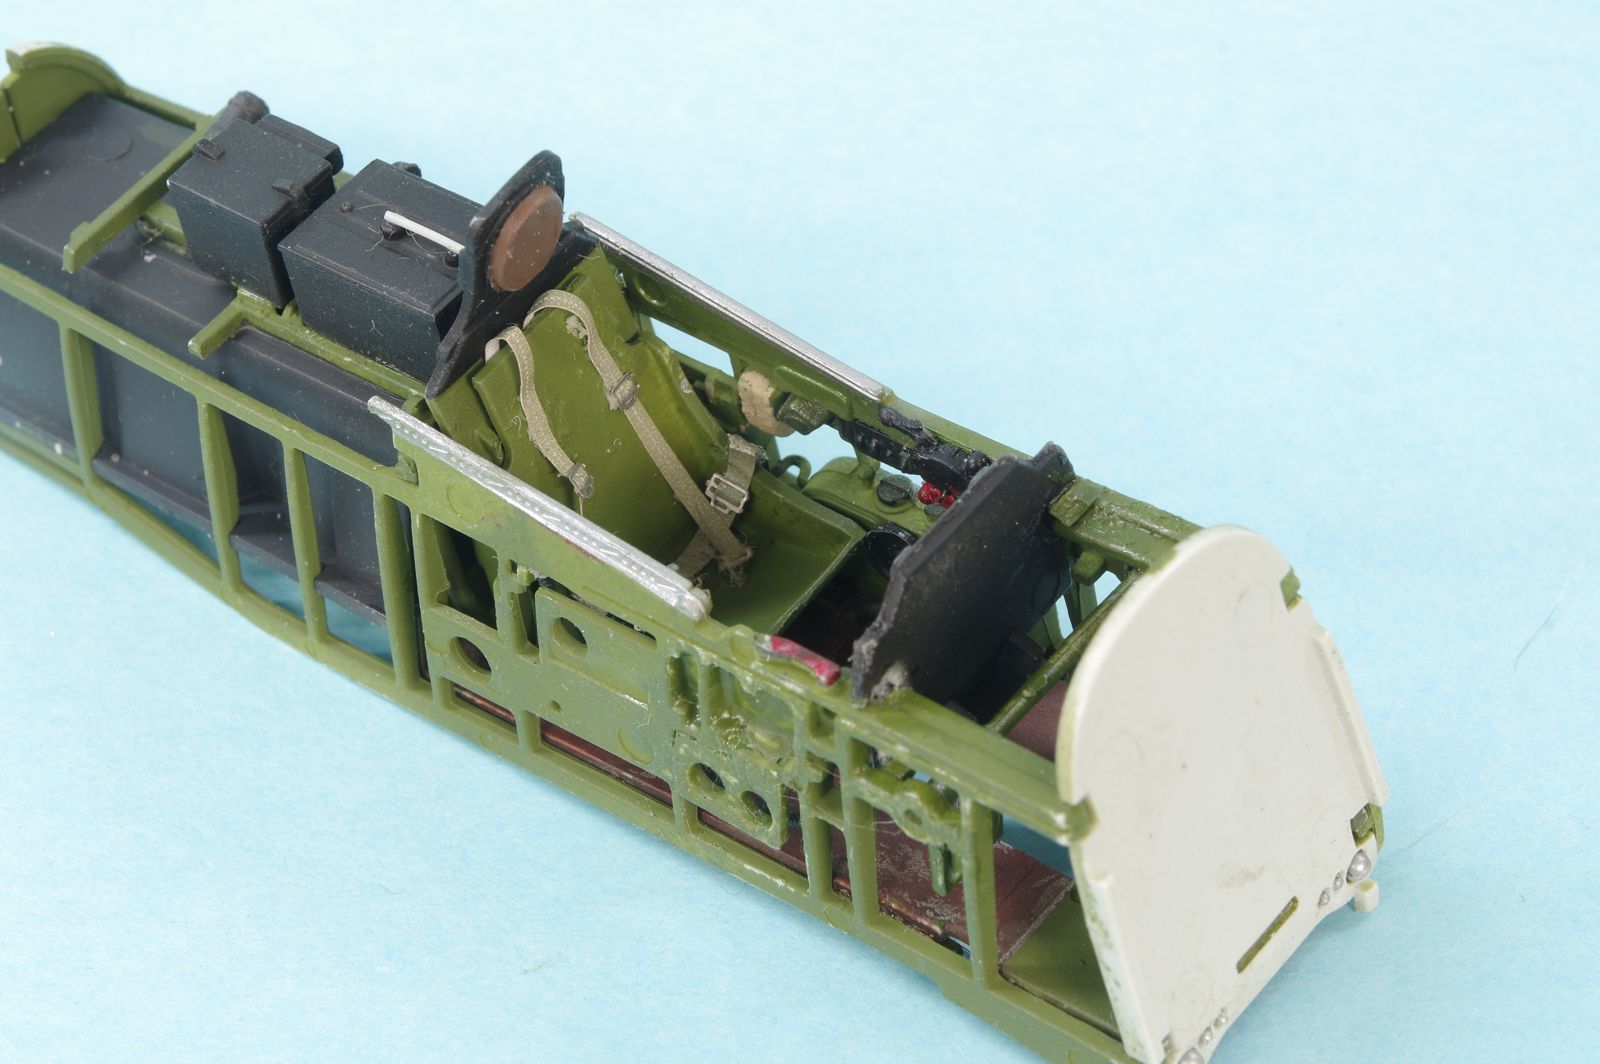
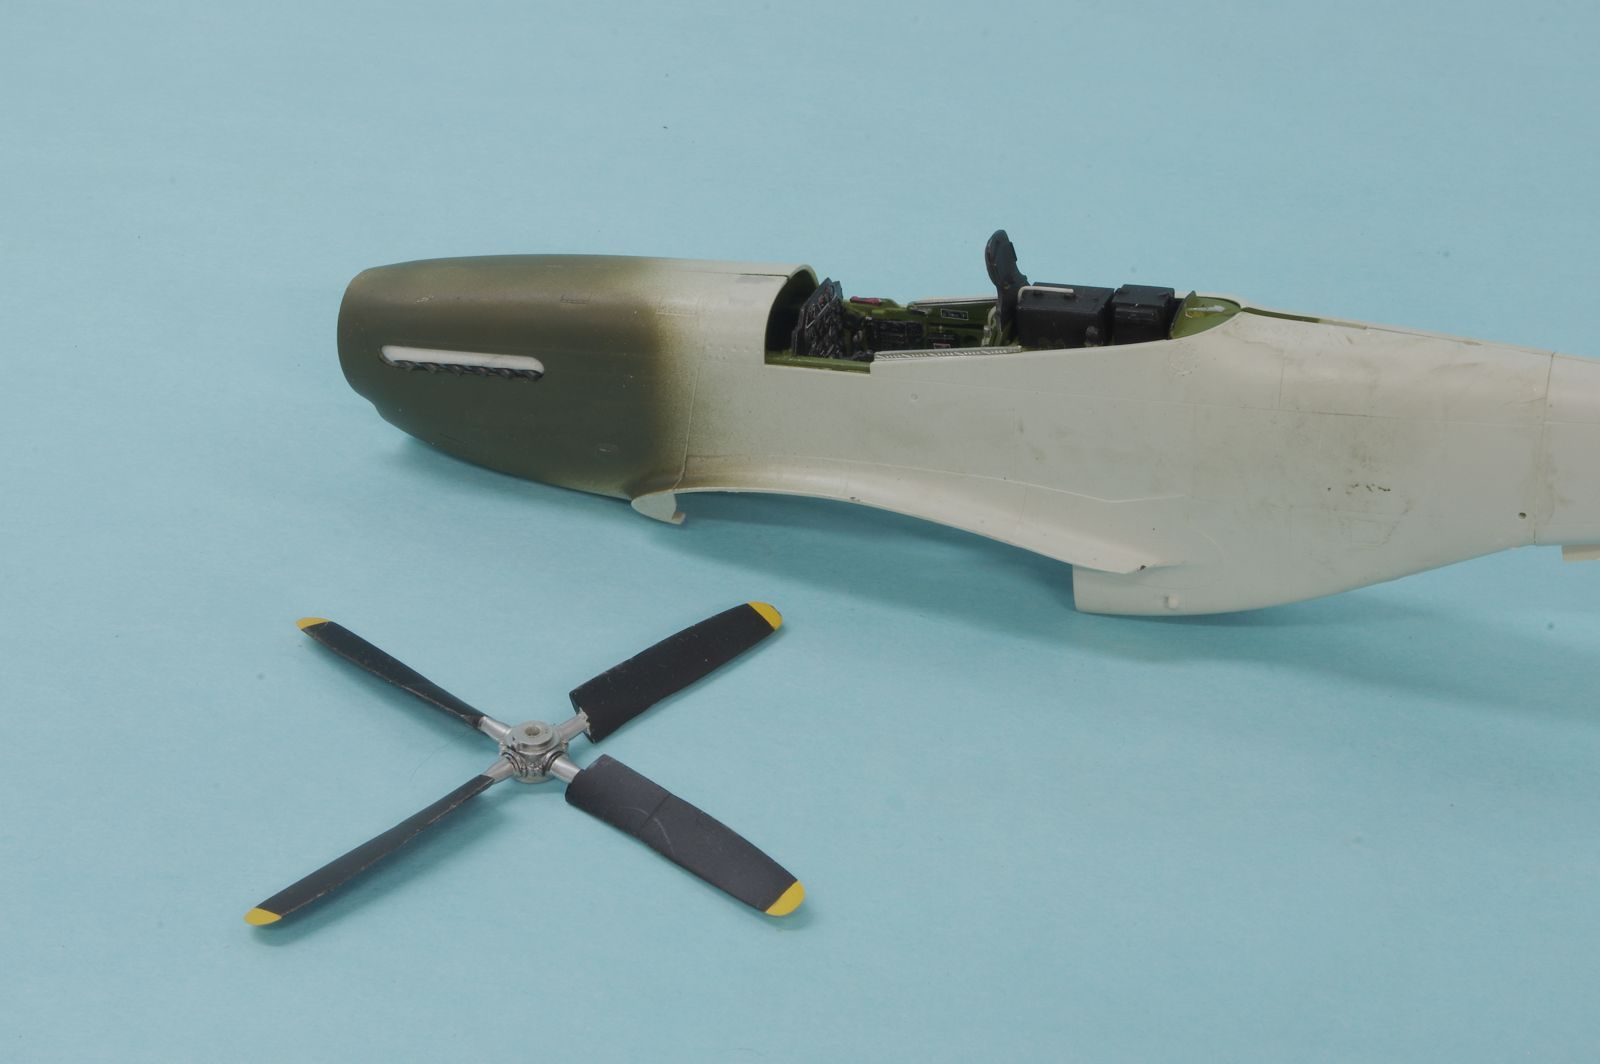
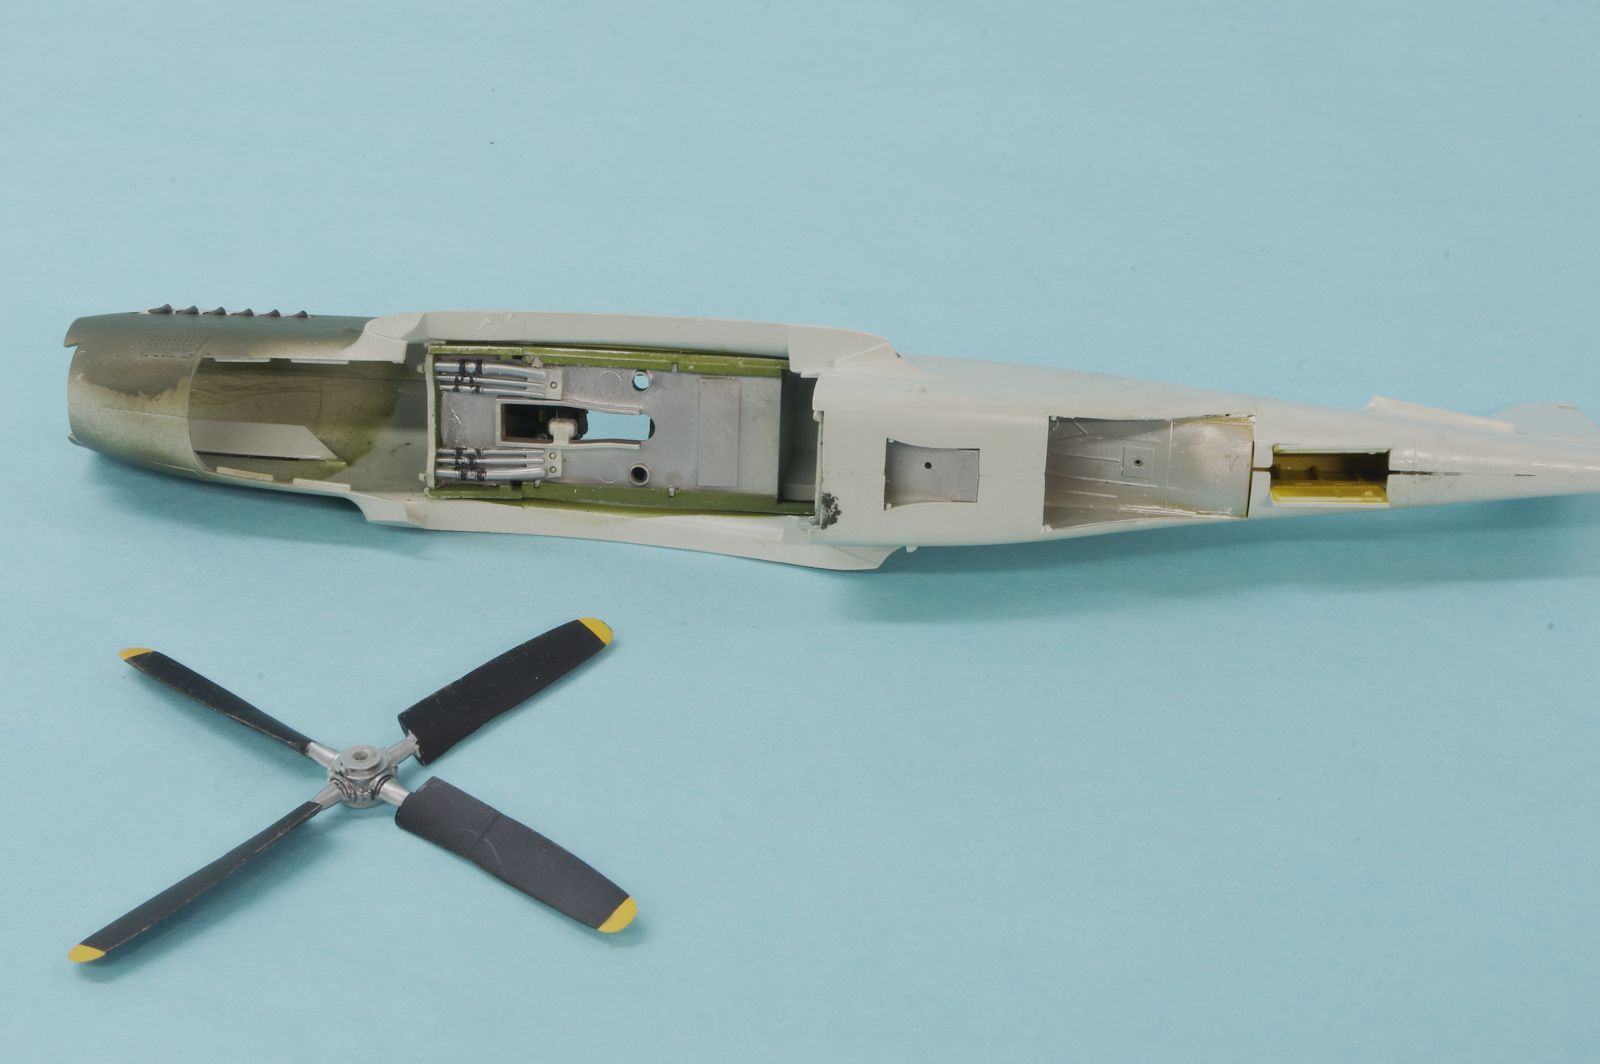
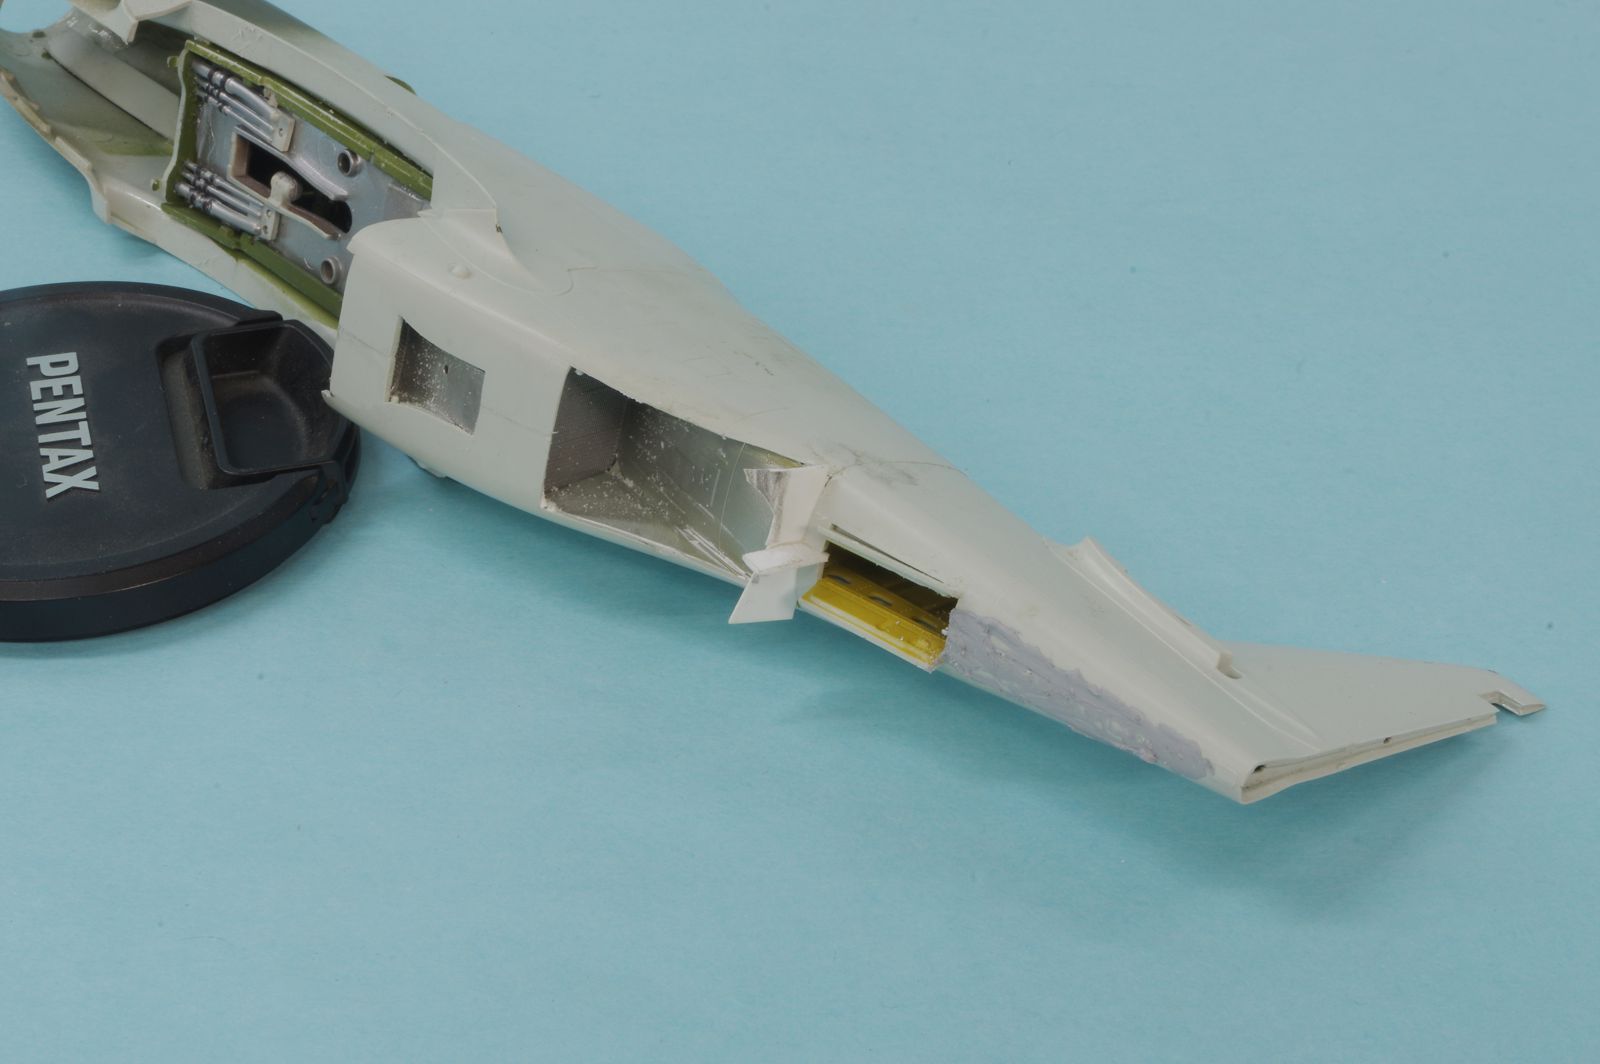
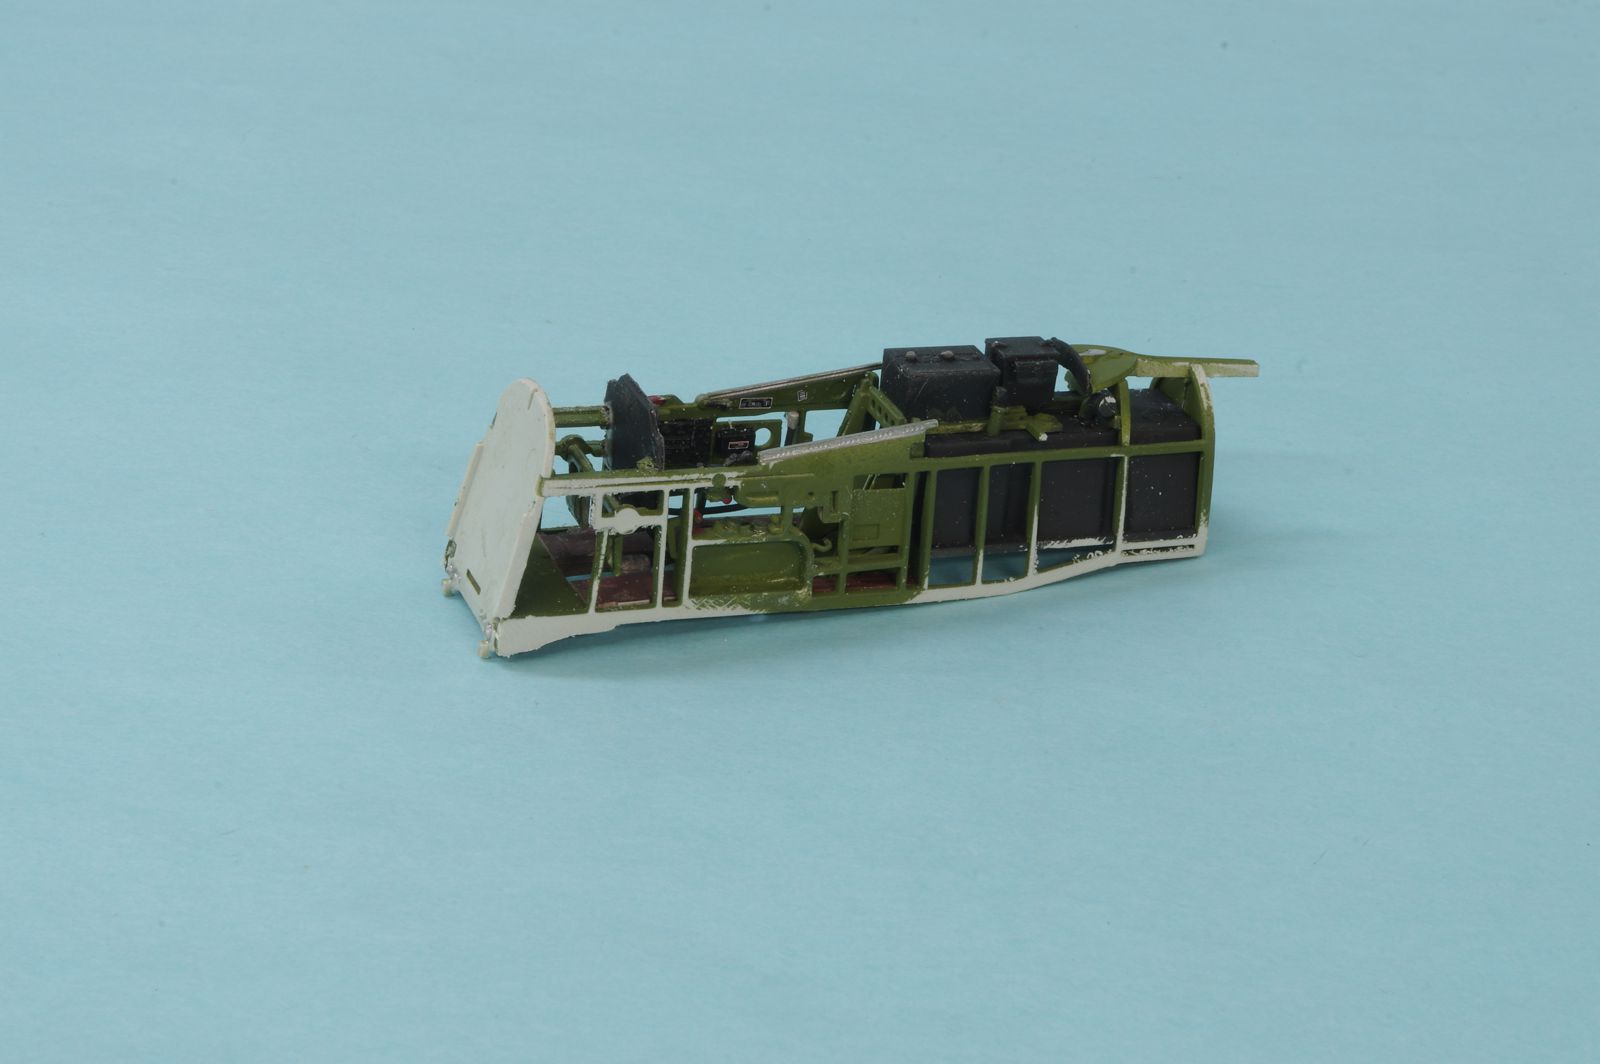
Finally got some work to show on this one. I had done some cockpit work before I started cancer treatment in March, and had gotten up to needing to add seat belts. I had to be away from home during much of the treatments, and then the side effects and need for caution about infections due to my immune system being compromised (the treatment is a form of transplant) made it so no modeling was possible. I still have to be careful but I am cleared back to the bench now. Unfortunately one of the side effects is that the tremor I have always had was made much worse. Putting together the HGW seatbelts was a 5 or 6 hour challenge but last week I got them done and installed. The interior parts are together and closed up in the fuselage. Don't know why but there are areas where I just couldn't get things to fall in to place without some gaps, but nothing too bad. Still, disappointing, and I don't thing it is all my errors. The way the exhausts and shrouds are engineered causes some complications as they have to be installed from the inside. I painted and assembled the exhaust parts, and painted the fuselage area around the exhausts the British Dark Green that the topsides are in for the scheme I am doing. Then I installed the exhausts from the inside. I will mask that area off before doing the rest of the topside painting.

00111p51.jpg


01211p51.jpg


01311p51.jpg


01411p51.jpg


00711p51.jpg


00811p51.jpg


00911p51.jpg


01011p51.jpg


01111p51.jpg
 
Great to see you back on the bench John! Best wishes on your recovery.

I remember building this years ago and had the same issue. :popcorn
 
Didn't know you were going through that John. Glad to see you posting and building again. Keep up with the struggle, we are all pulling for you!
 
Glad your back John and 'creds' to you getting back to the bench and getting the fiddly bits done on this one with all that you are going through.
:soldier :ro::good:
 
I was really disappointed in how this one was turning out. I could deal with the gaps on the fuselage seams and the wing fit, but there is no way to disguise the fit of the windscreen which only fits if the fuselage is closed up properly in that area. I bought this kit when it was first released and it was only $30 or so, but now they are twice that. However, I was able to buy an open box kit for $30 missing decals and clear parts which of course I already have. So now I need to break apart the fuselage without damaging the cockpit module. I think by sanding down the internals I can get the new fuselage parts to close up. Since I have a nice tight fit on the front fuselage bulkhead I am pretty sure the cockpit module, which includes the bulkhead, is just too big in both vertical and horizontal dimensions. There is also something wrong in the area of the tailwheel.
 
Looking great, John, and good to hear you're getting back up to speed. "Sniffin paint and gluing one's fingers together" is good therapy.

I've got a later release, or re-release of this Revell kit, or maybe not, I honestly am not certain. I'm guessing nothing has changed, so now I know what to expect. But this kit has a ton of detail within the fuselage, which I thought a bit strange. I recon when I get to it I'll find out how it goes.

The box says it's a P-51D-5NA, so it might be different all together. Box #85-5989. It was cheap, $34, new, unopened, so I snagged it. This kit was at B&B Hobbys in Spokane, got it in May. They are shutting down this month, retiring after 60+ years in the family business.
 
It good to hear you're on the mend! A bit of grinding and cussing should set the D right!
 
I bought this same kit. However, the issue with the fuse to wing fit was problematic at best so I binned the kit. I am getting to the point that if I pay good money for a kit, it should be a fair to great fit all around. Just an opinion.
 
Well, I will keep this all in mind when the time comes. The instruction sheets look pretty good for a Revell kit, at least from my memories of kits past. Ah heck, this hobby is always a challenge, right? Just some more than others, lol.
 
Back on this one now. Yes, I did rip it apart, luckily with no damage to the innards other than popping the seat out, but that will be OK, just needs to be re-glued. I am only using the fuselage shells from the partial kit I bought so I'll have lots of extra parts. If the carpet monster attacks anyone, let me know as I will not being doing another one of these. I have a Zoukei-Mura P-51D kit and two Tamiya 1/32 P-51D kits in the stash. I had thought the Revell kit would be a quicker build than those but it does not seem to be the case so far.

I first started back by fitting just the bare fuselage together with nothing inside, and test fit the windscreen and wing. The windscreen is not an exact fit, but it is very close and should be fine. The wing is another matter. The fuselage is supposed to fit into channels in the top of the one piece upper wing, but even without any internals the fuselage is a bit too wide to fit. In addition, the wing fairings sit proud of the upper surface of the wing far more than they should. I filed down the underside of the fairings, and also took a bit off each side to narrow that dimension up some, it didn't take much. At this point the wing fit was acceptable with the wing to fuselage fairing only slightly above the wing skin as it should be.

The next step was to fit the cockpit capsule into the fuselage. I filed down the sides at the front. When I assembled the fuselage with the cockpit inside, but not the radiator assembly, the wing would not fit . I removed some material from the bottom of the cockpit assembly, making sure it was level with the wing fairings, but still the wing was down too low.
Lastly I removed the aft sections of the coolant pipes and finally the wing fit properly.

After that I checked the fit of the radiator assembly, which without adjustment fit well with the exception of a slight gap between the radiator duct and the tail wheel well, which I will just fill as it would be very difficult to make any adjustment without fouling the fit of the radiator duct and fuselage sides. Next I test fit both the radiator assembly and the cockpit in both fuselage halves, which seemed pretty good, so I glued the radiator duct and cockpit into one fuselage half and clamped them tight.

01511p51.jpg


01611p51.jpg


01711p51.jpg
 
Makes you wonder just how they actually test build the test shots on these kits. I get it that there can be some change in the plastic once it is out of the mold, but in a lot of cases it is a real surprise just how poorly these kits fit.
 
Back
Top