• Modelers Alliance has updated the forum software on our website. We have migrated all post, content and user accounts but we could not migrate the passwords.
    This requires that you manually reset your password.
    Please click here, http://modelersalliance.org/forums/login to go to logon page and use the "Forgot your Password" option.

Tamiya M51 Sherman - ADDENDUM ADDED

OK getting more done over the weekend (and then some)

hf453cdb.jpg


h7aebee2.jpg


h880913a.jpg


h225bd16.jpg


and finally, the tracks complete one side:

h000294a.jpg

the finished product on the tracks look great, but my goodness is there a lot of work to them!
 
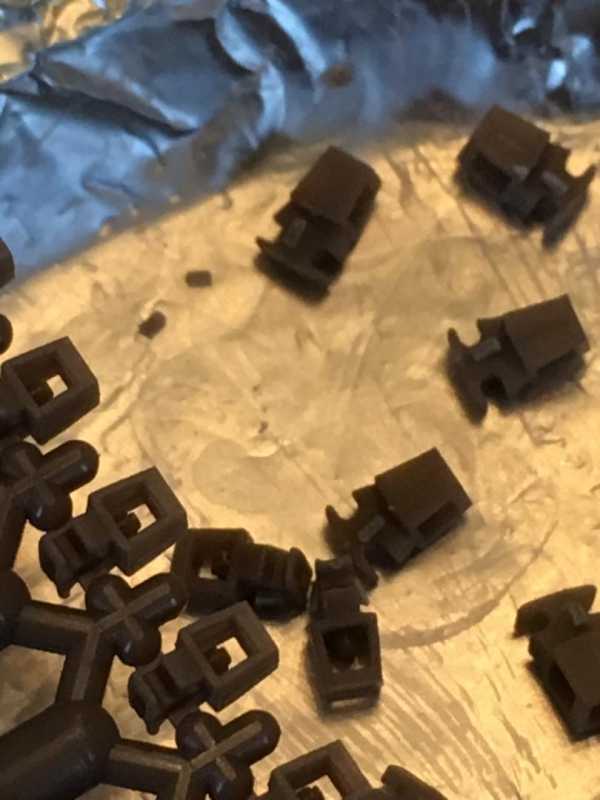
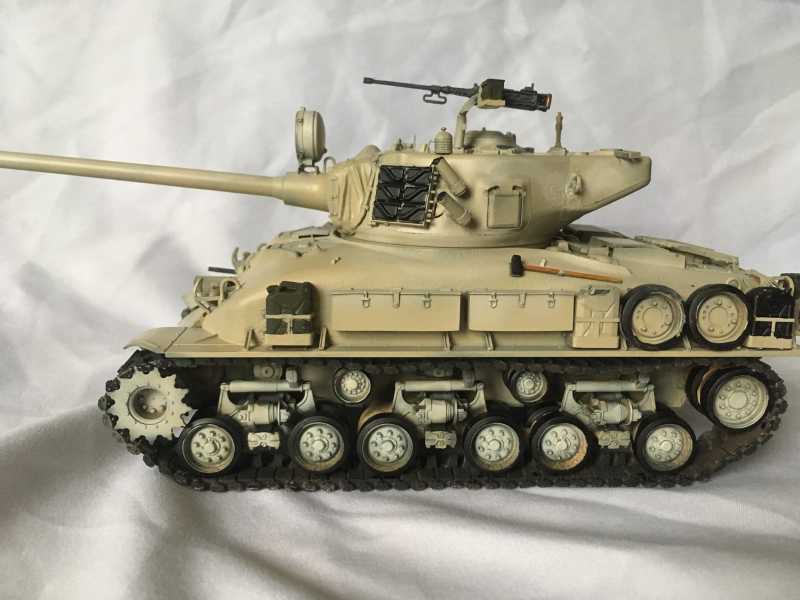
As an addendum to the tracks, I will again repeat, they are really well detailed, but this should give you an idea as to the work required. The basic issue is tht NONE of this is click, it just slides together, and glued, more on that later. Every link will basically consist of the link, a guide horn, and a cleat on the end (Names are likely incorrect. Just go with it...) So each one is tiny and must be clipped off and cleaned with a hobby knife, sanding stick, or both:

guide horn

h03ef5eb.jpg


links

h06488ec.jpg


cleat

h06488ec_2019-07-23.jpg


note that the instructions tell you to attach several of these at one time, but the issue is how to cleanly remove them from the sprue once attached? There isn't really, so I found it better to cut/pile them as shown.
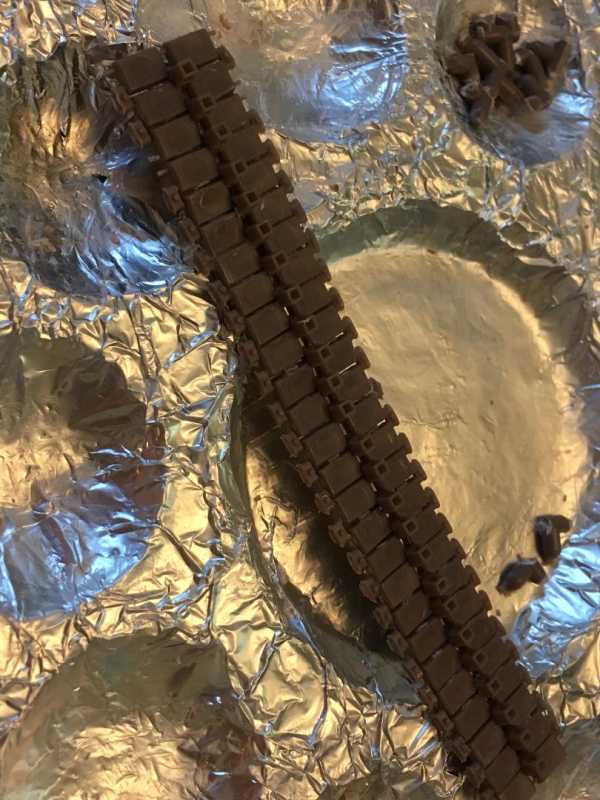
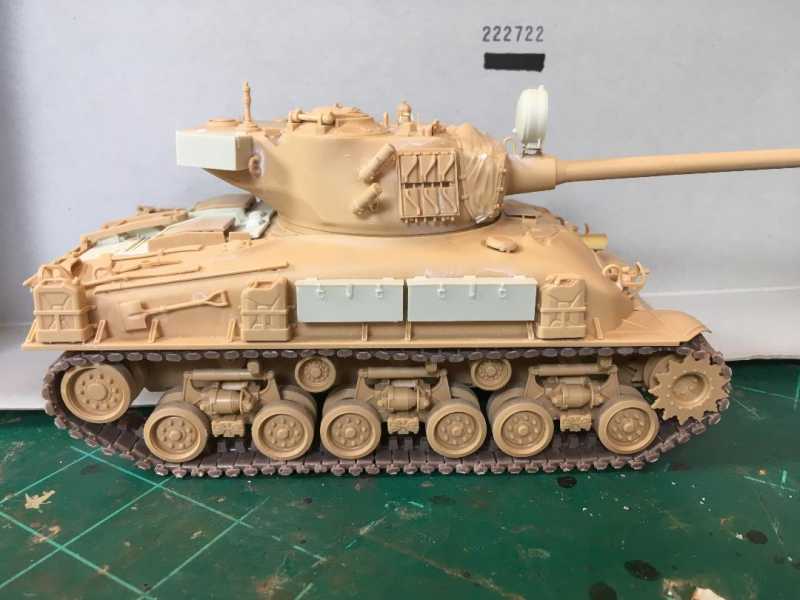
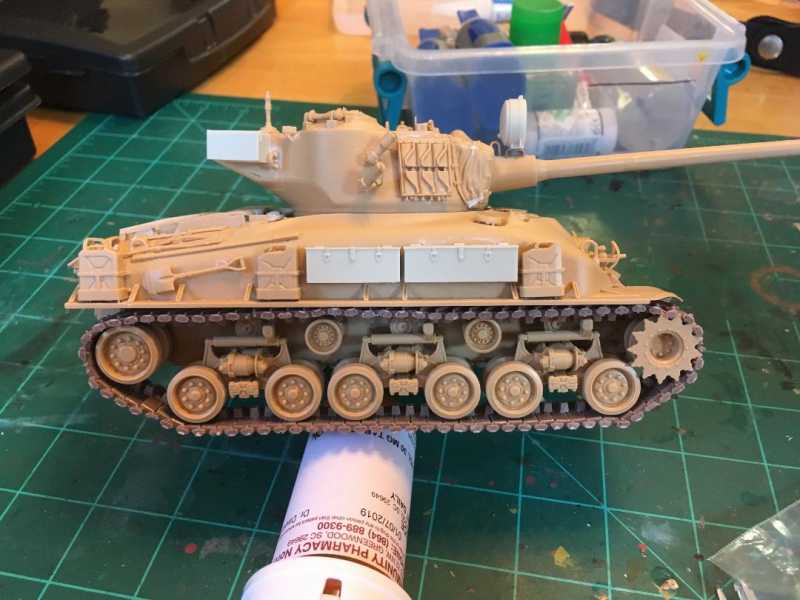
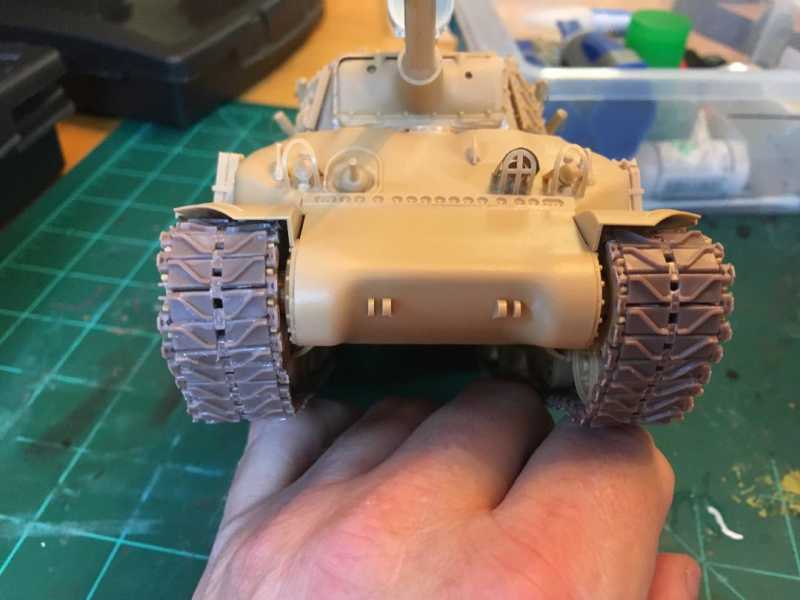
As stated earlier, none of this clicks together, it is all my friction, or rather, it falls apart SUPER easy, so I basically glued several guide horns and links together, maybe 4 or so, then attached the outer cleats, gluing as I go. Total PITA, but the end result admittedly, is quite nice. this run of about 26 track links total took nearly an hour of work, after everything was separated & cleaned

h653b0cc.jpg


Point I am making is, although these are quite good, and less than half the cost of metal links, the metal links I think will not require nearly this amount of time. So I guess the trade-off is one of time/money, eh?
 
OK so now it is really looking like a tank!

hf429e19.jpg


h8cf6def.jpg


h217c07b.jpg


h11fbbeb.jpg


Note the sink marks in these tracks showing at the rear. Nothing a bit of weathering won't cover, but it shows again that these AFV tracks were tough little boogers from the jump!

h3bf04de.jpg


Ok now I need to find some time for paint!
 
OK so got some paint on it today!

here is my first stab at modulation in VERY bright mid-day sunlight:

hfa8b834.jpg


h5387550.jpg


h607b231.jpg


hd7ced37.jpg


And I popped these shots indoors:

h0497774.jpg


h286a14f.jpg


hb2bebce.jpg


hbda7b8e.jpg


at 90 degrees, the humidity and heat index are saying it feels like it is nearly 100, and trust me, they are not far from wrong - WHEW! So at this point I pooped out and called it day. After all, I am doing this on the porch & still have to clean all this up before the better half gets home!

So I already showed it to Eric & MP, and they are correctly suggesting I nit the original color in a really light 'mist' to tone it down a bit on the upper surfaces. What y'all think?
 
Hmm......this thread isn’t getting too much love, but hey, I’m enjoying it!

Here is the latest. Really looking like a proper Sherman! Just need to add some stowage and get the weathering rolling!!

h8501a8f.jpeg


heeb0515.jpeg


h1106ee6.jpeg


hc539a95.jpeg


h751c553.jpeg


ha6ebc3e.jpeg
 
There you go...that looks better. Now start laying down the Pin Wash...and Pin Wash EVERY detail :D

:v
 
Hey Bruce here are a couple of color pics to help you out with the weathering. Find color photos of this is a bit of a challenge. Another approach is find a finished model that you like and get inspiration from that.

h8bb32c2.jpg


hf446826.jpg


HTH
:v
 
Hey thanks man! It is my nature at this point to over do it, I keep looking at the T-62 and by following your ‘less is more’ philosophy I have to say it came out very nice! Reason I stopped is to adhere to that philosophy if it kills me!


So on the Sherm I am going to do the same, thanks so much for those pics, they are REALLY helpful!
 
I am so sorry that I have not had time to do much work....darn this thing we call real life!!!

(good news is, I got a new (to me) Iphone 7 and man the increase in the quality of the pics over my old Iphone 5 are just great!

OK, FINALLY got some decals on it. These are from STAR DECALS, an they are my absolute fav-o-rite dee-cal (deck-uhl to you chaps across the pond) manufacturer! They cut easy, need only about 15 seconds of soaking, lay on smooth and I have never had any issues with silvering on this, the Egyptian IS-III, or several others I can name! So there are really just two views:


he27198f.jpg


hdfb2a4e.jpg


Oh and not sure if all are aware, but Hobby Lobby now carries a chrome paint pen right in the model section! With the 40% off coupon, it's less than $9 USD after taxes, and looks great! Here it is applied to the Shermie's Searchlight:

hea66c55.jpg


Now just to clearcoat and on to the stowage!
 
Looking Great! the decals came out nice. I'll have to check out that chrome pin.
:v
 
Looking Great! the decals came out nice. I'll have to check out that chrome pin.
:v

As my MIL would say "It's PEN....."

Sorry for not being on here as much as I would like, but have had little time - today I really had time only for the stowage install & paint. All of this stowage is from Value Gear, really great stuff!


h2f38d07.jpg


h1b596de.jpg


h45be5f1.jpg


Looks like now its ready for the weathering!
 
Looks really good there! Though I'm not sure about the red axe head however it goes give a nice little pop of color. :good:
I would paint the canvas cover on the mantlet a more brownish color...actually a OD would work good for that.
...and of Course the Pin Wash...

https://www.youtube.com/watch?v=iekseD0IrfA

:v
 
Back
Top