
-
Modelers Alliance has updated the forum software on our website. We have migrated all post, content and user accounts but we could not migrate the passwords.
This requires that you manually reset your password.
Please click here, http://modelersalliance.org/forums/login to go to logon page and use the "Forgot your Password" option.
You are using an out of date browser. It may not display this or other websites correctly.
You should upgrade or use an alternative browser.
You should upgrade or use an alternative browser.
Old Dog's CTA entry...Gone Steyr Crazy
- Thread starter Old Dog
- Start date

Sherman 18
Master at Arms
Old Dog
Well-known member
OK, while I haven't been posting much I have been plugging away at these and having so much fun I keep forgetting to take in progress photos but the basic vehicles pretty much fall together, after all they are Tamiya and most of the work has been in painting and watching paint dry is pretty boring. Early on the work consisted of a lot of removing and cleaning up parts and mass painting of things like wheels, chassis, exhaust systems, steering wheels and the like.
Anyway I guess it's time for a little catch up

No not that kind :yipee
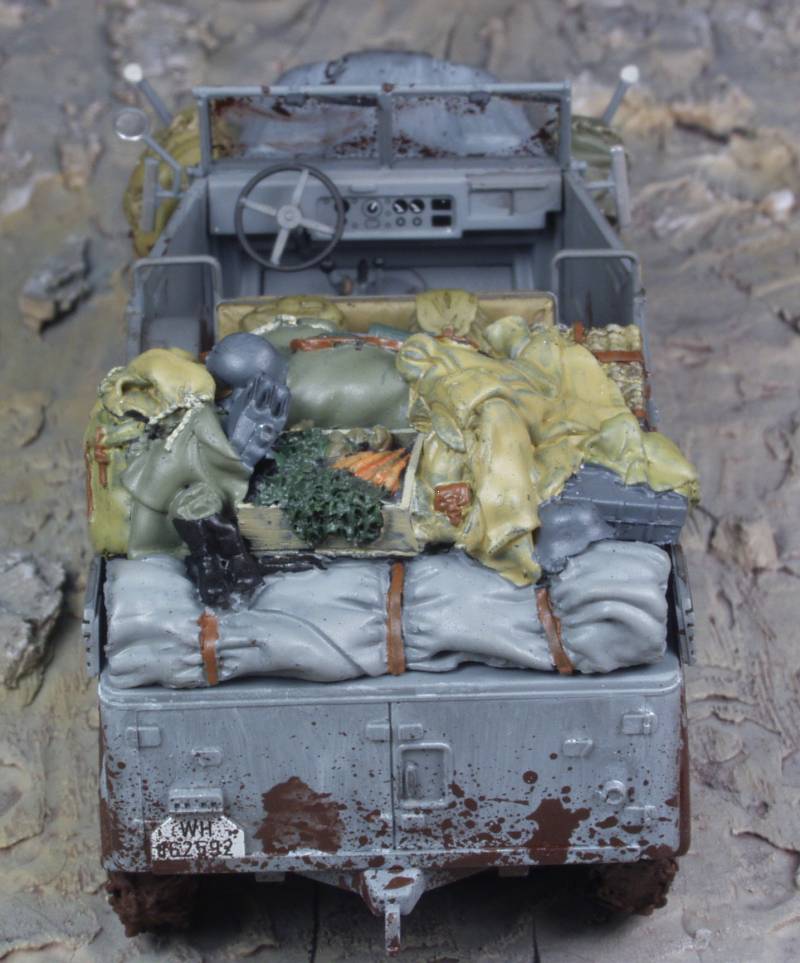
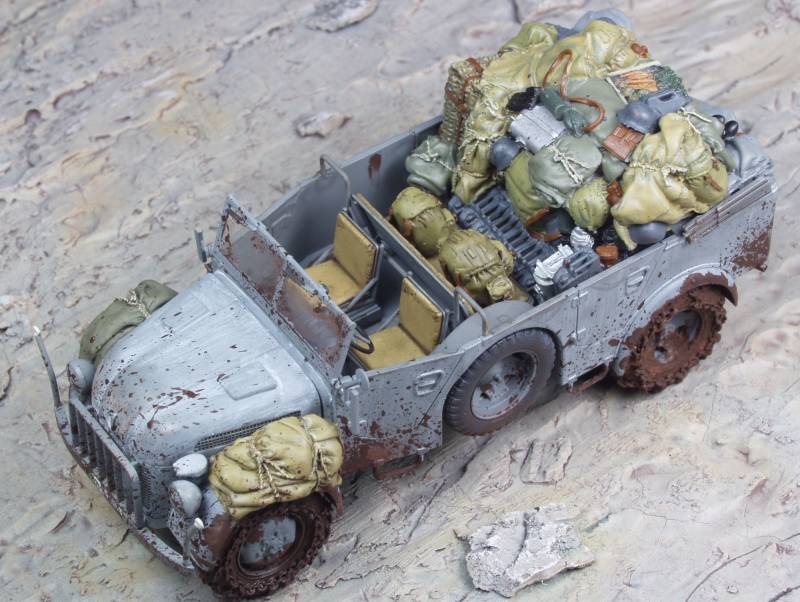
First up will be the basic Steyr with stowage. I only took one in progress shot and that was after the stowage was painted and installed. Amazingly I didn't use all off it :gogo
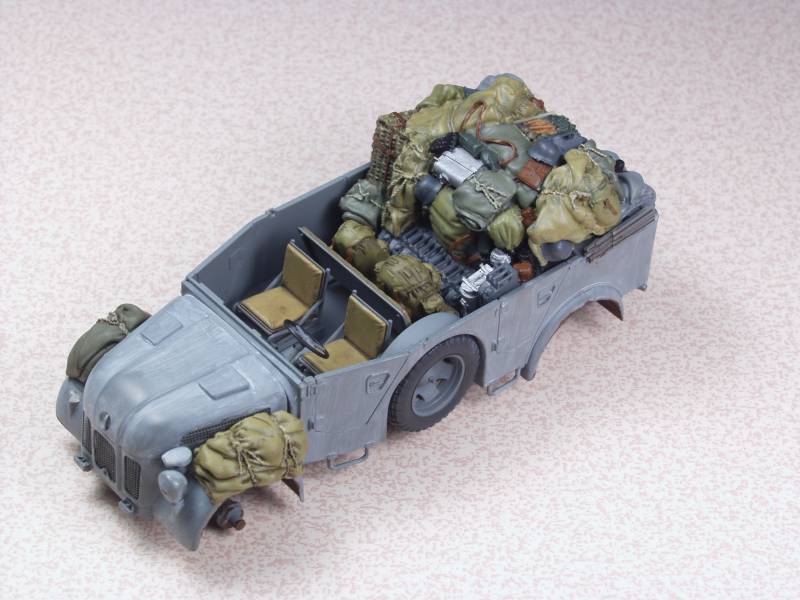
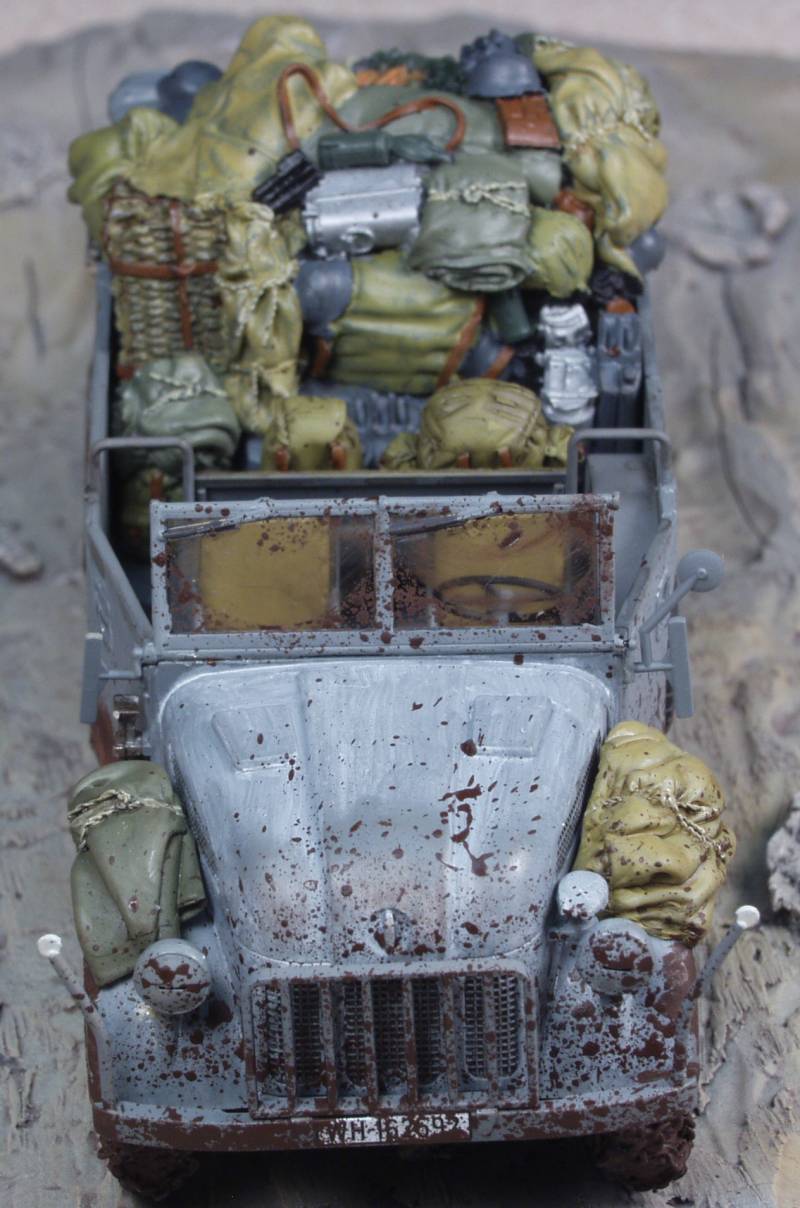
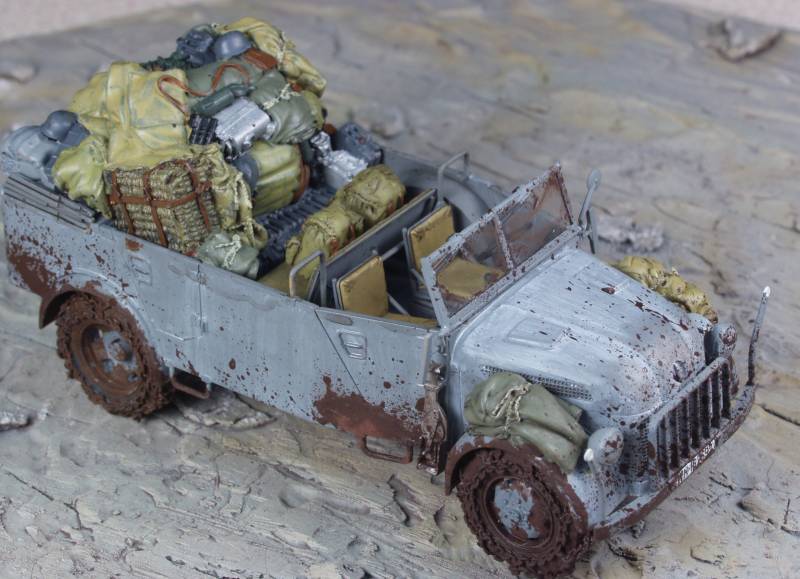
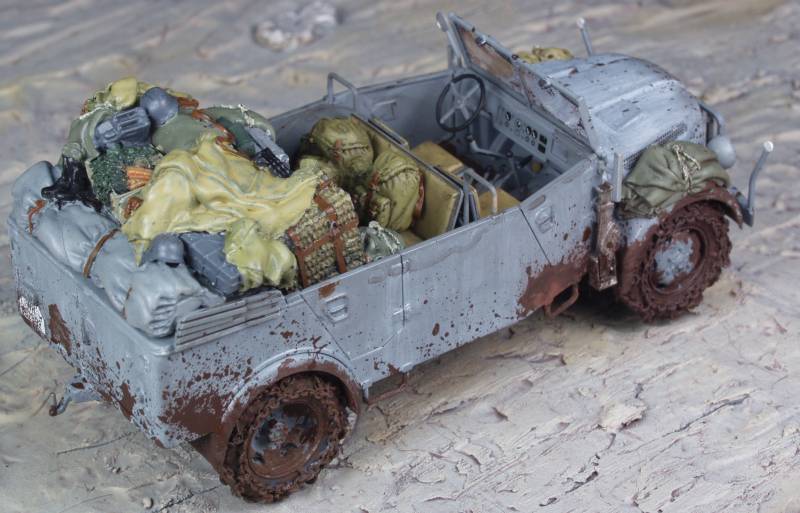
The finished vehicle was to be Eastern front in spring and the rains have not only turned the roads into quagmires but have washed most of the white wash winter camo off. Anyway I'm calling this one finished.
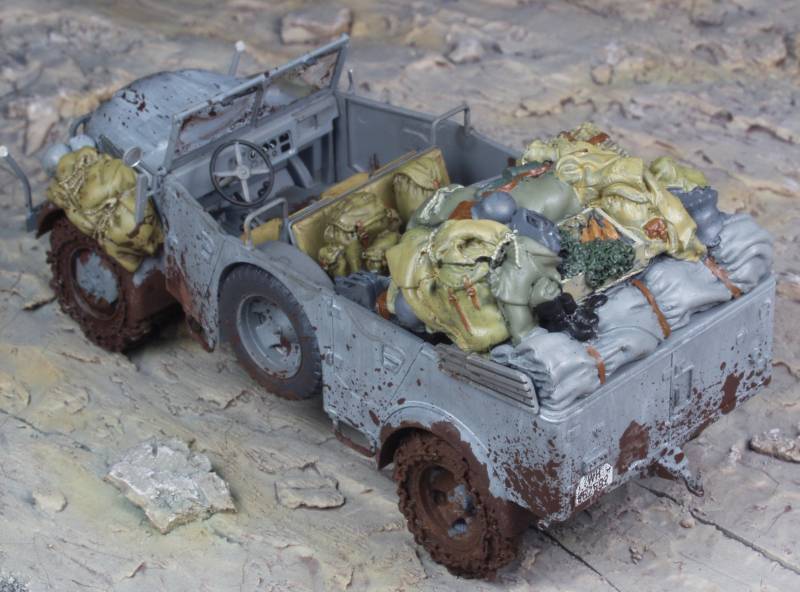
That's one down and four to go :woohoo:
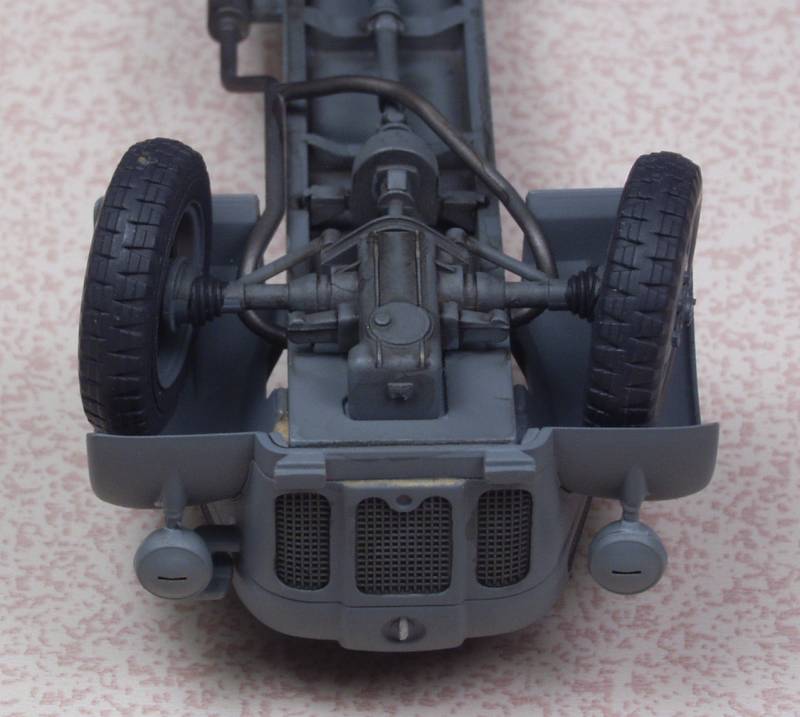
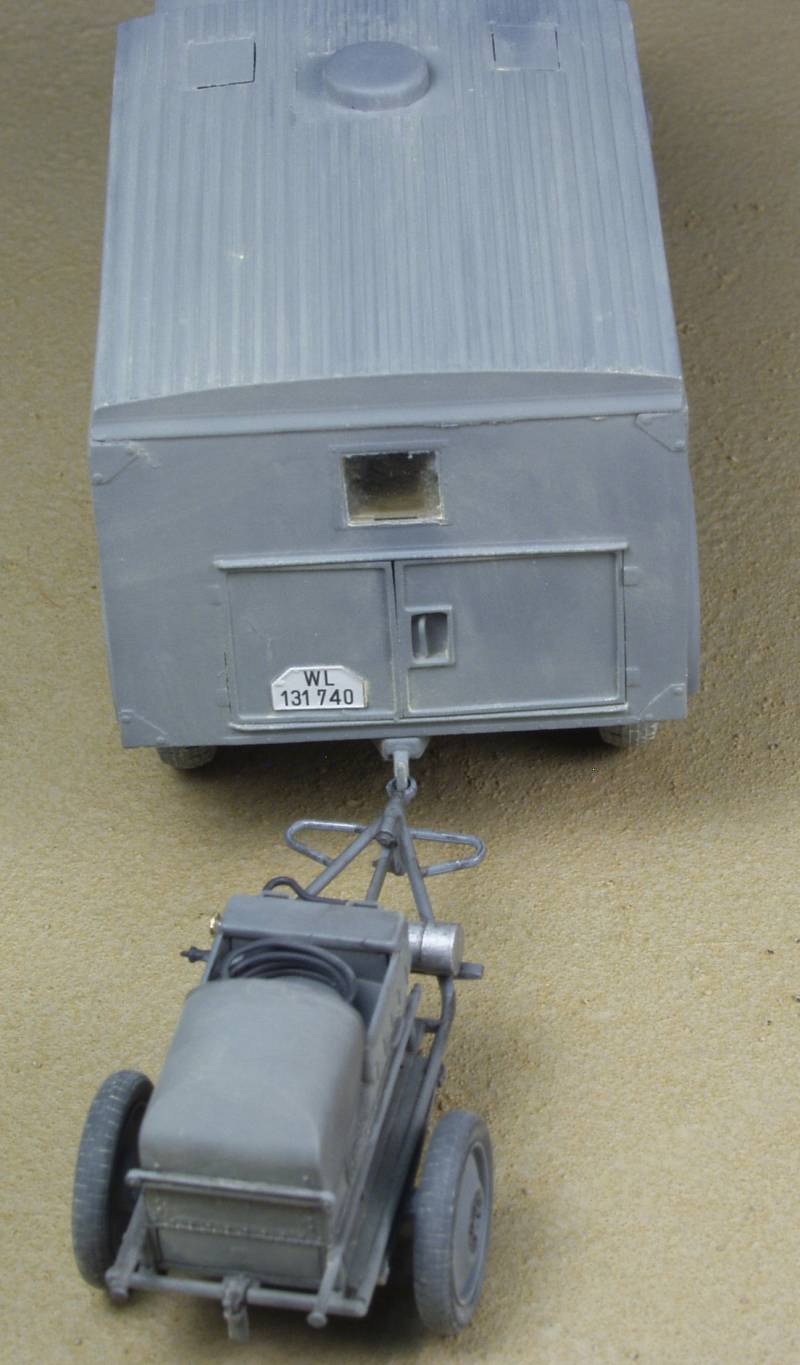
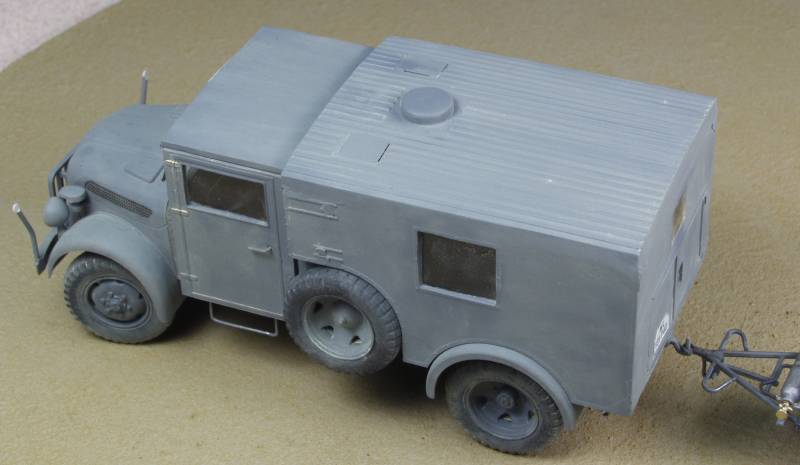
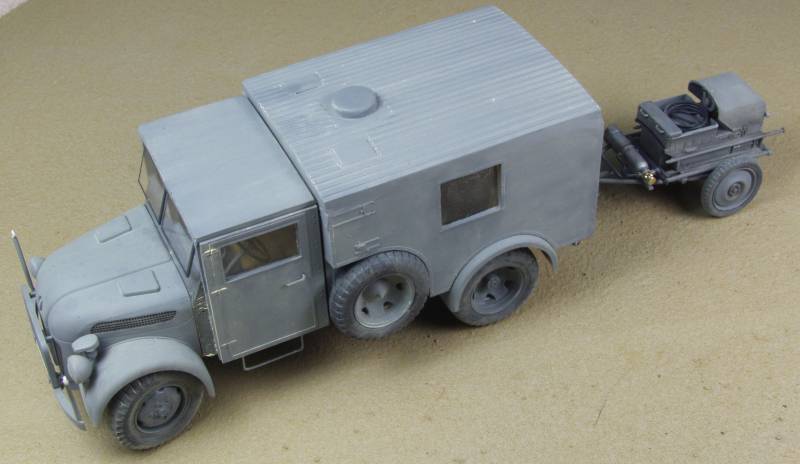
Steyr #2 will be the radio truck. One of the things I like to do with vehicles is turn the front wheels on some of them so they don't look like they are all parked in a parking lot. The chassis shown below was intended to be used on the basic Steyr but I found that the resin wheels with chains had clearance issues with the fenders in the turned position so this one will go on the radio truck instead. Not hard to do, I started by drilling a hole into the end of the axle into the universal boot. Then wheel hub was cut off and the universal boots filed at an angle. A pin was placed in the drilled hole to make certain the hub would be centered and it was then glued back on.
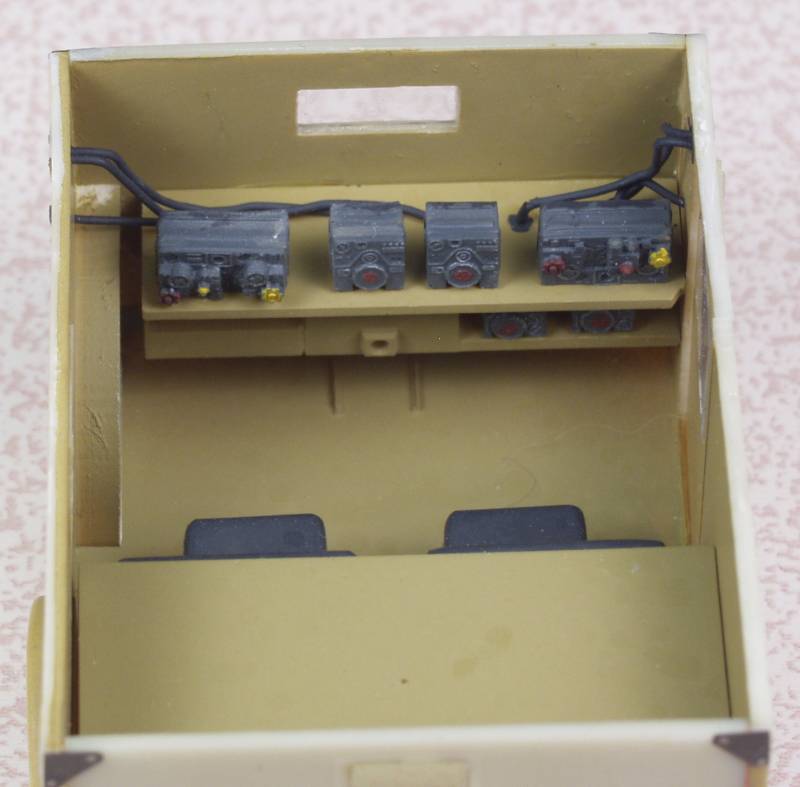
The interior of the radio truck looked pretty barren to me so I installed some aircraft transmitters and receivers intending to make this an airfield communication truck. While little of them will be seen through the windows, I know they are there :gogo
More to follow soon and I'll try to get a few more in progress shots of the other vehicles.
Thanks for looking in !
Anyway I guess it's time for a little catch up
No not that kind :yipee
First up will be the basic Steyr with stowage. I only took one in progress shot and that was after the stowage was painted and installed. Amazingly I didn't use all off it :gogo
The finished vehicle was to be Eastern front in spring and the rains have not only turned the roads into quagmires but have washed most of the white wash winter camo off. Anyway I'm calling this one finished.
That's one down and four to go :woohoo:
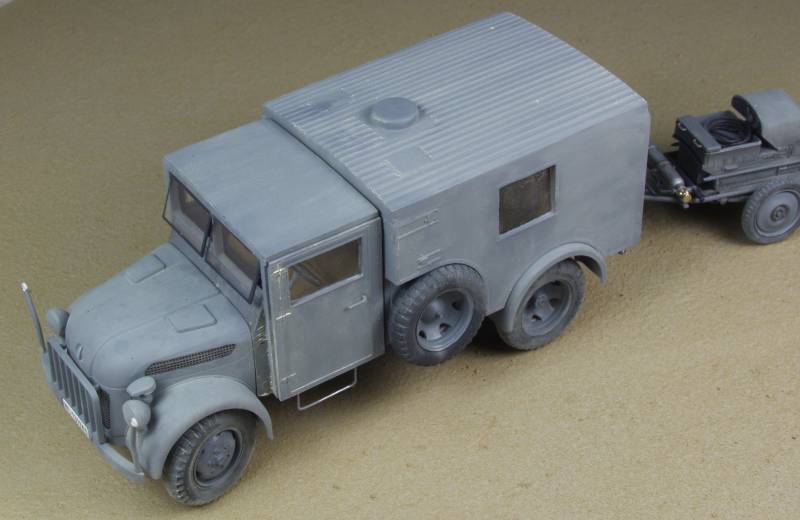
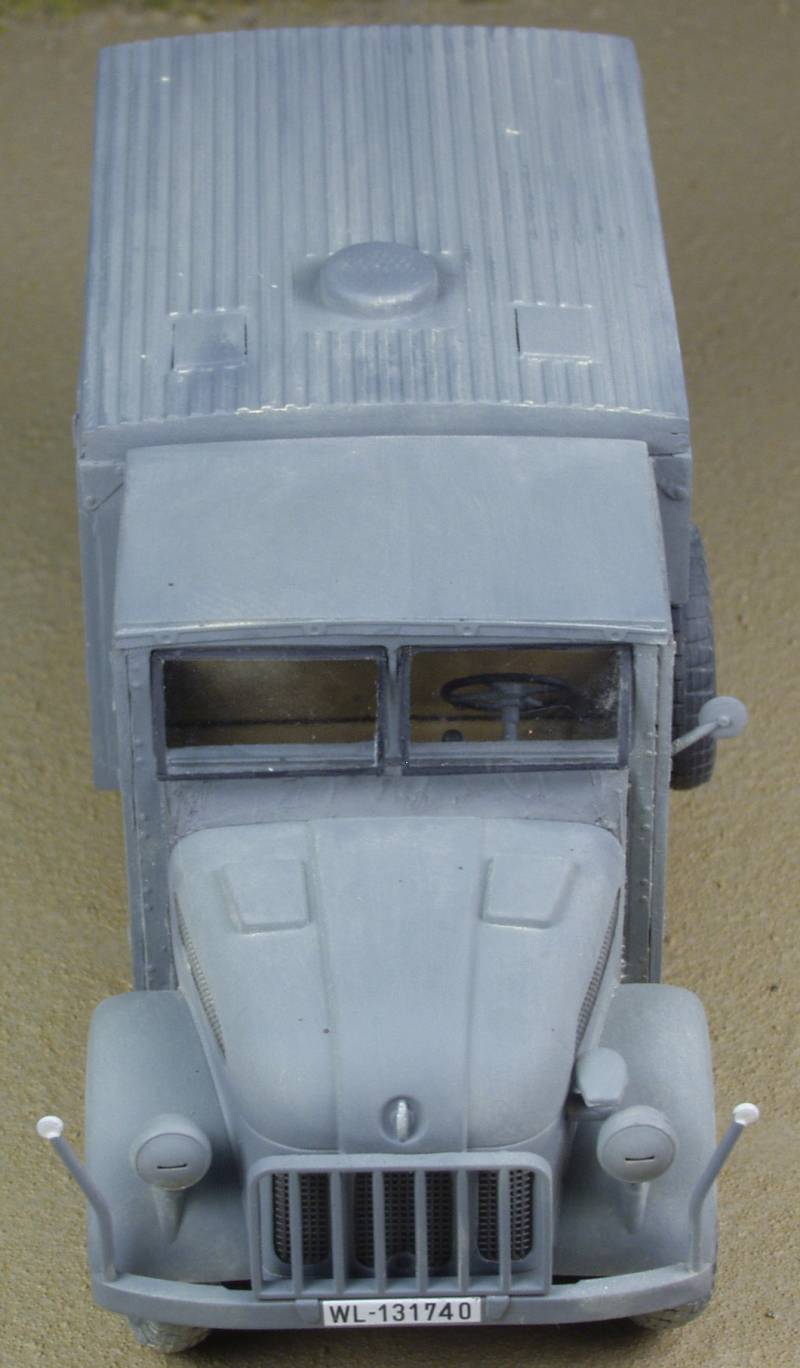
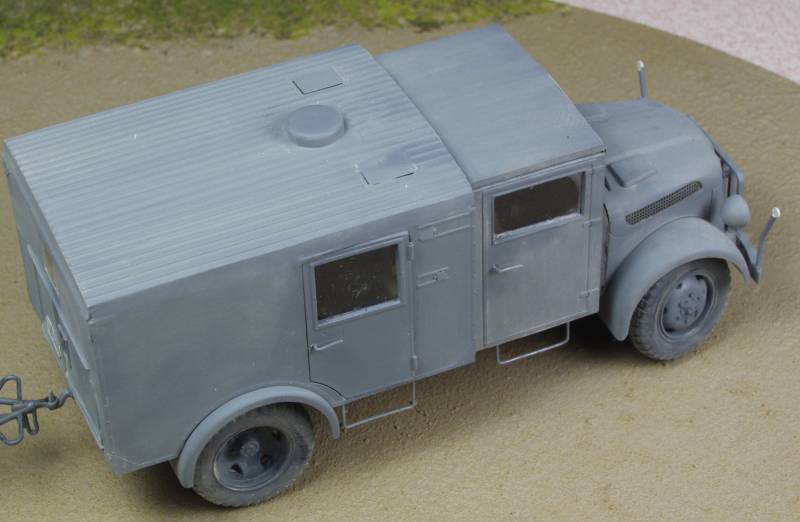
Steyr #2 will be the radio truck. One of the things I like to do with vehicles is turn the front wheels on some of them so they don't look like they are all parked in a parking lot. The chassis shown below was intended to be used on the basic Steyr but I found that the resin wheels with chains had clearance issues with the fenders in the turned position so this one will go on the radio truck instead. Not hard to do, I started by drilling a hole into the end of the axle into the universal boot. Then wheel hub was cut off and the universal boots filed at an angle. A pin was placed in the drilled hole to make certain the hub would be centered and it was then glued back on.
The interior of the radio truck looked pretty barren to me so I installed some aircraft transmitters and receivers intending to make this an airfield communication truck. While little of them will be seen through the windows, I know they are there :gogo
More to follow soon and I'll try to get a few more in progress shots of the other vehicles.
Thanks for looking in !
Duke Maddog
Well-known member
Congrats on getting one done. Nice splatter there too.
The second one is looking good. Keep going man!
The second one is looking good. Keep going man!
Old Dog
Well-known member
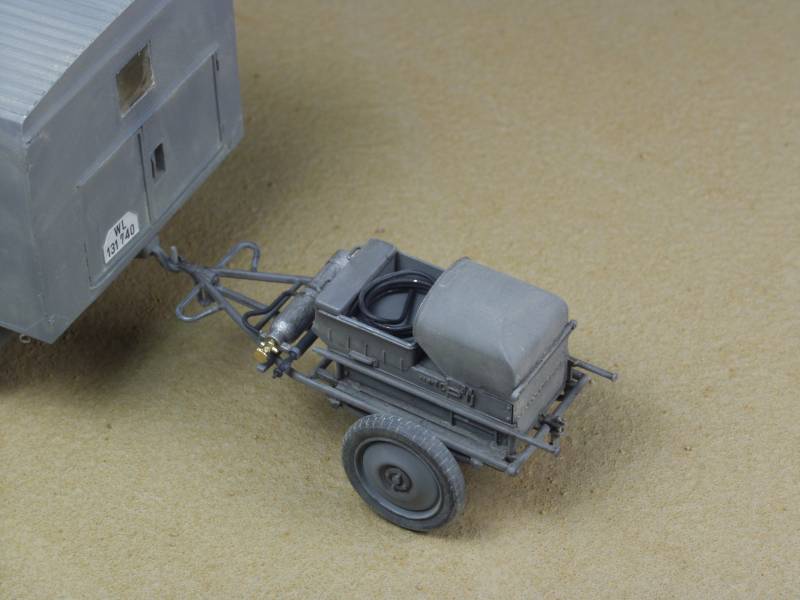
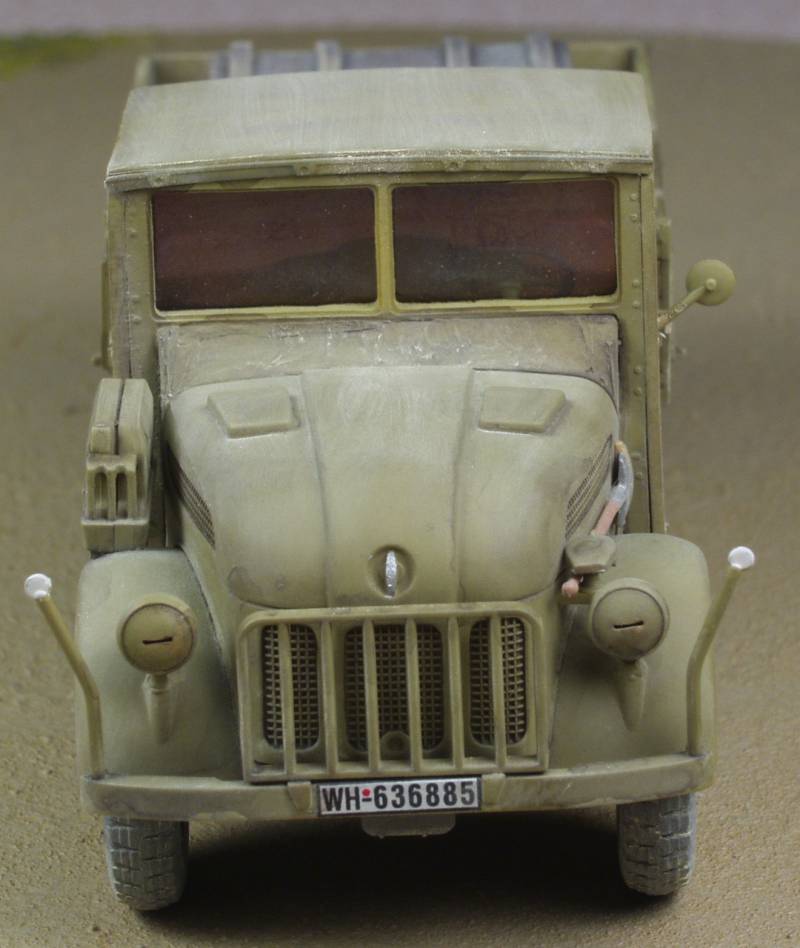
Next off the assembly line is the radio truck, it only got a light weathering of pastels. I decided since it was going to be an airfield radio truck it might need some extra power for the radios so I built up a Tamiya generator/starter trailer to give it something to pull.
Two down and three to go.
As always, thanks for looking.
Two down and three to go.
As always, thanks for looking.
reconron
Active member
As always, thanks for looking.
Think this is variety # 57 from the parallel universe..... :hmmm :idonno

Keep those Austrians Steyrs coming on,Gary!

Gr,Ron.
As always, thanks for looking.
Think this is variety # 57 from the parallel universe..... :hmmm :idonno
Keep those Austrians Steyrs coming on,Gary!
Gr,Ron.
:idonno
Help a poor boy out, what's the problem here?
reconron
Active member
:idonno
Help a poor boy out, what's the problem here?
It's okay now,tub tsrif ti saw derorrim.
Gator
Well-known member
I wonder if the troops assigned to this truck were related to the Beverly Hillbillies.
The mud is awesome!
Old Dog
Well-known member
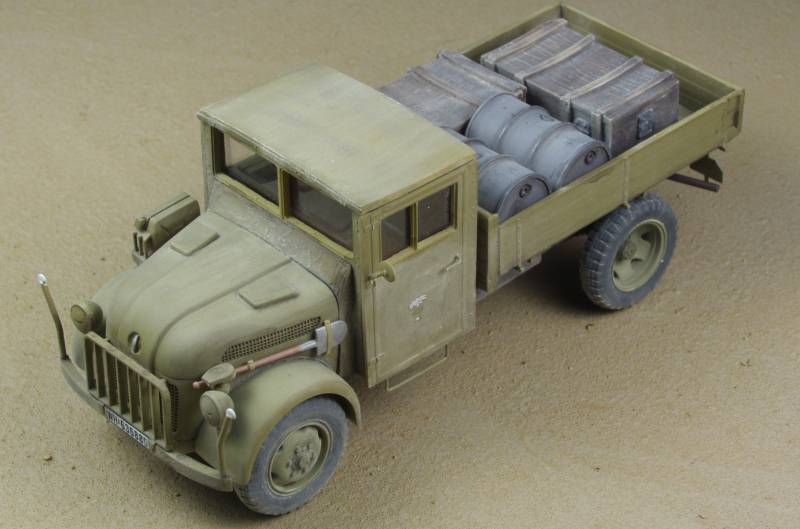
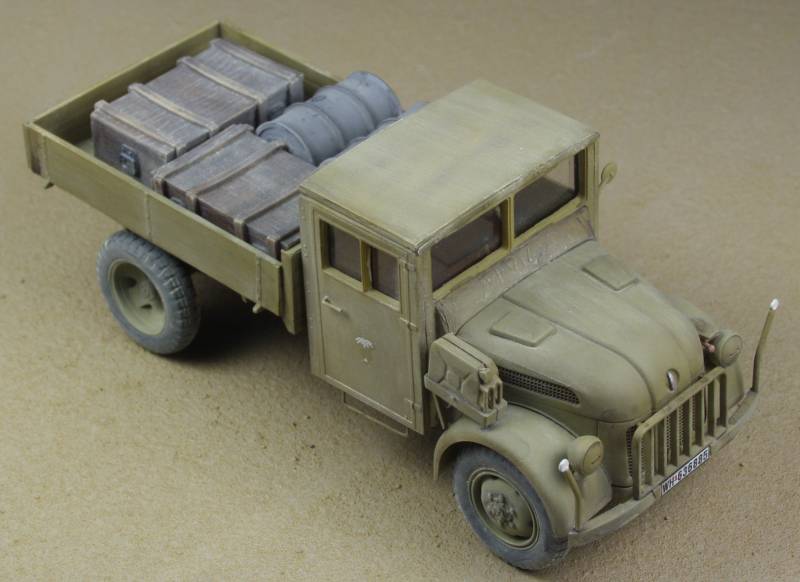
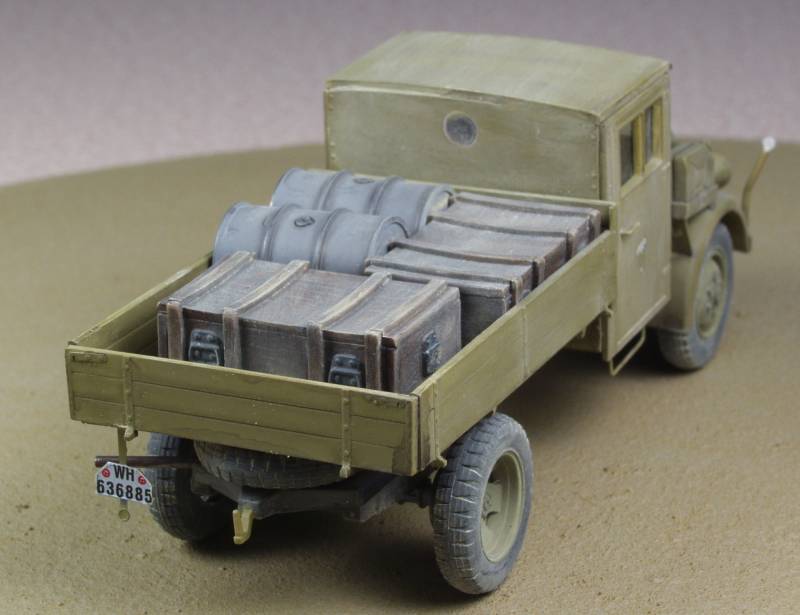
Thanks guys, these have been a hoot to build. Number three is now off the assembly line. The empty bed seemed to be begging for a load so I scrounged up a couple fuel drums and a couple 50 Kg bomb shipping crates...
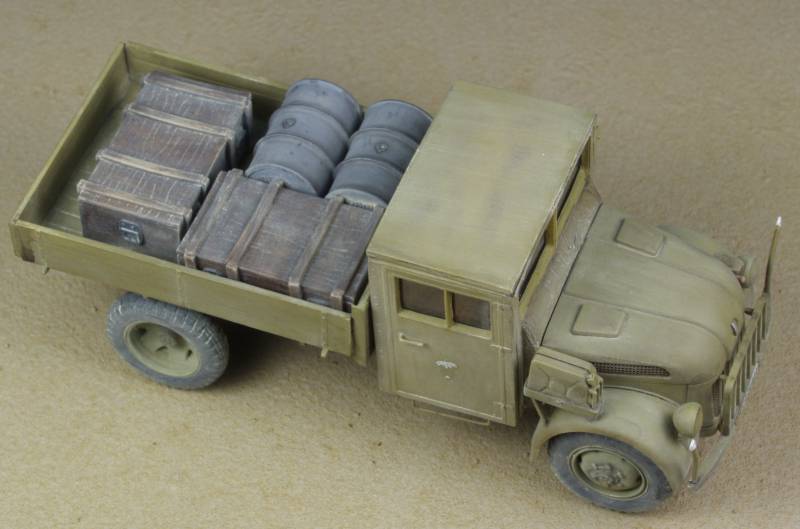
With that I'm going to take a break and get back to the Sunderland which needs to be done by the end of January, when it is finished I'll finish the last two of these.
As always, thanks for looking !
With that I'm going to take a break and get back to the Sunderland which needs to be done by the end of January, when it is finished I'll finish the last two of these.
As always, thanks for looking !