
-
Modelers Alliance has updated the forum software on our website. We have migrated all post, content and user accounts but we could not migrate the passwords.
This requires that you manually reset your password.
Please click here, http://modelersalliance.org/forums/login to go to logon page and use the "Forgot your Password" option.
You are using an out of date browser. It may not display this or other websites correctly.
You should upgrade or use an alternative browser.
You should upgrade or use an alternative browser.
Maddog Manufacturing 2018 Production
- Thread starter Duke Maddog
- Start date
It's just me but them putting all those bumps and stuff on the F16 is like putting Marilyn Monroe in a flack jacket.

Duke Maddog
Well-known member
Thanks for the great replies guys!
Pup, I agree. It does make for an interesting looking aircraft though...
Pup, I agree. It does make for an interesting looking aircraft though...
Duke Maddog
Well-known member
Thanks Frank. It's still a slow recovery, much slower than I like; but at least I'm getting better.
I do have more progress to post soon so stay tuned, more to come.
I do have more progress to post soon so stay tuned, more to come.
Duke Maddog
Well-known member
Once again, here is a small update showing what I was able to get done over this past weekend. I tried this time to get further along on a couple models I'd been neglecting or having trouble with. I also started another ship since I seem to be all fired up to increase my naval forces some more. Building ships has become quite appealing to me lately.
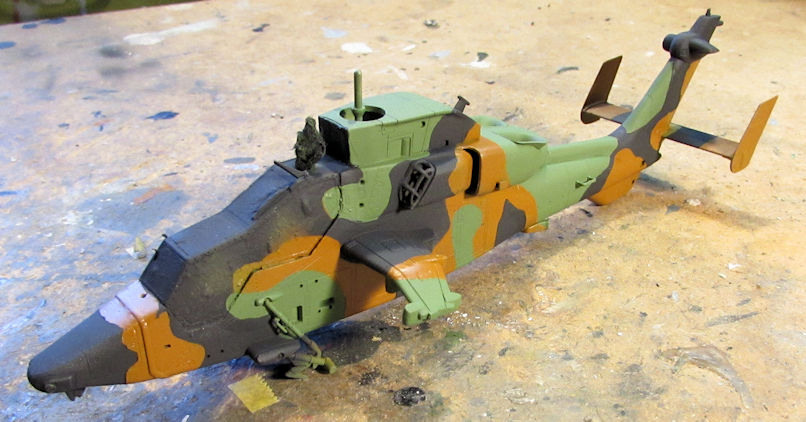
I'll start with the one aircraft I worked on. This is the Australian HAP Tigre I'd started some time ago. I had base coated this in the green color and then started to mask it. I finally finished the masking on this helicopter:
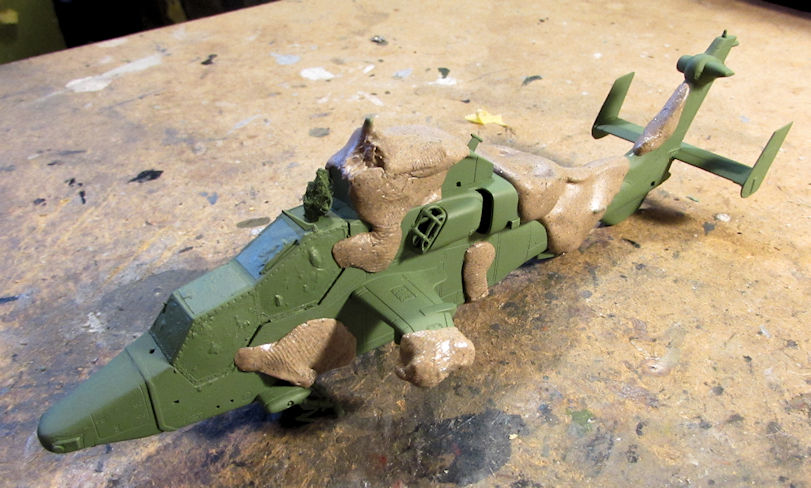
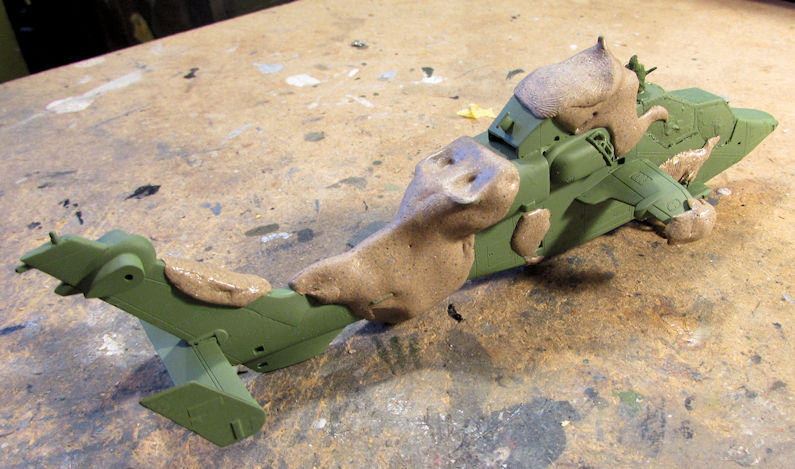
Next I shot the second color on this:
There's a third color I need to add so I'll have to continue to mask the brown before I shoot the light black. Hopefully I'll be able to do that tomorrow. Then I'll be able to clearcoat this for decals.
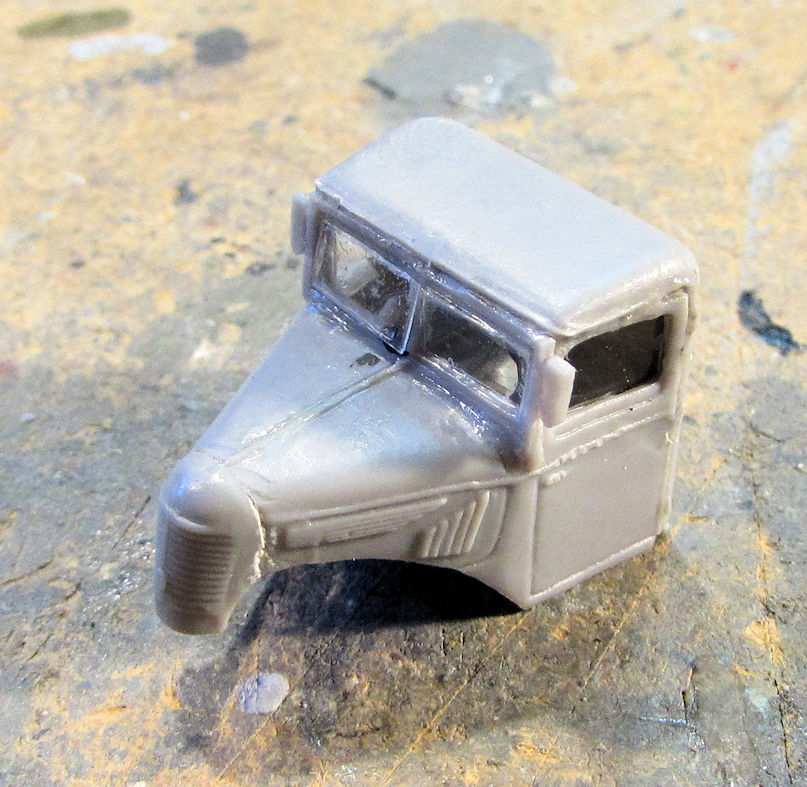
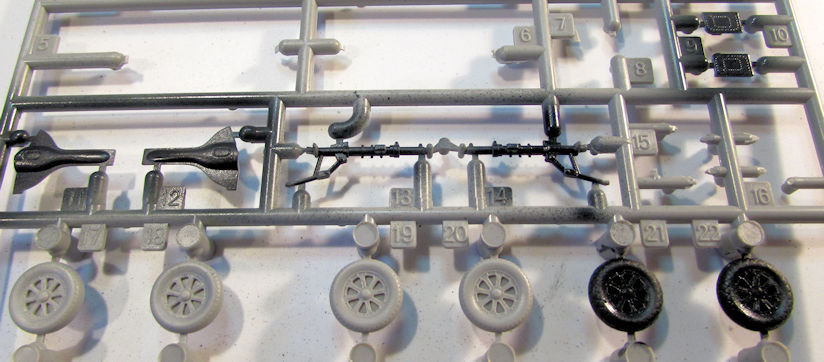
Moving on to my armor this time, I finally managed to win the fight with the cab of the Kurogane pickup. This thing is together now:
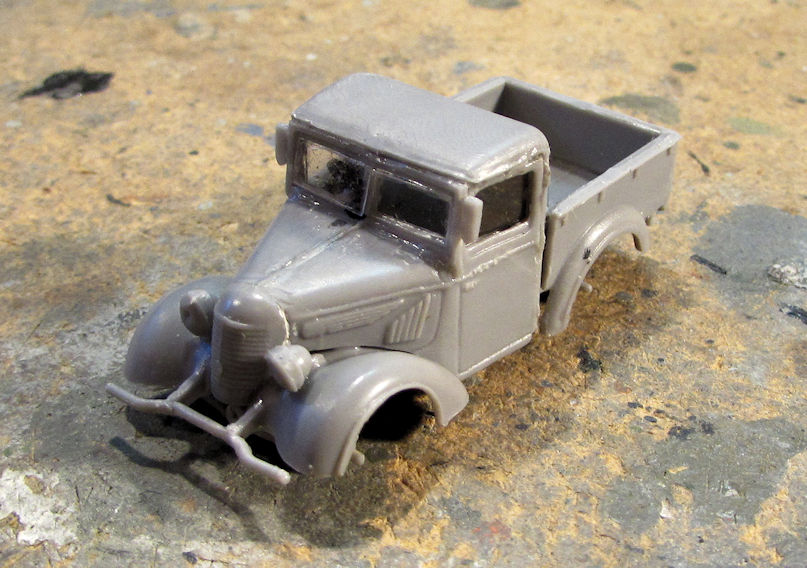
I then glued it into place on the chassis:
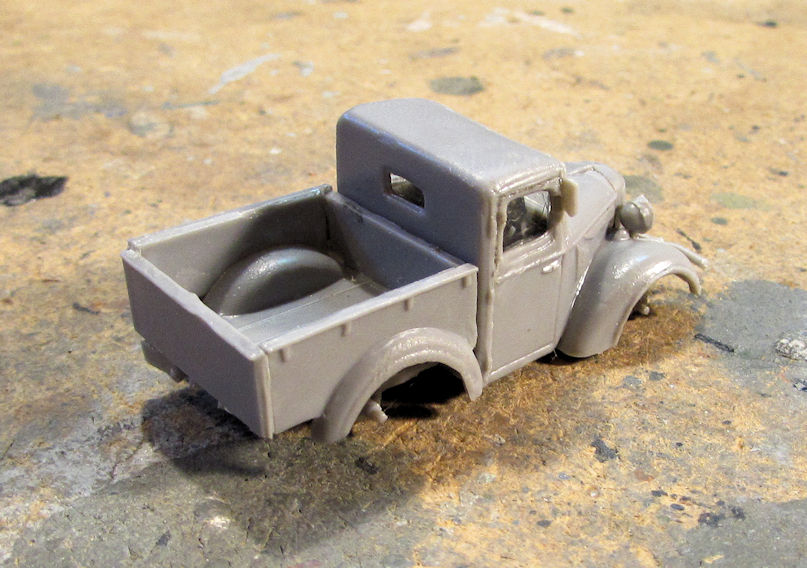
Once that was dry to my satisfaction, I masked off the windows in preparation for paint:
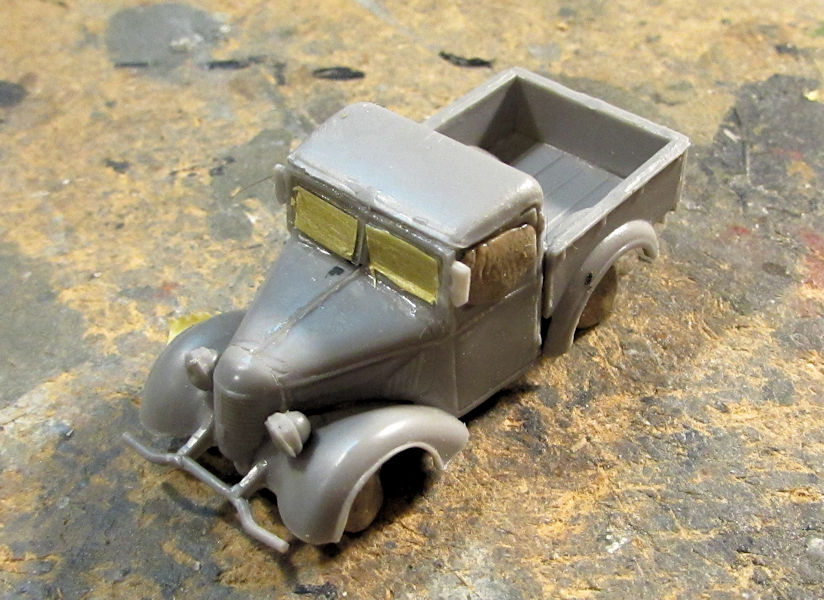
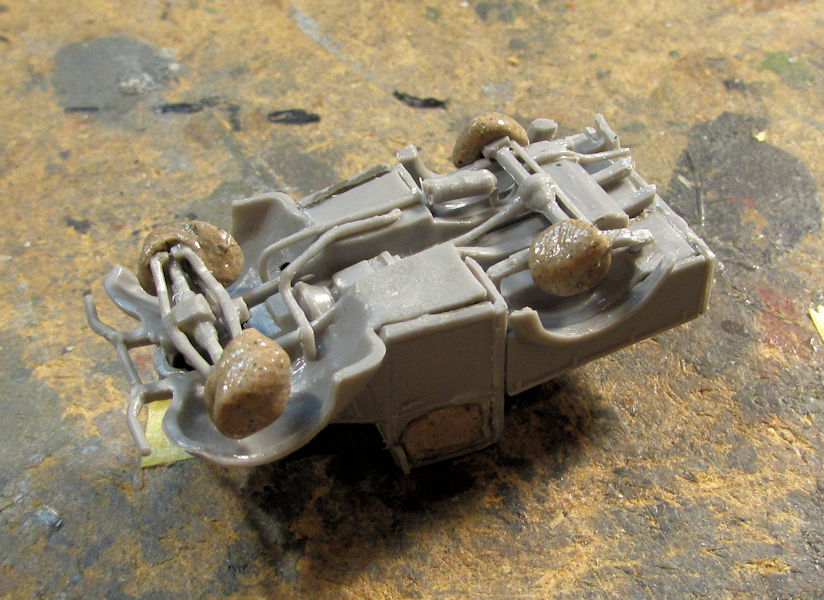
I then masked off the wheel posts on the underside so the wheels would glue better:
Finally, this has paint! I even tried to modulate the color a bit with some faded olive drab after I shot the basecoat. It is not all that visible in these pics, so you'll have to take my word for it:
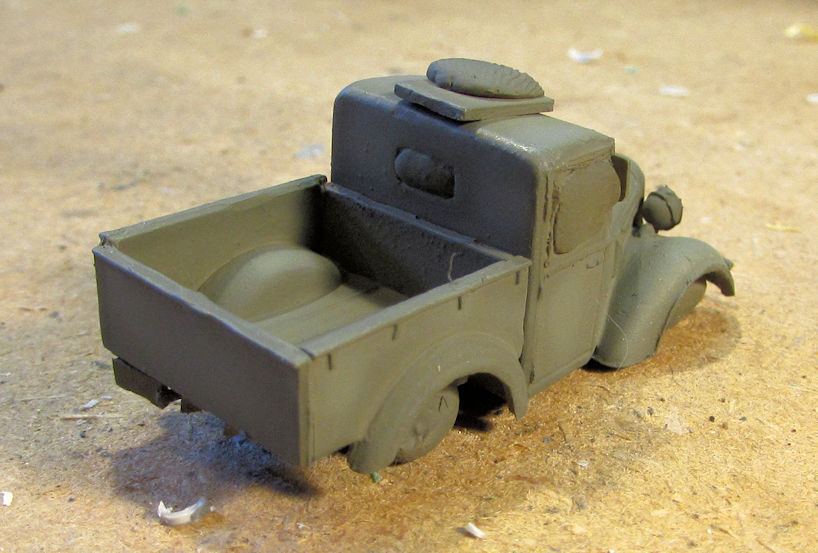
The glob of Silly Putty on the roof panel is to cover the spot where the spare tire goes. I want it to be able to glue as well.
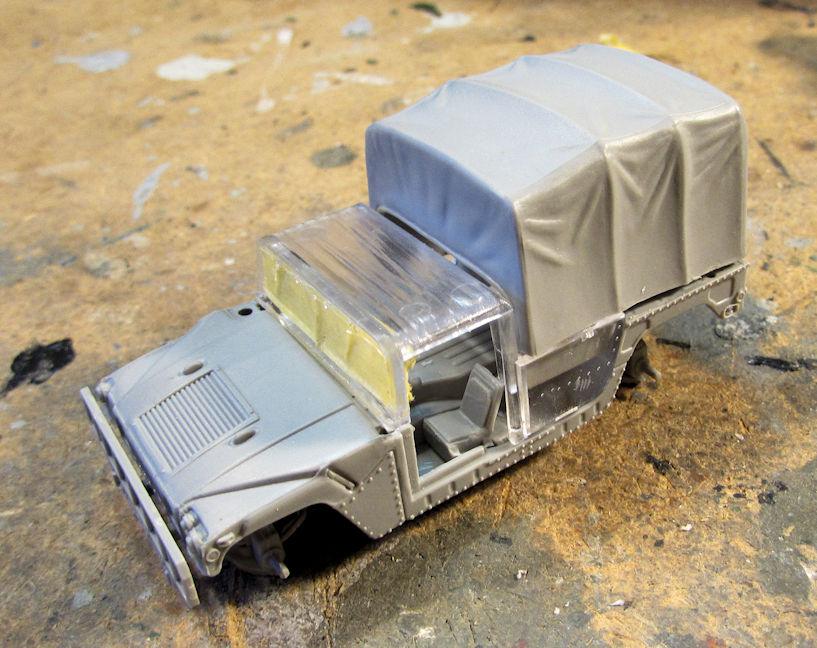
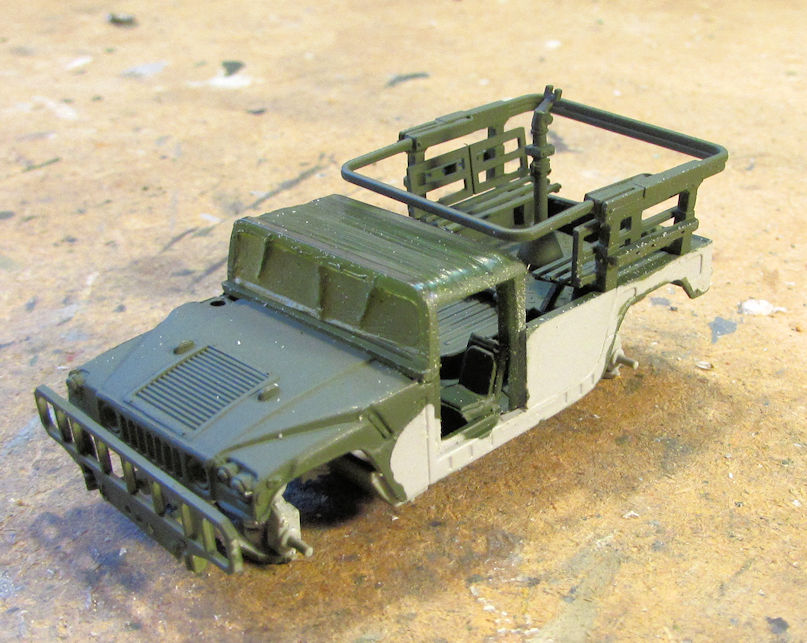
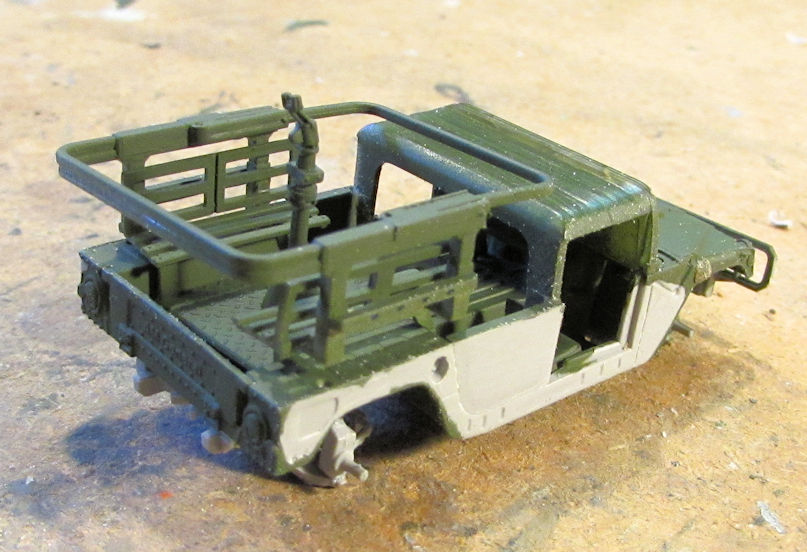
Moving on from that, I worked on my two Humvees since I wanted to do something easy after all that fight with the Japanese pickup. To start, I masked off the areas that I didn't want paint on:
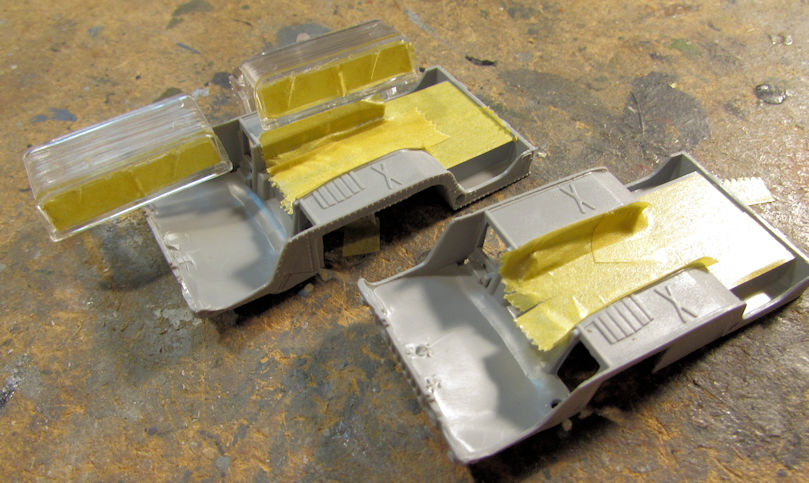
I had to mask off the inside of the cabs as well to keep the windows clear. After that I dry-fit the cabs onto their respective chassis to see how things fit:
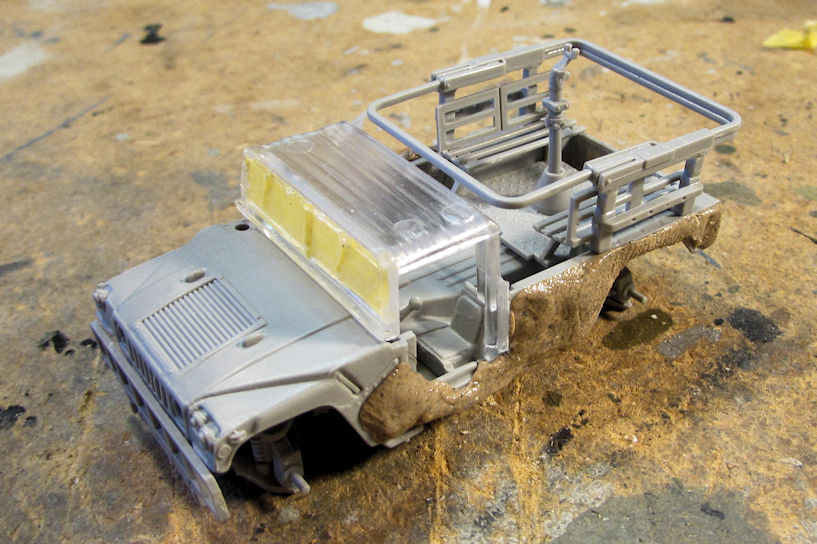
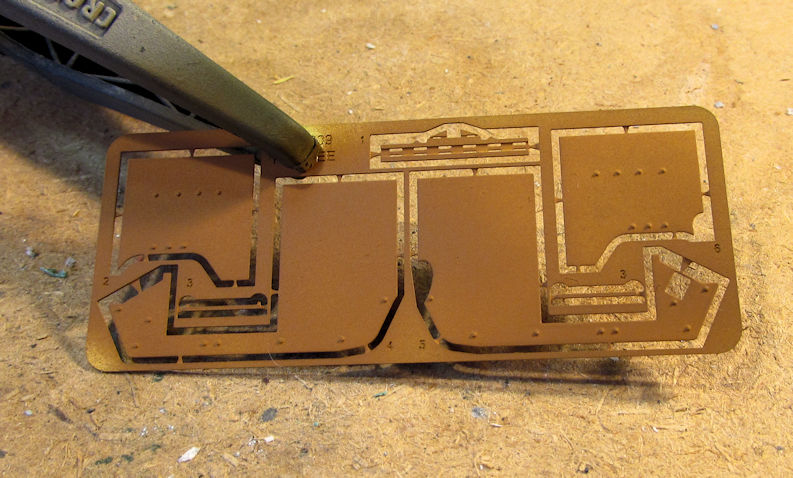
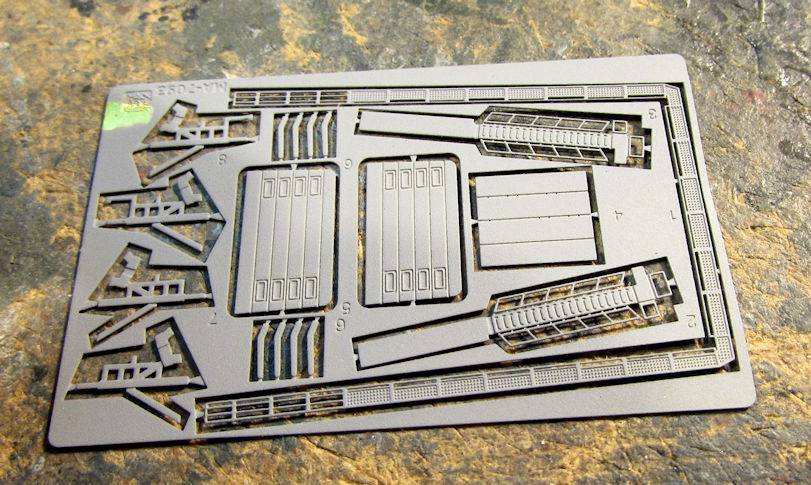
You can see that I masked off the sides of this one with the Silly Putty. That is where the photo-etch armor pieces will go, so I wanted to make sure they would glue well:
Speaking of armor plate; I sprayed them in the rusty brown color I'm seeing in the box art pics:
Now these two Humvees have basecoats:
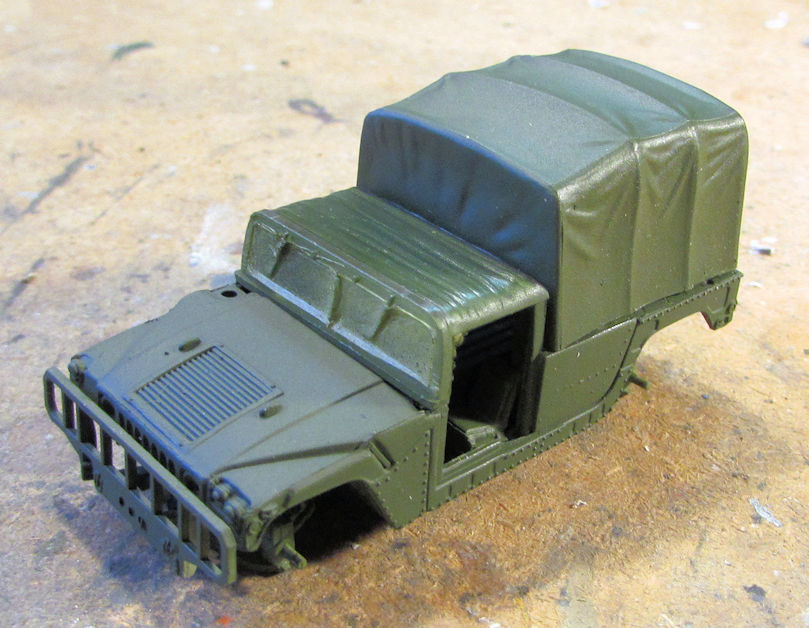
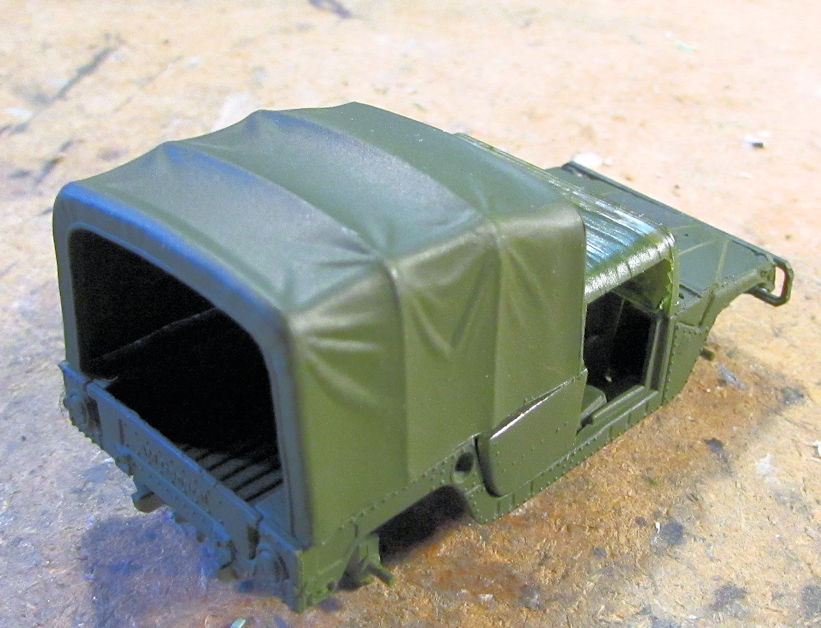
You can see I haven't shot paint on the top side of the cabs. I had these taped upside down to shoot the paint so they wouldn't get blown away by the airbrush. I should have no problem shooting more paint later. The troop carrier with the tilt will be painted a three-tone NATO pattern while the gun truck will be only in green.
Moving on to my shipyards, I started out by shooting the photo-etch parts for the HMS Daring destroyer:
There's only a few of those parts I'll use.
Next, I painted the hull and deck of the USS Bootes Liberty ship after adding most of the little greeblies it needs:

Later I did the same with the Japanese fleet oiler:
Both of these ships have been clearcoated for decals.
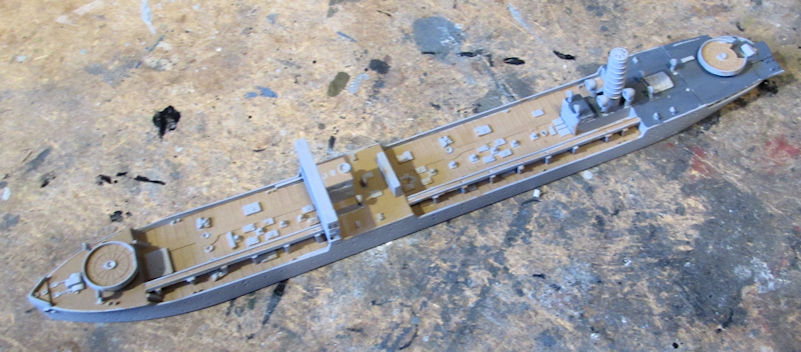
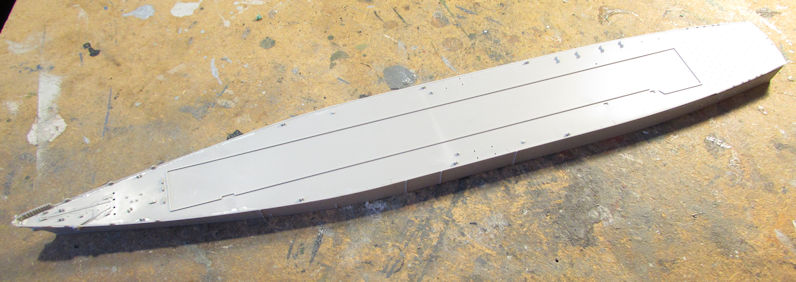
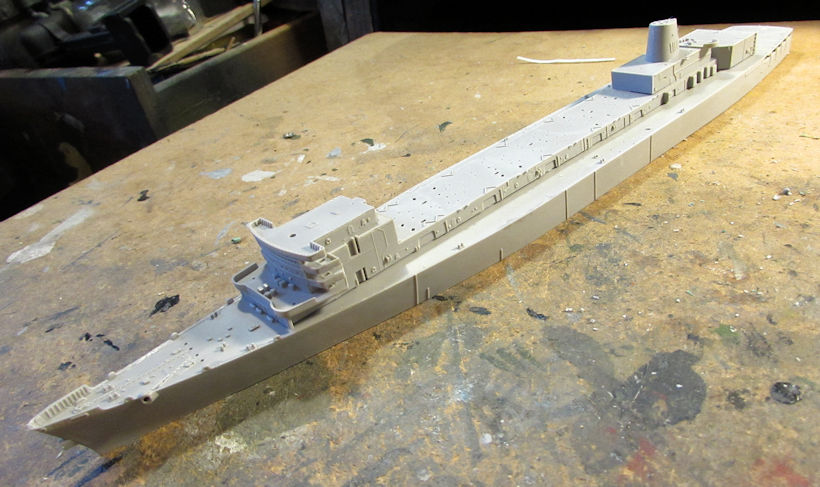
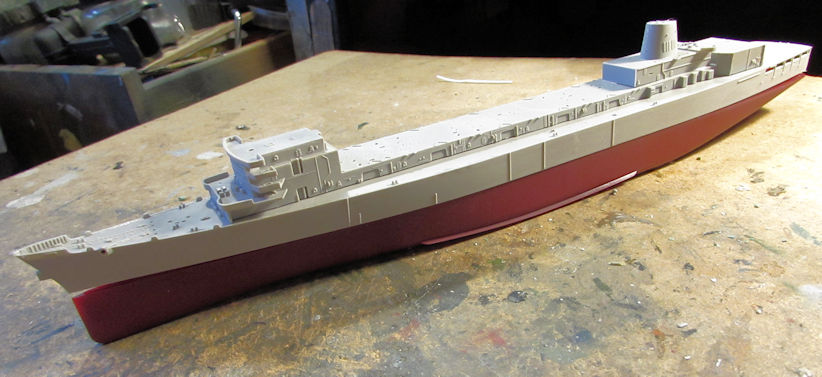
Finally, my shipyards laid down the keel of yet another ship. This is one I'd been wanting to build for awhile, so I pulled it out and started it. This is the USS Sacramento an AOE unrep ship. I started of course, by adding the deck to the main hull:
Next I built the main superstructure which stretches almost the entire length of the ship:
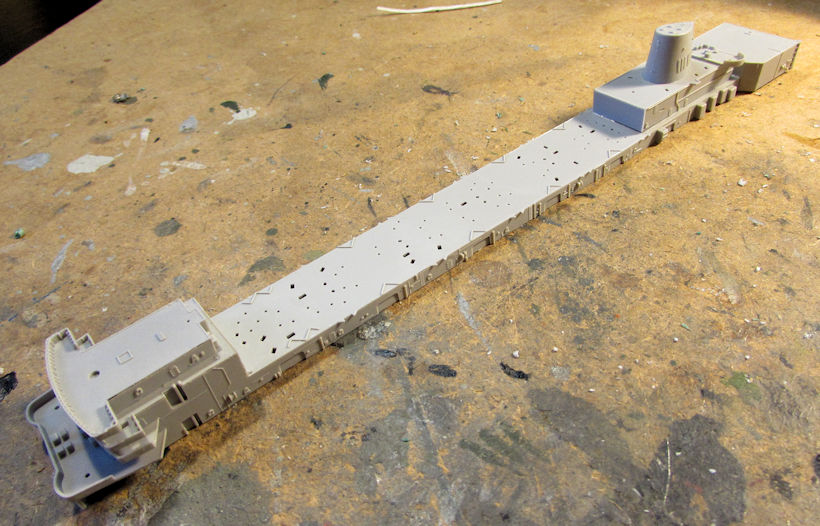
There's a disturbing number of holes on the top of that superstructure....
Here's how it looks all dry-fit together:
I also test fit the lower hull to see if I wanted to make this a full-hulled version. I was surprised at the deep draft of this ship:
That's all I have for this weekend. I'll see what else I can get done this coming week. Until then, comments are welcome, thanks for looking in.
I'll start with the one aircraft I worked on. This is the Australian HAP Tigre I'd started some time ago. I had base coated this in the green color and then started to mask it. I finally finished the masking on this helicopter:
Next I shot the second color on this:
There's a third color I need to add so I'll have to continue to mask the brown before I shoot the light black. Hopefully I'll be able to do that tomorrow. Then I'll be able to clearcoat this for decals.
Moving on to my armor this time, I finally managed to win the fight with the cab of the Kurogane pickup. This thing is together now:
I then glued it into place on the chassis:
Once that was dry to my satisfaction, I masked off the windows in preparation for paint:
I then masked off the wheel posts on the underside so the wheels would glue better:
Finally, this has paint! I even tried to modulate the color a bit with some faded olive drab after I shot the basecoat. It is not all that visible in these pics, so you'll have to take my word for it:
The glob of Silly Putty on the roof panel is to cover the spot where the spare tire goes. I want it to be able to glue as well.
Moving on from that, I worked on my two Humvees since I wanted to do something easy after all that fight with the Japanese pickup. To start, I masked off the areas that I didn't want paint on:
I had to mask off the inside of the cabs as well to keep the windows clear. After that I dry-fit the cabs onto their respective chassis to see how things fit:
You can see that I masked off the sides of this one with the Silly Putty. That is where the photo-etch armor pieces will go, so I wanted to make sure they would glue well:
Speaking of armor plate; I sprayed them in the rusty brown color I'm seeing in the box art pics:
Now these two Humvees have basecoats:
You can see I haven't shot paint on the top side of the cabs. I had these taped upside down to shoot the paint so they wouldn't get blown away by the airbrush. I should have no problem shooting more paint later. The troop carrier with the tilt will be painted a three-tone NATO pattern while the gun truck will be only in green.
Moving on to my shipyards, I started out by shooting the photo-etch parts for the HMS Daring destroyer:
There's only a few of those parts I'll use.
Next, I painted the hull and deck of the USS Bootes Liberty ship after adding most of the little greeblies it needs:
Later I did the same with the Japanese fleet oiler:
Both of these ships have been clearcoated for decals.
Finally, my shipyards laid down the keel of yet another ship. This is one I'd been wanting to build for awhile, so I pulled it out and started it. This is the USS Sacramento an AOE unrep ship. I started of course, by adding the deck to the main hull:
Next I built the main superstructure which stretches almost the entire length of the ship:
There's a disturbing number of holes on the top of that superstructure....
Here's how it looks all dry-fit together:
I also test fit the lower hull to see if I wanted to make this a full-hulled version. I was surprised at the deep draft of this ship:
That's all I have for this weekend. I'll see what else I can get done this coming week. Until then, comments are welcome, thanks for looking in.
MM2CVS9
Active member
That Liberty and the oiler are really looking nice.
I'm doing an oiler for a friend that served on the Mattaponi AO41. The kit I'm using is a Lindberg repop, 1/525. It's a fairly crude kit. The kit is actually a Kennebec class oiler, a T-2 type and the Mattaponi was the first of her class, a T-2A. She was 20 feet longer, but basically the same otherwise, but it's taking a bit of work to make it the Mattaponi.
That Sacramento is a nice looking build. Who's kit is it?
EJ
Heavens Eagle
Well-known member
They are coming along nicely there Mark! I like the Liberty ship a lot. Have one of the 1/350 ones in my stash. Wish they had a Victory ship as well but those are not as well know.
The Hummers are also coming along well. You have a couple of different types there. What is the one with the frame in the back?
The Hummers are also coming along well. You have a couple of different types there. What is the one with the frame in the back?

Gator
Well-known member
They are coming along nicely there Mark! I like the Liberty ship a lot. Have one of the 1/350 ones in my stash. Wish they had a Victory ship as well but those are not as well know.
The Hummers are also coming along well. You have a couple of different types there. What is the one with the frame in the back?
You have to go to resin for Victory ships. I have two of them in 1/700 scale waiting to be built.
Duke Maddog
Well-known member
Thanks everyone for the awesome replies!
EJ, the Sacramento is the Trumpeter 1/700 scale kit. I would love to see your work on the Mattaponi AO41.
Thanks Paul! I would also love to have a Victory ship. The Humvee with the frame in the back is the gun truck version. The brown armor plate that I painted will be going on the sides. Surprisingly enough, they didn't add any plate to the rear.... :idonno
Thanks Frank! My production might surpass yours, but you are doing outstanding work on your troops. Way to go!
Thanks Luiz!
Good to know Kenny. If I didn't have any issues with resin, I'd consider it. I have a tough enough time making my ships look good already. And thank you for your earlier comment that came in when I was posting mine.
Thanks again guys for the fantastic comments!
Gator
Well-known member
Thanks everyone for the awesome replies!
EJ, the Sacramento is the Trumpeter 1/700 scale kit. I would love to see your work on the Mattaponi AO41.
Thanks Paul! I would also love to have a Victory ship. The Humvee with the frame in the back is the gun truck version. The brown armor plate that I painted will be going on the sides. Surprisingly enough, they didn't add any plate to the rear.... :idonno
Gotta have a quick way to get out if you're taking heavy fire.
Duke Maddog
Well-known member
Good to know Kenny, I hadn't thought about that.
Stay tuned everyone, more to come.
Stay tuned everyone, more to come.
Duke Maddog
Well-known member
Okay, I had some time to spare for a couple days so I spent a lot of time in my Hobby Room trying to get several models moved forward. Now that my camera battery is dead, I'll go ahead and upload what I have so far this weekend. I'll start with some of my aircraft first.
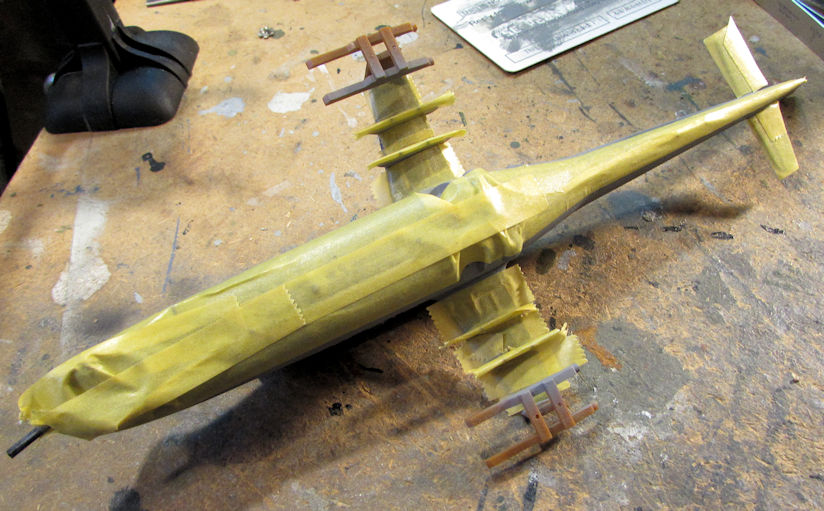
I had shot a grey underside on my Nigerian Hind, and then masked it off in preparation for the upper camouflage pattern:
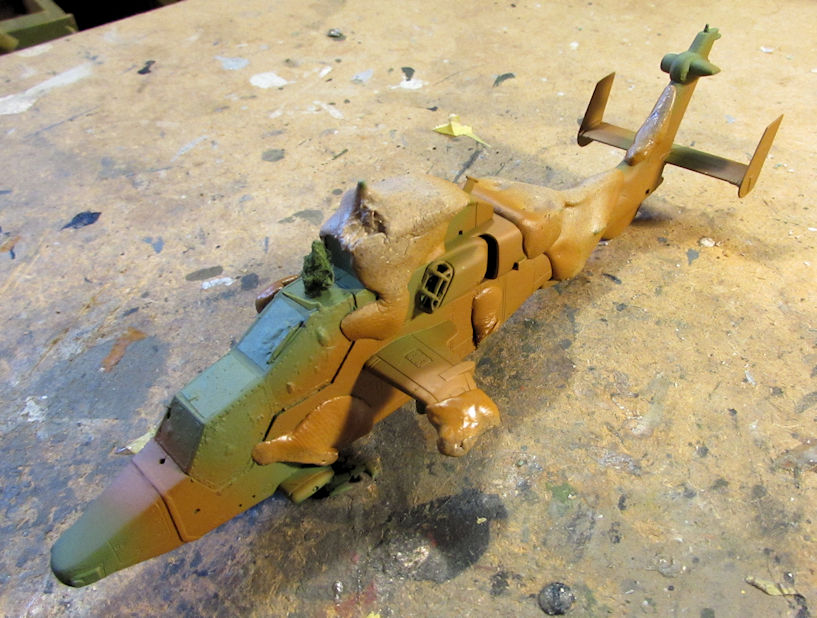
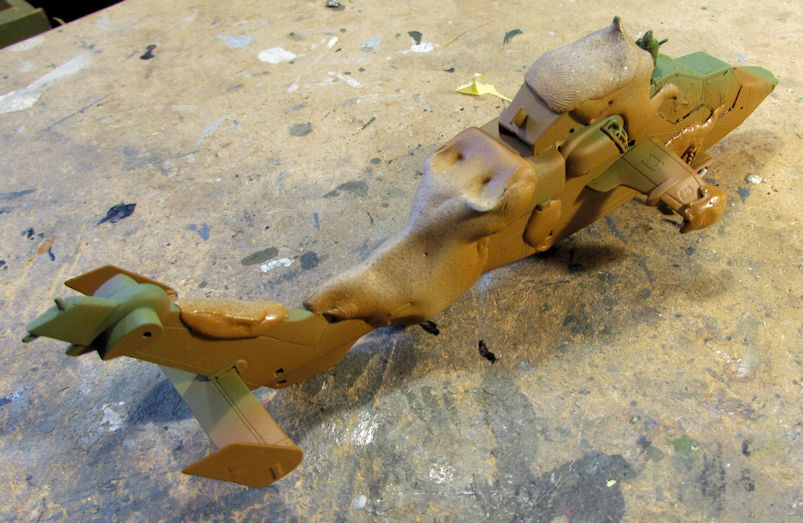
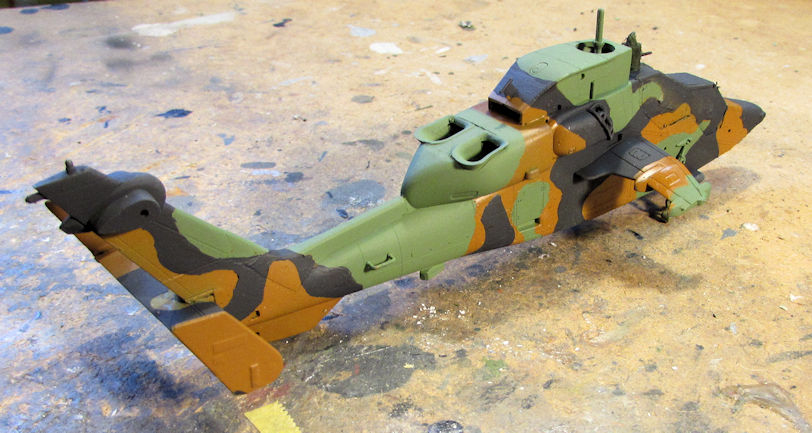
Speaking of upper camouflage patterns, I shot the final color on the Australian Tigre and then removed all the Silly Putty:
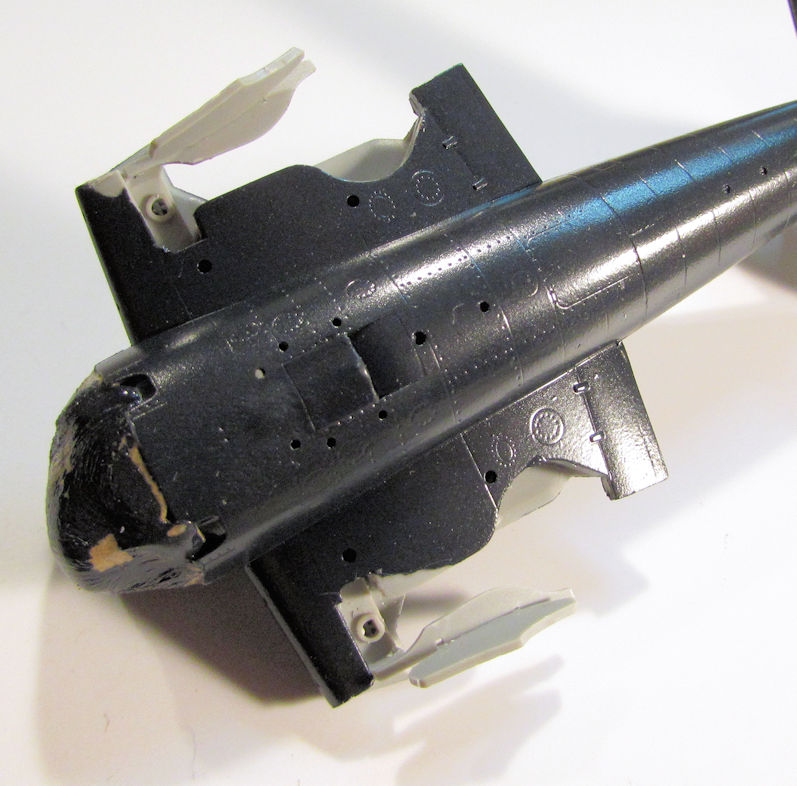
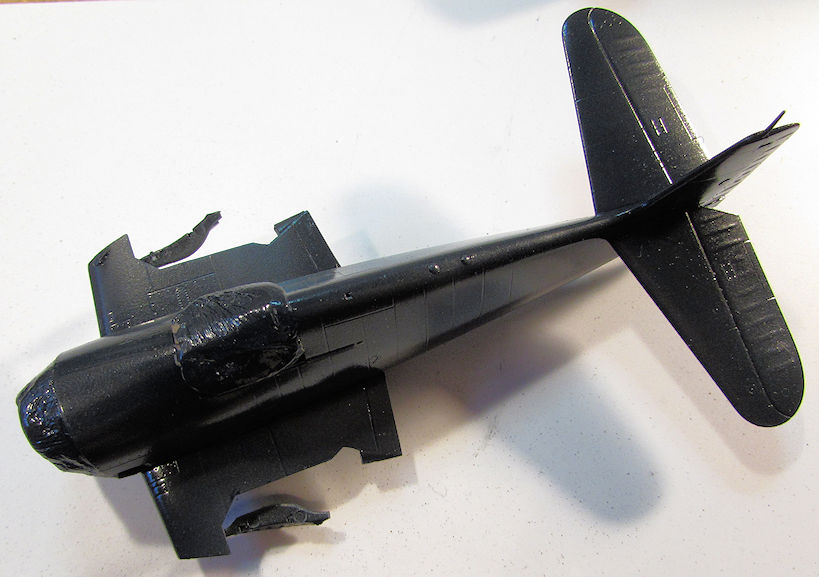
Moving on, I had finally shot paint on the F-6F Hellcat I'm building on commission. I had shot the whole thing in dark navy blue.
Fuselage:
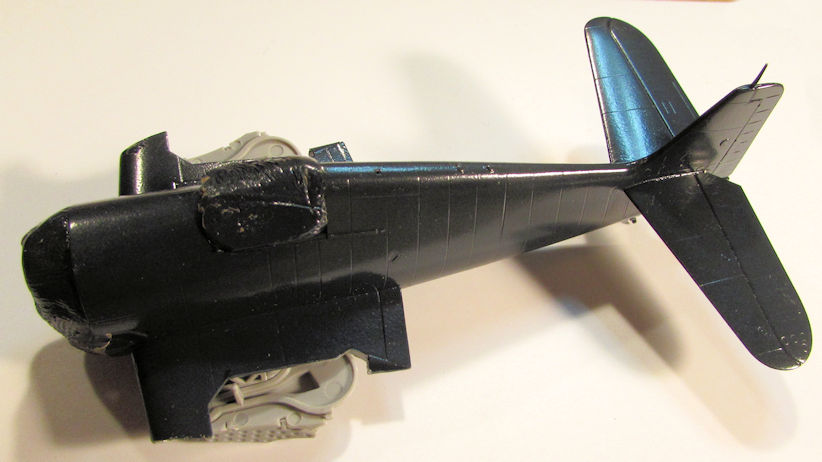
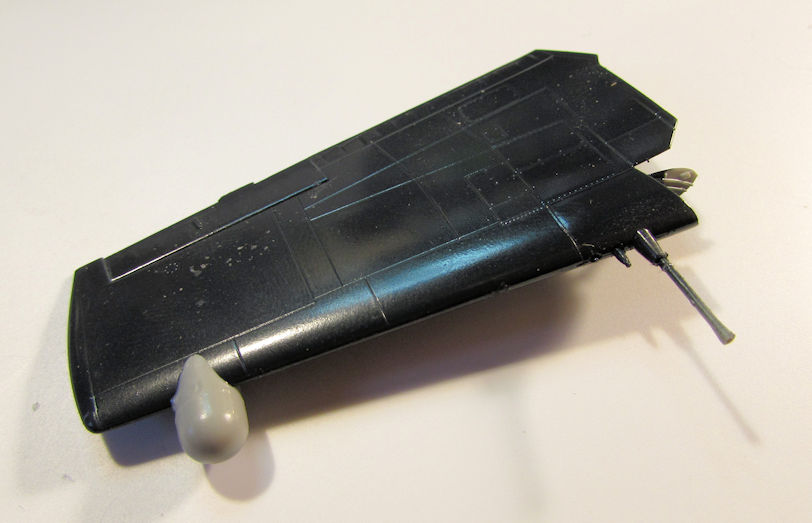
Wings:
Afterward as you can see, I added the night fighting radar to the one wing since I'd forgotten to do it before painting.
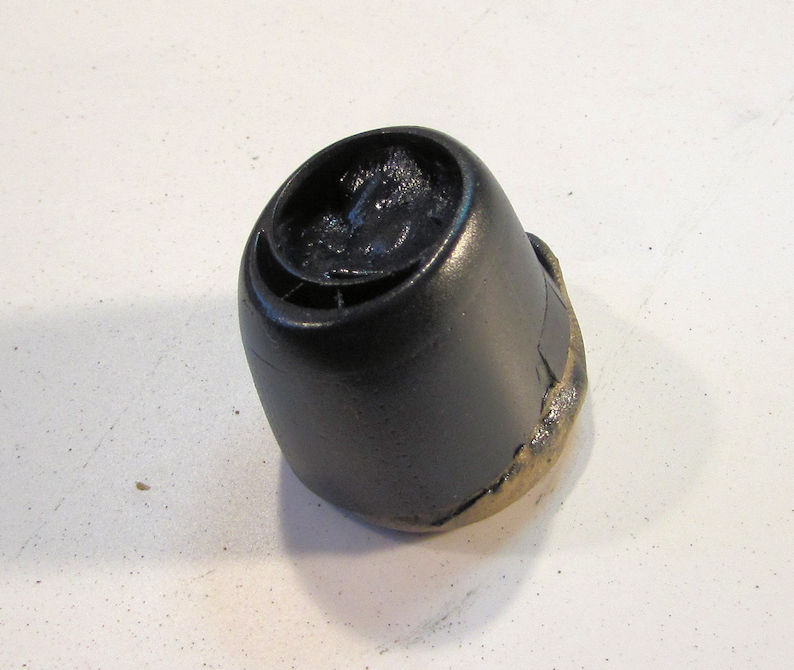
Cowl and drop tank:
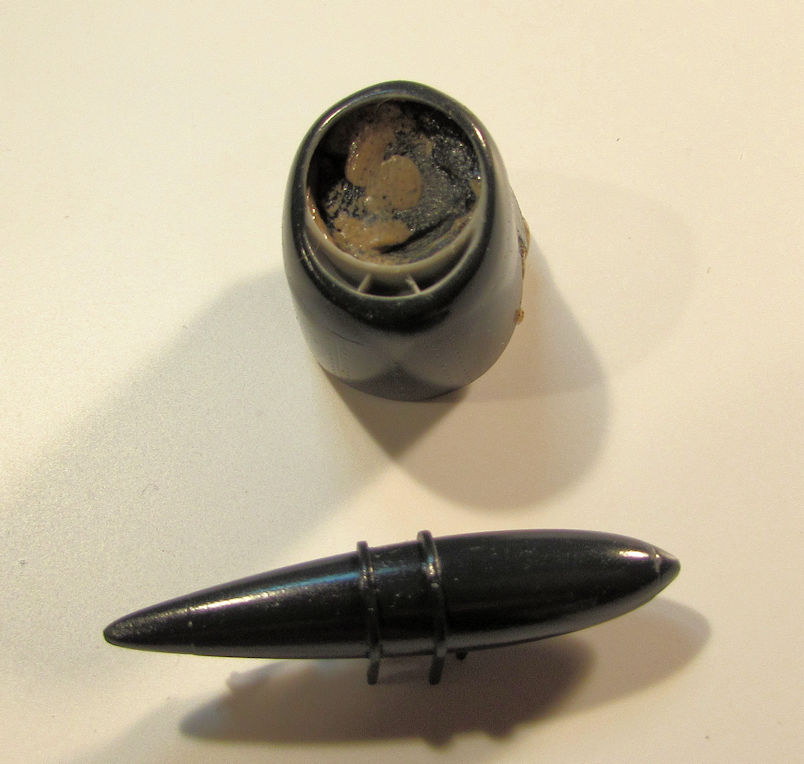
Cowl needs touchup, that'll happen...
Next, I decided to attempt to glue in those parts B-7 through -10 that I couldn't figure out before. A pretty good idea struck me as to how I could get them to glue properly. After gluing the two parts together, I took the retracted landing gear parts and snapped them into place. Then I carefully glued the parts B-7 through -10 in place; lining them up with the 'retracted' landing gear:
Later, when I snapped off the retracted gear parts, the two sections stayed in place where they are supposed to go:
Here's another shot of the wing that got the radar pod:
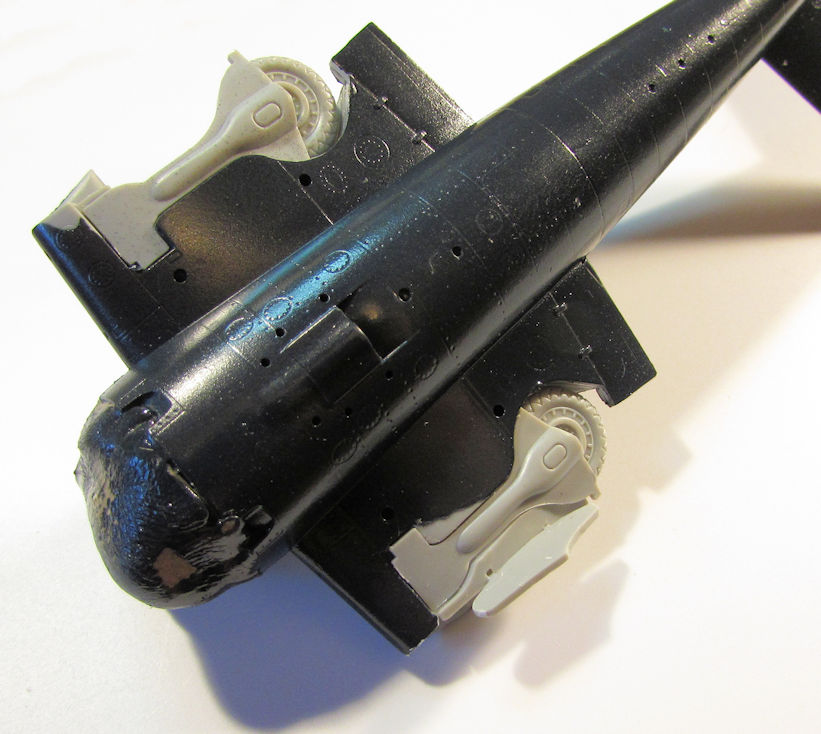
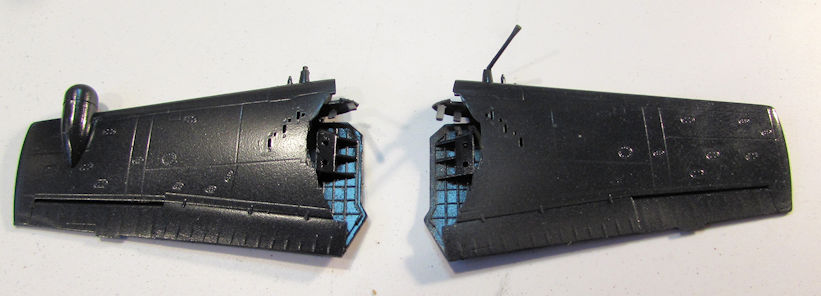
After getting more information about the interior section of the wing fold being dark blue like the rest of the plane; I shot a new coat of blue on the bare sections, as well as touched up other places. Here's the cowl:
Here's the wings:
As you can see, whoever mentioned the long gun barrels being prone to breakage cursed me! Gonna have to replace these as I lost the one completely.
The wheels, struts and landing gear doors were next:
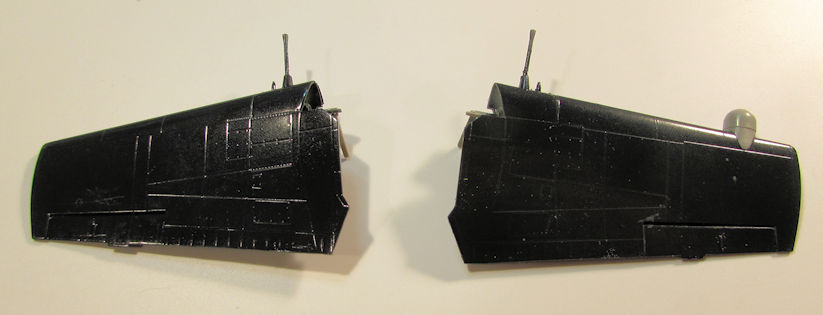
And finally, the fuselage top and bottom:
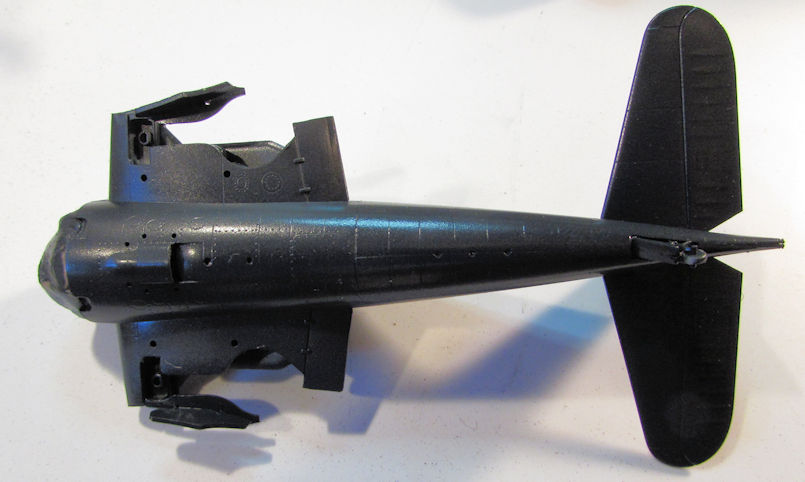
Some of that paint got a little dull so I'll have to go over it again. Then hopefully I'll be able to apply the decals.
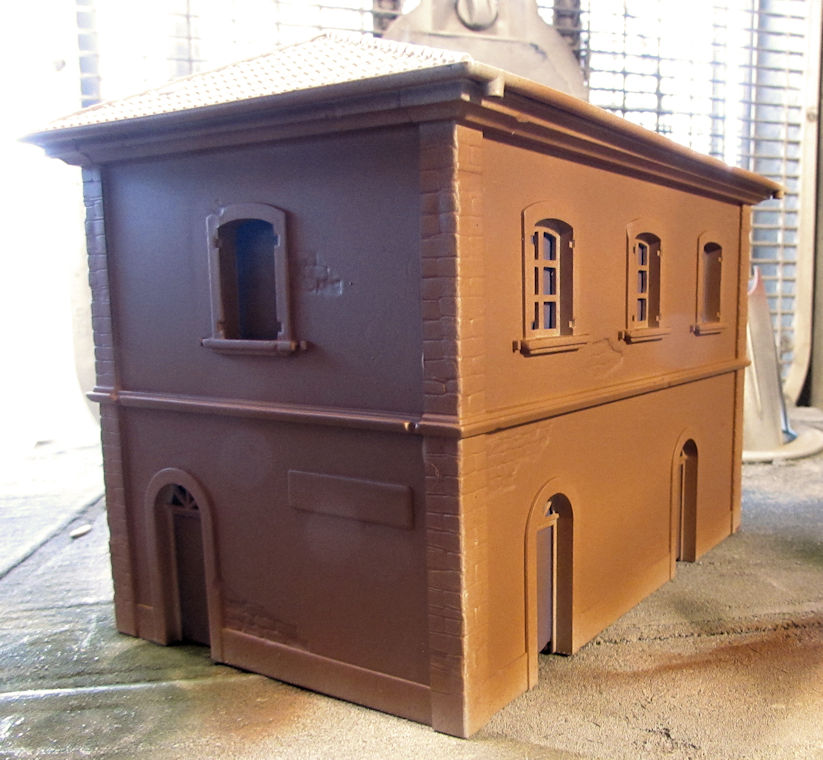
Moving on from there, I decided to do something simple and almost mindless. I had two buildings waiting for paint so it was time to get that done. First I masked the windows (and the hole in the roof) from inside on both the train station and the Berlin House:
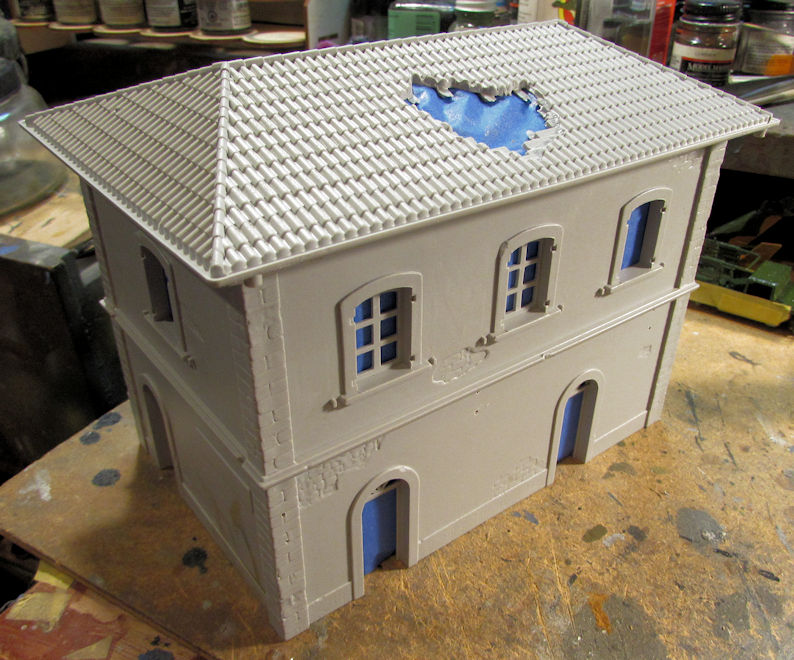
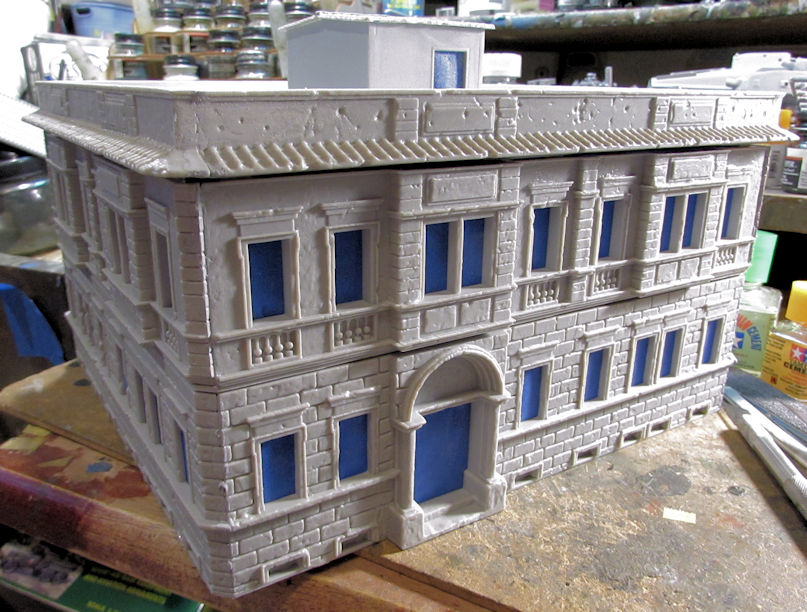
Yeah, in that second pic, you can see the Federal Disaster Area that is my workbench right now.
Next I shot the basecoat on the train station:
I used the same color for the upper story of the Berlin House as well:
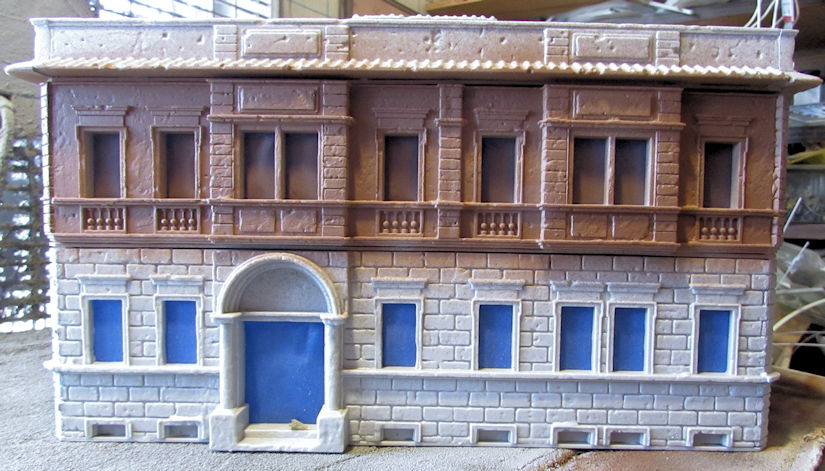
I then used an RAF Ocean Grey for the bottom story as a base coat:
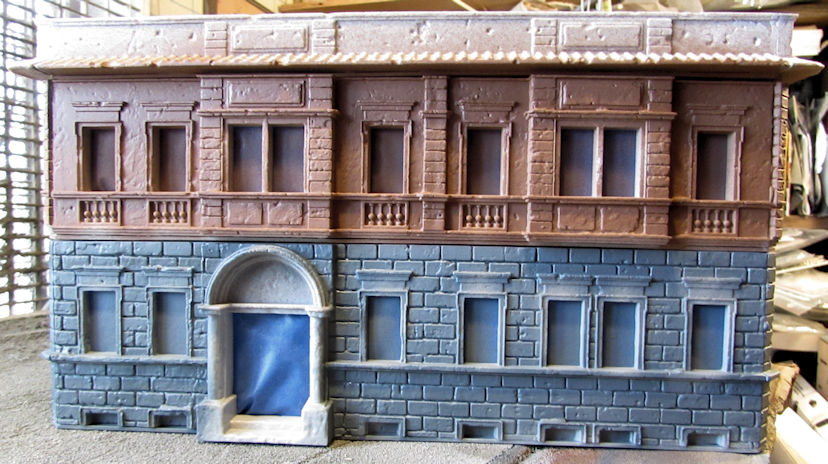
Later I used a medium grey to dry-brush the bricks on the lower story, as well as paint the top section around the roof:
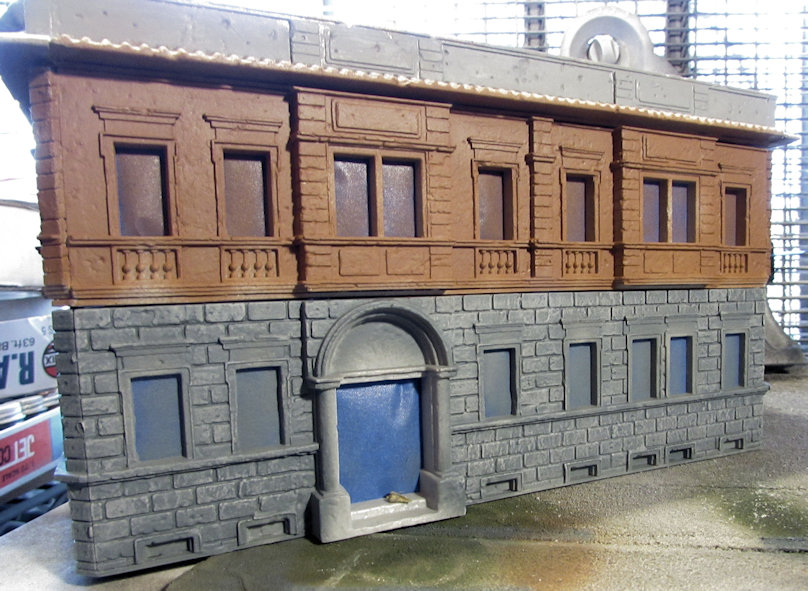
This is looking quite nice already if I do say so myself. Now where is that church I also have.....
Okay, that's all I have for this short update. Thanks all for looking in, comments are welcome.
I had shot a grey underside on my Nigerian Hind, and then masked it off in preparation for the upper camouflage pattern:
Speaking of upper camouflage patterns, I shot the final color on the Australian Tigre and then removed all the Silly Putty:
Moving on, I had finally shot paint on the F-6F Hellcat I'm building on commission. I had shot the whole thing in dark navy blue.
Fuselage:
Wings:
Afterward as you can see, I added the night fighting radar to the one wing since I'd forgotten to do it before painting.
Cowl and drop tank:
Cowl needs touchup, that'll happen...
Next, I decided to attempt to glue in those parts B-7 through -10 that I couldn't figure out before. A pretty good idea struck me as to how I could get them to glue properly. After gluing the two parts together, I took the retracted landing gear parts and snapped them into place. Then I carefully glued the parts B-7 through -10 in place; lining them up with the 'retracted' landing gear:
Later, when I snapped off the retracted gear parts, the two sections stayed in place where they are supposed to go:
Here's another shot of the wing that got the radar pod:
After getting more information about the interior section of the wing fold being dark blue like the rest of the plane; I shot a new coat of blue on the bare sections, as well as touched up other places. Here's the cowl:
Here's the wings:
As you can see, whoever mentioned the long gun barrels being prone to breakage cursed me! Gonna have to replace these as I lost the one completely.
The wheels, struts and landing gear doors were next:
And finally, the fuselage top and bottom:
Some of that paint got a little dull so I'll have to go over it again. Then hopefully I'll be able to apply the decals.
Moving on from there, I decided to do something simple and almost mindless. I had two buildings waiting for paint so it was time to get that done. First I masked the windows (and the hole in the roof) from inside on both the train station and the Berlin House:
Yeah, in that second pic, you can see the Federal Disaster Area that is my workbench right now.
Next I shot the basecoat on the train station:
I used the same color for the upper story of the Berlin House as well:
I then used an RAF Ocean Grey for the bottom story as a base coat:
Later I used a medium grey to dry-brush the bricks on the lower story, as well as paint the top section around the roof:
This is looking quite nice already if I do say so myself. Now where is that church I also have.....
Okay, that's all I have for this short update. Thanks all for looking in, comments are welcome.
Duke Maddog
Well-known member
Thanks Sharkman! I appreciate that.
")