• Modelers Alliance has updated the forum software on our website. We have migrated all post, content and user accounts but we could not migrate the passwords.
    This requires that you manually reset your password.
    Please click here, http://modelersalliance.org/forums/login to go to logon page and use the "Forgot your Password" option.

German U-boat Type VIIB Conning Tower Gun Deck

Still More Sanding


I gave the gun and deck and gun a primer coat and then went back and started sanding the imperfections found in all the nooks and crannies. The primer coat really brought out areas that were hard to see otherwise.

The gun is proving to be the most time consuming, but that is the nature of the nylon 3D printing material. Even after using the XTC-3D and sanding the snot out of it I still had a lot of work to do to get rid of the "fuzzy hairs" and bumps. This will take several coats of primer in specific problem areas to remedy, all while ensuring I don't cover up any details.

Some of the areas were gently scraped with a sharp flat dental tool while other tight areas were accessed by using various types of files, such as sanding sticks, finger nails filers, standard models files and strips of sanding paper as shown before.

The gun may not look so good right now, i.e., the fuzz, but slowly I am making progress. I just keep the DVD player running with "Das Boot", "Gray Lady Down" or some other submariner movie and I barely notice the clock, HA!

_DSC2612b-vi.jpg


_DSC2614b-vi.jpg


_DSC2615b-vi.jpg


The deck portion of this beast was not so bad. The XTC-3D worked really well on this section, but it still had the typical nylon print issues. Given it's a much flatter surface it was easier to clean up, but there is still a "boat load" of fuzz on the actual grid deck. Trust me, you won't see it when I'm done and I ain't gonna sweat the piddly stuff, not gonna do it, lol.

Also, there is some clean up around the tower bolts/rivets that were created when sanding and filing before the primer coat. I'll go back and add some putty to smooth out those surface areas. All these little details will scream at you in this scale, so don't neglect them, you'll pay for it in end if you do.

The minor blemishes on the starboard ladder section will be filled and filed. If you look closely you can see the geometry of the print still visible on the ventilation tube. I've sanded that till I'm blue in the face and it still wants to be part of the picture. I'm not sure how much further I can go down without distorting the details, but I may have to Dremel it a bit to square it up before I call it good.

_DSC2621b-vi.jpg


_DSC2617b-vi.jpg


One item that is not pictured here is the sights on the gun itself. The nylon print is super bulky and looks way out of proportion, so I'll scratch build another one out of thin wire and mount it. This would be a great place for some PE, but I'm not going to learn that process today, lol.

Ok, time permitting, I'll get the sanding closed out and get ready for cables, ship's bell, minor details and painting, yehaaaaaaa!


Thx for watchin. Cheers, Ski.
 
I have the 6 hour version of Das Boot recorded.

Enemy Below, Run Silent Run Deep, Up Periscope (James Garner action), Destination Tokyo (shot during war time)...just to give you some sub inspiration. Oh and Operation Petticoat for some laughs.

:popcorn
 
All good flicks MP, gotta get "Up Periscope".

Thx Luis, Mike and Ian.

Bunker time is at a stop, I have a Bobcat arriving Tues AM, so I'll be bouncing round the north 40 for a few days, lol. I always dread the end of winter, but I still love the spring. I know, I'm confused, lol.

Thx Gents, Ski.
 
Alpine's 1/16th scale German U-Boat Watch Officer

Ok Gents, the bunker has been cranked up to full power and we are in business once again, it's been a long summer.

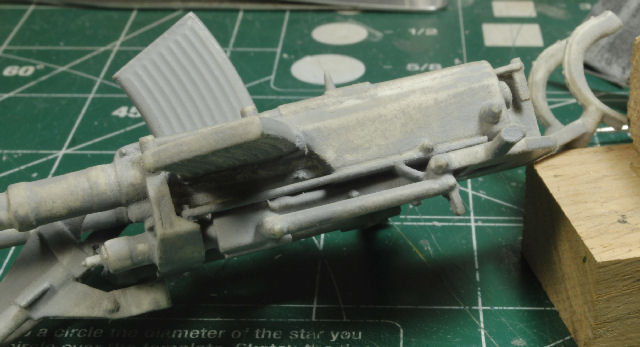
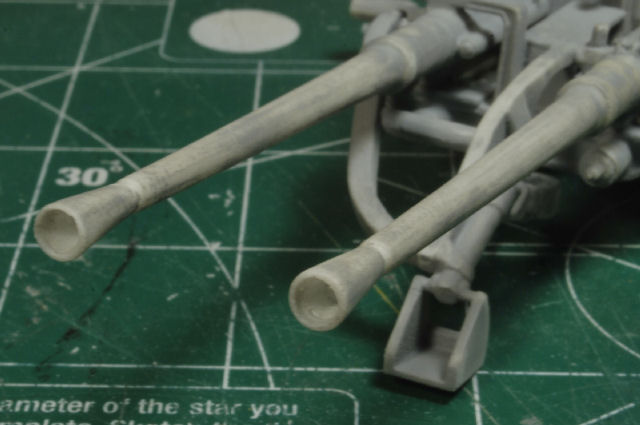
At the end of last winter I was working on the 3D German U-Boat Gun Deck, Type VIIB made by Shapeways, Sasa Drobac. Taesung Hamms graciously sent me Alpine's 1/16th scale German U-Boat Captain, kit # 16021, and I picked up another Watch Officer figure for that particular dio build.

I'll be covering Alpine's 1/16th scale German U-Boat Watch Officer, kit #16036, by Taesung Hamms. Now, yall may remember I've already done this figure for Track-link, exclusive build. I paid for this Watch Officer to go with Alpine's 1/16th scale German U-Boat Captain, kit # 16021, which I did not pay for. So, the Watch Officer in this blog and the Captain will appear in the final pics for this particular blog, the Gun Deck. The Captain will "not" be a feature in this blog except for the final pics, that is for Track-Link exclusively. Clear as mud, I know, HA!

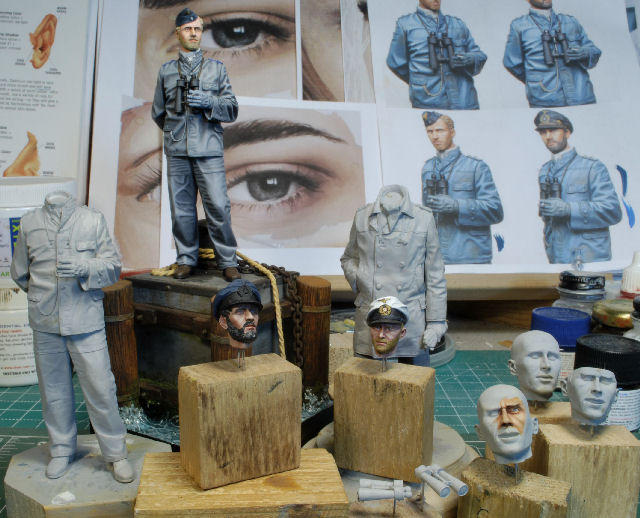
Here we have the motley crew all together.
_DSC2623b-vi.jpg


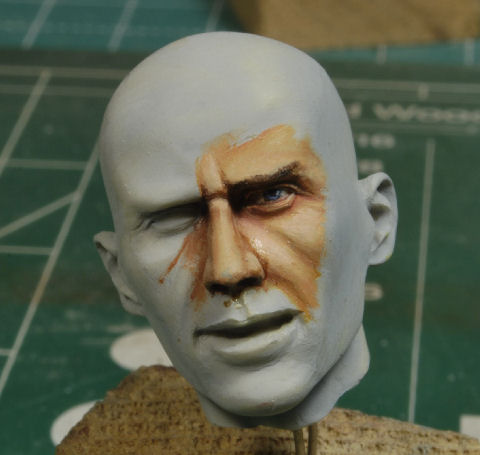
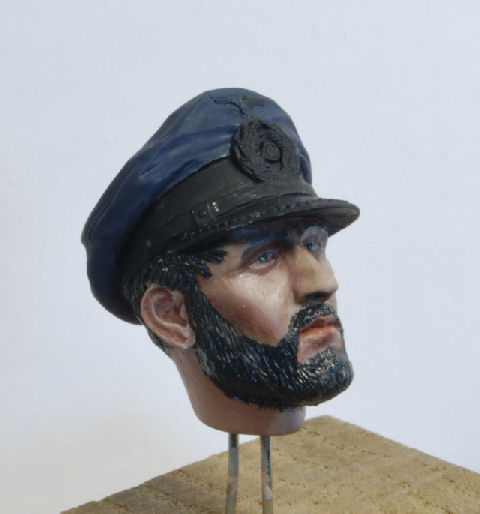
Now, what you did not see, unless you visited my blog on TL, was the method used to paint the face specifically. I ran across a young lady's work on YT showing how she blends oils and starts from a basic grey background and produces some incredible work. So much so that I've used it to paint the Captain's face exclusively, with better than expected results. That partial head painted you see on the right was painted as a test run for this method. The pretty young lady's name is Daria Callie. She's very well known in the portrait community and she has several videos you can use to perfect your techniques. I had to go through the videos once again to get back into the swing of things, so to speak, after a long summer season.

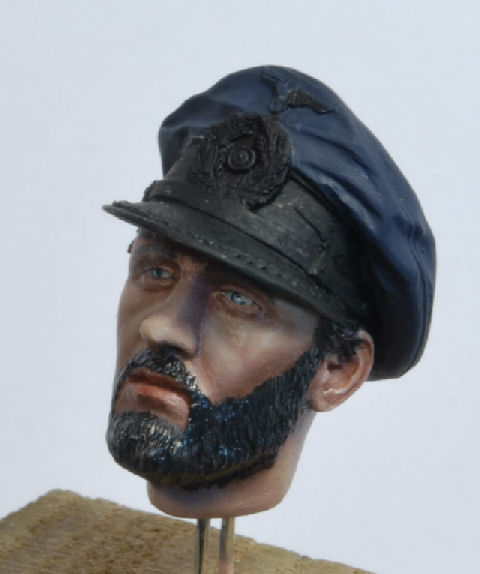
A frontal view showing the flesh tones blended without a base tone. The pics are a bit glossy, but oils will dull after a few days. There's still plenty to work over on this head, but for right now, he's looking pretty good for starters. I painted this head in just over four hours, that's a first! I plan to nail this method down hard, it works too well to just let it get rusty in the ol cabesa.
_DSC2625b-vi.jpg


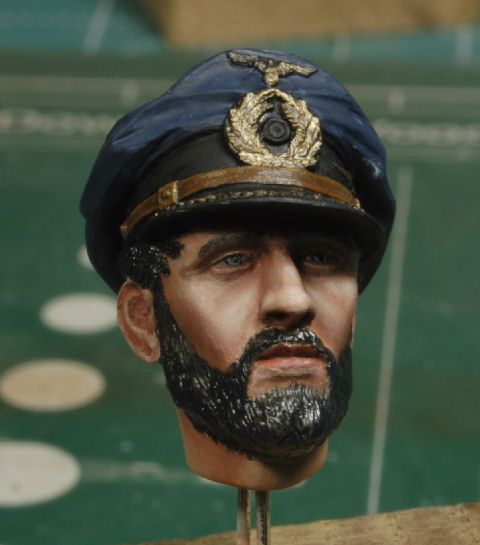
The eyes will be worked a bit more, plus blending more tones/values into the surrounding upper cheek and below the eyes, etc.
_DSC2626b-vi.jpg


After a few days I will go over the beard to get it dialed in. The lips will be worked a bit more too. As you can see, the gloss from the oils makes it difficult to really see all the detail, but they will become more apparent after the Dull Coat.
_DSC2629b-vi.jpg


At any rate, it's been one heck of a long summer and I'm glad to be back in the bunker. The only thing stopping me now is plowing snow, and that ain't so bad, HA!

Please, if you "see something, say something", I'm not shy to constructive criticism, I'm still learning too.


Thanks for watching, more to follow soon. Cheers, Ski.

P.S. Daria Callie's link:
https://www.youtube.com/channel/UCyGgRLbgcXjON9ZS5DaqMOQ
 
Alpine's 1/16th scale German U-Boat Watch Officer

Fantastic! Steve i'm glad you're sharing here, please do link your Track-Link blog, we have no problem with showing other websites.

:popcorn
 
I realized I never did a "white balance" before taking the last set of pics, oops, my bad.

At any rate, I did some reworking of the eyes, cheeks and lips. While that was drying I used oils for the cap leather strap and worked the gold trim on the elements. In a few days the original layer of oils will be close to dried at which time I'll start adding layers of reddish tones where needed as well as defining the eye lids, etc.

There's still plenty to do, but we are making progress. Hopefully this head will be done in a few days and then it will be uniform time.

Remember "ol one eye"? This was a perfect head to practice on. As you can see this is just a rough draft, but it shows just how easy the techniques described above really works. A big thanks goes out to Steve Readdie of "Reedees Miniatures" for supplying several different heads. http://www.reedeesminiatures.co.uk/the-quartermasters/1-9---200mm

_DSC2643b-vi.jpg

_DSC2631b-vi.jpg

_DSC2636b-vi.jpg

_DSC2639b-vi.jpg

_DSC2642b-vi.jpg


More to follow and thanks for watchin. Cheers, Ski.
 
Back
Top