
-
Modelers Alliance has updated the forum software on our website. We have migrated all post, content and user accounts but we could not migrate the passwords.
This requires that you manually reset your password.
Please click here, http://modelersalliance.org/forums/login to go to logon page and use the "Forgot your Password" option.
You are using an out of date browser. It may not display this or other websites correctly.
You should upgrade or use an alternative browser.
You should upgrade or use an alternative browser.
German U-boat Type VIIB Conning Tower Gun Deck
- Thread starter Steve Ski
- Start date

Outstanding detail 
Steve Ski
Well-known member
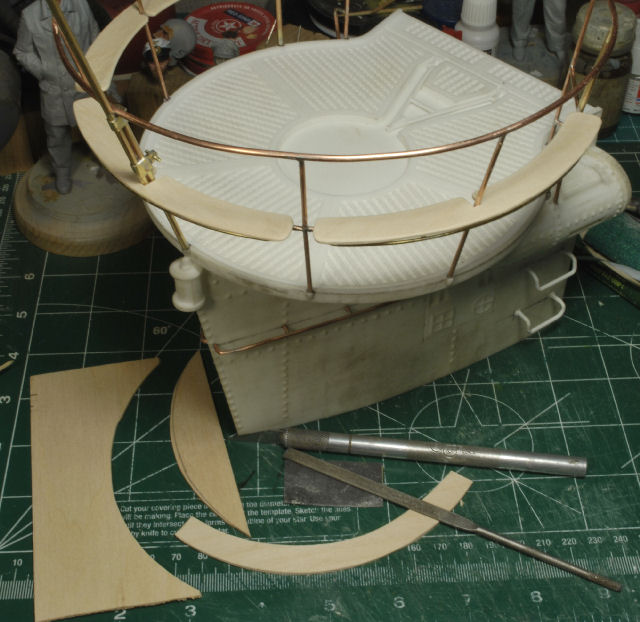
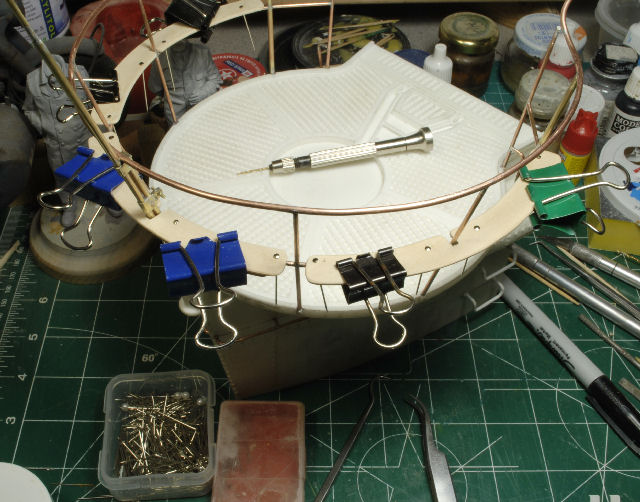
Take A Seat, Relax. Wood Planks
One feature on the U-Boats was seating for the crew to take a break on the "smoking deck". From what I've read the planks were wood and some boats didn't have any, but more than likely they were removed due to damage, etc.
In the photos below you can see how I clamped the planks in place for pinning and securing them. After the bass wood was cut to fit I used sewing pins to secure them to the railing supports. I drilled a slight recess into the wood to get a flush fit on the sewing pins. I then flipped the tower over and soldered the pins in place and trimmed the excess. Then I went back and lightly sanded the plank with 600 grit sand paper. This process was fast and easy.
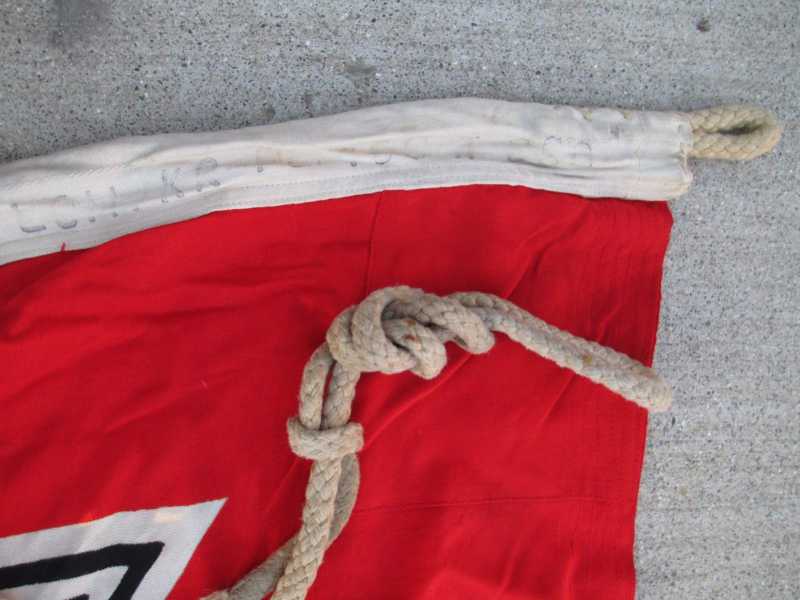
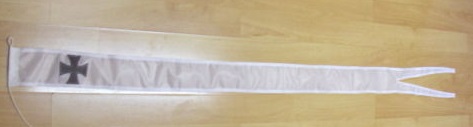
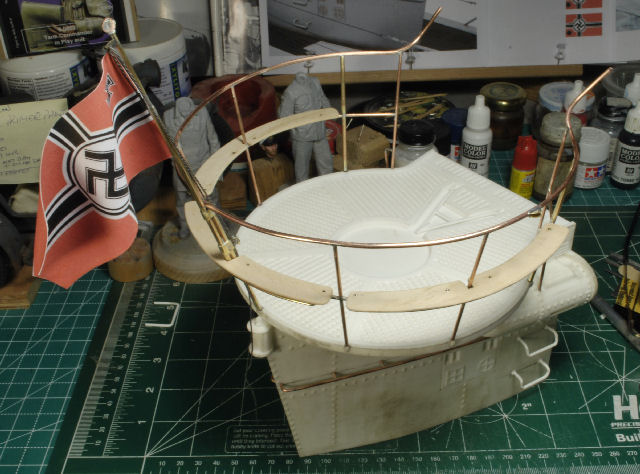
And, a photo of the flag mounted temporarily. Not shown here, but I did add the white strip on the mounting side of the flag. Thx for the intel Piet.
Next up, sanding the gun and mount, what a hoot!
Cheers, Ski.
One feature on the U-Boats was seating for the crew to take a break on the "smoking deck". From what I've read the planks were wood and some boats didn't have any, but more than likely they were removed due to damage, etc.
In the photos below you can see how I clamped the planks in place for pinning and securing them. After the bass wood was cut to fit I used sewing pins to secure them to the railing supports. I drilled a slight recess into the wood to get a flush fit on the sewing pins. I then flipped the tower over and soldered the pins in place and trimmed the excess. Then I went back and lightly sanded the plank with 600 grit sand paper. This process was fast and easy.
And, a photo of the flag mounted temporarily. Not shown here, but I did add the white strip on the mounting side of the flag. Thx for the intel Piet.
Next up, sanding the gun and mount, what a hoot!
Cheers, Ski.
phantom II
Master at Arms
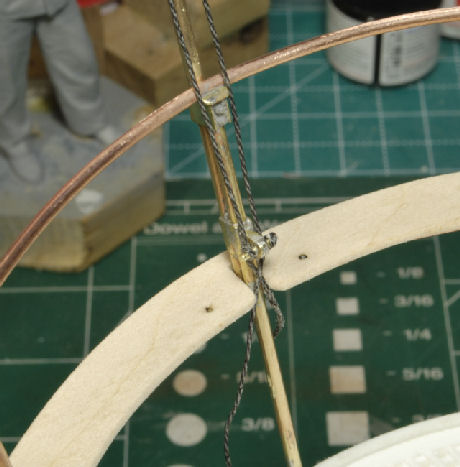
Very impressive Ski  Do the pins actually go into a piece of tubing ?
Cheers, Christian B)
Do the pins actually go into a piece of tubing ?Cheers, Christian B)
phantom II
Master at Arms
Thx Christian.
Yep, they're soldered on the underside, then filed flush. It was the only way to secure the wood.
Thanks Luiz, more to follow.
Cheers, Ski.
That's what I was thinking but couldn't spot them . Fine soldering
Cheers, Christian B)
JamesOLeary
Master at Arms
Wow, Ski! That is quite an impressive undertaking. There's lots of great detail work going on there and with it being a larger scale the audience will actually be able to see it and appreciate it unlike if this were done in 1/35th scale or smaller.
Your soldering work looks good. I don't know if I would ever try something like this, but you make it look easy.") I'm sure it isn't and that there are a bunch of 4-letter explicatives bouncing around your work space.
I'm sure it isn't and that there are a bunch of 4-letter explicatives bouncing around your work space.
Great work. I look forward to seeing this one finished. I am sure it will be awesome.
Cheers, Bro!
James
Your soldering work looks good. I don't know if I would ever try something like this, but you make it look easy.
I'm sure it isn't and that there are a bunch of 4-letter explicatives bouncing around your work space. Great work. I look forward to seeing this one finished. I am sure it will be awesome.
Cheers, Bro!
James
Steve Ski
Well-known member
Thx mucho Brother James. Ah, the cussing goes with the territory, HA! One good reason to always kee3p the door closed, lol. I've3 done quite a bot of soldering now, so it's become quite easy, just need to make sure it's practical for the application. In other words, I ain't gonna do it if I ain't gotta, HA! Thx for the compliment Bro.
Thx Mr. MP!
Thx Mr. MP!
Steve Ski
Well-known member
Sanding The Deck Gun And Mount
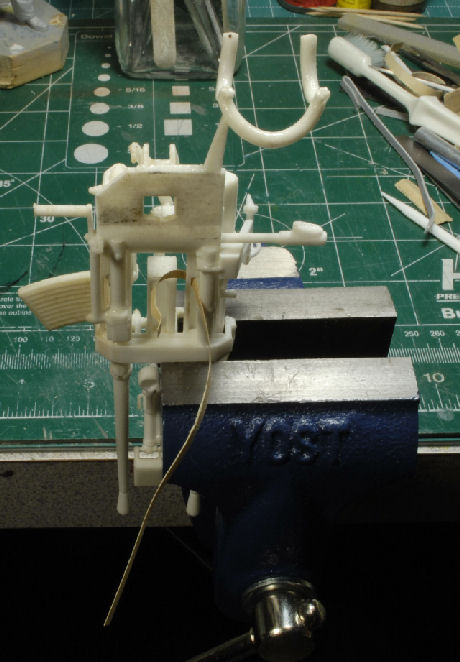
Ok, now that the deck has been completed and is ready for priming and painting it's time to fight the good fight and sand the deck gun and mount. The mount was not such a big deal, but this gun is one piece and it has some very delicate parts within the structure that are not easy to get to. As you can see, cutting up sand paper into long strips was a necessity and saved my sanity.


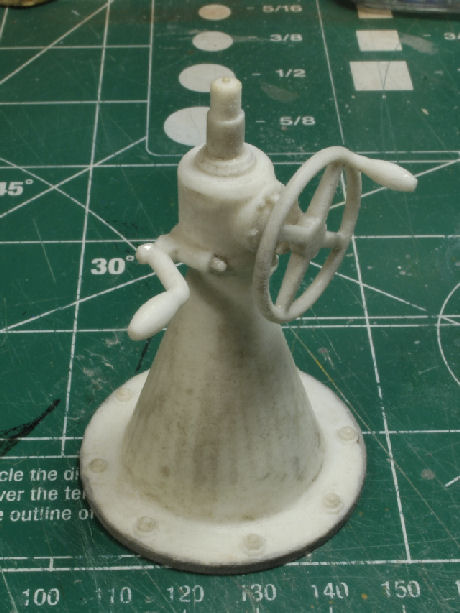
I ran into a fore mentioned issue with improperly mixed resin on this gun, so it's been a long process to bring it in to line. I am paying for my lack of attention to detail weeks ago, go figure. Ah, t'sall good!
I will say this, without my Yost miniature vise I would have gone battys by now. This vise was one of the best investments I've made for the model bunker in a long time. I was able to get a decent grip on this gun so I could get to those tight spots.
I recon any miniature vise will work, but I did do my research on vises and found that the Yost vise has the best design for my needs. It has already been upgraded to avoid the retaining washers from crimping and failing. Meaning, a common issue with these smaller vises is the retaining/tension ring/washer has a tendency to fail and you won't get your vise open. Now, that would not be any fun if I had this gun stuck in that vise, nuff said!

More to follow soon, if I ever get this gun sanded, HA! Cheers, Ski.
Ok, now that the deck has been completed and is ready for priming and painting it's time to fight the good fight and sand the deck gun and mount. The mount was not such a big deal, but this gun is one piece and it has some very delicate parts within the structure that are not easy to get to. As you can see, cutting up sand paper into long strips was a necessity and saved my sanity.
I ran into a fore mentioned issue with improperly mixed resin on this gun, so it's been a long process to bring it in to line. I am paying for my lack of attention to detail weeks ago, go figure. Ah, t'sall good!
I will say this, without my Yost miniature vise I would have gone battys by now. This vise was one of the best investments I've made for the model bunker in a long time. I was able to get a decent grip on this gun so I could get to those tight spots.
I recon any miniature vise will work, but I did do my research on vises and found that the Yost vise has the best design for my needs. It has already been upgraded to avoid the retaining washers from crimping and failing. Meaning, a common issue with these smaller vises is the retaining/tension ring/washer has a tendency to fail and you won't get your vise open. Now, that would not be any fun if I had this gun stuck in that vise, nuff said!
More to follow soon, if I ever get this gun sanded, HA! Cheers, Ski.
Similar threads
- Replies
- 2
- Views
- 226
- Replies
- 53
- Views
- 8K
- Replies
- 13
- Views
- 1K
- Replies
- 4
- Views
- 1K
- Replies
- 8
- Views
- 2K