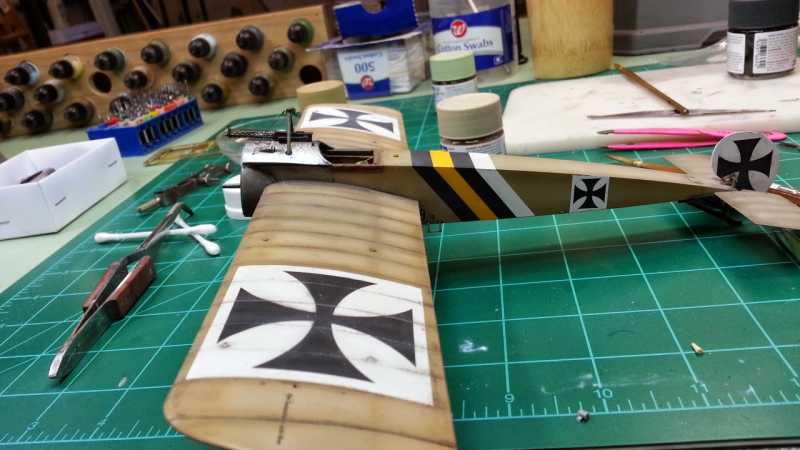
I put a little NAto Black no the black decals for some fade effect, what color y'all think I should use for the yellow on the stripe? Buff??

-
Modelers Alliance has updated the forum software on our website. We have migrated all post, content and user accounts but we could not migrate the passwords.
This requires that you manually reset your password.
Please click here, http://modelersalliance.org/forums/login to go to logon page and use the "Forgot your Password" option.
You are using an out of date browser. It may not display this or other websites correctly.
You should upgrade or use an alternative browser.
You should upgrade or use an alternative browser.
Fokker Eindecker
- Thread starter moon puppy
- Start date
Phil those Oberursel motors were a total loss oil system, there was oil slinging everywhere
I'm with you now. :drinks
I put a little NAto Black no the black decals for some fade effect, what color y'all think I should use for the yellow on the stripe? Buff??
I think I would use just a touch of white instead.
Looks great Bob!
")
Thanks, will give it a shot.
Oh the pain of obsession. 
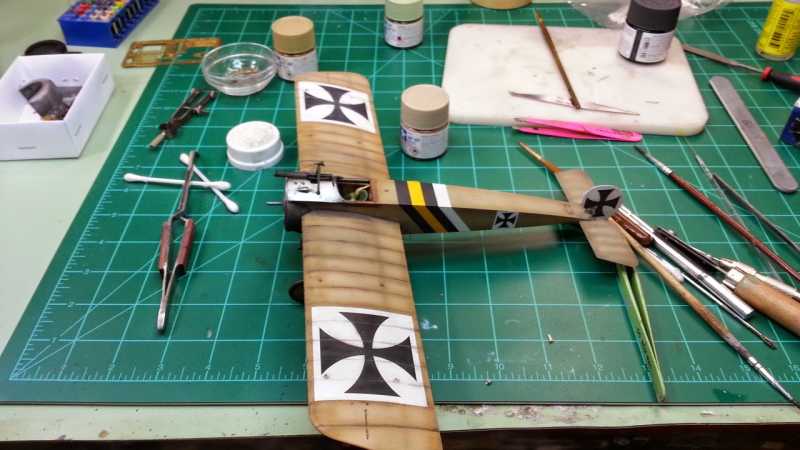
Well I did it, think I did. not 100% but dang close.
I got brass control horns. Went through 4 prototypes before I was happy. First one was really thin stock then I got this, oh crap, can't remember how thick, fairly thick because I bused all my tiny drill bits up to number 75. Even my spares I had forgotten about. Half way through this I remember i'm suppose to be using half rounds for drilling thick metal. Oh well. Drill Bit City is gonna get an order soon.
I first took four chunks of stock, about 4mm long and drilled my first hole, .8mm dia, this would be for the connecting rod. Then the .3 hole for the attchment for the turnbuckle. I threaded both holes with some spare stock and clamped them together then started shaping at one. Got the general outline of the control horn then I started working with each one individually shaping them some.
Well here's what I ended up with.
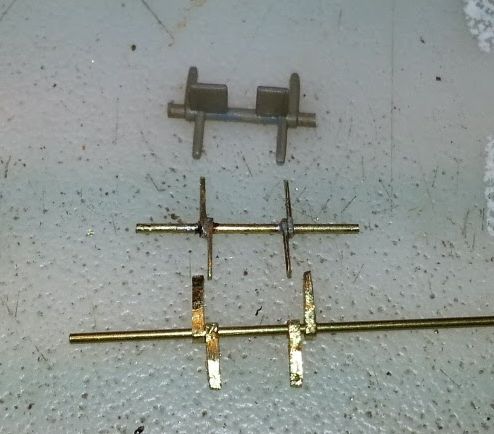
Kit part up top, first attempt, last attempt. Those in the middle don't count...
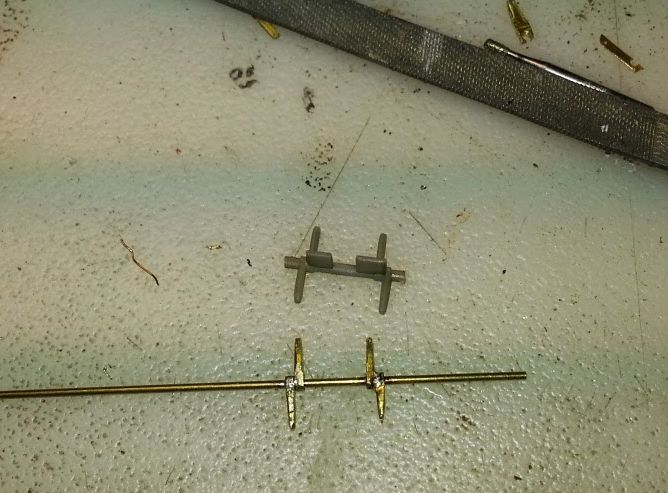
after some shaping.
I drilled out a little close to the top edge of the elevator, i've since stripped, patched and repainted the elevators so this shouldn't be an issue now. If it is i'll distract you with a different angle so you can't notice it.
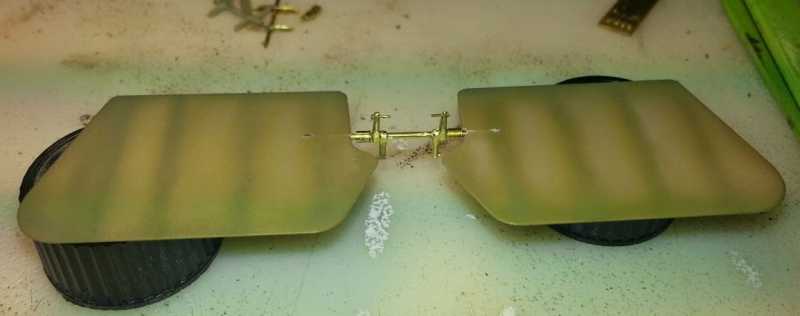
whatcha think?
Well I did it, think I did. not 100% but dang close.
I got brass control horns. Went through 4 prototypes before I was happy. First one was really thin stock then I got this, oh crap, can't remember how thick, fairly thick because I bused all my tiny drill bits up to number 75. Even my spares I had forgotten about. Half way through this I remember i'm suppose to be using half rounds for drilling thick metal. Oh well. Drill Bit City is gonna get an order soon.
I first took four chunks of stock, about 4mm long and drilled my first hole, .8mm dia, this would be for the connecting rod. Then the .3 hole for the attchment for the turnbuckle. I threaded both holes with some spare stock and clamped them together then started shaping at one. Got the general outline of the control horn then I started working with each one individually shaping them some.
Well here's what I ended up with.
Kit part up top, first attempt, last attempt. Those in the middle don't count...
after some shaping.
I drilled out a little close to the top edge of the elevator, i've since stripped, patched and repainted the elevators so this shouldn't be an issue now. If it is i'll distract you with a different angle so you can't notice it.
whatcha think?
phantom II
Master at Arms
Ok Bob. Need an explanation on half round :coolio
Half round, paddle bit or Spade bit Chris, can't remember who but someone told me a while back that those types of bits are better when working in our scales but I haven't found any in the wire sizes I like. Maybe it's just that I'm too rough on them the reason the break.
phantom II
Master at Arms
Half round, paddle bit or Spade bit Chris, can't remember who but someone told me a while back that those types of bits are better when working in our scales but I haven't found any in the wire sizes I like. Maybe it's just that I'm too rough on them the reason the break.
Must be time to check with drill bit city . He always seem to know the answers :dude
I have plenty of paddle bits in my tool box . Starting at 3/8 " . Never heard them called that though

Thanks Terry. :zen
I could buy all new from them for what it would cost you in shipping James.
Thanks, getting my inspiration from you so you keep at it Bud.
Thanks, getting my inspiration from you so you keep at it Bud.
randy_ditton
Master at Arms
Hi Bob,
Getting caught up on your progress and must say I'm impressed
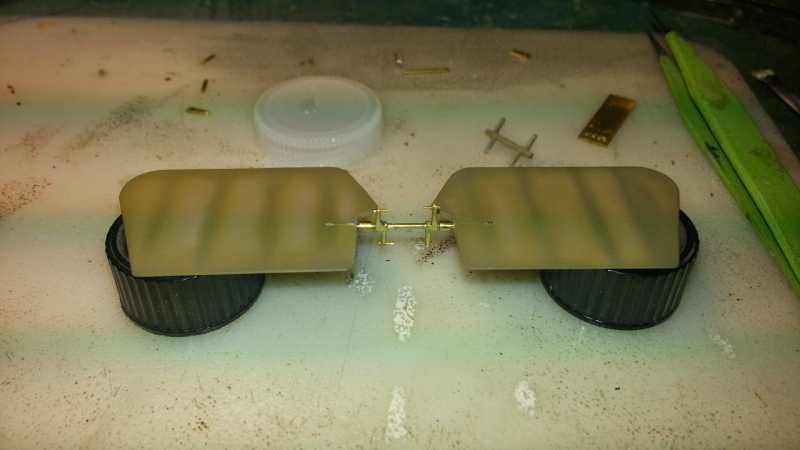
The wing looks great and I love the brass horns
Randy
Getting caught up on your progress and must say I'm impressed
The wing looks great and I love the brass horns
Randy
Hi Bob,
Getting caught up on your progress and must say I'm impressed
The wing looks great and I love the brass horns
Randy
And I'm humbled...
Thanks Randy.
Now that the shop is all cleaned up...no really it is. hyeah
I've had time to get back to the Eindecker. Had a misstep with the decal and attempted to patch it up with come cut out parts from other decals but they didn't blend well. So I figure give it a shot, sprayed Vallejo Off White and it blended very well. After a gloss coat and some dark wash, then a flat coat, this is where we are today.
Just got it propped up on the landing gear right now, still trying to figure out this rigging up under the plane. Top side not so bad.
Well going to weather up the flat side now with some oil stains and other nastiness then another gloss coat to seal that, hopefully start rigging tomorrow.
hyeah I've had time to get back to the Eindecker. Had a misstep with the decal and attempted to patch it up with come cut out parts from other decals but they didn't blend well. So I figure give it a shot, sprayed Vallejo Off White and it blended very well. After a gloss coat and some dark wash, then a flat coat, this is where we are today.
Just got it propped up on the landing gear right now, still trying to figure out this rigging up under the plane. Top side not so bad.
Well going to weather up the flat side now with some oil stains and other nastiness then another gloss coat to seal that, hopefully start rigging tomorrow.
phantom II
Master at Arms
Looks pretty darn awesome from here Bob
Cheers, Christian B)
Cheers, Christian B)
Similar threads
- Replies
- 52
- Views
- 7K
- Replies
- 13
- Views
- 781
- Replies
- 106
- Views
- 11K