
-
Modelers Alliance has updated the forum software on our website. We have migrated all post, content and user accounts but we could not migrate the passwords.
This requires that you manually reset your password.
Please click here, http://modelersalliance.org/forums/login to go to logon page and use the "Forgot your Password" option.
You are using an out of date browser. It may not display this or other websites correctly.
You should upgrade or use an alternative browser.
You should upgrade or use an alternative browser.
Eindecker IV
- Thread starter moon puppy
- Start date
 :drinks
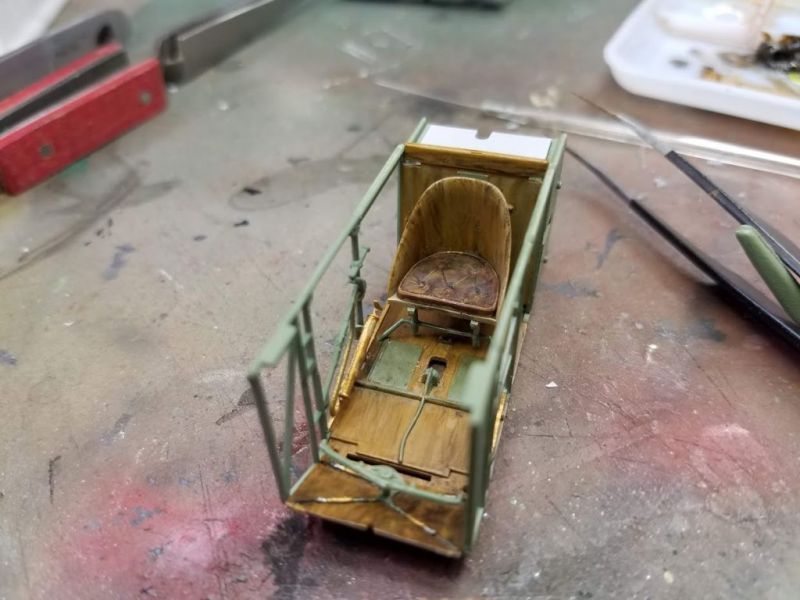
Dry fit. Checking out the various wood grains.
Heavens Eagle
Well-known member
Looking good Bob!
")


Duke Maddog
Well-known member
Impressive wood grain Bob! Way to go!
Trying to get my head around the rigging here. When I built the Eindecker before I remember thinking that some of the rigging tied into the control column so I got some lines hanging down from the cockpit, this is going to complicate painting. How soon do I start painting the exterior because painting around the rigging can be a chore. So it's slow going here.

Kinda sorta dry fit

Also gotta be thinking ahead about the tail plane rigging. far easier to do it before buttoning up but we back to the paint issue. There was also a pretty strong seam up top of the fuselage.
Well this is supposed to be challenging so there's that.
Kinda sorta dry fit
Also gotta be thinking ahead about the tail plane rigging. far easier to do it before buttoning up but we back to the paint issue. There was also a pretty strong seam up top of the fuselage.
Well this is supposed to be challenging so there's that.

jknaus
Administrator
Looking good. If you leave the rigging hanging out the bottom you can get a postit note and make a small tube. Slide the rigging through the tube and then slide the tube up over the bottom of the control column. That will protect the control column and plug the hole in the fuse and protect the rigging when you paint.
Great idea James, will give it a go. I have an eyelet hanging from the line.Looking good. If you leave the rigging hanging out the bottom you can get a postit note and make a small tube. Slide the rigging through the tube and then slide the tube up over the bottom of the control column. That will protect the control column and plug the hole in the fuse and protect the rigging when you paint.
I was thinking about cannibalizing the first Eindecker for the pulley and tail plane that I built but I think i'm going to build new. I think I can work the kit part well enough this time not to have to rebuild it. That pulley though, it begs for upgrade.
Heavens Eagle
Well-known member
It's coming along well Bob!


A little cart in front of the horse action.
I have to do a lot of the painting before I get too far into in the construction.

Really have to think this thing through.
And no I'm not the stay in the lines kinda guy.
I have to do a lot of the painting before I get too far into in the construction.
Really have to think this thing through.
And no I'm not the stay in the lines kinda guy.
Last edited:
Looking back at the E.III I did years ago one issue that popped up was wings developed a anhedral sag. Not sure when that happened because there's pretty robust attachment points and alignment slots for the wings. As such I think I'm going to attach the wings very early on and make sure they are square instead of waiting till the gear on and handling is tricky.

I'll get a better shot of that tomorrow. Another nice gift from @Iron Mike