• Modelers Alliance has updated the forum software on our website. We have migrated all post, content and user accounts but we could not migrate the passwords.
    This requires that you manually reset your password.
    Please click here, http://modelersalliance.org/forums/login to go to logon page and use the "Forgot your Password" option.

Looking for tips on how to achieve rusted effect

Adam Baker

Active member
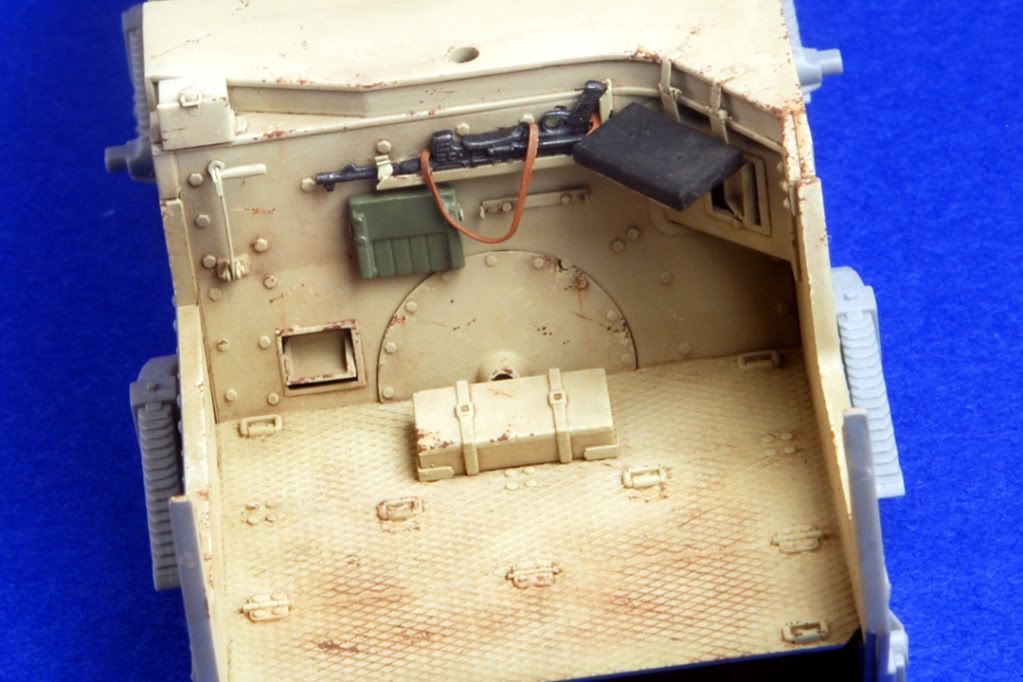
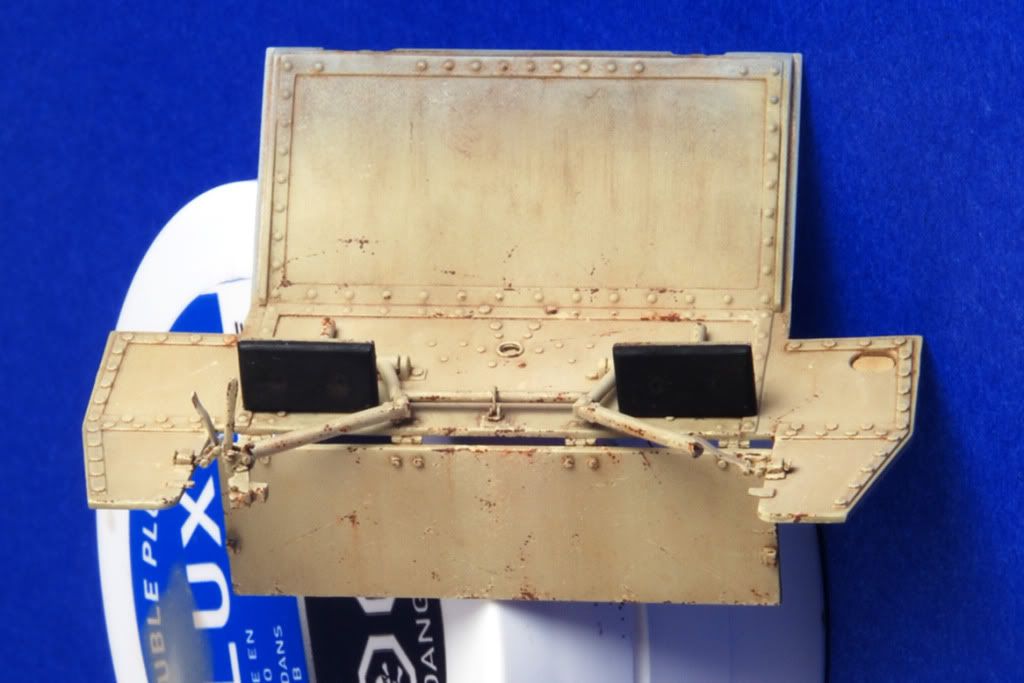
Working on my Befehlsjager and hoping to begin painting parts, and looking for suggestions on how to achieve a rusted chipped look.

These images are from a Marder III build that I really like the look of, but not sure exactly how to achieve the look.

Images are from this thread at Planet Armor
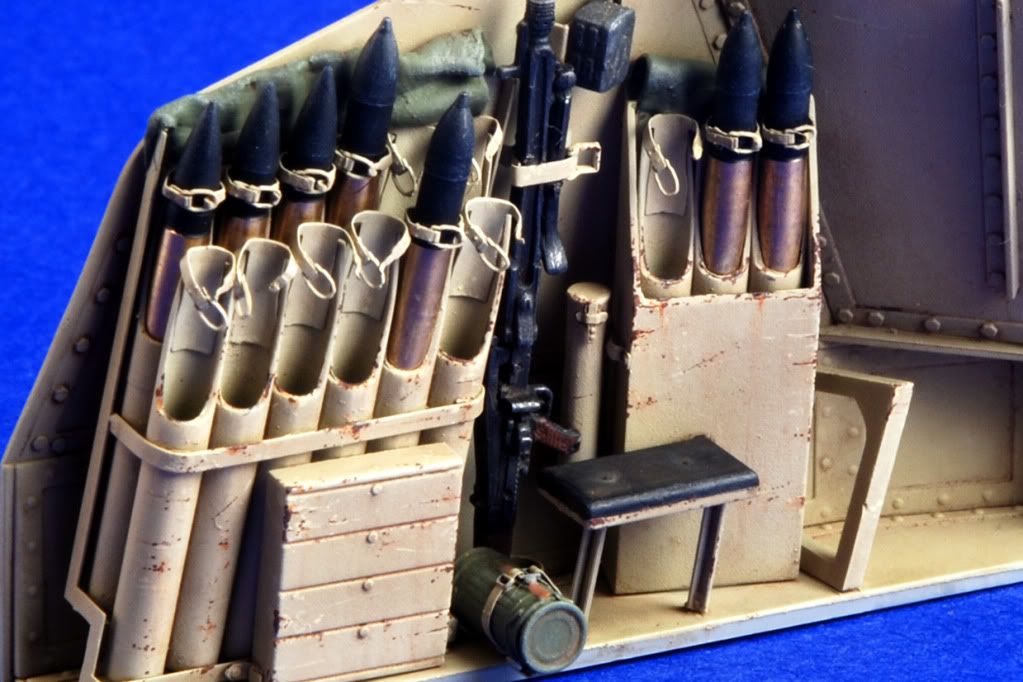
DSC_0323.jpg


DSC_0340.jpg


DSC_0334.jpg


Not sure whether the hair spray method, sponges, or a brush is the best way to achieve this look. I've not used sponges before to get wear, and I've only done it w/ hair spray once w/ limited success.

I know w/ hair spray I'd base w/ the rust, and then put the ivory over it, and the other methods I'd base w/ the ivory and then go back w/ the rust.
 
My personal thought is dont bother with the rust. Its unrealistic. But the chips, you could use some German gray and a stub brish and with an almost dry brush dab it where you want chips. Not to many though.
James
 
This looks more like worn and chipped, not rust. Think James has it, something superficial instead of the hairspray technique. Dry brushing and sponge. I did the Sponge a bit the other week on the inside of the halftrack. Hope Chad picks that build back up one day soon.
 
I was thinking that the effect I was looking to achieve was better off w/ sponges than hairspray, I just wasnt sure since I've never attempted it.
 
Working on my Befehlsjager and hoping to begin painting parts, and looking for suggestions on how to achieve a rusted chipped look.

It's not so hard to do as you might think,Adam.
Have a look at this one:

MUN4.jpg


Start with a fine pointed brush with a black,dark brown acrylic paint over a slightly lighter color of your base color for starters.
Then you have several options;you can use enamel or oil washes fading away the wash with thinners from the chipped area.
Or (my personal favorite)use genuine pigment powders,put it on the chipped area and with a brush moistend with thinner fading the pigments away from the chipped area...practise makes perfect.

Hope this helps.
Greetings,Ron.
 
:) I agree with James on the over use of rust, it's done to death these days - it's good where it is appropriate, however the only tanks that I see the high level of rust and staining are the totally destroyed tanks photographed in scrap yards and collection centres well after hostilities had finished.
A little is good but too much is not so good. The rust theme comes from diggers and hydraulic building equipment from modern day, used as examples' however these vehicles are used for years in very different conditions and are not continually over-sprayed as a lot of the German stuff was.
Still it can look very cool, just be careful with the effect.
The effect.
The above effects are quite simple achieved with a fine brush, the right paint, and some oils or pigments.
The lighter chips are done with the base color applied by fine brush after it has been ghosted on by airbrush. Additionally you can add a touch of white to the base coat to lighten it slightly. There are no hairspray effects here as that is a method used for breaking the upper coat of paint away to reveal the underlying color in a random damage pattern - too heavy and broad spectrum for these effects.
The rust is applied inside the light chips by fine brush - use Vallejo German c. black(70822) - made by the gods for all old dark rust effects - especially tracks.
The streaking can be done by the correct oil mix applied very subtly or by pigment in the same way.
The dirty staining is applied as James has pointed out.

I hope this helps Ron.

Ian
 
Back
Top