Back in the early 80s, I had been taking a lot of step by step pics as I built models to later put together a book. They were all taken in black & white as magazines back then only printed in black and white! (Hard to believe, isn’t it?). After the “Winds of War” my first huge diorama, had made a stir when it was on the cover of Fine Scale Modeler’s second issue, they had made me an offer to do other articles and to publish a book. A few months later, they had some internal problems, this was in ‘83-'84. They contacted me and said that corporate had blocked all books for the next year. Not much later, I met my future partner and he suggested I let him do the book instead. I agreed and the result was “Superdioramas”. Verlinden was one of the first, if not the first, to print every page of a modeling book or magazine in full color, so, I have hundreds of unpublished B&W photographs that have been in a box for over a quarter century. I had an idea to start a thread using those photographs. If you guys like it, this is kind of an experiment, then I will do more. I will begin with the giant stone railroad bridge in the diorama, “Legacies”. Hope you like it!
Bob
The bridge is in 1/35th scale, but in real size, it stands almost two feet high, (610 mm). I built this in a similar process as I build most of my structures. I begin with a corrugated cardboard shape constructed with white glue. I buy my own 4 X 8 sheets today, but, back then, I used boxes found at the rear of most supermarkets. BTW, with all materials involved, I probably spent less than $20 on this. That might make a down payment on a layaway plan for a 1/35th tank now! It is a very cheap way to build buildings even today.
Here is the shape I created. I always make the base first, then lay out the streets/sidewalks and alleys. That gives me the dimensions for the buildings.

------------------------------------
Then I add the other shapes I want using wood, balsa or bass, and white glue. I also give it a veneer of matt board, available in art stores. This gives the structure a strength that is remarkable. I have built these things as early as 1971 and they still look today as they did back then. They are far more sturdy than any plastic model.
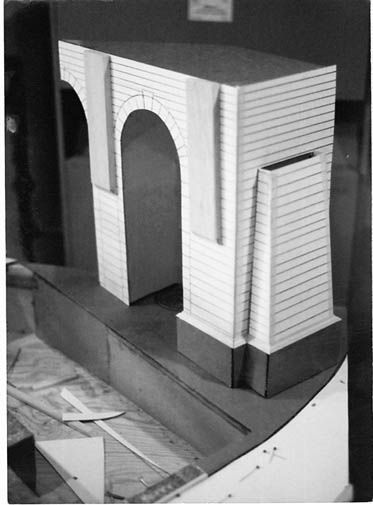
This photo shows how the “stones” are made. I take Hydrastone plaster and mix it with water to the texture of thick paint. Other guys have tried this and took a shortcut and left out the matt board. Corrugated cardboard with collapse from the wet plaster. The matt board keeps the cardboard dry! Then i draw horizontal lines on the mattboard to keep the stones level, and begin “painting” the stones. Some I give three coats, others four and five coats. That creates a realistic texture. I have began to make the RR track base on top. With this and the river wall and the new stone pillar in the Legacies II diorama, there are over 9000 stones! Multiply times 3-5 coats each, I was really tired of making stones!
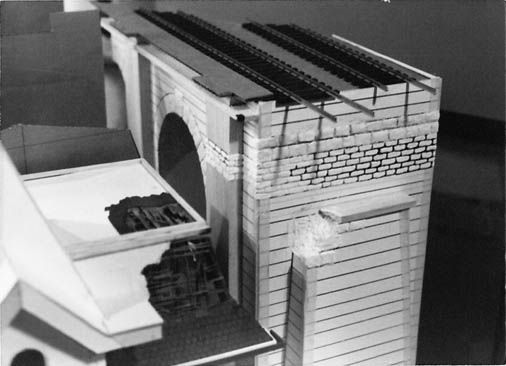
See another angle here. As you can see the arch stones have been added using Miliput epoxy putty shaped and then carved to simulate the texture of stones.
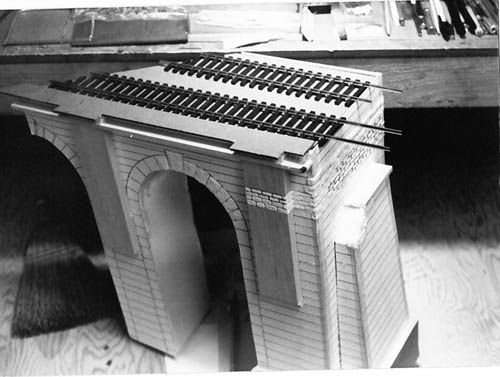
This is a birds eye view showing the upper deck progressing.
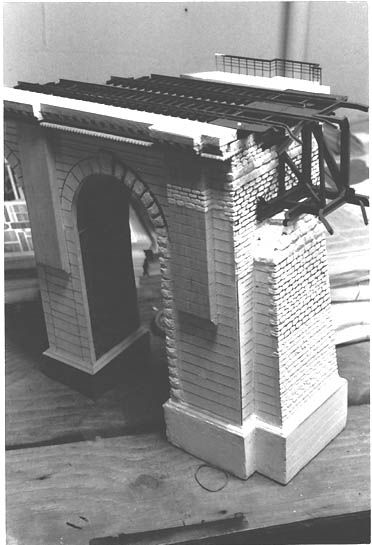
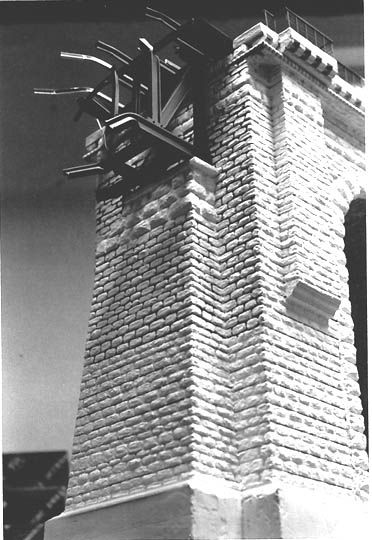
With most of the stones complete, here is a shot of what it would look like from a human’s perspective. The trestle that has been blown was made of the PVC products Plastruct architectural shapes, a very useful product that I have used as far back as I can remember. I have used it to build factories and aircraft hangars.
This is a birds eye view showing the upper deck progressing.
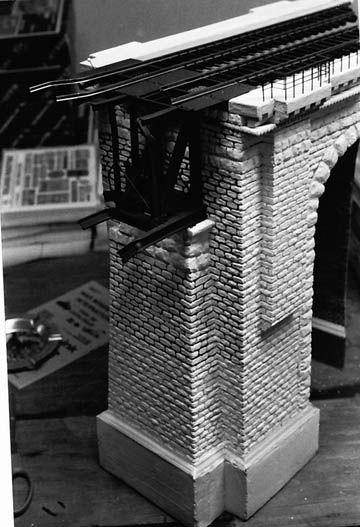
All stonework finished, here I have given it a base coat of paint. A flat medium gray.

Side view. The fancy trim on the top is from a lumber store used for trimming woodwork. Just a bit of nostalgia. Note the stacks of VP products I was selling out of my basement at the time, (1983). The beginnings of The VLS Corporation.
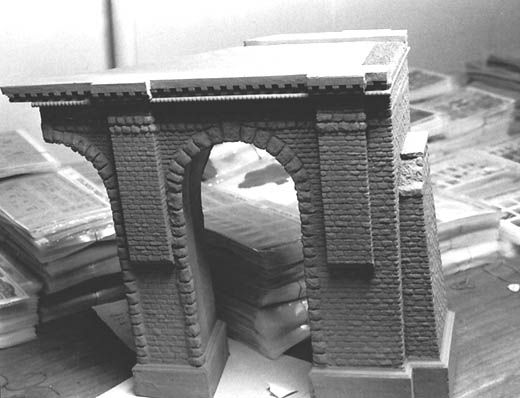
Now, I begin applying the weathering process. That begins with randomly painting the stones about five different shades of the base color. Then a raw umber “wash” using artists oils mixed with rectified turpentine to the consistency of milk. A complete coat of the mixture covers the model and then is cleaned off with a dry, clean cloth using a blotting method, leaving only the dirty color in the cracks and crevices. It also darkens and ages all five colors of paint to an extent. Then using a light gray, I painted the area that had been blown away, which replicated the fresh, unweathered stone, never exposed to the weather. A touch up using the dry brush of only one shade lighter than the stones very subtly adds visual texture. Then streaks are made from various colors of artists oils to simulate wear and tear over a century of use.

Another view.
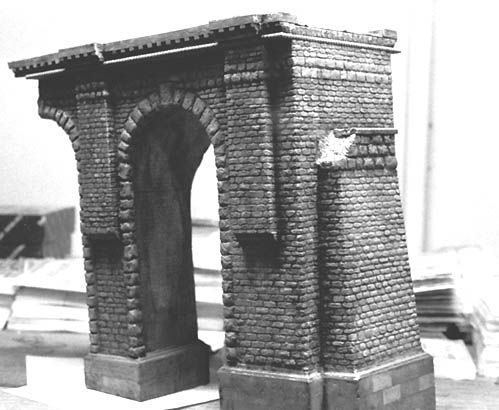
Still working on the deck. In Legacies II, this deck was extended to 3.5 feet, (Around 1100 mm).
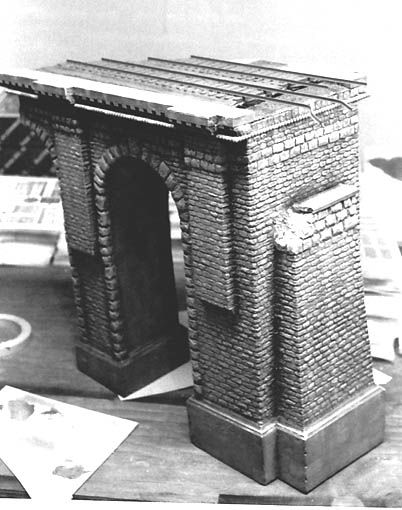
Now with the tracks, fencing and RR signals, weathered and rusted girders added, It is finally complete.
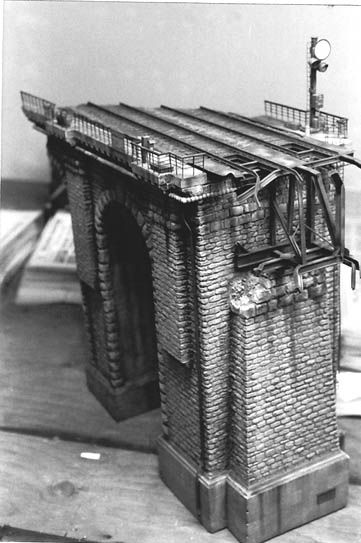
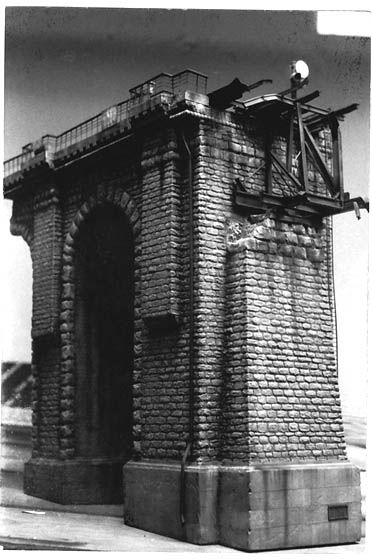
Finally finished, I prefer the this, the human's eye view. Compare the finished model to the beginning!

Unfortunately, the only pic of the bridge in the diorama was taken by an FSM photographer, Paul Boyer about 4 years ago. I have lots, but they haven't been scanned. It is somewhat visible, just follow the steel trestle till you see the stone. This is Legacies II, after it was rebuilt into an intact bridge, erasing all the damage. It was rebuilt in 1991, and at that time the trees were green. Over time, they have bleached out to an autumn shade. Hmmmmm! How's that for having seasons in your diorama!
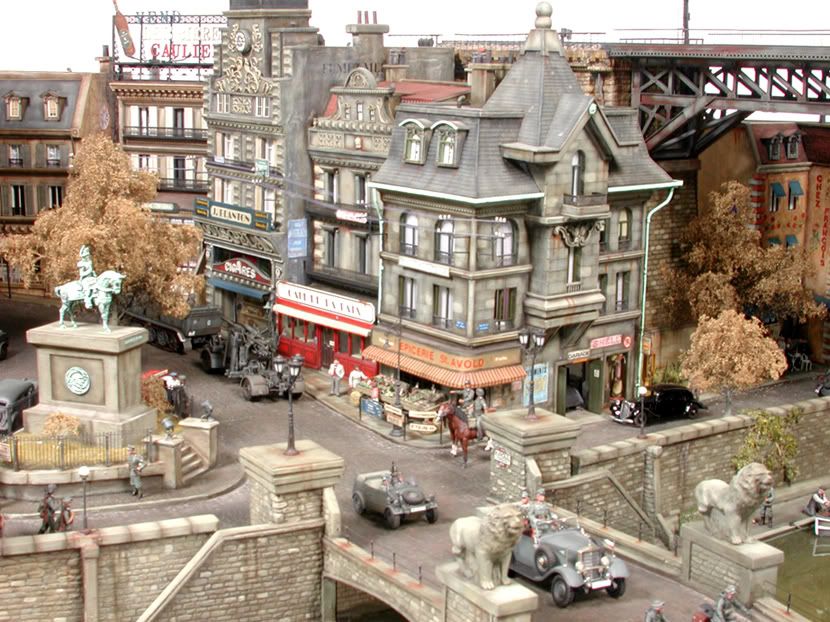
Photograph courtesy of Fine Scale Modeler.
Please let me know if this is something you would like to see more of, or maybe it is just too old!
Bob
Bob
The bridge is in 1/35th scale, but in real size, it stands almost two feet high, (610 mm). I built this in a similar process as I build most of my structures. I begin with a corrugated cardboard shape constructed with white glue. I buy my own 4 X 8 sheets today, but, back then, I used boxes found at the rear of most supermarkets. BTW, with all materials involved, I probably spent less than $20 on this. That might make a down payment on a layaway plan for a 1/35th tank now! It is a very cheap way to build buildings even today.
Here is the shape I created. I always make the base first, then lay out the streets/sidewalks and alleys. That gives me the dimensions for the buildings.

------------------------------------
Then I add the other shapes I want using wood, balsa or bass, and white glue. I also give it a veneer of matt board, available in art stores. This gives the structure a strength that is remarkable. I have built these things as early as 1971 and they still look today as they did back then. They are far more sturdy than any plastic model.

This photo shows how the “stones” are made. I take Hydrastone plaster and mix it with water to the texture of thick paint. Other guys have tried this and took a shortcut and left out the matt board. Corrugated cardboard with collapse from the wet plaster. The matt board keeps the cardboard dry! Then i draw horizontal lines on the mattboard to keep the stones level, and begin “painting” the stones. Some I give three coats, others four and five coats. That creates a realistic texture. I have began to make the RR track base on top. With this and the river wall and the new stone pillar in the Legacies II diorama, there are over 9000 stones! Multiply times 3-5 coats each, I was really tired of making stones!

See another angle here. As you can see the arch stones have been added using Miliput epoxy putty shaped and then carved to simulate the texture of stones.

This is a birds eye view showing the upper deck progressing.

With most of the stones complete, here is a shot of what it would look like from a human’s perspective. The trestle that has been blown was made of the PVC products Plastruct architectural shapes, a very useful product that I have used as far back as I can remember. I have used it to build factories and aircraft hangars.

This is a birds eye view showing the upper deck progressing.

All stonework finished, here I have given it a base coat of paint. A flat medium gray.

Side view. The fancy trim on the top is from a lumber store used for trimming woodwork. Just a bit of nostalgia. Note the stacks of VP products I was selling out of my basement at the time, (1983). The beginnings of The VLS Corporation.

Now, I begin applying the weathering process. That begins with randomly painting the stones about five different shades of the base color. Then a raw umber “wash” using artists oils mixed with rectified turpentine to the consistency of milk. A complete coat of the mixture covers the model and then is cleaned off with a dry, clean cloth using a blotting method, leaving only the dirty color in the cracks and crevices. It also darkens and ages all five colors of paint to an extent. Then using a light gray, I painted the area that had been blown away, which replicated the fresh, unweathered stone, never exposed to the weather. A touch up using the dry brush of only one shade lighter than the stones very subtly adds visual texture. Then streaks are made from various colors of artists oils to simulate wear and tear over a century of use.

Another view.

Still working on the deck. In Legacies II, this deck was extended to 3.5 feet, (Around 1100 mm).

Now with the tracks, fencing and RR signals, weathered and rusted girders added, It is finally complete.

Finally finished, I prefer the this, the human's eye view. Compare the finished model to the beginning!


Unfortunately, the only pic of the bridge in the diorama was taken by an FSM photographer, Paul Boyer about 4 years ago. I have lots, but they haven't been scanned. It is somewhat visible, just follow the steel trestle till you see the stone. This is Legacies II, after it was rebuilt into an intact bridge, erasing all the damage. It was rebuilt in 1991, and at that time the trees were green. Over time, they have bleached out to an autumn shade. Hmmmmm! How's that for having seasons in your diorama!

Photograph courtesy of Fine Scale Modeler.
Please let me know if this is something you would like to see more of, or maybe it is just too old!
Bob
