
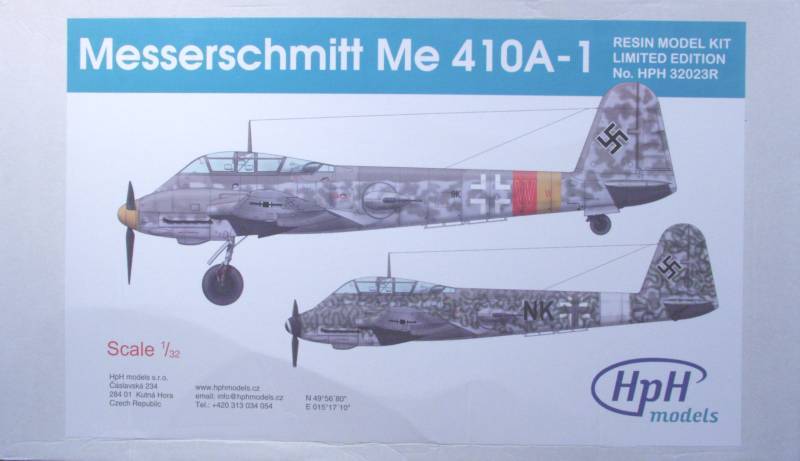
HPH 23023R Messerschmitt Me 410A-1 1:32
History:
The Messerschmitt Me 410 was essentially an improved Me 210. Most of the issues that lead to the cancellation of the Me 210 had already been worked out prior to it being canceled but due to the scandal that occurred in official circles as a result of the dismal failure of the original aircraft, it was deemed necessary to change the designation to 410. Only nine months elapsed between the cancellation of the 210 and the time that the first 410 rolled off the assembly line. By comparison with the original Me 210, the handling characteristics of the 410 were, if uninspiring, perfectly acceptable. It possessed no serious vices and it was spin proof. Most important its performance was an advance over that of the Bf 110 which it was to replace. Within a few weeks of the V1 aircraft completing initial handling trials the production line was turning out A-1's and A-2's. The A-1 was a Schnellbomber and the A-2 a Zerstorer. Both versions were similar, both having a fixed forward armament of two 20-mm MG 151 cannon and two 13-mm MG 131 machine guns. For defensive armament two 7.9-mm machine guns mounted in remotely controlled lateral barbettes. The internal weapons bay could accommodate a single 2,205-lb SC 1000 or SD 1000 bomb, two 1,102-lb, SC 500 bombs or up to eight 110-lb SC 50 bombs, although all loads over 1,102-lb, were considered overloads.
The B series took the place of the A series in April 1944. Structurally similar to the A series, differed in being powered by the DB 603G engines with higher power. The B-1 and B-2 were the Schnellbomber and Zerstorer respectively. A variety of armament kits were tried to improve it's potency as an anti-bomber weapon. While it initially was successful against bombers, once the P-51 showed up in numbers, attrition eventually became too great and by the end of 1944 the Me 410 was phased out with a total of 1,160 built. Remaining aircraft were converted to single seat fighters and operated in the reconnaissance role.
The Kit:
The box is fairly large as one might expect but only a little over 1" deep. Both the top and bottom are of corrugated cardboard. When opening the box here is what you see.
------------------------------------
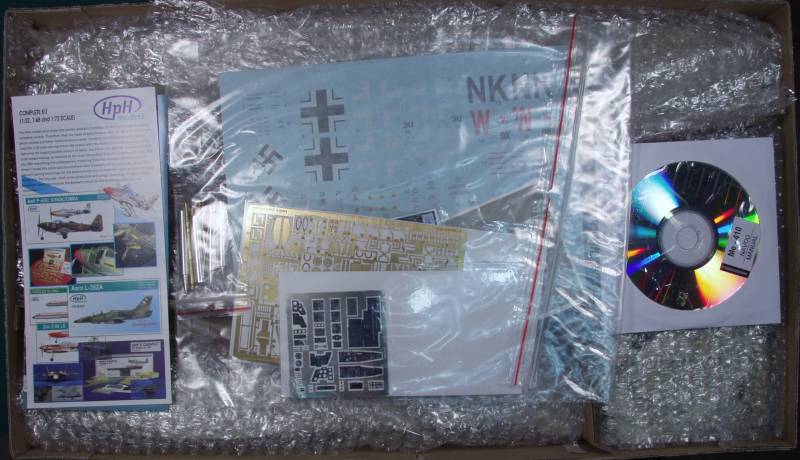
Inside the box is partitioned and on top of everything else one finds two color brochures featuring other HPH kits, a zip lock bag of metal parts, another zip lock bag containing the decals, three PE frets and a sheet with vinyl masks for the clear parts. The CD has the instructions in pdf format. When those items are removed besides the kit parts one finds...
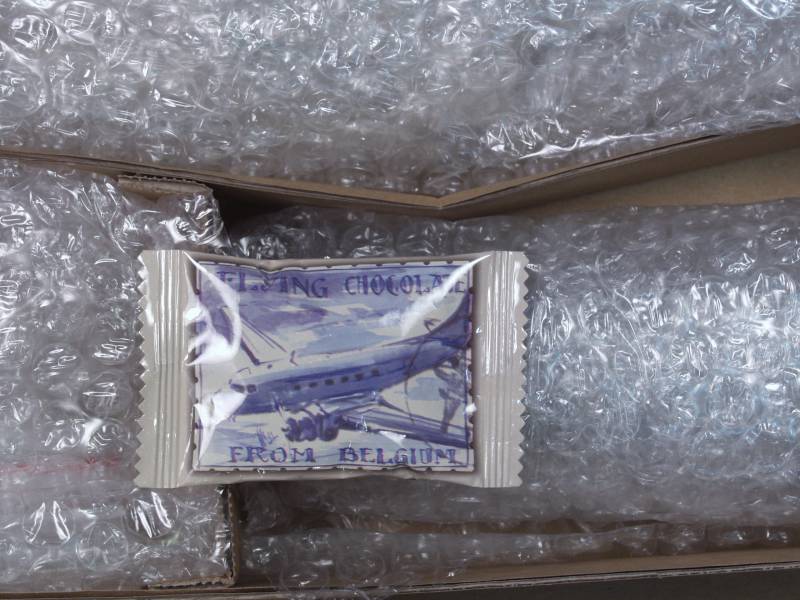
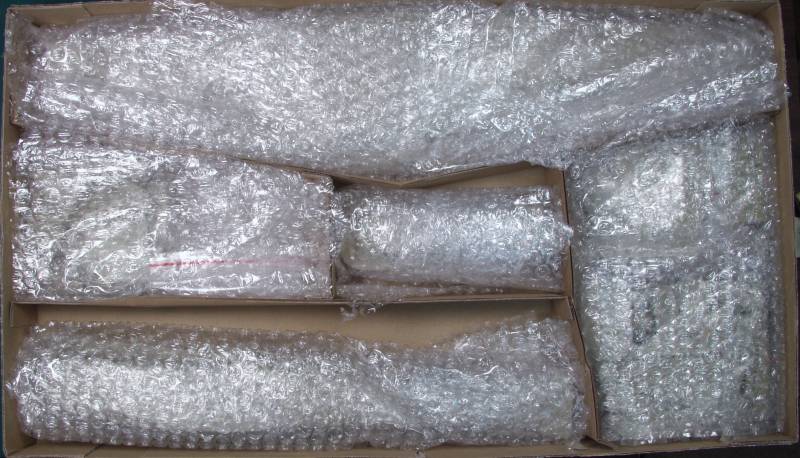
A Belgium chocolate, this is included in all the HPH kits as I understand, it was quite tasty ! As can be seen below everything is well packed and wrapped in bubble wrap.
So going section by section lets see what hides beneath the bubble wrap. The first one I opened contained the fuselage halves. As you can see this it a large plane in 1/32.
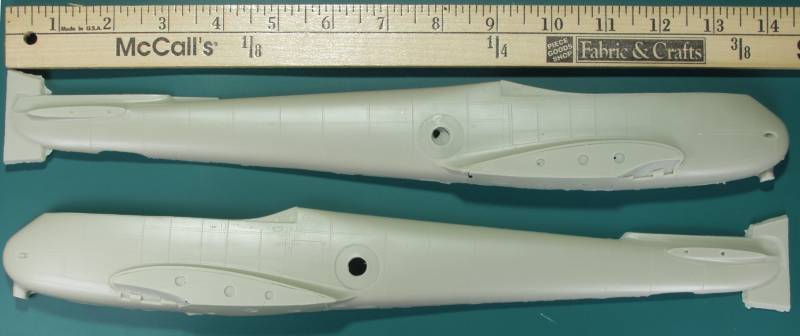
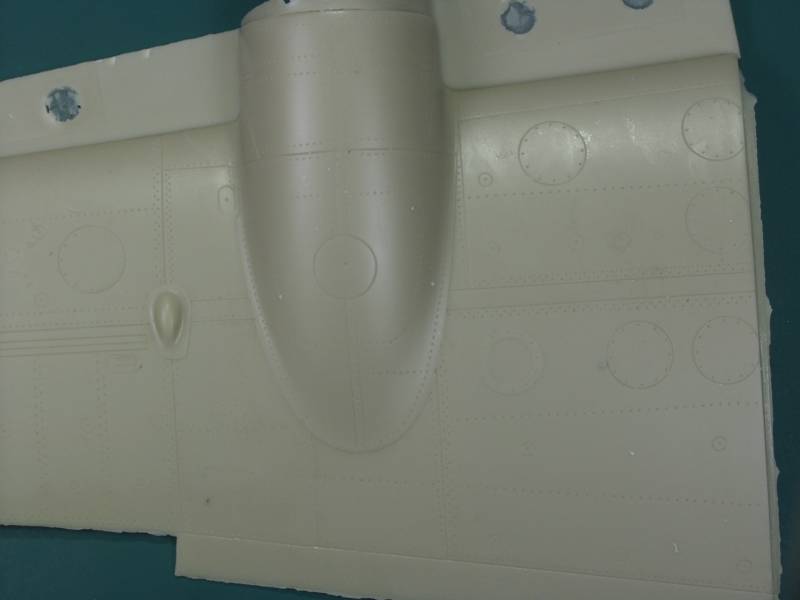
The fuselage halves set flat on the table indicating no warpage. There are some fairly heavy molding stubs to be removed, the worst of which is under the nose. The area at the tail end is fairly thin next to the fuselage and shouldn't be that hard to remove. There are some places flashed over but the resin is paper thin in these areas and will remove easily. A close up shows the lovely surface detail consisting of fine recessed uniform panel lines and recessed rivet detail. The rivet detail looks good for the scale and not over done as on many Trumpeter kits .
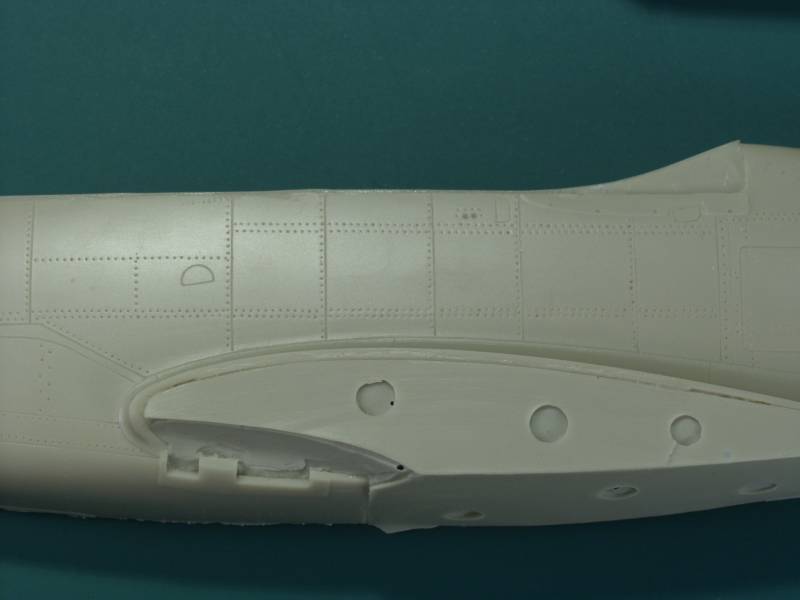
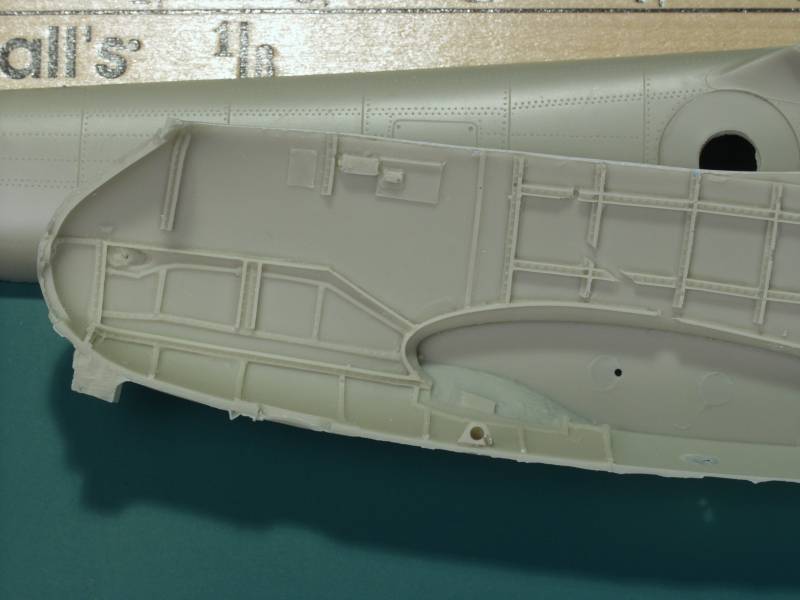
The next two photos show some of the interior detail and the thinness of the fuselage walls, thinner than some injection molded kits. I didn't photograph it but there is also structure molded in the tail wheel bay as well. The cut outs in the structure are for other pieces added during assembly.

The bomb bay is molded closed but can be cut out and separate parts are supplied for the open doors.
The next section contained the wing parts. Again these parts exhibited no warping that I could detect. The pour stub along the leading edge should be easy to remove by scoring along the leading edge of the wing and snapping it off. Use caution and make certain your scribe line is deep and uniform as I have heard that the resin HPH uses is a bit more brittle than some others.
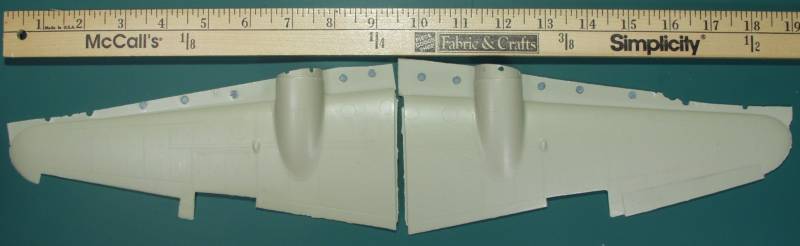
As with the fuselage the wing surface detail was quite nice and I found it hard to get the lighting to show it off. Although the outer edges look rough, this is outside the actual wing area and should smooth up with a light pass with a sanding stick.
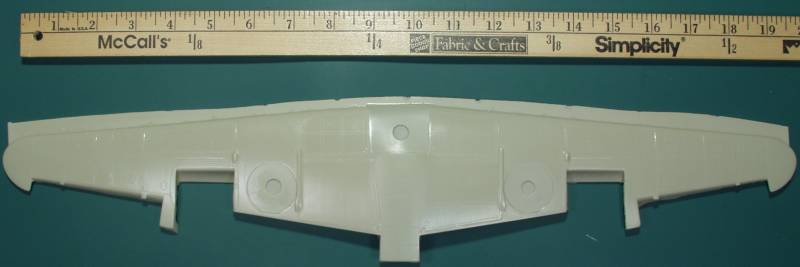
The bottom wing section is molded as one piece and is an impressively sized casting. The ailerons, flaps and cooling flaps for the radiator are all molded separately. The piece had the dihedral molded in but sighting down each leading edge the outer wing sections showed no signs of warping.
The surface detail is equally nice on this part. Some areas were shinier than others add I can only guess that these sections of the master were more highly polished that the others.

From here on we get to the pieces parts, each of the remaining sections in the box contained one or more bubble wrapped zip lock bags full of parts. In some cases I did not photograph all the parts in case of duplicates. I also have not identified all of them as it would have required my looking through the instructions to identify some of them them. In some cases there were too many in a bag to get in one photo so I did them in groups so I could get closer shots.
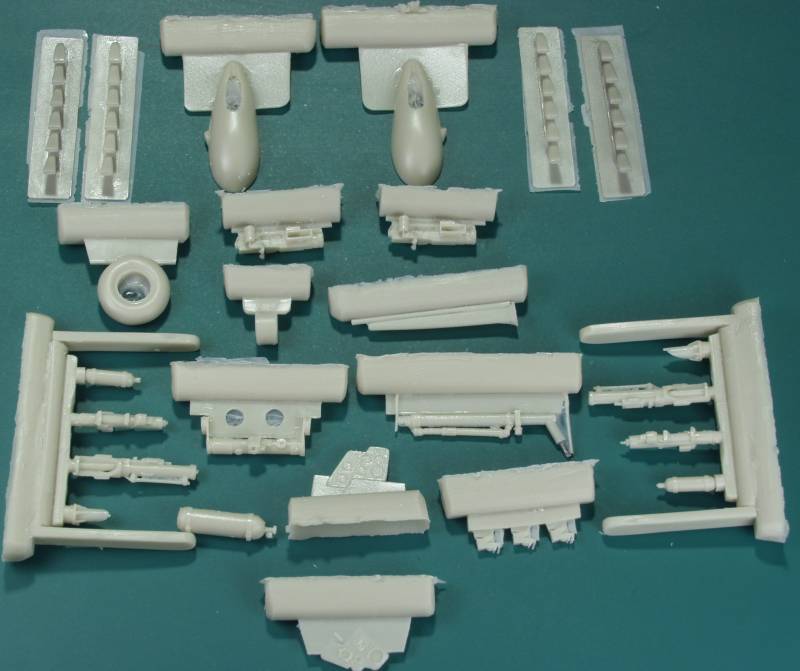
Lower wing engine cowlings.
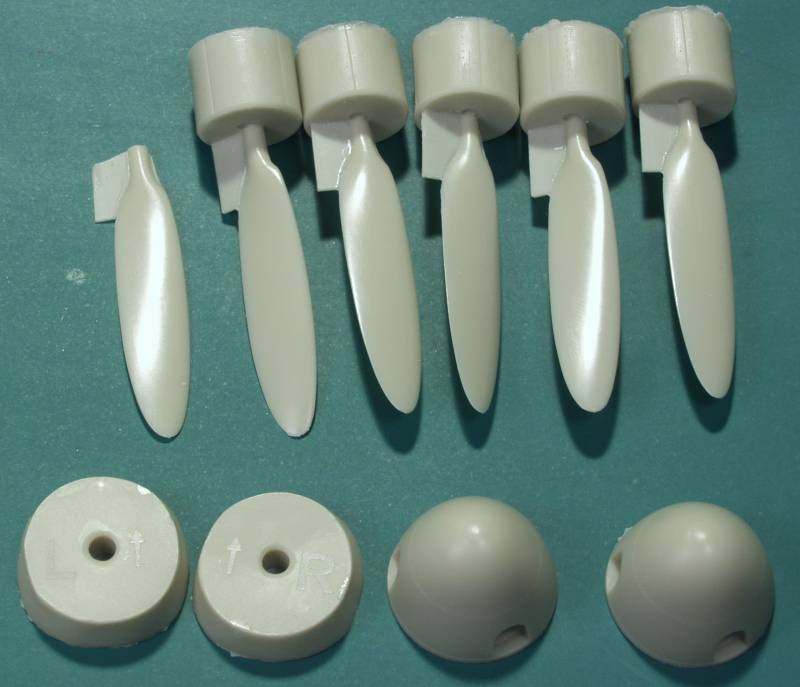
Props, spinners and engine cowl fronts, one prop was off the mold block but apparently it occurred at the point of origin as there was no extra block in the box, it won't be an issue as there is enough shaft to mount to the hub.
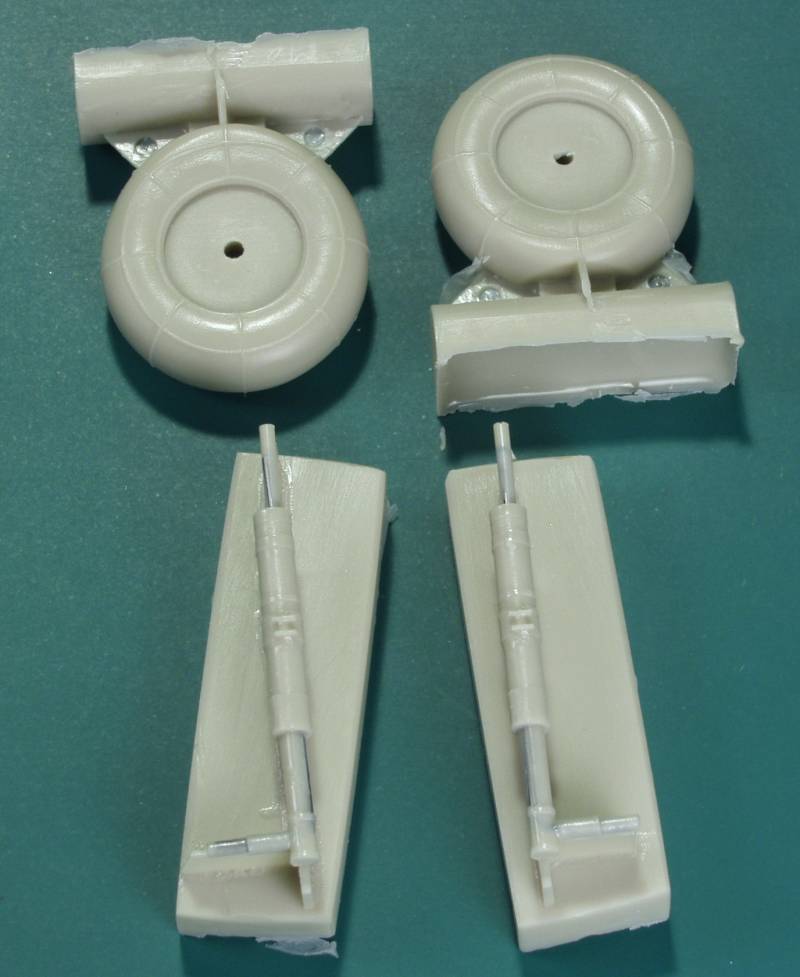
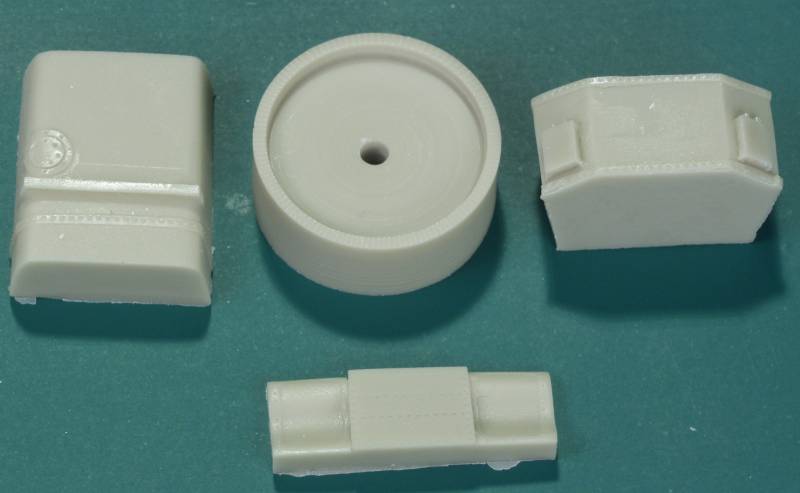
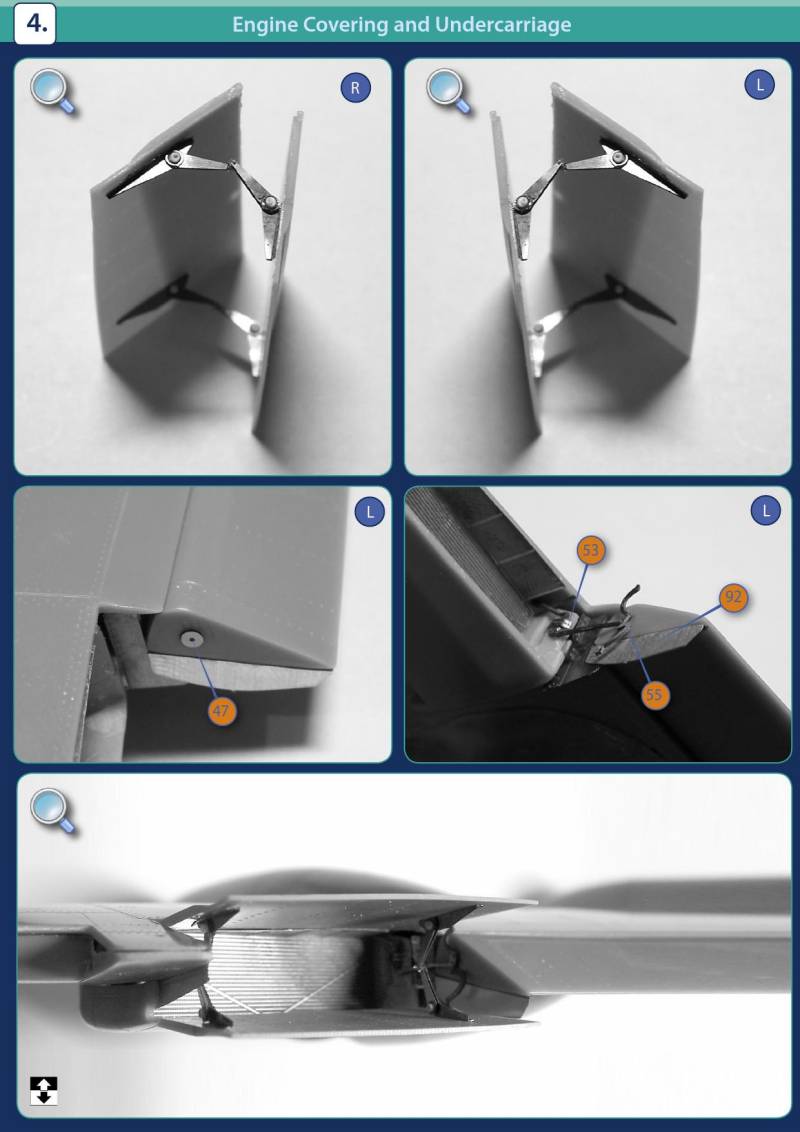
Landing gear struts and wheels, as you can see the tires are weighted and the hubs are separate. The struts have a steel pin inside for strength.
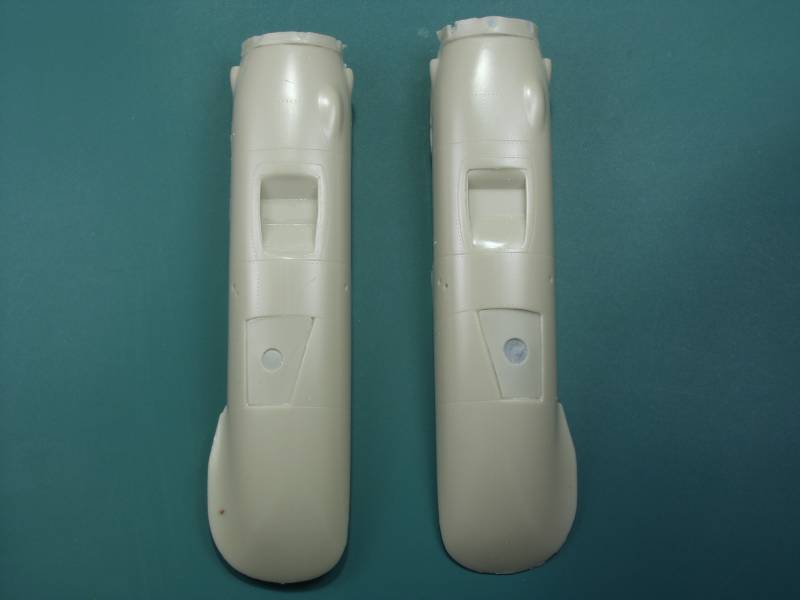
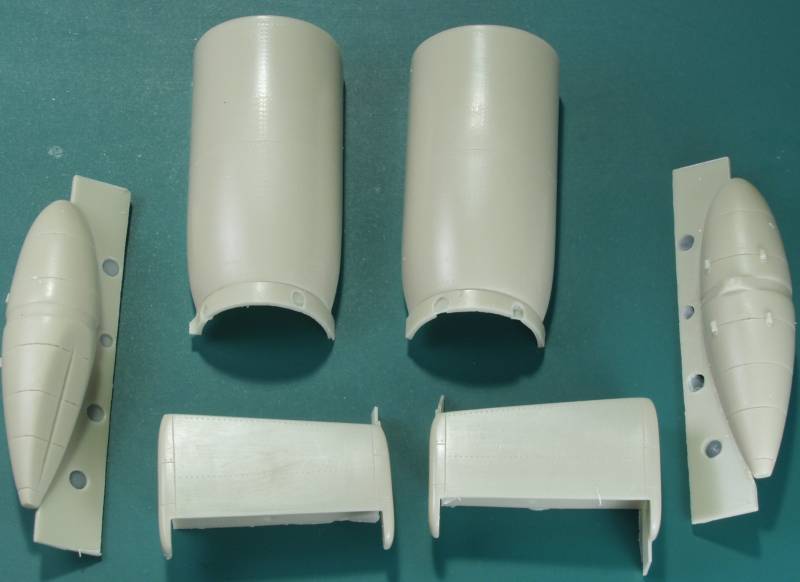
Engine cowlings, under wing tanks and under wing radiator housings.
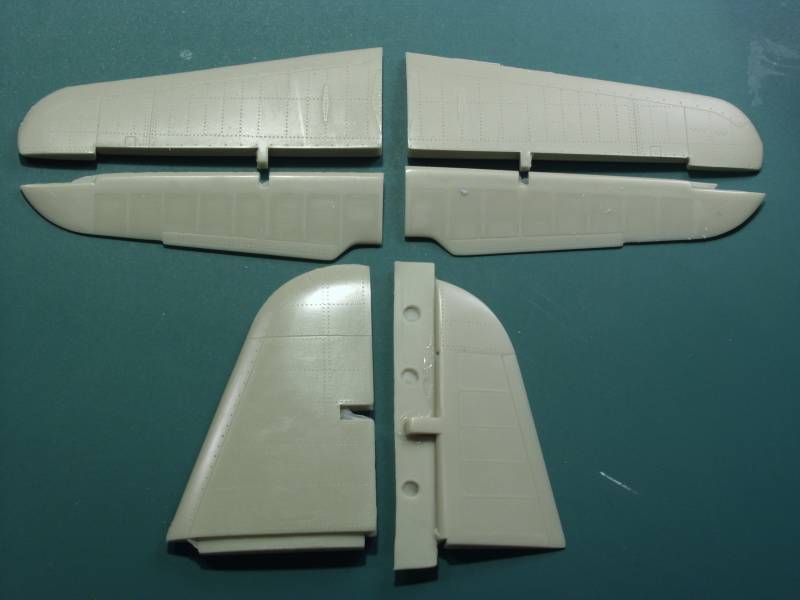
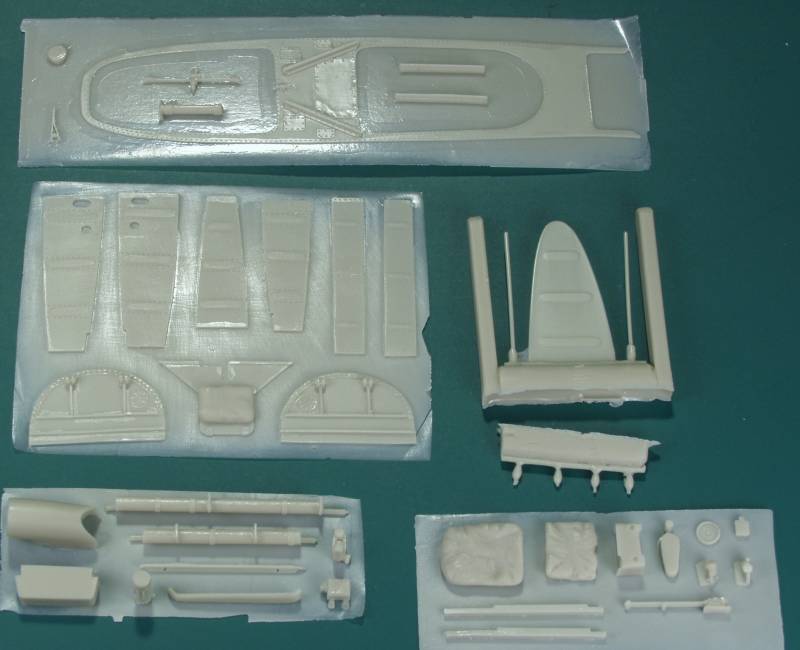
Horizontal stabs and elevators, vertical tail and rudder.
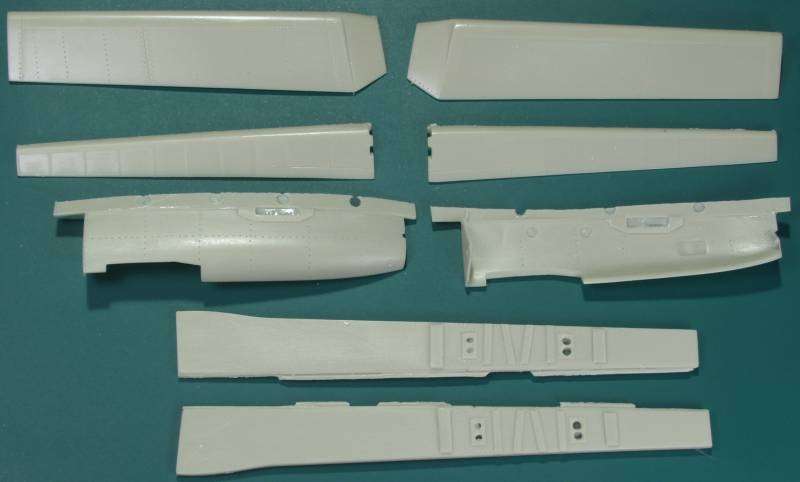
Flaps, ailerons, bomb bay doors and some interior panels.
The next group consists of an internal fuselage tank, a jig for drilling the prop shaft in the rear of the spinner and what I think is an ammo canister that mounts in the bomb bay. the bottom part I didn't identify.
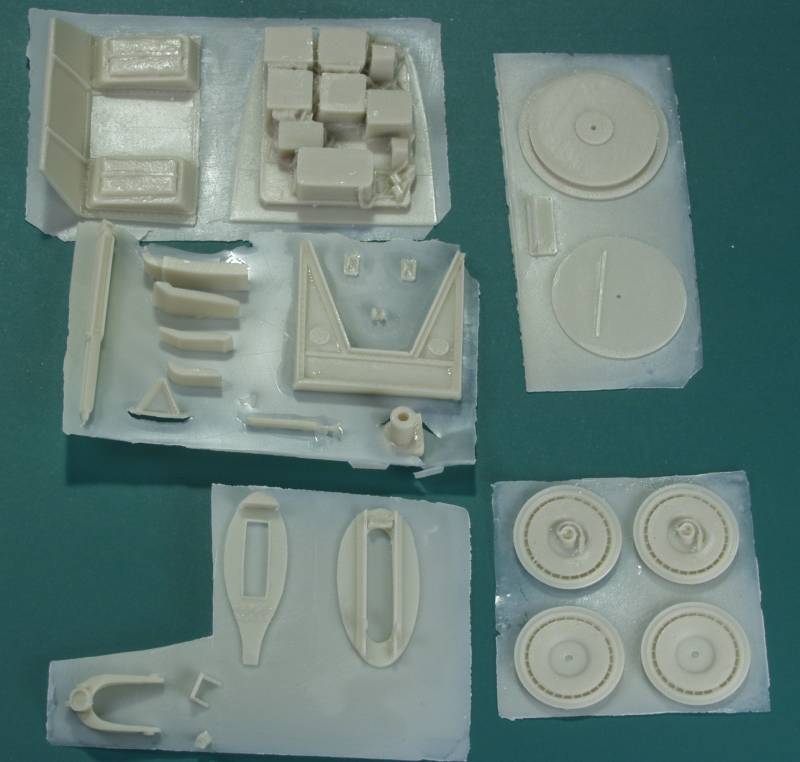
Many of the smaller parts are attached to a thin film of resin which is easy to remove but holds the parts secure until needed. Next up is the upper cockpit decking, parts to close in the wheel wells, pilots seat cushions and a number of other interior parts to numerous to mention.
Parts here include rear part of cockpit tub, radio rack, bomb bay structural parts, shell ejector chutes, remote gun turret parts, wheel hubs and tail wheel fork.
A lot of odds and ends here, some bomb bay parts, structural parts, some of the struts are for the under wing tanks and some for the under wing mortar tubes.
Pilot and gunners seats, a lot of cockpit related parts including a life raft and joystick.
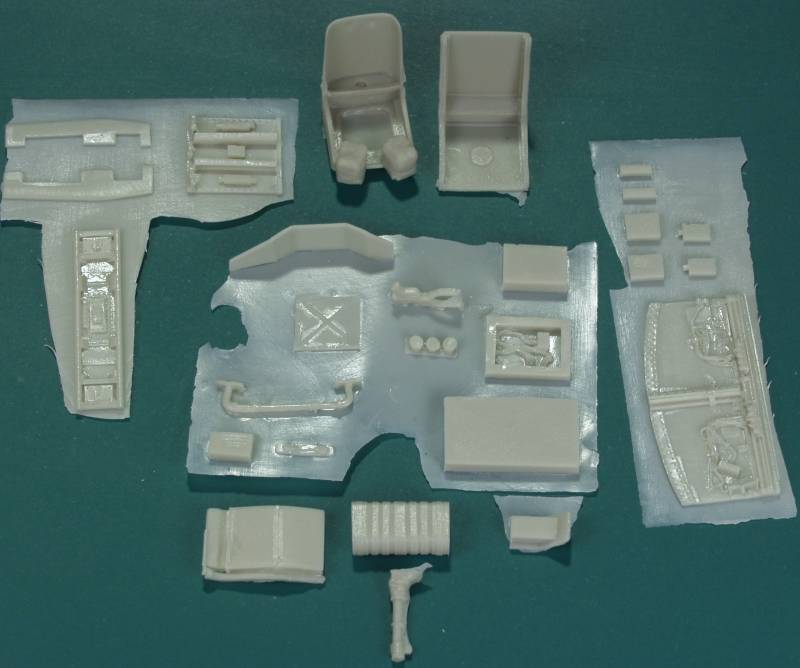
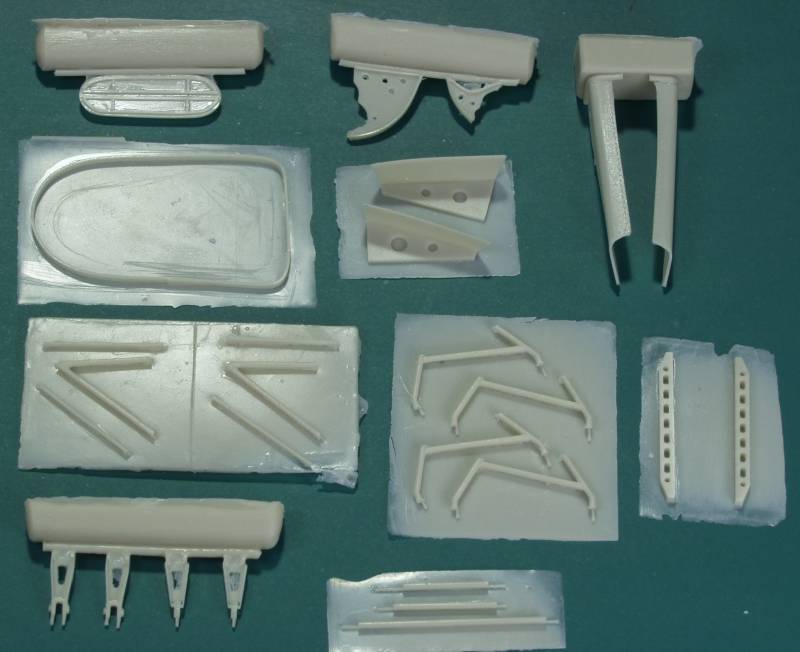
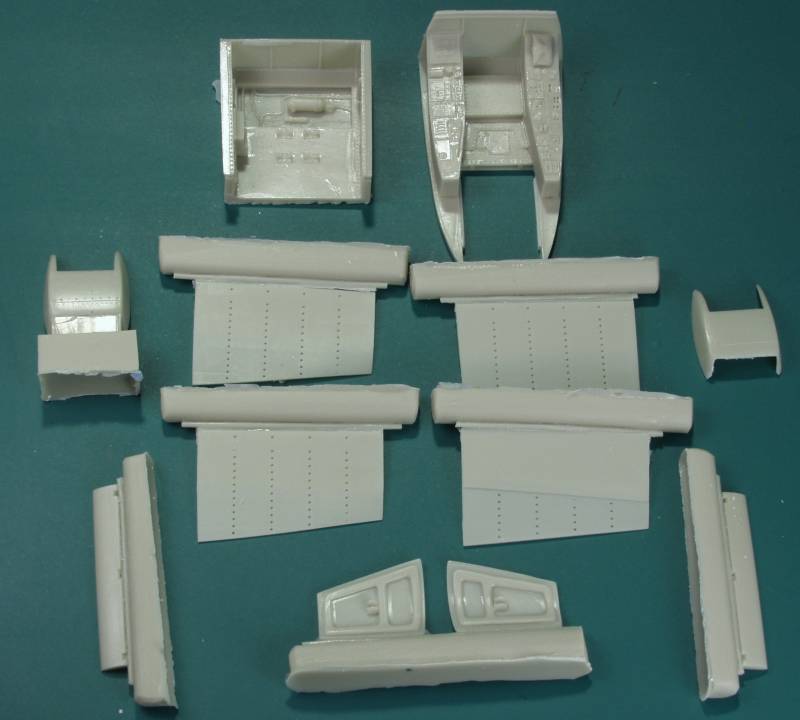
More cockpit tub parts, under engine radiators housings, flaps for the engine radiator and landing gear doors.
More of the gun barbette parts, exhaust stacks, tail wheel, tail wheel strut, gun breaches, sub instrument panels, gun charging bottle and other parts.
Whew, that's a lotta parts, but wait, were not through yet ! Next up is the clear parts. These are cast resin, thin and very clear with options for open panels, also included are wing tip navigation lenses and an armored piece for behind the wind screen.
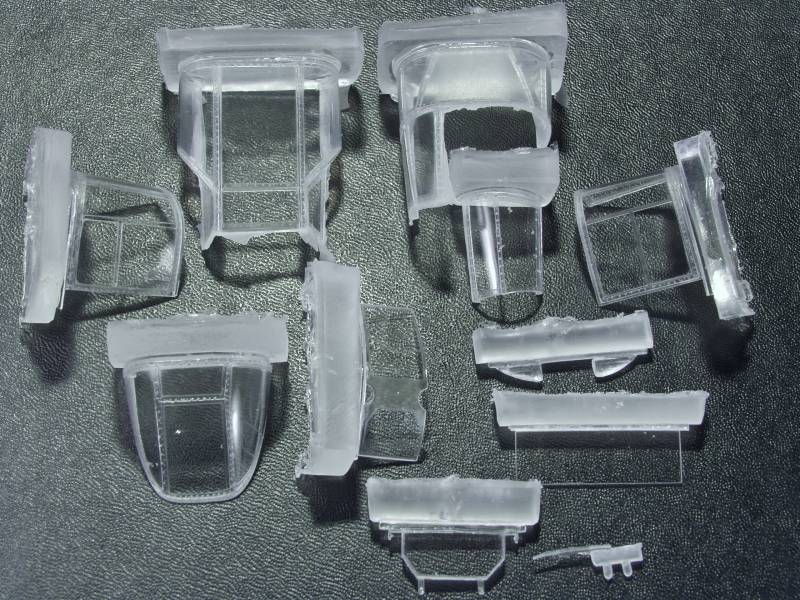
While I didn't go over each part looking for defects I really didn't see any pin holes, air bubbles or short shots in any of the major parts.
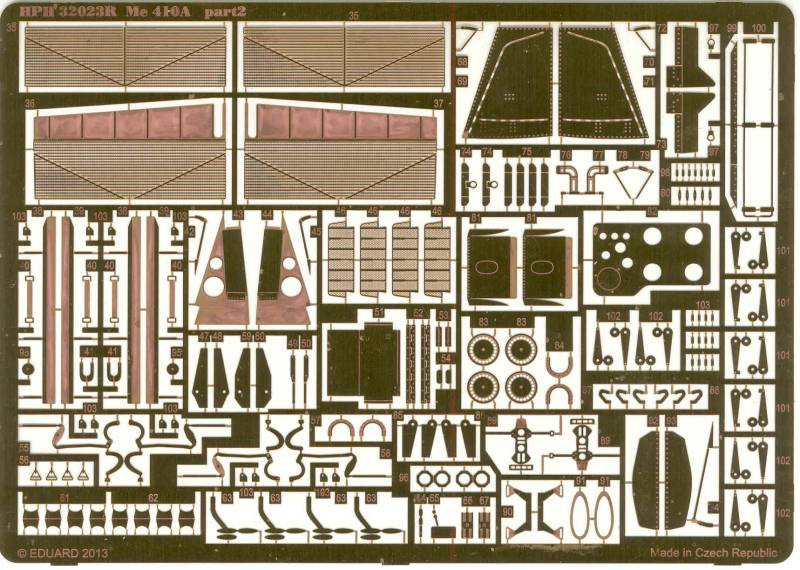
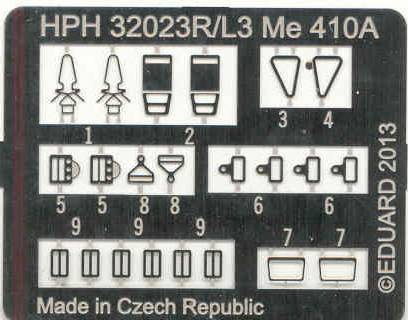
If that weren't enough the kit also includes two PE frets one colored from Eduard and one not. The Eduard set covers the cockpit with their typical consoles, panels and radios and a few levers.

The second fret provides a whole host of things including intake and outlet screens for the radiators and coolers, rudder pedals, some structural parts and all sorts of actuators and levers, grab handles and the back ends for the aerial mortars.
Also included is a set of HPH's microfiber laser cut seat belts. I didn't take them out of the wrapper so it's not the best view of them, they do look really nice in person but I suspect will be a real test of patience to assemble.

And a small fret of buckles to go with the belts.
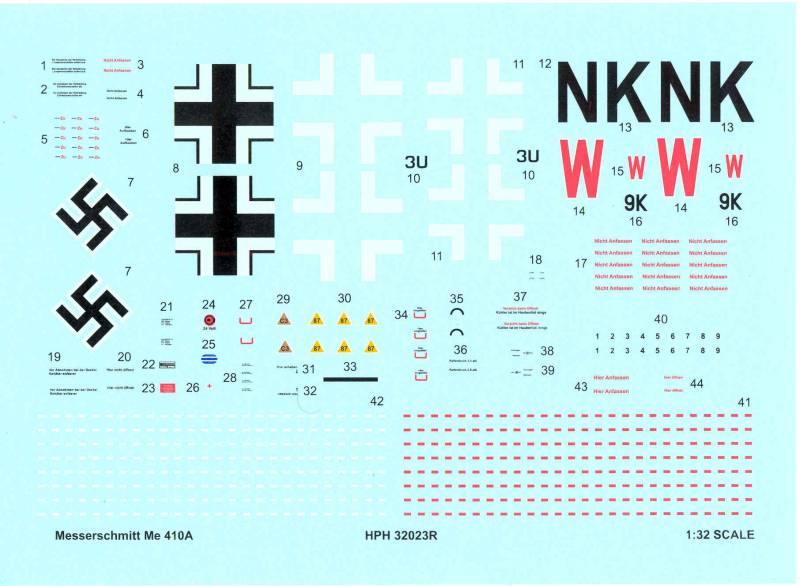
The decals provide marking for two aircraft, both 74/75 over 76, one with mottles and the other with mottles and 02 squiggles . There is no printers name on the sheet but they look to be from one of the top houses. Everything is in register including the very small white border around the W, the borders on the fuel markings as well as the white border on the Swastika which is provide whole and not segmented as is norm for European made kits. There is a goodly amount of stenciling provided and even the smallest ones are readable. Wing walk areas are provided in both white and red. The amount of excess clear film is minimal, they appear opaque and the decals have semi gloss finish.
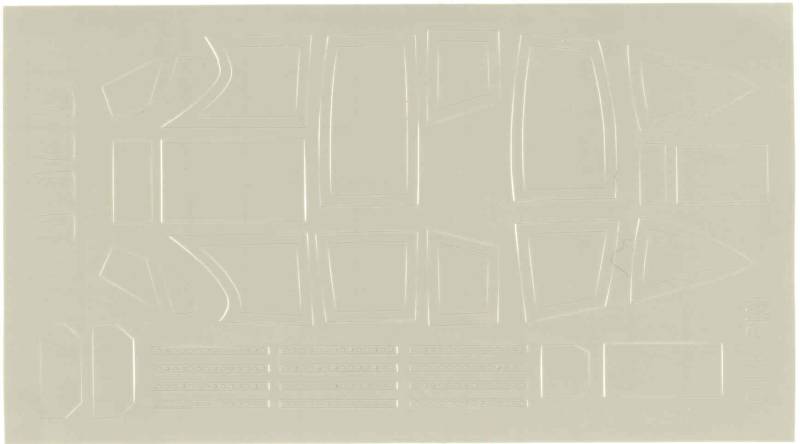
And lastly the kit comes with a set of vinyl masks for the clear parts. A little hard to see but I think you get the idea.
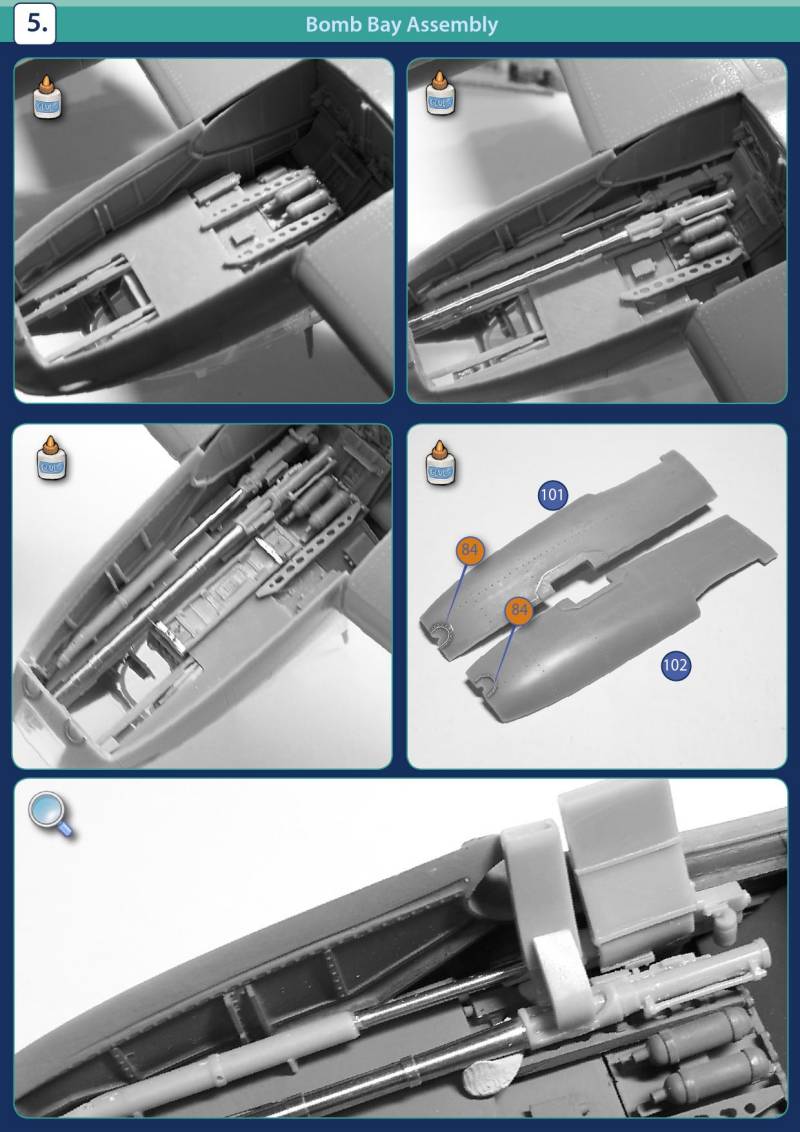
The instructions as I mentioned earlier are supplied on a CD in pdf format. The manual is 52 pages long including the cover page. So if you desire a printed copy it's just a matter of printing them out. The instructions include a parts map which is a photo of all the parts with them numbered. There are very few drawings provided with nearly all of the assembly steps illustrated with photos of the actual kit parts. The only drawings are for assembly of the seat belts and harness, one illustrating how the mortars and external tanks mount and one showing the proper angle for the gear wheels. Throughout the manual there are extensive notes concerning where to sand or thin things for better fit and dimensions shown for critical fit items. A color list is provided listing generic names and RLM numbers where applicable and matching Gunze numbers. There are a few translation issues that result in some strange sounding terms but nothing that can't be figured out. While I don't think I would like to build while looking at it on a computer it would have been difficult and expensive to do it in this style in a fully printed format. Here are a couple of pages from the manual to give you an idea what it looks like and some of the level of detail.
My two cents worth:
OK, this kit is not for wimps ! It's a large very complex model that will require doing a lot of clean up of the many parts, some of them quite delicate. It is also quite pricey when compared with many injection molded kits in 1/32 scale of similar size, however, if you look at it from a value stand point it really isn't that bad. Look at what an after market cockpit set costs in 1/32. How many folks bought the HK B-25 or the Hobby Boss P-61 and then spent more on after market parts than the kit cost, making it a lot more expensive than this kit which is pretty complete right out of the box and until someone does an injection molded kit of it, it's the only game in town. You will also get your moneys worth in entertainment time as this kit will be quite the project, not something you can bang through in a short period of time. Not recommend to anyone that hasn't already built a few all resin kits and someone who feels that they are up to the challenge of a major project. The kit provides the necessary materials to build a stunning model of the Me 410.
Thanks for looking in !
History:
The Messerschmitt Me 410 was essentially an improved Me 210. Most of the issues that lead to the cancellation of the Me 210 had already been worked out prior to it being canceled but due to the scandal that occurred in official circles as a result of the dismal failure of the original aircraft, it was deemed necessary to change the designation to 410. Only nine months elapsed between the cancellation of the 210 and the time that the first 410 rolled off the assembly line. By comparison with the original Me 210, the handling characteristics of the 410 were, if uninspiring, perfectly acceptable. It possessed no serious vices and it was spin proof. Most important its performance was an advance over that of the Bf 110 which it was to replace. Within a few weeks of the V1 aircraft completing initial handling trials the production line was turning out A-1's and A-2's. The A-1 was a Schnellbomber and the A-2 a Zerstorer. Both versions were similar, both having a fixed forward armament of two 20-mm MG 151 cannon and two 13-mm MG 131 machine guns. For defensive armament two 7.9-mm machine guns mounted in remotely controlled lateral barbettes. The internal weapons bay could accommodate a single 2,205-lb SC 1000 or SD 1000 bomb, two 1,102-lb, SC 500 bombs or up to eight 110-lb SC 50 bombs, although all loads over 1,102-lb, were considered overloads.
The B series took the place of the A series in April 1944. Structurally similar to the A series, differed in being powered by the DB 603G engines with higher power. The B-1 and B-2 were the Schnellbomber and Zerstorer respectively. A variety of armament kits were tried to improve it's potency as an anti-bomber weapon. While it initially was successful against bombers, once the P-51 showed up in numbers, attrition eventually became too great and by the end of 1944 the Me 410 was phased out with a total of 1,160 built. Remaining aircraft were converted to single seat fighters and operated in the reconnaissance role.
The Kit:
The box is fairly large as one might expect but only a little over 1" deep. Both the top and bottom are of corrugated cardboard. When opening the box here is what you see.
------------------------------------
Inside the box is partitioned and on top of everything else one finds two color brochures featuring other HPH kits, a zip lock bag of metal parts, another zip lock bag containing the decals, three PE frets and a sheet with vinyl masks for the clear parts. The CD has the instructions in pdf format. When those items are removed besides the kit parts one finds...
A Belgium chocolate, this is included in all the HPH kits as I understand, it was quite tasty ! As can be seen below everything is well packed and wrapped in bubble wrap.
So going section by section lets see what hides beneath the bubble wrap. The first one I opened contained the fuselage halves. As you can see this it a large plane in 1/32.
The fuselage halves set flat on the table indicating no warpage. There are some fairly heavy molding stubs to be removed, the worst of which is under the nose. The area at the tail end is fairly thin next to the fuselage and shouldn't be that hard to remove. There are some places flashed over but the resin is paper thin in these areas and will remove easily. A close up shows the lovely surface detail consisting of fine recessed uniform panel lines and recessed rivet detail. The rivet detail looks good for the scale and not over done as on many Trumpeter kits .
The next two photos show some of the interior detail and the thinness of the fuselage walls, thinner than some injection molded kits. I didn't photograph it but there is also structure molded in the tail wheel bay as well. The cut outs in the structure are for other pieces added during assembly.
The bomb bay is molded closed but can be cut out and separate parts are supplied for the open doors.
The next section contained the wing parts. Again these parts exhibited no warping that I could detect. The pour stub along the leading edge should be easy to remove by scoring along the leading edge of the wing and snapping it off. Use caution and make certain your scribe line is deep and uniform as I have heard that the resin HPH uses is a bit more brittle than some others.
As with the fuselage the wing surface detail was quite nice and I found it hard to get the lighting to show it off. Although the outer edges look rough, this is outside the actual wing area and should smooth up with a light pass with a sanding stick.
The bottom wing section is molded as one piece and is an impressively sized casting. The ailerons, flaps and cooling flaps for the radiator are all molded separately. The piece had the dihedral molded in but sighting down each leading edge the outer wing sections showed no signs of warping.
The surface detail is equally nice on this part. Some areas were shinier than others add I can only guess that these sections of the master were more highly polished that the others.
From here on we get to the pieces parts, each of the remaining sections in the box contained one or more bubble wrapped zip lock bags full of parts. In some cases I did not photograph all the parts in case of duplicates. I also have not identified all of them as it would have required my looking through the instructions to identify some of them them. In some cases there were too many in a bag to get in one photo so I did them in groups so I could get closer shots.
Lower wing engine cowlings.
Props, spinners and engine cowl fronts, one prop was off the mold block but apparently it occurred at the point of origin as there was no extra block in the box, it won't be an issue as there is enough shaft to mount to the hub.
Landing gear struts and wheels, as you can see the tires are weighted and the hubs are separate. The struts have a steel pin inside for strength.
Engine cowlings, under wing tanks and under wing radiator housings.
Horizontal stabs and elevators, vertical tail and rudder.
Flaps, ailerons, bomb bay doors and some interior panels.
The next group consists of an internal fuselage tank, a jig for drilling the prop shaft in the rear of the spinner and what I think is an ammo canister that mounts in the bomb bay. the bottom part I didn't identify.
Many of the smaller parts are attached to a thin film of resin which is easy to remove but holds the parts secure until needed. Next up is the upper cockpit decking, parts to close in the wheel wells, pilots seat cushions and a number of other interior parts to numerous to mention.
Parts here include rear part of cockpit tub, radio rack, bomb bay structural parts, shell ejector chutes, remote gun turret parts, wheel hubs and tail wheel fork.
A lot of odds and ends here, some bomb bay parts, structural parts, some of the struts are for the under wing tanks and some for the under wing mortar tubes.
Pilot and gunners seats, a lot of cockpit related parts including a life raft and joystick.
More cockpit tub parts, under engine radiators housings, flaps for the engine radiator and landing gear doors.
More of the gun barbette parts, exhaust stacks, tail wheel, tail wheel strut, gun breaches, sub instrument panels, gun charging bottle and other parts.
Whew, that's a lotta parts, but wait, were not through yet ! Next up is the clear parts. These are cast resin, thin and very clear with options for open panels, also included are wing tip navigation lenses and an armored piece for behind the wind screen.
While I didn't go over each part looking for defects I really didn't see any pin holes, air bubbles or short shots in any of the major parts.
If that weren't enough the kit also includes two PE frets one colored from Eduard and one not. The Eduard set covers the cockpit with their typical consoles, panels and radios and a few levers.
The second fret provides a whole host of things including intake and outlet screens for the radiators and coolers, rudder pedals, some structural parts and all sorts of actuators and levers, grab handles and the back ends for the aerial mortars.
Also included is a set of HPH's microfiber laser cut seat belts. I didn't take them out of the wrapper so it's not the best view of them, they do look really nice in person but I suspect will be a real test of patience to assemble.
And a small fret of buckles to go with the belts.
The decals provide marking for two aircraft, both 74/75 over 76, one with mottles and the other with mottles and 02 squiggles . There is no printers name on the sheet but they look to be from one of the top houses. Everything is in register including the very small white border around the W, the borders on the fuel markings as well as the white border on the Swastika which is provide whole and not segmented as is norm for European made kits. There is a goodly amount of stenciling provided and even the smallest ones are readable. Wing walk areas are provided in both white and red. The amount of excess clear film is minimal, they appear opaque and the decals have semi gloss finish.
And lastly the kit comes with a set of vinyl masks for the clear parts. A little hard to see but I think you get the idea.
The instructions as I mentioned earlier are supplied on a CD in pdf format. The manual is 52 pages long including the cover page. So if you desire a printed copy it's just a matter of printing them out. The instructions include a parts map which is a photo of all the parts with them numbered. There are very few drawings provided with nearly all of the assembly steps illustrated with photos of the actual kit parts. The only drawings are for assembly of the seat belts and harness, one illustrating how the mortars and external tanks mount and one showing the proper angle for the gear wheels. Throughout the manual there are extensive notes concerning where to sand or thin things for better fit and dimensions shown for critical fit items. A color list is provided listing generic names and RLM numbers where applicable and matching Gunze numbers. There are a few translation issues that result in some strange sounding terms but nothing that can't be figured out. While I don't think I would like to build while looking at it on a computer it would have been difficult and expensive to do it in this style in a fully printed format. Here are a couple of pages from the manual to give you an idea what it looks like and some of the level of detail.
My two cents worth:
OK, this kit is not for wimps ! It's a large very complex model that will require doing a lot of clean up of the many parts, some of them quite delicate. It is also quite pricey when compared with many injection molded kits in 1/32 scale of similar size, however, if you look at it from a value stand point it really isn't that bad. Look at what an after market cockpit set costs in 1/32. How many folks bought the HK B-25 or the Hobby Boss P-61 and then spent more on after market parts than the kit cost, making it a lot more expensive than this kit which is pretty complete right out of the box and until someone does an injection molded kit of it, it's the only game in town. You will also get your moneys worth in entertainment time as this kit will be quite the project, not something you can bang through in a short period of time. Not recommend to anyone that hasn't already built a few all resin kits and someone who feels that they are up to the challenge of a major project. The kit provides the necessary materials to build a stunning model of the Me 410.
Thanks for looking in !