
Dornier Do 215B-4 from ICM 1:48 scale
OK, here is my 2¢ on this new kit...
------------------------------------
History
The Dornier Do 215 was essentially a 17Z powered by Daimler-Benz DB 601a liquid cooled engines. This came about as a result of Dornier soliciting orders from foreign countries, specifically Yugoslavia, which was already tooling up for the Do 17K version. The RLM insisted on assigning a new designation for export versions and hence the 17Z was re designated 215. Initially it was to be equipped with Gnome-Rhone 14 cylinder radial engines but these didn't offer a sufficient improvement in performance over the 17K that was just going into production in Yugoslavia. However, when the DB 601's were installed it showed a significant improvement in performance and as a result Sweden placed orders for 18 aircraft. Before these could be delivered, an embargo was placed on exporting bombers and the order went instead to the Luftwaffe for use as reconnaissance duties. Dornier was ordered to continue producing the 215 for the Luftwaffe. Several versions were built, The original order for Sweden were designated B-0 and B-1 variants when taken over by the Luftwaffe. These were modified on the assembly line for long range reconnaissance tasks. The B-2 designation was allocated to a pure bomber variant but none were built. The B-3 designation was applied to two examples supplied in early 1940 to the Soviet Union under the Russo-German agreement. The B-4 variant differed from the B-1 variant in its camera equipment. The main cameras were mounted in a fairing below the lower gunner's position and an additional camera was mounted on the inside of the crew hatch. The B-5 designation was given to airframes that were modified to the night fighter role. These were found to be much better at the task than the 17Z's that had been similarly modified due to the better performance provide by the DB-601 engines. In all 101 of the 215's were built.
The Kit
The ICM kit comes in a medium sized box with a lid hinged to one side. Better than an end open box but I still prefer a separate top. Inside the box one finds a large recloseable cellophane bag with all the sprues in it. The decals and instruction sheet are in the bottom of the box. Inside the large bag the clear parts are enclosed in a separate smaller resealable bag. Better than just thrown in with the rest but one of the clear parts in my kit had still broken loose from the sprue. The parts are molded in a medium gray plastic. The surface is matte and smooth with some light flash on some parts. Surface detail consists of recessed panel lines. The panel lines are wider than those on the Classic Airframes Do 17Z but finer than those on the Hobbycraft kit. In my opinion while they are large for the scale (aren't they all) but they should be just right once painted to provide a good conduit for weathering. I found no major surface defects on the airframe parts. There are some flow patterns in the plastic but they should not show under paint. There were a few places where I found a bit of rough surface that might require a touch of filler to smooth. The cockpit interior parts mount into recesses in the fuselage walls and due to the thinness of the walls the recessed areas leave only a very thin amount of plastic. Thin enough to be able to see light through the wall. I'm not sure this will be a problem but I could see these bulging or melting through if too much glue is applied to the interior part. Like many limited run kits the sprue attachment points are a bit large on some parts, especially the smaller ones. The kit parts do have alignment pins for those who get nervous without them. Ejector pin marks have been kept out of sight for the most part but there are a couple in the cockpit area and in the gear wells that some will want to deal with.
From a detail stand point the control surfaces are all separate with the exception of the flaps and feature subtle fabric representation, something that CA missed on their 17Z. The kit contains two complete engines each comprising 14 parts. These can be seen by leaving the upper cowlings off if desired. The cockpit is well anointed with detail that should satisfy most although some parts would probably be better rendered in resin or PE. The instrument panels feature raised bezels and the decal sheet included instrument decals but they are rather featureless and would probably look better with some Airscale replacements if you have the required patience. In my case something from Eduard would be preferred. The bomb bay is also well detailed with bulkheads and structure. Since this is a reconnaissance aircraft the forward part of the bomb bay is equipped with a fuel tank and bombs are supplied for the aft section. The bay doors are supplied both as open parts and a single piece closed part. The landing gear struts look nice and appear to mount securely. The gear bays are boxed in as part of the engine cowling assembly and feature some structural detail. The cowlings themselves are made up of 13 separate parts and look like they could be a bit fiddly to assemble. The wheels are in halves and are not weighted. The tail wheel is molded with the tail wheel fairing which will make painting difficult but it is nicely detailed. The propellers are molded as a single piece saving messing with getting the pitch angles right. ICM did pick up some detail that Classic Airframes missed on their 17Z kit, the tube for the trailing wire antenna and the towel rack antenna on the bottom of the fuselage. Like Classic Airframes they missed the fact that the starboard tail plane should be offset 3.5º. I have seen some profiles drawn both ways so I guess it's easily overlooked and not all that noticeable.
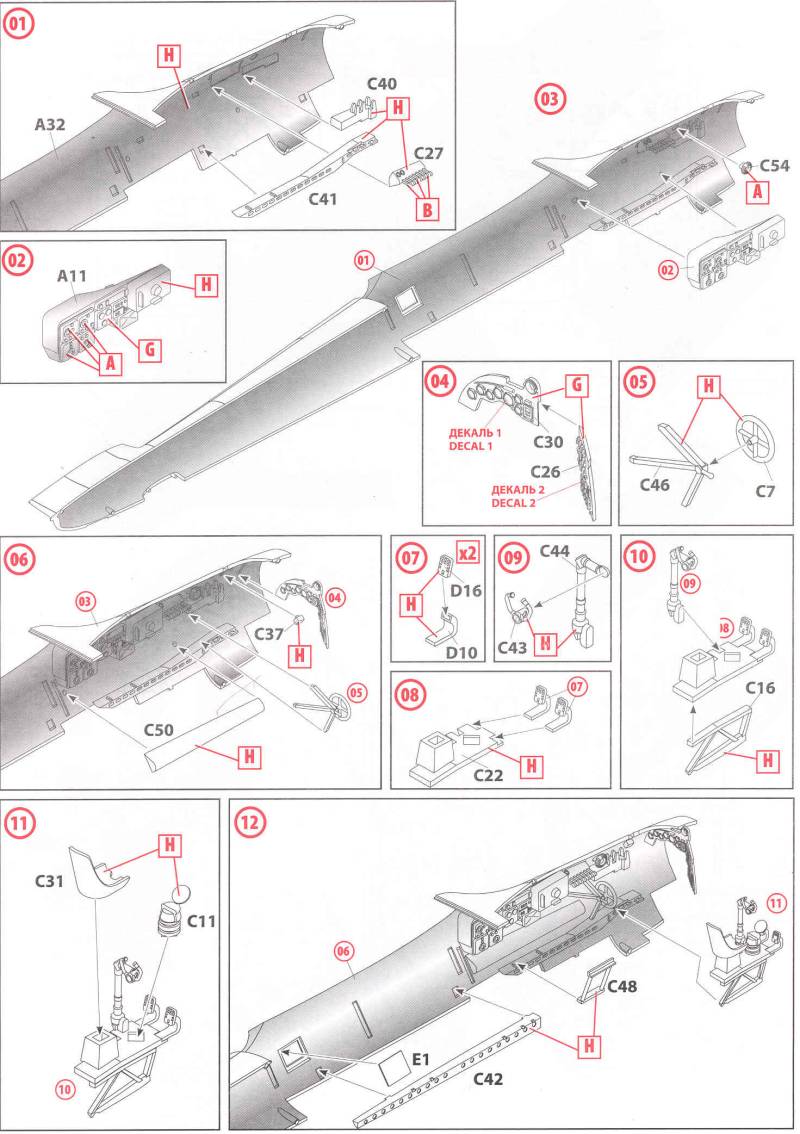
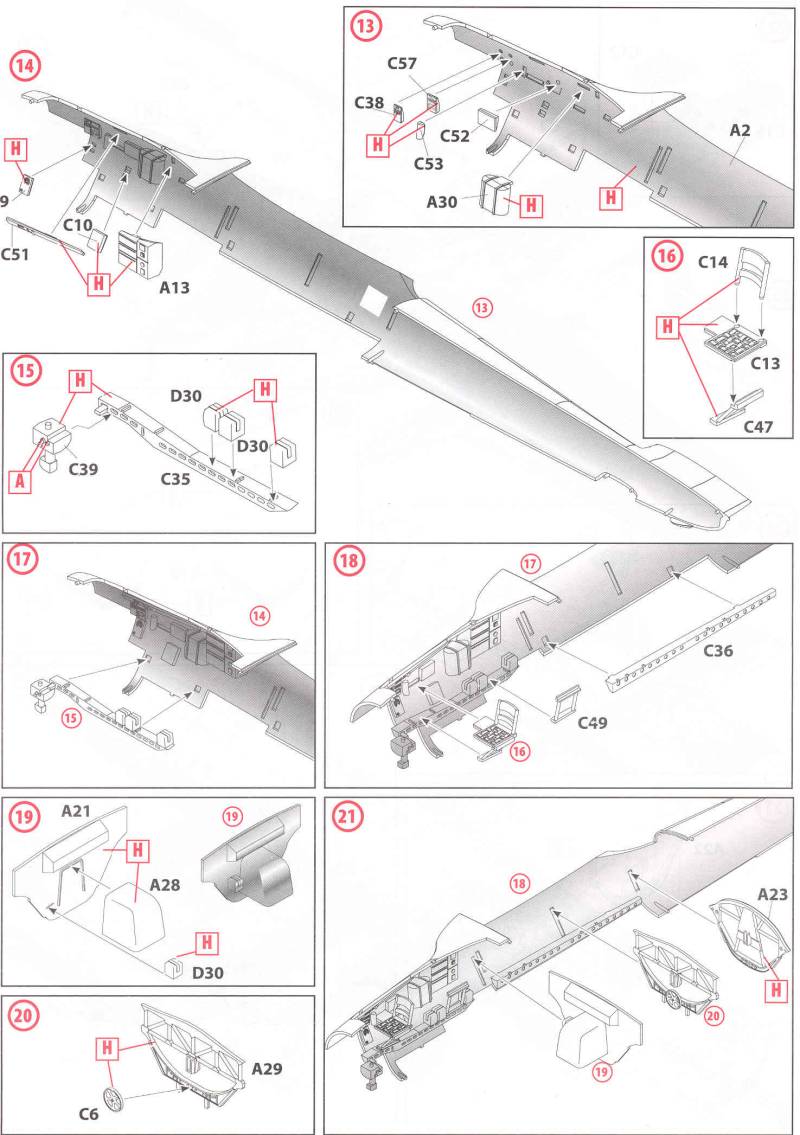
To provide an idea of the level of detail of the kit here are some excepts from the kit instructions. first the interior and bomb bay...
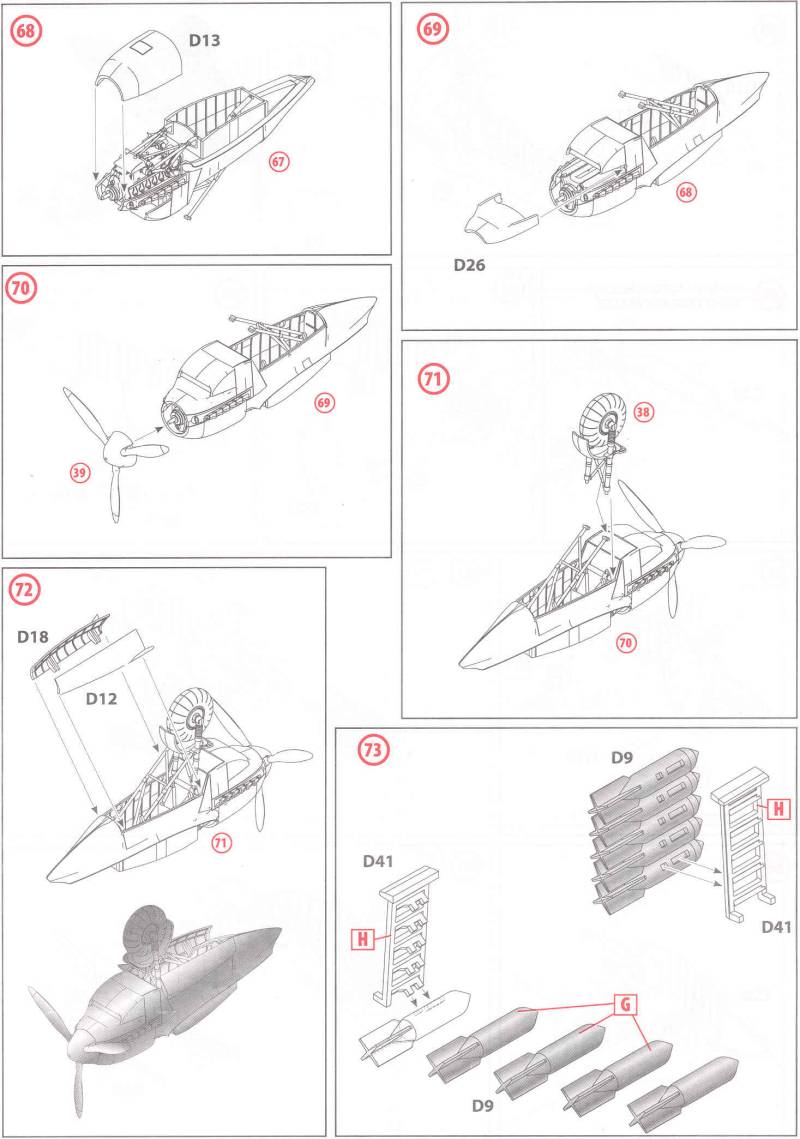
The engine and cowlings.

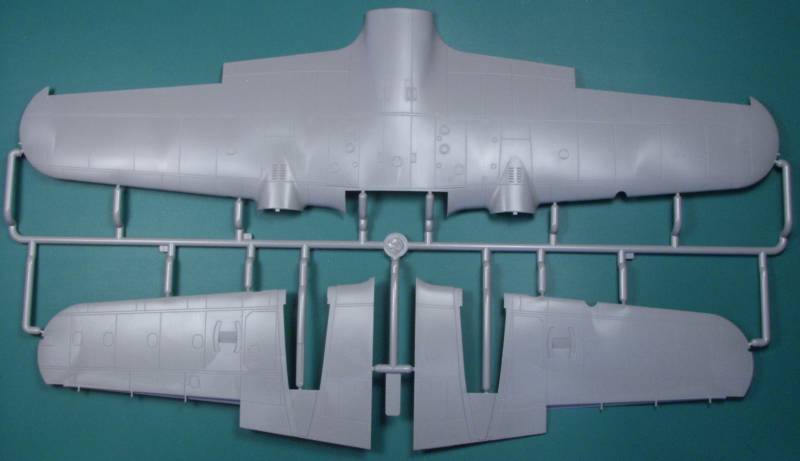
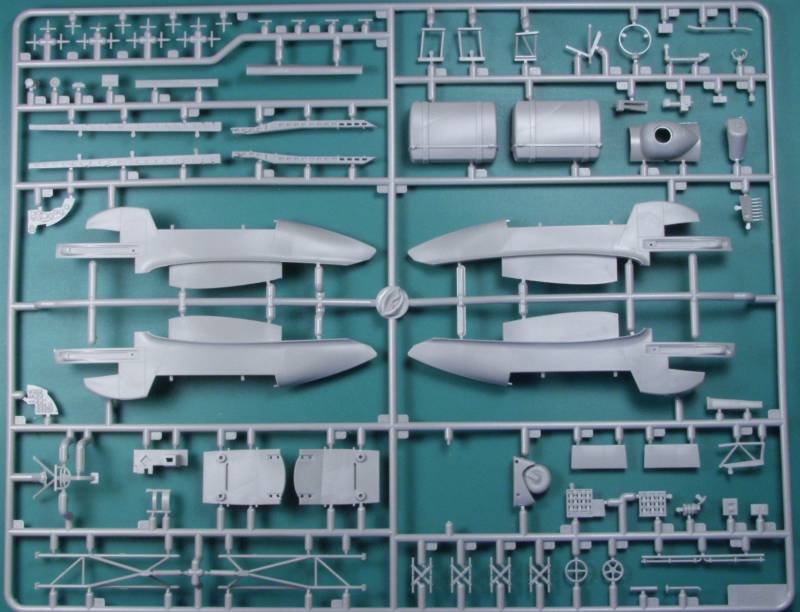
OK enough verbiage let look at the sprues. First up the wings...
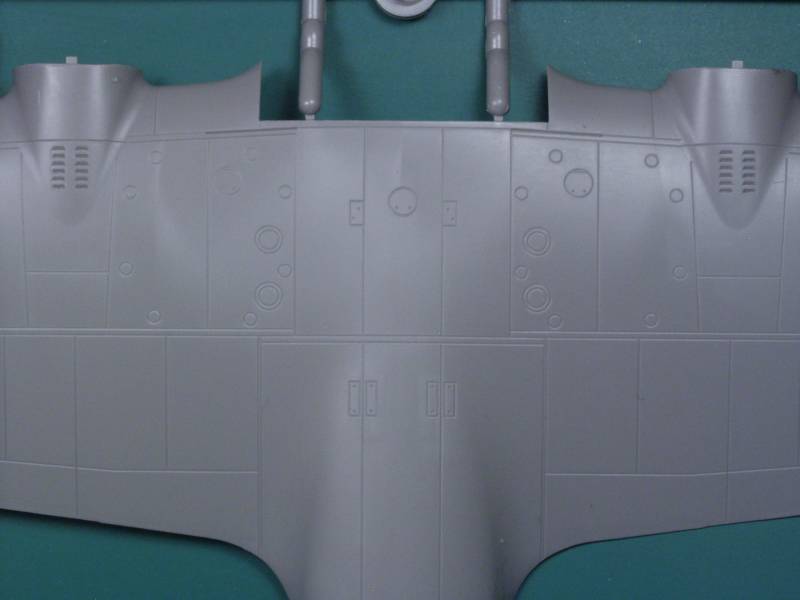
A close up to show the recessed detail. Except for the engine mounting detail the panel lines pretty much match those on the Classic Airframes Do 17 kit.
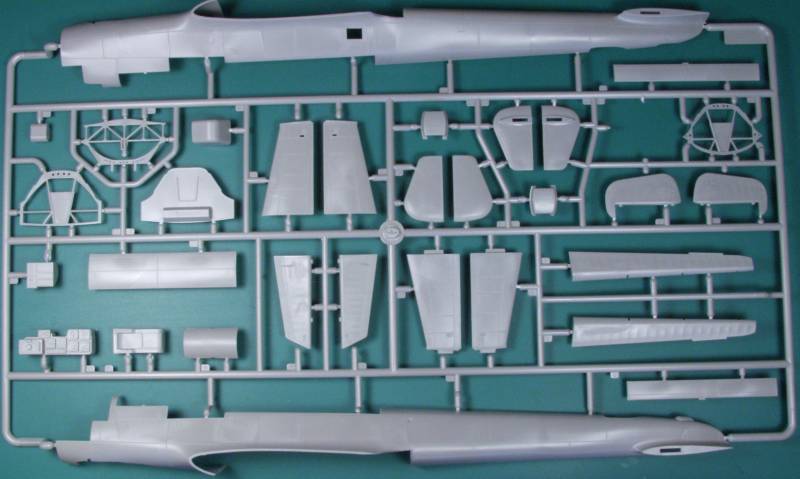
And yes Virginia the fuselage is straight.
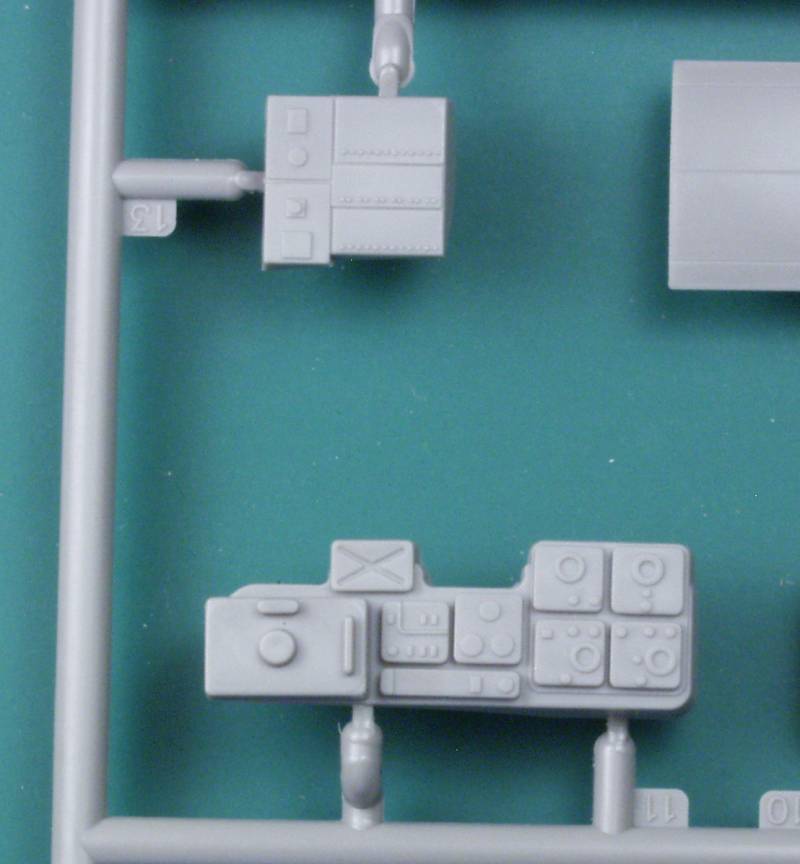
Some of the interior detail.
Fabric representation on the control surfaces.

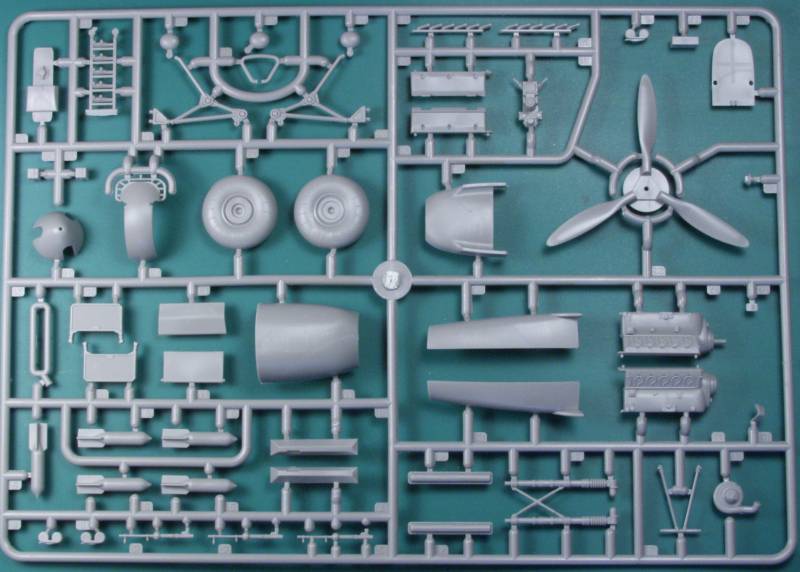
Engines, cowling and miscellaneous parts, there are two of these sprues.
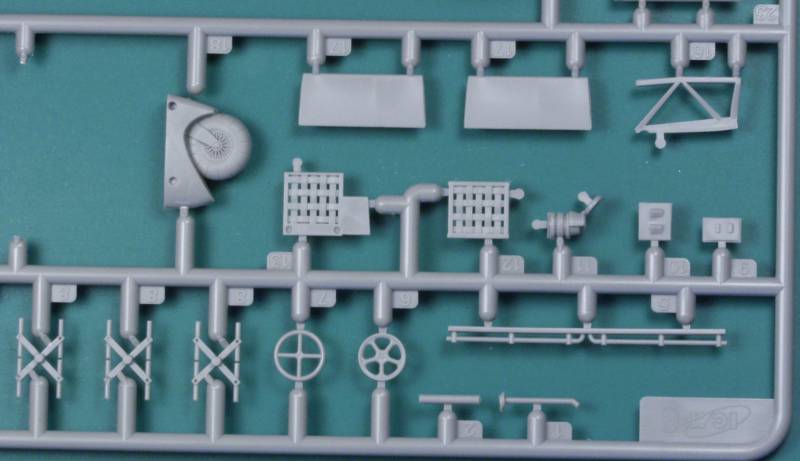
More interior and cowling parts. Radar antennas are supplied so it's a good bet a night fighter version will be forth coming although I believe only about ten of these were converted to night fighter use.
Note the fine detail on the seat webbing, also note the tail wheel.
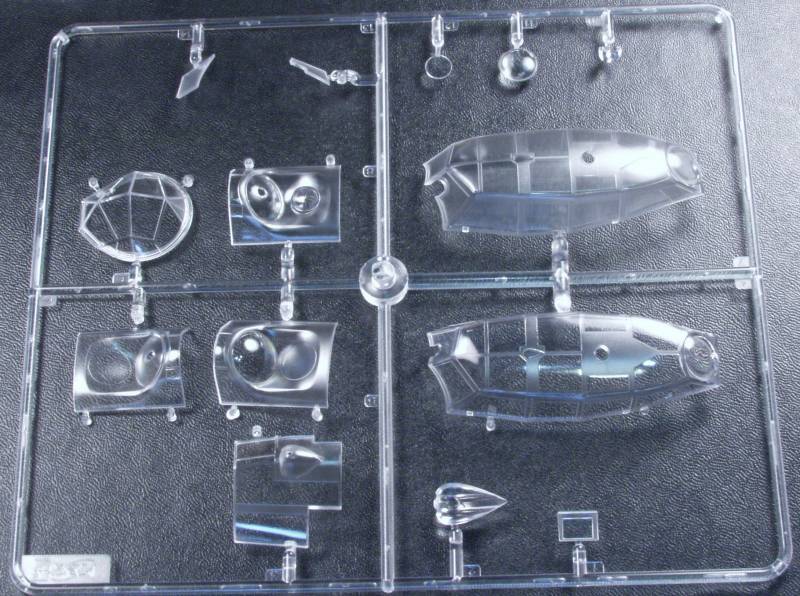
The clear parts are nice and clear, reasonably thin and have nice raised frame lines and are frosted in painted areas. There are two main canopies supplied, one has a large opening on the pilots side for the infrared gun sight for the night fighter version and there are three different lower gun position parts supplied.
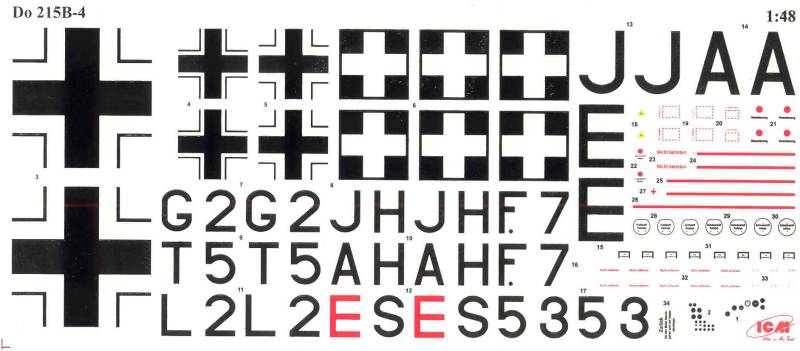
The decals are a mixed bag, the printing on mine was not all that good, things are in register but some of the letters and edges of the thin parts on the national insignia seemed to have spots missing ink and edges of some of the letters were a bit non uniform. There is a good amount of stencillings supplied. The decals appear thin and have a lot of excess clear areas on them. My experience with ICM decals is limited but they don't seem to have a very good reputation. Marking are supplied for four aircraft, three German and one Hungarian.
The instructions are in the form of a 20 page A4 sized booklet printed on thin glossy paper with nice cad style illustrations as show earlier. They include a parts map, a paint chart with generic names and RLM numbers where applicable and Model Master numbers and the usual icon chart and safety warnings.
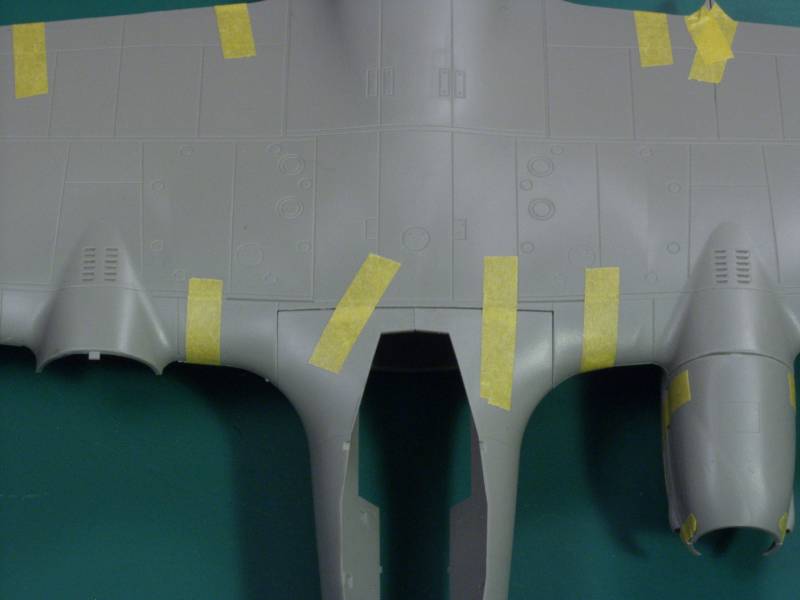
OK, so after all that how does it fit ? Well ICM kits are limited run style kits and seem to have at least some reputation for not being the easiest to build. While a test fit will certainly not answer all questions it does give one some idea of what is ahead. Taping together the fuselage was a bit of a test due to all the open areas, assuming that the interior does not create problems the fuselage should go together easier with some structure inside. The wings fit together well but in order to get a thin edge at the trailing edge the edge is molded with the top wing and the bottom half ends before the edge creating a seam where there is no panel line so some clean up and filler may be required there. The tail parts fit well but were a bit loose in the mating holes in the fuselage and I had to use some sticky tack to hold on the fins. Because of the number of parts and the rather fiddly fit I only did one of the engine nacelles. Note that only a minimal amount of trim was done. Here is the overall view.

A close up showing the fit of the forward portion of the wing to fuselage. The gap between the engine cover and the leading edge of the wing was a bit wider than I would have liked, won't be an issue if left off to display the engine and it may fit better once the nacelle assembly is actually glued together and attached to the wing.
Tail fit.

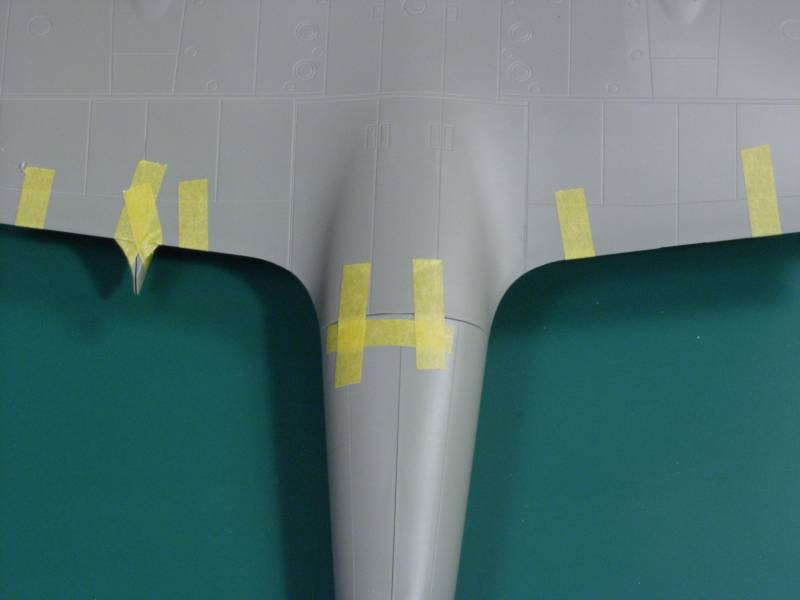
Rear wing to fuselage join.
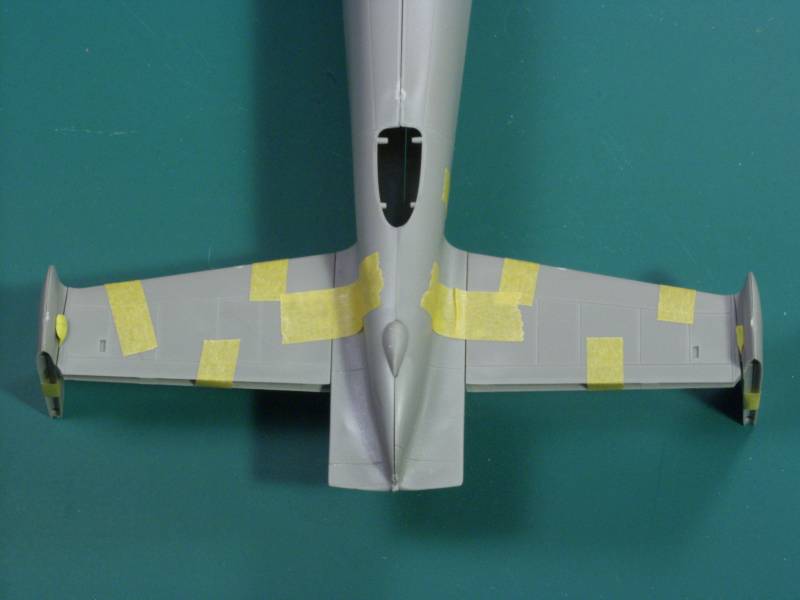
Under side of tail and rear fuselage join.
Underside of wing to fuselage.

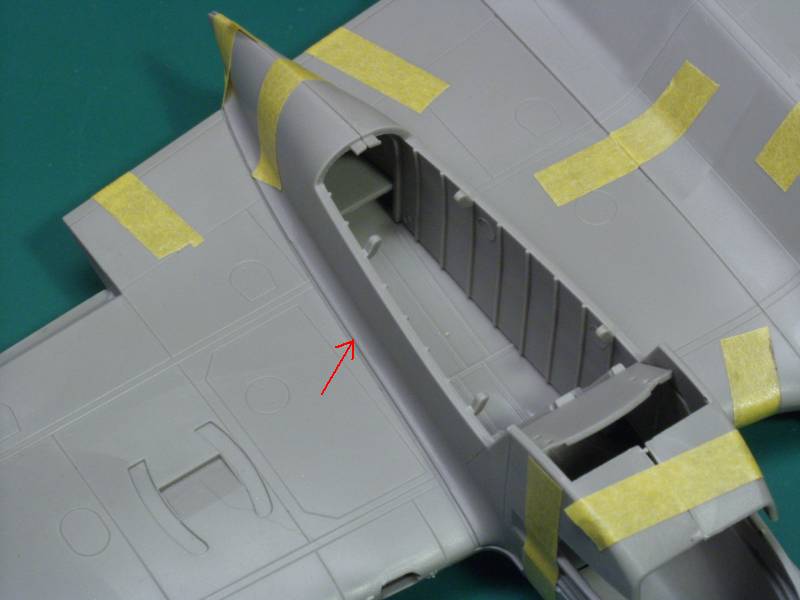
The worst area of fit was the outside of the nacelle as shown with the red arrow. At first I thought it was due to not having the bulkheads installed in the nacelle but adding them didn't help. The nacelle fits into a recess in the wing which should make a nice clean joint but the nacelle appears to be narrow leaving a gap. It may be that the opening in the wing that allows the gear bay sides to fit into the wing needs to be opened up a bit, at this point I didn't want to go there. I do like the recesses supplied for thing like the nacelle and the under wing radiators as they should provide a cleaner fit than a butt joint, assuming the part fills the opening.
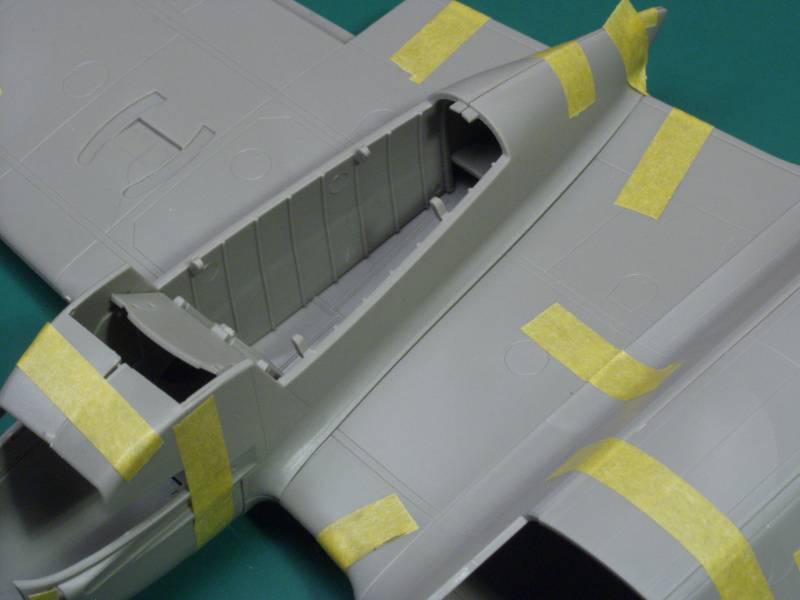
The other side shows how it should fit. To me the nacelles will be the most fiddly part of the kit as there are a lot of small parts that need to play well in order for it to all fit together well. Over all I'm encouraged, hopefully the interior parts won't make matters more difficult.
Conclusion
Overall the kit looks pretty good to me and shouldn't be any harder than the Classic Airframes 17Z. Of course I'm just glad to see another 1/48 scale Dornier. Note that I didn't waste a lot of time doing measurements and I have a blind sense of vision when it comes to most shape errors, I leave that to those who seem to find something wrong with every new kit.
OK, here is my 2¢ on this new kit...
------------------------------------
History
The Dornier Do 215 was essentially a 17Z powered by Daimler-Benz DB 601a liquid cooled engines. This came about as a result of Dornier soliciting orders from foreign countries, specifically Yugoslavia, which was already tooling up for the Do 17K version. The RLM insisted on assigning a new designation for export versions and hence the 17Z was re designated 215. Initially it was to be equipped with Gnome-Rhone 14 cylinder radial engines but these didn't offer a sufficient improvement in performance over the 17K that was just going into production in Yugoslavia. However, when the DB 601's were installed it showed a significant improvement in performance and as a result Sweden placed orders for 18 aircraft. Before these could be delivered, an embargo was placed on exporting bombers and the order went instead to the Luftwaffe for use as reconnaissance duties. Dornier was ordered to continue producing the 215 for the Luftwaffe. Several versions were built, The original order for Sweden were designated B-0 and B-1 variants when taken over by the Luftwaffe. These were modified on the assembly line for long range reconnaissance tasks. The B-2 designation was allocated to a pure bomber variant but none were built. The B-3 designation was applied to two examples supplied in early 1940 to the Soviet Union under the Russo-German agreement. The B-4 variant differed from the B-1 variant in its camera equipment. The main cameras were mounted in a fairing below the lower gunner's position and an additional camera was mounted on the inside of the crew hatch. The B-5 designation was given to airframes that were modified to the night fighter role. These were found to be much better at the task than the 17Z's that had been similarly modified due to the better performance provide by the DB-601 engines. In all 101 of the 215's were built.
The Kit
The ICM kit comes in a medium sized box with a lid hinged to one side. Better than an end open box but I still prefer a separate top. Inside the box one finds a large recloseable cellophane bag with all the sprues in it. The decals and instruction sheet are in the bottom of the box. Inside the large bag the clear parts are enclosed in a separate smaller resealable bag. Better than just thrown in with the rest but one of the clear parts in my kit had still broken loose from the sprue. The parts are molded in a medium gray plastic. The surface is matte and smooth with some light flash on some parts. Surface detail consists of recessed panel lines. The panel lines are wider than those on the Classic Airframes Do 17Z but finer than those on the Hobbycraft kit. In my opinion while they are large for the scale (aren't they all) but they should be just right once painted to provide a good conduit for weathering. I found no major surface defects on the airframe parts. There are some flow patterns in the plastic but they should not show under paint. There were a few places where I found a bit of rough surface that might require a touch of filler to smooth. The cockpit interior parts mount into recesses in the fuselage walls and due to the thinness of the walls the recessed areas leave only a very thin amount of plastic. Thin enough to be able to see light through the wall. I'm not sure this will be a problem but I could see these bulging or melting through if too much glue is applied to the interior part. Like many limited run kits the sprue attachment points are a bit large on some parts, especially the smaller ones. The kit parts do have alignment pins for those who get nervous without them. Ejector pin marks have been kept out of sight for the most part but there are a couple in the cockpit area and in the gear wells that some will want to deal with.
From a detail stand point the control surfaces are all separate with the exception of the flaps and feature subtle fabric representation, something that CA missed on their 17Z. The kit contains two complete engines each comprising 14 parts. These can be seen by leaving the upper cowlings off if desired. The cockpit is well anointed with detail that should satisfy most although some parts would probably be better rendered in resin or PE. The instrument panels feature raised bezels and the decal sheet included instrument decals but they are rather featureless and would probably look better with some Airscale replacements if you have the required patience. In my case something from Eduard would be preferred. The bomb bay is also well detailed with bulkheads and structure. Since this is a reconnaissance aircraft the forward part of the bomb bay is equipped with a fuel tank and bombs are supplied for the aft section. The bay doors are supplied both as open parts and a single piece closed part. The landing gear struts look nice and appear to mount securely. The gear bays are boxed in as part of the engine cowling assembly and feature some structural detail. The cowlings themselves are made up of 13 separate parts and look like they could be a bit fiddly to assemble. The wheels are in halves and are not weighted. The tail wheel is molded with the tail wheel fairing which will make painting difficult but it is nicely detailed. The propellers are molded as a single piece saving messing with getting the pitch angles right. ICM did pick up some detail that Classic Airframes missed on their 17Z kit, the tube for the trailing wire antenna and the towel rack antenna on the bottom of the fuselage. Like Classic Airframes they missed the fact that the starboard tail plane should be offset 3.5º. I have seen some profiles drawn both ways so I guess it's easily overlooked and not all that noticeable.
To provide an idea of the level of detail of the kit here are some excepts from the kit instructions. first the interior and bomb bay...
The engine and cowlings.
OK enough verbiage let look at the sprues. First up the wings...
A close up to show the recessed detail. Except for the engine mounting detail the panel lines pretty much match those on the Classic Airframes Do 17 kit.
And yes Virginia the fuselage is straight.
Some of the interior detail.
Fabric representation on the control surfaces.
Engines, cowling and miscellaneous parts, there are two of these sprues.
More interior and cowling parts. Radar antennas are supplied so it's a good bet a night fighter version will be forth coming although I believe only about ten of these were converted to night fighter use.
Note the fine detail on the seat webbing, also note the tail wheel.
The clear parts are nice and clear, reasonably thin and have nice raised frame lines and are frosted in painted areas. There are two main canopies supplied, one has a large opening on the pilots side for the infrared gun sight for the night fighter version and there are three different lower gun position parts supplied.
The decals are a mixed bag, the printing on mine was not all that good, things are in register but some of the letters and edges of the thin parts on the national insignia seemed to have spots missing ink and edges of some of the letters were a bit non uniform. There is a good amount of stencillings supplied. The decals appear thin and have a lot of excess clear areas on them. My experience with ICM decals is limited but they don't seem to have a very good reputation. Marking are supplied for four aircraft, three German and one Hungarian.
The instructions are in the form of a 20 page A4 sized booklet printed on thin glossy paper with nice cad style illustrations as show earlier. They include a parts map, a paint chart with generic names and RLM numbers where applicable and Model Master numbers and the usual icon chart and safety warnings.
OK, so after all that how does it fit ? Well ICM kits are limited run style kits and seem to have at least some reputation for not being the easiest to build. While a test fit will certainly not answer all questions it does give one some idea of what is ahead. Taping together the fuselage was a bit of a test due to all the open areas, assuming that the interior does not create problems the fuselage should go together easier with some structure inside. The wings fit together well but in order to get a thin edge at the trailing edge the edge is molded with the top wing and the bottom half ends before the edge creating a seam where there is no panel line so some clean up and filler may be required there. The tail parts fit well but were a bit loose in the mating holes in the fuselage and I had to use some sticky tack to hold on the fins. Because of the number of parts and the rather fiddly fit I only did one of the engine nacelles. Note that only a minimal amount of trim was done. Here is the overall view.
A close up showing the fit of the forward portion of the wing to fuselage. The gap between the engine cover and the leading edge of the wing was a bit wider than I would have liked, won't be an issue if left off to display the engine and it may fit better once the nacelle assembly is actually glued together and attached to the wing.
Tail fit.
Rear wing to fuselage join.
Under side of tail and rear fuselage join.
Underside of wing to fuselage.
The worst area of fit was the outside of the nacelle as shown with the red arrow. At first I thought it was due to not having the bulkheads installed in the nacelle but adding them didn't help. The nacelle fits into a recess in the wing which should make a nice clean joint but the nacelle appears to be narrow leaving a gap. It may be that the opening in the wing that allows the gear bay sides to fit into the wing needs to be opened up a bit, at this point I didn't want to go there. I do like the recesses supplied for thing like the nacelle and the under wing radiators as they should provide a cleaner fit than a butt joint, assuming the part fills the opening.
The other side shows how it should fit. To me the nacelles will be the most fiddly part of the kit as there are a lot of small parts that need to play well in order for it to all fit together well. Over all I'm encouraged, hopefully the interior parts won't make matters more difficult.
Conclusion
Overall the kit looks pretty good to me and shouldn't be any harder than the Classic Airframes 17Z. Of course I'm just glad to see another 1/48 scale Dornier. Note that I didn't waste a lot of time doing measurements and I have a blind sense of vision when it comes to most shape errors, I leave that to those who seem to find something wrong with every new kit.