
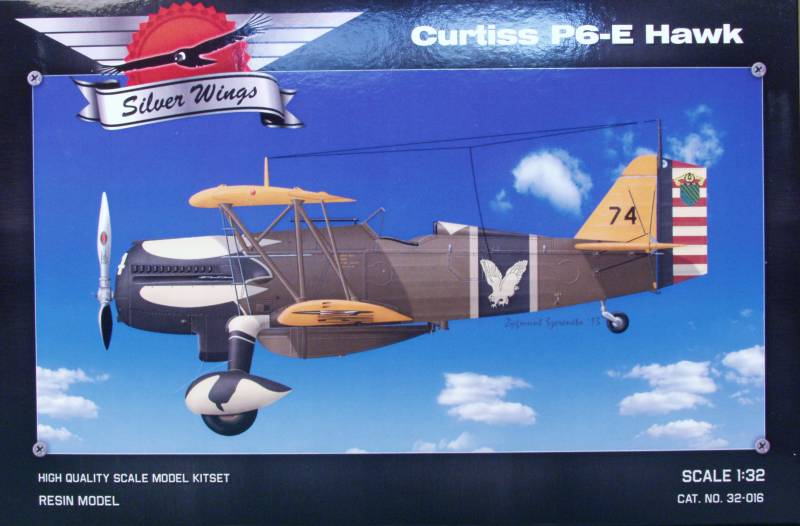
Curtiss P-6E Hawk 1/32 Silver Wings
History
I had little in the way of reference material for this aircraft, if anyone knows of a good reference, please shout out ! The following is a compilation of the history from the kit instructions and Wikipedia...
Starting in 1925 with the P-1, Curtiss built a long series of fighters carrying the name "Hawk". Of the eight different P-6 models produced, The P-6E remains the best known. It was a first line pursuit aircraft for the Army Air Corps in the early 30's and the last of the fabric covered biplanes used by the Air Corps. Curtiss delivered 46 P-6E Hawks in 1931 through 1932. The P-6Es served between 1932 and 1937 with the 1st Pursuit Group (17th and 94th PS) at Selfridge, and with the 8th Pursuit Group (33rd PS) at Langley Field, Virginia. Numerous accidents claimed at least 27 of the 46 aircraft delivered. As the P-6Es became obsolete, instead of receiving depot overhauls, they were allowed to wear out in service and were scrapped or sold. At least one survived into 1942. A single P-6E survives. The aircraft was donated to the Smithsonian National Air and Space Museum by Mr. Edward S. Perkins of Anniston, Alabama and restored by the School of Aeronautics at Purdue University. It is on indefinite loan and display at the National Museum of the United States Air Force at Wright-Patterson AFB near Dayton, Ohio. Originally s/n 32-261 and assigned to the 33rd Pursuit Squadron, it was dropped from records at Tampa Field, Florida, in September 1939. It was restored and marked as 32-240 of 17th Pursuit Squadron, missing on a flight over Lake Erie on 24 September 1932.
The P-6E is recognized as one of the most beautiful aircraft of the 1930's , and to some, it is one of the most beautiful biplanes ever built.
The Kit...
------------------------------------
The Silver Wings kit comes in a rather smallish box for a 1/32 scale kit, smaller than many 1/72 scale kits. It is a top open tray type box with a thin cardboard lid and a heavier corrugated bottom. In spite of its small size the box isn't totally stuffed. One finds three bubble pack bags and a zip lock bag containing the decals, a PE fret and a small instrument panel film. Inside each of the bubble packs are parts sealed in zip lock bags.
Before I start looking at the parts let me state that I know many folks see resin kits as being a lot like vacuform kits and thus never consider them. I have built a couple resin kits and can say that the Silver Wing kits are a bit different. The fuselage halves are molded nearly as thin as injection molded kits and the majority of the parts have been removed from their casting blocks and sprues so that clean up is minimal saving a ton of work not to mention the risk of damaging parts in the process. While this kit will also scare some off due to the rigging, it's not your normal resin kit. The folks at Silver Wings are enthusiasts just like you and know what modelers want.
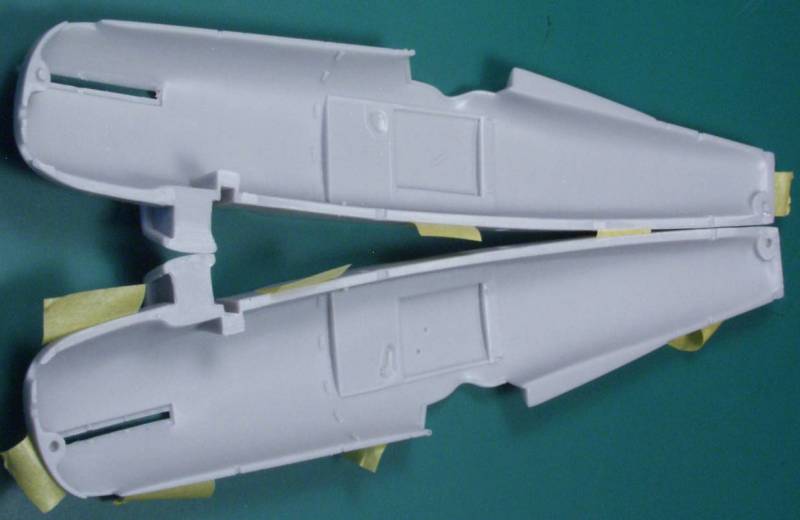
OK, off my soapbox and on with the review. The first parts I looked at were the fuselage halves. These come just as shown in the photos below already cleaned up and taped together. This protects them from damage, helps prevent warping and shows you right off the bat how well they fit.
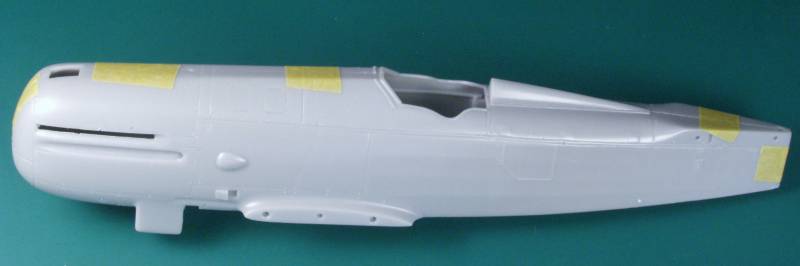
The surface panel lines are recessed and nicely sized for the scale. The fastener detail is recessed but not just a divot. There is a small domed area in the center and on some one can actually see a slot. Other detail is raised as applicable. The fabric detail is very subtle as it should be and is difficult to see in these photos.
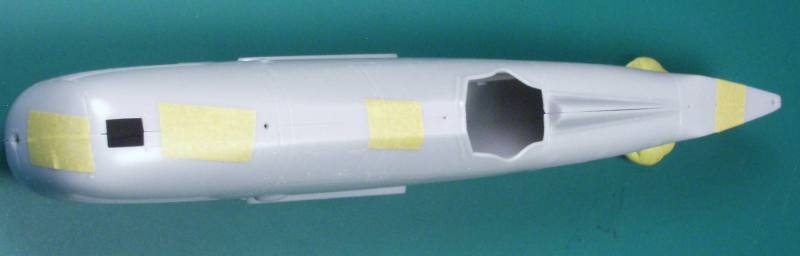
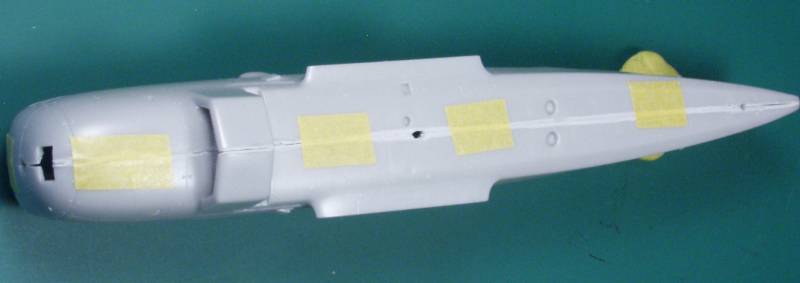
Top and bottom views. Other than a couple of specks which could have been dust on the molds I found no defects on the fuselage halves.
The tape was removed to show the inside and give an idea of the thinness in areas. There is some molded on detail, more will be added during assembly. Note that there are two alignment pegs.
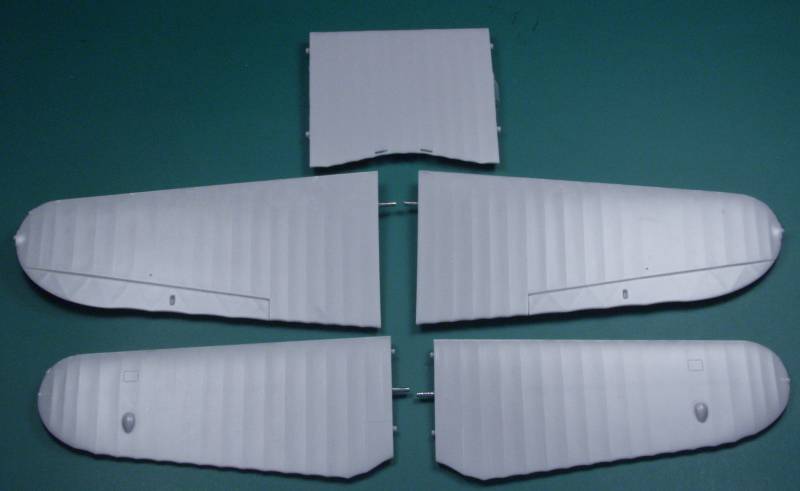
Next up are the wings. Another thing prevalent in resin kits is a lower parts count. In an injection molded kit the parts below would likely have been presented as twelve parts instead of the six we have here. I tried to adjust the angle of the lighting here to show the lovely fabric detail. Each wing is molded as one piece. I have done no clean up work at all, every thing is just as it came out of the box. The wing parts are beautifully cast with a smooth finish and no sign of warping or defects. Each wing has a metal alignment rod cast integrally and there are cast on alignment pegs and recesses. Most short run kits don't have these. There is a small amount of cleanup to do but nothing a few minutes with a sanding stick won't fix and no wing seams to worry about. There are dimples where the 'N' struts and cabane struts will mount to the wings. these will need to be drilled out. Also the holes where the metal wing pins fit into the wing center section and where the metal pins on the lower wing fit into the fuselage need to be drilled out.
Top sides first.

And the bottom sides, note the very petite hand holds molded in the wing center section. These go all the way through.
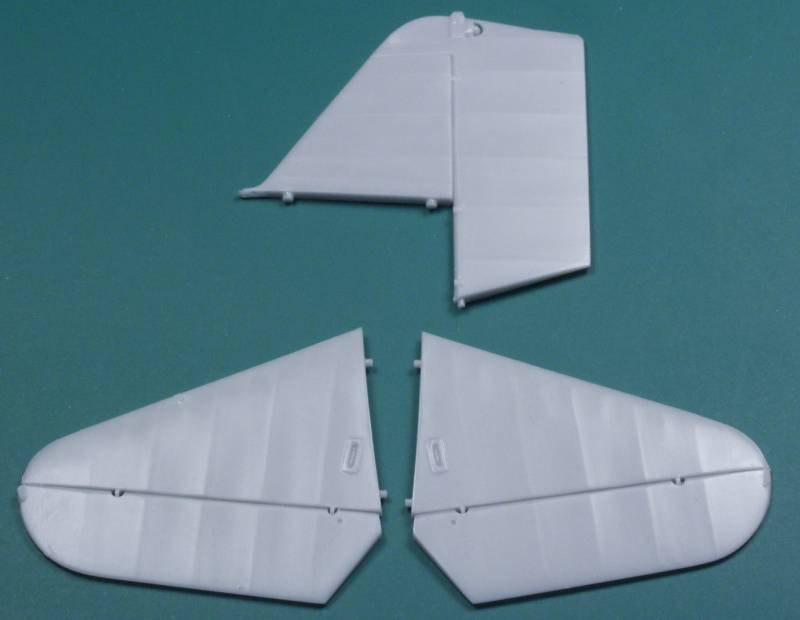
The tail pieces also exhibit the same fineness and quality as the wings.
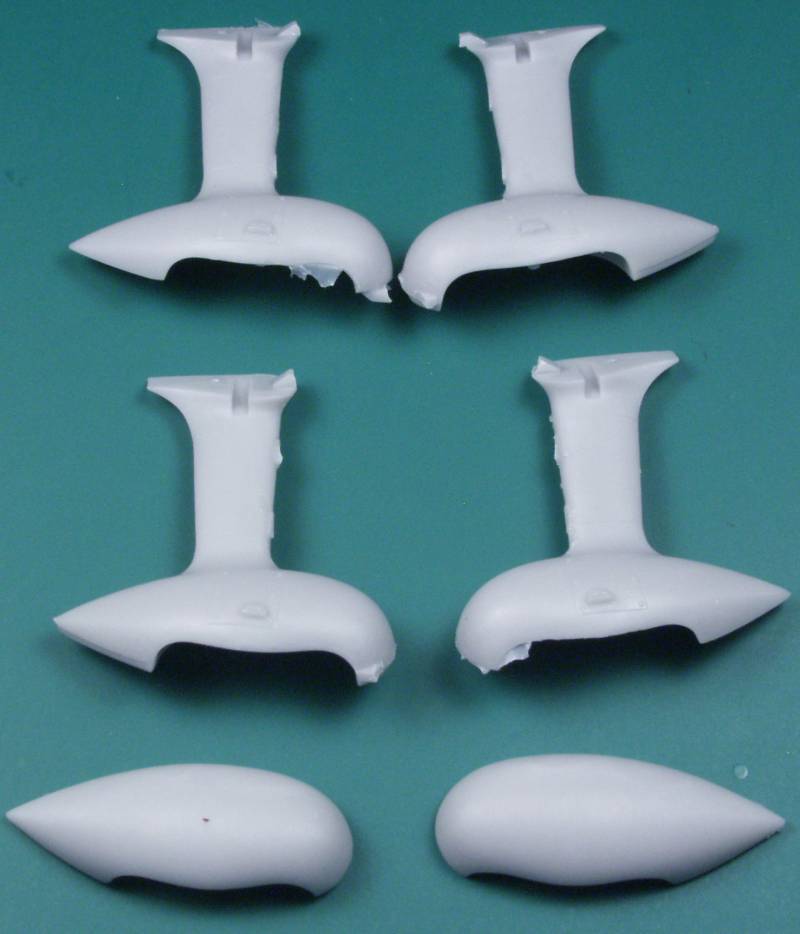
The landing gear struts have a bit of flash on them but it's thin and easily cleaned and there is also some stubs where the mold sprues were cut off that will need to be cleaned up. No casting defects noted. Why, you ask, are there four landing gear struts ? Well, one of the markings supplied with the kit is an aircraft that did not have the outer portion of the spats installed allowing the wheel and tire to show. The spat cover has alignment pins and the strut has matching hole, also the structure around the periphery of the spat where the cover mounts shows so there is an extra set without the holes and with the structure. A rather nice touch I think. Note the mark on the one spat cover is dust, not a defect.
The parts in the next group of photos are arranged by bag, each group was in its own zip lock bag. First up is the belly fuel tank which has detail on the top side which will be mostly unseen, cockpit floor, pilots seat, the cockpit rear bulkhead, the wheels and prop blades.
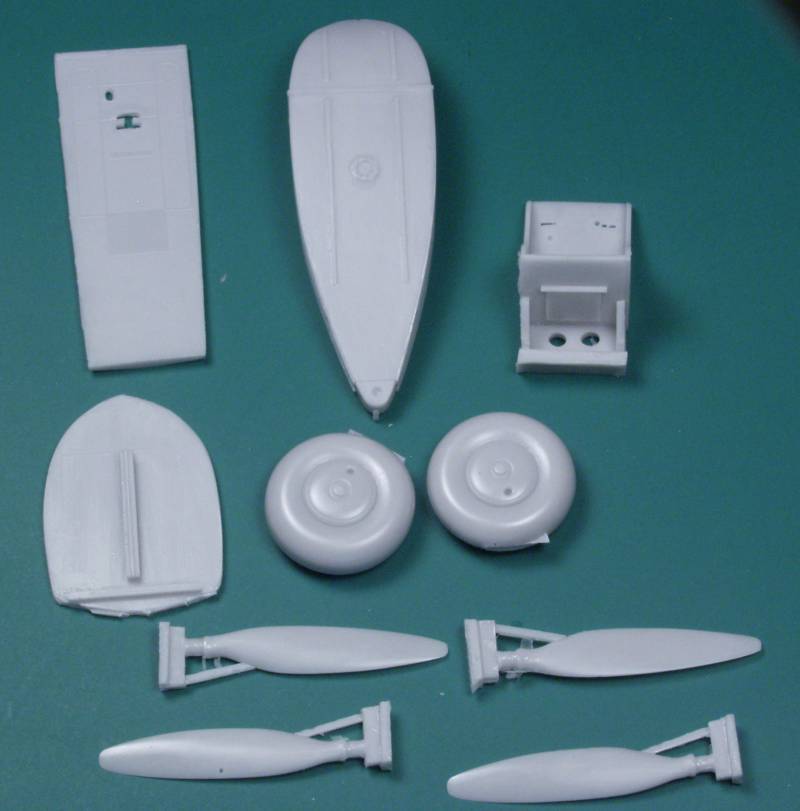
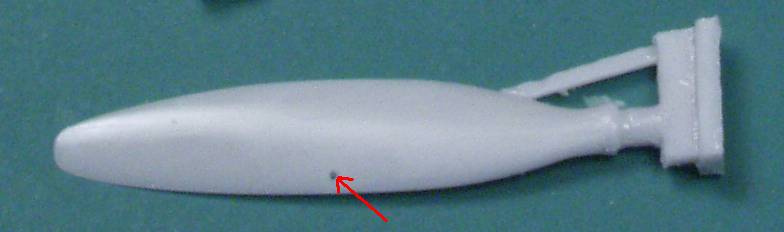
In this grouping two minor defects were found, the first being a bubble in one blade, a spare is provided so it's a non issue.
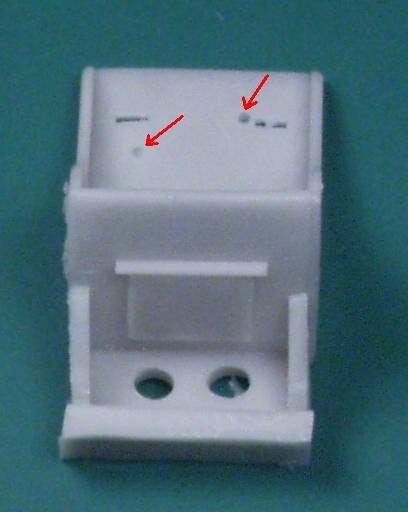
The second was a couple of bubbles in the pilots seat. The one on the left will be covered by the shoulder harness so it won't be seen anyway, the other will need to be filled, not a that much of a chore. I'm sure if I complained a replacement seat would be supplied, but its something pretty common with resin set anyway and not a big deal to fix.
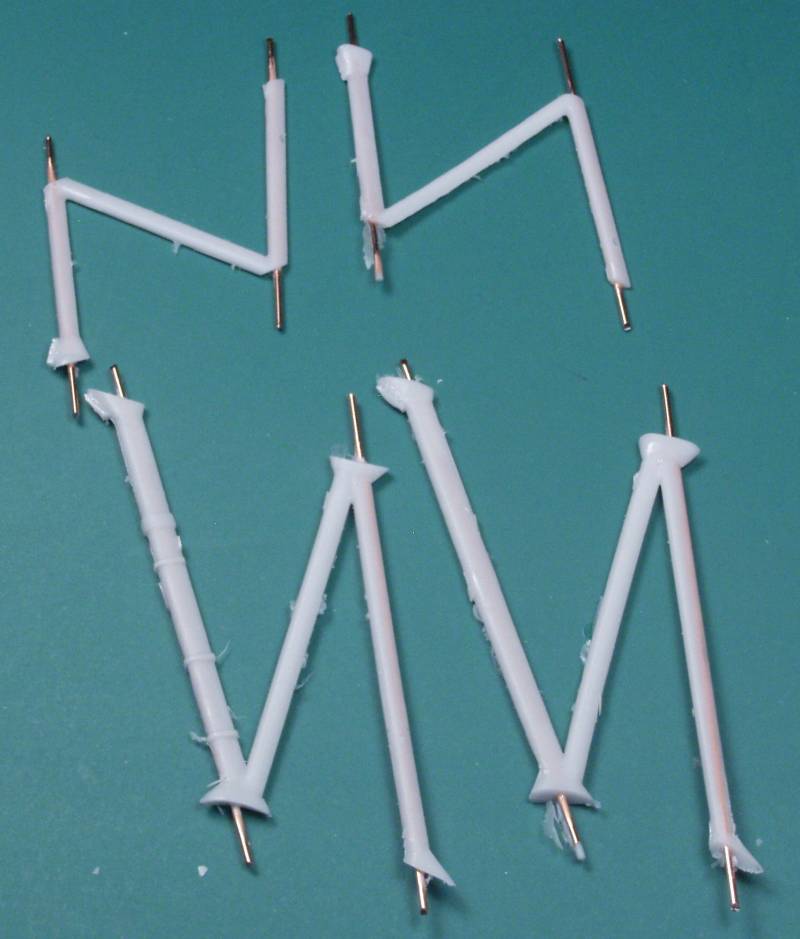
The 'N' struts and cabane struts were in the next bag. A little light flash to clean off. Note that they have metal reinforcements molded in for both strength and mounting purposes, these will need to be trimmed to length when the time comes.
The next bag had a mixture of parts, instrument panel which is a sandwich affair with a supplied film for the dial faces. The two top pieces that look like spars or structural pieces are actually a long strut that connects the upper and lower ailerons. The heavier top piece and the three stubs are part of the pour stubs that are left on to protect the part from damage and warping. This one of the few things you will need to remove and clean up yourself. Also shown here are the propeller hub, the parts with the small holes are part of the structure to which the landing gear mount, machine gun barrels, the small cylindrical items are exhaust stubs which have hollowed out ends and a couple other parts I didn't take time to identify.
Next up are the tail wheel and strut, the strut is very petite and I recommend it be one of the last things installed. Also shown are the rudder pedals, landing gear shocks the control stick, a filler for the belly tank and a host of other items too numerous to mention.
Control horns and some internal cockpit parts make up the last batch.
The kit includes a PE fret that includes seat belts and a harness. I'm a dubious about this as I have read the aircraft from this era didn't have a shoulder harness but at the moment I don't have proof one way or the other. Other parts include the instrument panel, latches for the deck behind the pilot, rudder pedal mounting parts, gun sight and a few other detail parts. The "C" shaped and "V" shapes pieces are zippers for inspection points on the fuselage, these varied depending on the aircraft being modeled as some used one style or the other.

The clear part. Only one, the wind screen, cast in clear resin, quite thin so be careful handling, it does need the pour block removed. Nice and clear with good demarcations for the frame members.
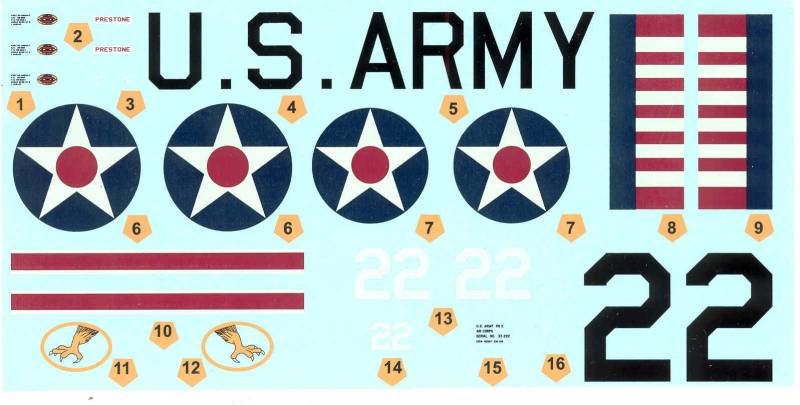
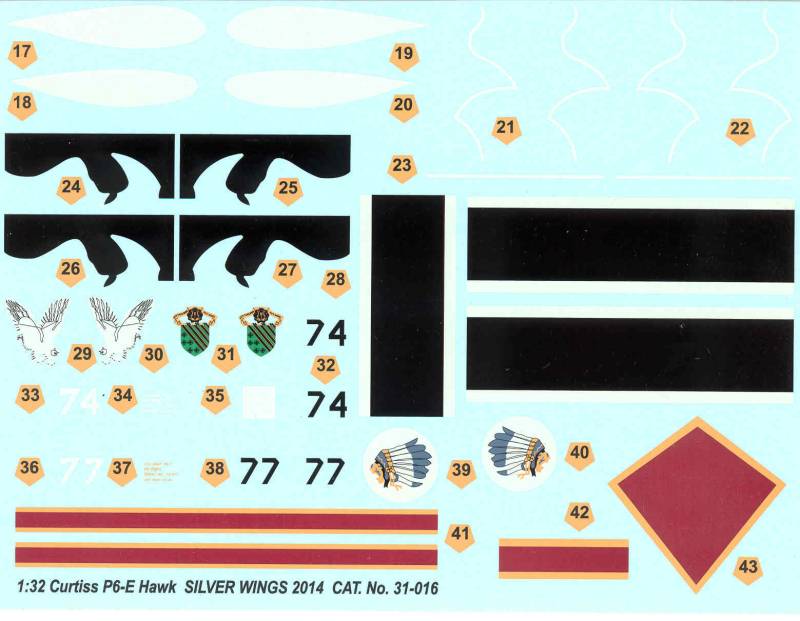
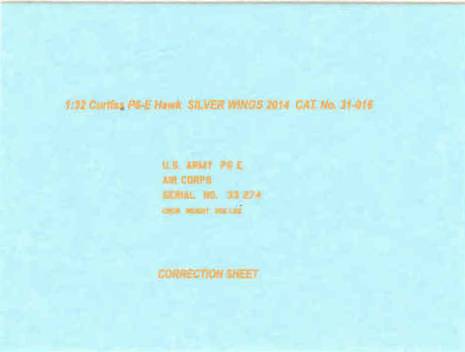
The decals are well registered, glossy, appear opaque and are very well printed. You can even read the Hamilton Standard on the the propeller logo decals and all the stenciling is readable. In spite of stating markings for two aircraft on the box you get decals for three, one each from the three squadrons that operated them. The only thing I noticed was that the yellow stripes on the red yellow bands are not equal width but these could be trimmed. They look equal on the profile. I suspect that next to rigging, the decals for the snowy owl version will be most challenging to apply. As shown below a small correction sheet was provided with the serial number data in yellow as for this aircraft it was printed in white on the main sheet. There was no printers name on the decal so I'm not sure who did them but they do look like they were done by one of the top printers.
The instructions are a little different in that they are done up in a booklet in the landscape format rather than portrait. It's a stapled booklet of 16 pages on glossy stock and uses color mostly for part numbers and paint call outs. The front page has history and technical data. There is no parts map or the usual paint chart. Colors are called out by name only for the minor and interior parts. Pages 2 though 13 are assembly steps. There are places where you will need to supply your own material for control rods, antennas and a few other bits and bobs. You will also need to drill some holes for control rods, struts and rigging. A rigging diagram is supplied as is a diagram showing the correct dihedral for the bottom wing. The last three pages are color profiles for painting and markings. Here the colors are called out by name, what I assume are service numbers (45 Insignia red, 22 Olive drab, etc) and also by F.S. numbers.
So how well does it fit ? That will remain to be seen. Test fitting on biplanes is problematic anyway and in this case due to the number of holes that would need to be drilled to do a test fit, it ain't gonna happen on my watch. One needs to take their time when doing all of this and I'm not going to charge through it and risk making fatal mistakes. It is my feeling that worst case it will be no worse than the best of the limited run injection molded kits.
My two cents worth...
This is an expensive kit, I paid full retail from a distributor here in the US, about $160. Silver Wings sells direct and offers discounts to those who subscribe to their newsletter but your shipping will be more.
This kit (and other Silver Wings kits I have seen) is pretty impressive for an all resin kit. The fact that a great deal of the clean up work has been done is a big bonus and helps offset the cost of the kit. If you look at the volume of resin parts and compare it to a lot of resin upgrade sets it's actually a bargain. It obviously is not one to chose for your first resin kit as it is a bit complex and also needs to be rigged. I suspect some of the smallest cockpit parts will be a challenge to work with and one or two might be better replaced with another media. The thing I dislike most about resin kits is cutting off pour blocks and using super glue or epoxy to assemble them and most of the first part is done for you on this kit. Apparently the kit is selling well as Silver Wings has stated that demand exceeded their expectations. So if you are up to the challenge of the rigging and have some experience with resin kits or resin upgrade sets you might want to give this one a try.
Thanks for looking in !
History
I had little in the way of reference material for this aircraft, if anyone knows of a good reference, please shout out ! The following is a compilation of the history from the kit instructions and Wikipedia...
Starting in 1925 with the P-1, Curtiss built a long series of fighters carrying the name "Hawk". Of the eight different P-6 models produced, The P-6E remains the best known. It was a first line pursuit aircraft for the Army Air Corps in the early 30's and the last of the fabric covered biplanes used by the Air Corps. Curtiss delivered 46 P-6E Hawks in 1931 through 1932. The P-6Es served between 1932 and 1937 with the 1st Pursuit Group (17th and 94th PS) at Selfridge, and with the 8th Pursuit Group (33rd PS) at Langley Field, Virginia. Numerous accidents claimed at least 27 of the 46 aircraft delivered. As the P-6Es became obsolete, instead of receiving depot overhauls, they were allowed to wear out in service and were scrapped or sold. At least one survived into 1942. A single P-6E survives. The aircraft was donated to the Smithsonian National Air and Space Museum by Mr. Edward S. Perkins of Anniston, Alabama and restored by the School of Aeronautics at Purdue University. It is on indefinite loan and display at the National Museum of the United States Air Force at Wright-Patterson AFB near Dayton, Ohio. Originally s/n 32-261 and assigned to the 33rd Pursuit Squadron, it was dropped from records at Tampa Field, Florida, in September 1939. It was restored and marked as 32-240 of 17th Pursuit Squadron, missing on a flight over Lake Erie on 24 September 1932.
The P-6E is recognized as one of the most beautiful aircraft of the 1930's , and to some, it is one of the most beautiful biplanes ever built.
The Kit...
------------------------------------
The Silver Wings kit comes in a rather smallish box for a 1/32 scale kit, smaller than many 1/72 scale kits. It is a top open tray type box with a thin cardboard lid and a heavier corrugated bottom. In spite of its small size the box isn't totally stuffed. One finds three bubble pack bags and a zip lock bag containing the decals, a PE fret and a small instrument panel film. Inside each of the bubble packs are parts sealed in zip lock bags.
Before I start looking at the parts let me state that I know many folks see resin kits as being a lot like vacuform kits and thus never consider them. I have built a couple resin kits and can say that the Silver Wing kits are a bit different. The fuselage halves are molded nearly as thin as injection molded kits and the majority of the parts have been removed from their casting blocks and sprues so that clean up is minimal saving a ton of work not to mention the risk of damaging parts in the process. While this kit will also scare some off due to the rigging, it's not your normal resin kit. The folks at Silver Wings are enthusiasts just like you and know what modelers want.
OK, off my soapbox and on with the review. The first parts I looked at were the fuselage halves. These come just as shown in the photos below already cleaned up and taped together. This protects them from damage, helps prevent warping and shows you right off the bat how well they fit.
The surface panel lines are recessed and nicely sized for the scale. The fastener detail is recessed but not just a divot. There is a small domed area in the center and on some one can actually see a slot. Other detail is raised as applicable. The fabric detail is very subtle as it should be and is difficult to see in these photos.
Top and bottom views. Other than a couple of specks which could have been dust on the molds I found no defects on the fuselage halves.
The tape was removed to show the inside and give an idea of the thinness in areas. There is some molded on detail, more will be added during assembly. Note that there are two alignment pegs.
Next up are the wings. Another thing prevalent in resin kits is a lower parts count. In an injection molded kit the parts below would likely have been presented as twelve parts instead of the six we have here. I tried to adjust the angle of the lighting here to show the lovely fabric detail. Each wing is molded as one piece. I have done no clean up work at all, every thing is just as it came out of the box. The wing parts are beautifully cast with a smooth finish and no sign of warping or defects. Each wing has a metal alignment rod cast integrally and there are cast on alignment pegs and recesses. Most short run kits don't have these. There is a small amount of cleanup to do but nothing a few minutes with a sanding stick won't fix and no wing seams to worry about. There are dimples where the 'N' struts and cabane struts will mount to the wings. these will need to be drilled out. Also the holes where the metal wing pins fit into the wing center section and where the metal pins on the lower wing fit into the fuselage need to be drilled out.
Top sides first.
And the bottom sides, note the very petite hand holds molded in the wing center section. These go all the way through.
The tail pieces also exhibit the same fineness and quality as the wings.
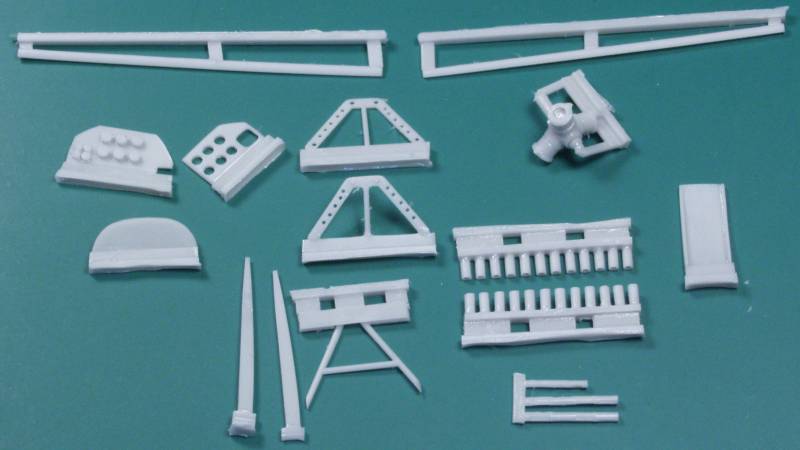
The landing gear struts have a bit of flash on them but it's thin and easily cleaned and there is also some stubs where the mold sprues were cut off that will need to be cleaned up. No casting defects noted. Why, you ask, are there four landing gear struts ? Well, one of the markings supplied with the kit is an aircraft that did not have the outer portion of the spats installed allowing the wheel and tire to show. The spat cover has alignment pins and the strut has matching hole, also the structure around the periphery of the spat where the cover mounts shows so there is an extra set without the holes and with the structure. A rather nice touch I think. Note the mark on the one spat cover is dust, not a defect.
The parts in the next group of photos are arranged by bag, each group was in its own zip lock bag. First up is the belly fuel tank which has detail on the top side which will be mostly unseen, cockpit floor, pilots seat, the cockpit rear bulkhead, the wheels and prop blades.
In this grouping two minor defects were found, the first being a bubble in one blade, a spare is provided so it's a non issue.
The second was a couple of bubbles in the pilots seat. The one on the left will be covered by the shoulder harness so it won't be seen anyway, the other will need to be filled, not a that much of a chore. I'm sure if I complained a replacement seat would be supplied, but its something pretty common with resin set anyway and not a big deal to fix.
The 'N' struts and cabane struts were in the next bag. A little light flash to clean off. Note that they have metal reinforcements molded in for both strength and mounting purposes, these will need to be trimmed to length when the time comes.
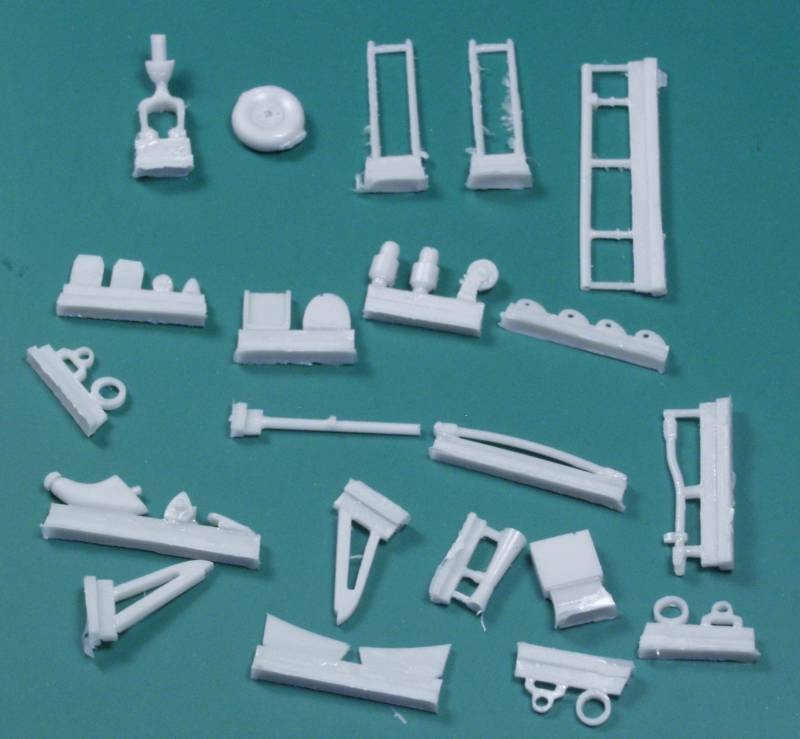
The next bag had a mixture of parts, instrument panel which is a sandwich affair with a supplied film for the dial faces. The two top pieces that look like spars or structural pieces are actually a long strut that connects the upper and lower ailerons. The heavier top piece and the three stubs are part of the pour stubs that are left on to protect the part from damage and warping. This one of the few things you will need to remove and clean up yourself. Also shown here are the propeller hub, the parts with the small holes are part of the structure to which the landing gear mount, machine gun barrels, the small cylindrical items are exhaust stubs which have hollowed out ends and a couple other parts I didn't take time to identify.
Next up are the tail wheel and strut, the strut is very petite and I recommend it be one of the last things installed. Also shown are the rudder pedals, landing gear shocks the control stick, a filler for the belly tank and a host of other items too numerous to mention.
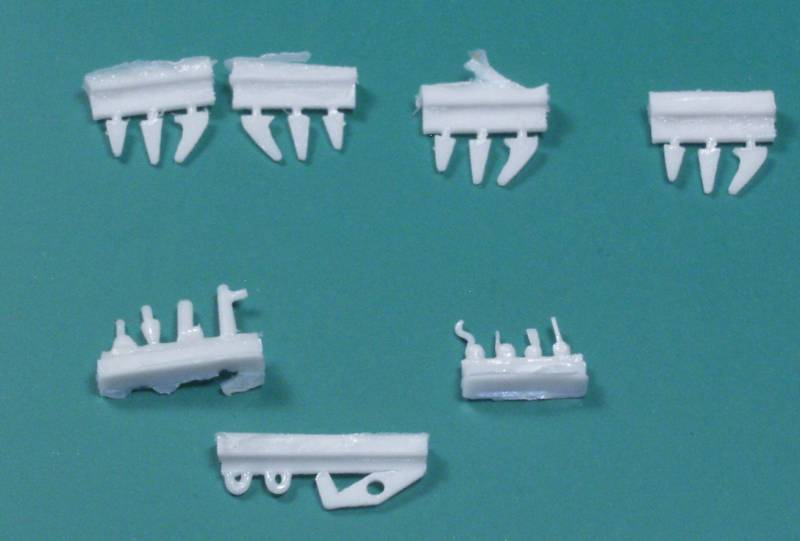
Control horns and some internal cockpit parts make up the last batch.
The kit includes a PE fret that includes seat belts and a harness. I'm a dubious about this as I have read the aircraft from this era didn't have a shoulder harness but at the moment I don't have proof one way or the other. Other parts include the instrument panel, latches for the deck behind the pilot, rudder pedal mounting parts, gun sight and a few other detail parts. The "C" shaped and "V" shapes pieces are zippers for inspection points on the fuselage, these varied depending on the aircraft being modeled as some used one style or the other.
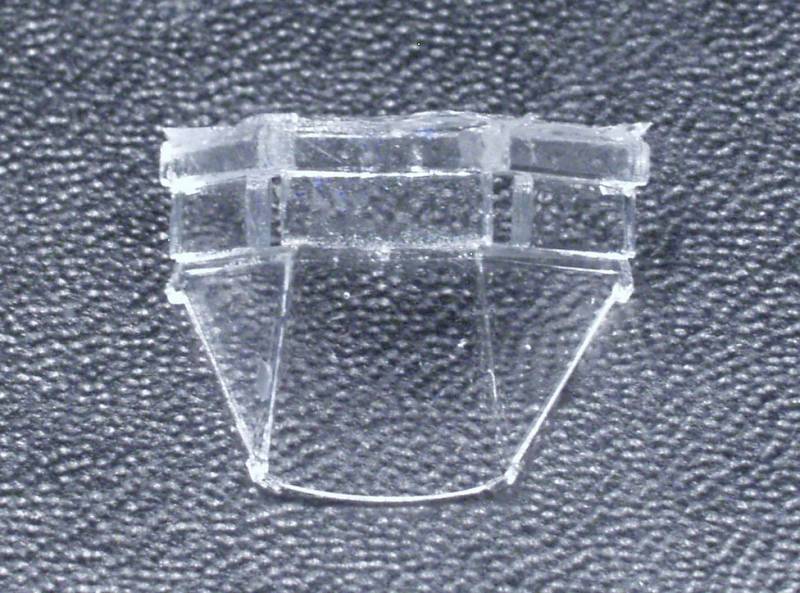
The clear part. Only one, the wind screen, cast in clear resin, quite thin so be careful handling, it does need the pour block removed. Nice and clear with good demarcations for the frame members.
The decals are well registered, glossy, appear opaque and are very well printed. You can even read the Hamilton Standard on the the propeller logo decals and all the stenciling is readable. In spite of stating markings for two aircraft on the box you get decals for three, one each from the three squadrons that operated them. The only thing I noticed was that the yellow stripes on the red yellow bands are not equal width but these could be trimmed. They look equal on the profile. I suspect that next to rigging, the decals for the snowy owl version will be most challenging to apply. As shown below a small correction sheet was provided with the serial number data in yellow as for this aircraft it was printed in white on the main sheet. There was no printers name on the decal so I'm not sure who did them but they do look like they were done by one of the top printers.
The instructions are a little different in that they are done up in a booklet in the landscape format rather than portrait. It's a stapled booklet of 16 pages on glossy stock and uses color mostly for part numbers and paint call outs. The front page has history and technical data. There is no parts map or the usual paint chart. Colors are called out by name only for the minor and interior parts. Pages 2 though 13 are assembly steps. There are places where you will need to supply your own material for control rods, antennas and a few other bits and bobs. You will also need to drill some holes for control rods, struts and rigging. A rigging diagram is supplied as is a diagram showing the correct dihedral for the bottom wing. The last three pages are color profiles for painting and markings. Here the colors are called out by name, what I assume are service numbers (45 Insignia red, 22 Olive drab, etc) and also by F.S. numbers.
So how well does it fit ? That will remain to be seen. Test fitting on biplanes is problematic anyway and in this case due to the number of holes that would need to be drilled to do a test fit, it ain't gonna happen on my watch. One needs to take their time when doing all of this and I'm not going to charge through it and risk making fatal mistakes. It is my feeling that worst case it will be no worse than the best of the limited run injection molded kits.
My two cents worth...
This is an expensive kit, I paid full retail from a distributor here in the US, about $160. Silver Wings sells direct and offers discounts to those who subscribe to their newsletter but your shipping will be more.
This kit (and other Silver Wings kits I have seen) is pretty impressive for an all resin kit. The fact that a great deal of the clean up work has been done is a big bonus and helps offset the cost of the kit. If you look at the volume of resin parts and compare it to a lot of resin upgrade sets it's actually a bargain. It obviously is not one to chose for your first resin kit as it is a bit complex and also needs to be rigged. I suspect some of the smallest cockpit parts will be a challenge to work with and one or two might be better replaced with another media. The thing I dislike most about resin kits is cutting off pour blocks and using super glue or epoxy to assemble them and most of the first part is done for you on this kit. Apparently the kit is selling well as Silver Wings has stated that demand exceeded their expectations. So if you are up to the challenge of the rigging and have some experience with resin kits or resin upgrade sets you might want to give this one a try.
Thanks for looking in !