
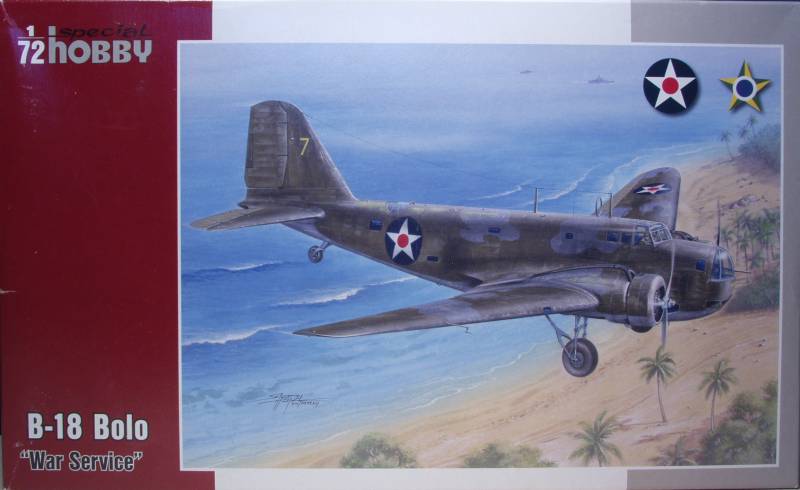
1/72 Special Hobby B-18 Bolo
History:
Of all of the American bombers of World War II, the B-18 is probably the least known. The story of the airliner turned bomber has languished in obscurity. The few articles that have been written about it have only emphasized its faults and maligned it as a budget bomber with few virtues. The economy minded Congress of the mid thirties chose to fund the twin engined B-18 over the more promising and much more expensive B-17 which the prototype had the misfortune of crashing during testing. When the Air Corps received their speedy and comfortable B-18's in 1937 they seemed cutting edge compared to the Martin B-10 which had been the innovative bomber of the early thirties.
The B-18 had been built using contemporary but dead end design specifications and it soon showed itself to be what it was, an airliner bomber. It had little latitude for future development and thus would not measure up to the B-17, B-24 or the twin engined B-25 and B-26 and its mass production delayed development and production of these more modern bombers that could have made a difference in the grim days following Pearl Harbor. But at the time of Pearl Harbor the B-18 was the most numerous American bomber to be based overseas and proved itself to be useful as a stopgap bomber and jack of all trades until the more modern bombers could become operational. As a stopgap bomber the B-18 left an important legacy. At a time when the B-17 and B-24 could not be spared, it was available in numbers and played a significant role in America's early anti-submarine operations, first off the American and later in the Caribbean.
The Kit:
The Special Hobby kit comes in a medium sized traditional top opening tray top box with a thin cardboard top and a heavier corrugated cardboard bottom. The box top offers some nice artwork. Inside the box one finds a large resealable bag with all of the main sprues, a smaller resealable bag with the clear parts, a small zip lock bag with some resin parts and a small resealable bag containing the decals and a photo etch fret. The main parts are molded in a medium gray plastic and feature recessed panel lines and some rivet and fastener detail. The panel lines are quite fine and not at all like the deep trenches found on some other recent releases in this scale. The surface is reasonably smooth but not polished and a few areas show where the molds were not as smooth as they could have been but these should not show under a coat of paint. There is a light amount of flash on some parts and a medium level of mold separation seams to clean up on some of the smaller parts. There are no alignment pins to be found. As with many limited run kits the sprue attachment point are quite heavy in some places and the mating surfaces would benefit from a light sanding to remove irregularities I found no sink marks or other surface defects on the air frame parts. The fabric surface detail is restrained. All flight control surfaces are molded in the neutral position and the only complaint I have with these are that the joint lines for the control surfaces are a bit shallow which would be an easy fix if this bothers you. There is only one ejector pin tower that may show in the interior but it should be easy to remove.
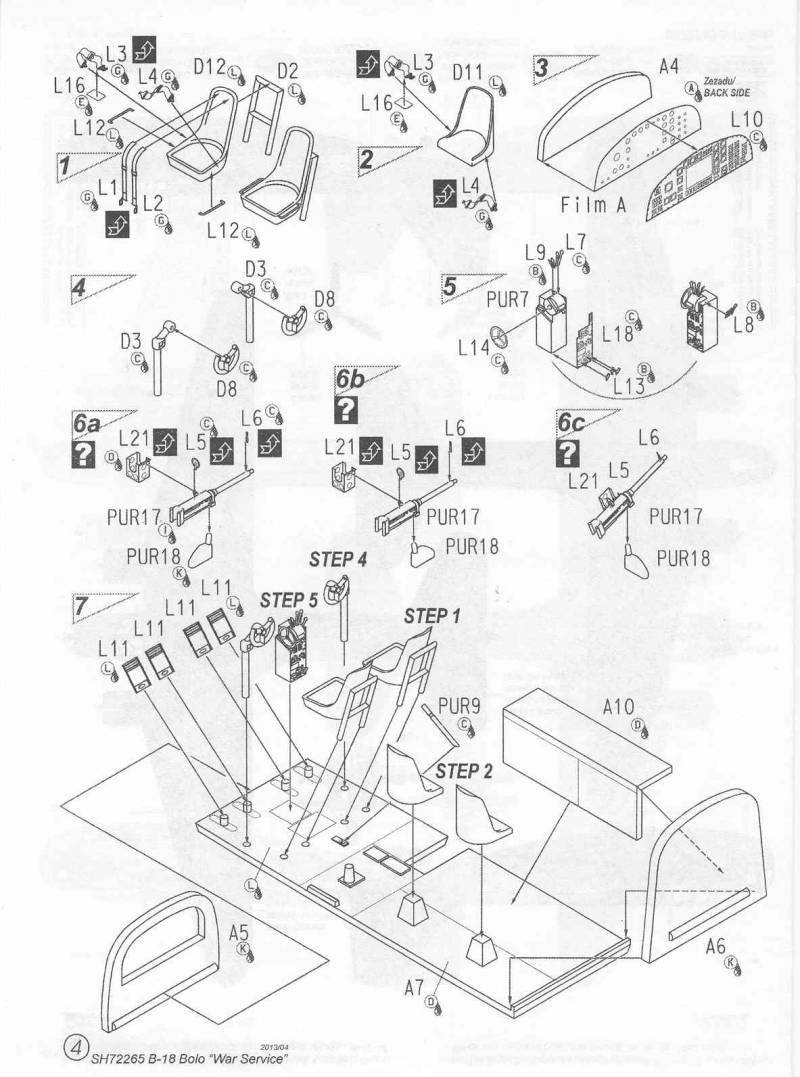
The interior is provided with a good level of detail, especially the cockpit as can be seen in the excerpt from the instructions shown below. The instrument panel is done sandwich style and a lot of the photo etch and resin parts end up here. Some of them will prove to be a challenge to those vision impaired and ham fisted.
------------------------------------
There are a number of options available depending on which aircraft you are modeling so it will be wise to study the instructions in that respect. There are different turrets, engine cowling parts and upper wing parts. The landing gear are nicely depicted. The tires have nice tread detail. The wheels are molded in halves and the tires are not weighted. The propellers are one piece moldings and need a bit of cleaning up. The engines are a bit plain looking being just half cylinders molded on a firewall. These are fairly visible so some extra detail or after market parts would improve the overall look. OK, lets look at the parts.

This close up gives a good idea of the surface detail and finish.

The balance of the fuselage sprue that I cut off in the first photo.

There are two of these sprues.


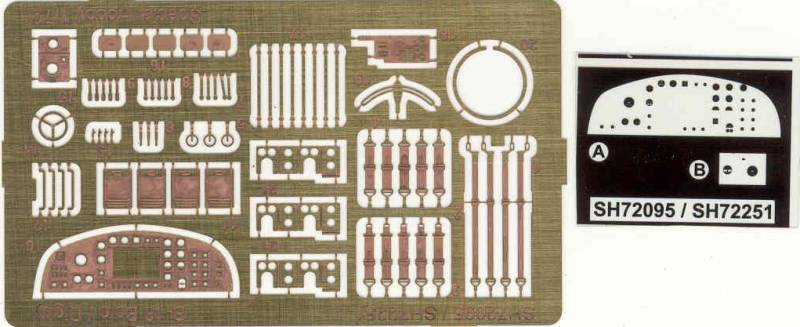
The photo etch fret and clear film for the instrument panel.
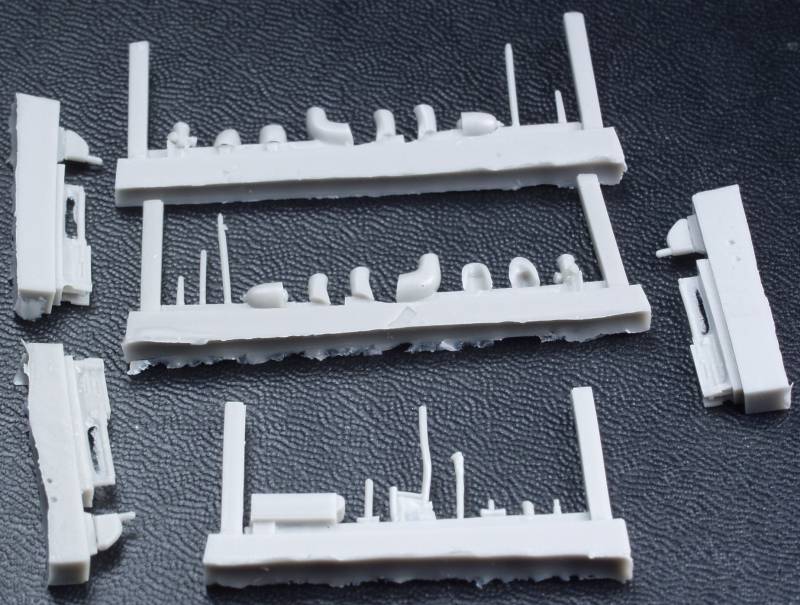
A small bag of resin parts is supplied, it contains intake scoops for the engines, some interior parts and machine guns. Most were well molded with no defects but the machine guns will require a bit of clean up.
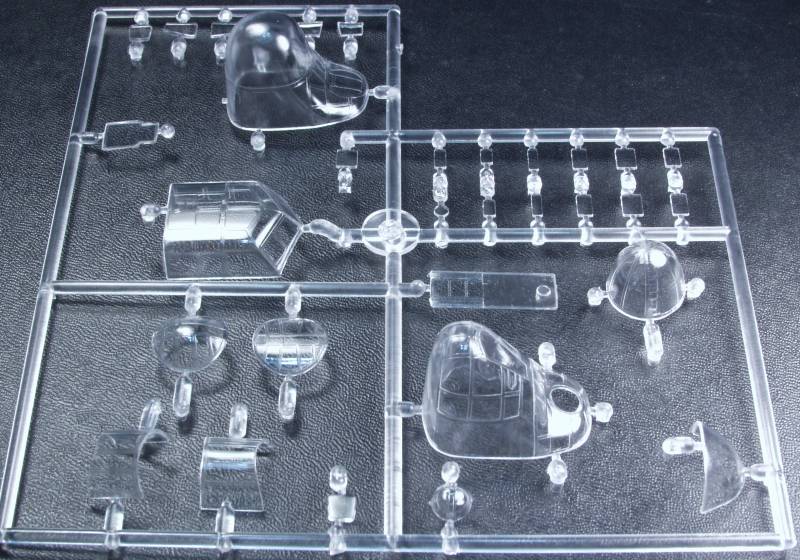
The clear parts include all noses used on later versions, the shark nose which came about as a results of complaints that the bombardiers position was too cramped on the pug nosed version and the later solid radar nose so theoretically three different versions could be made from this kit. The parts are reasonably thin and clear. The larger parts were better in this respect than some of the smaller ones and they all could benefit from a dip in Future.
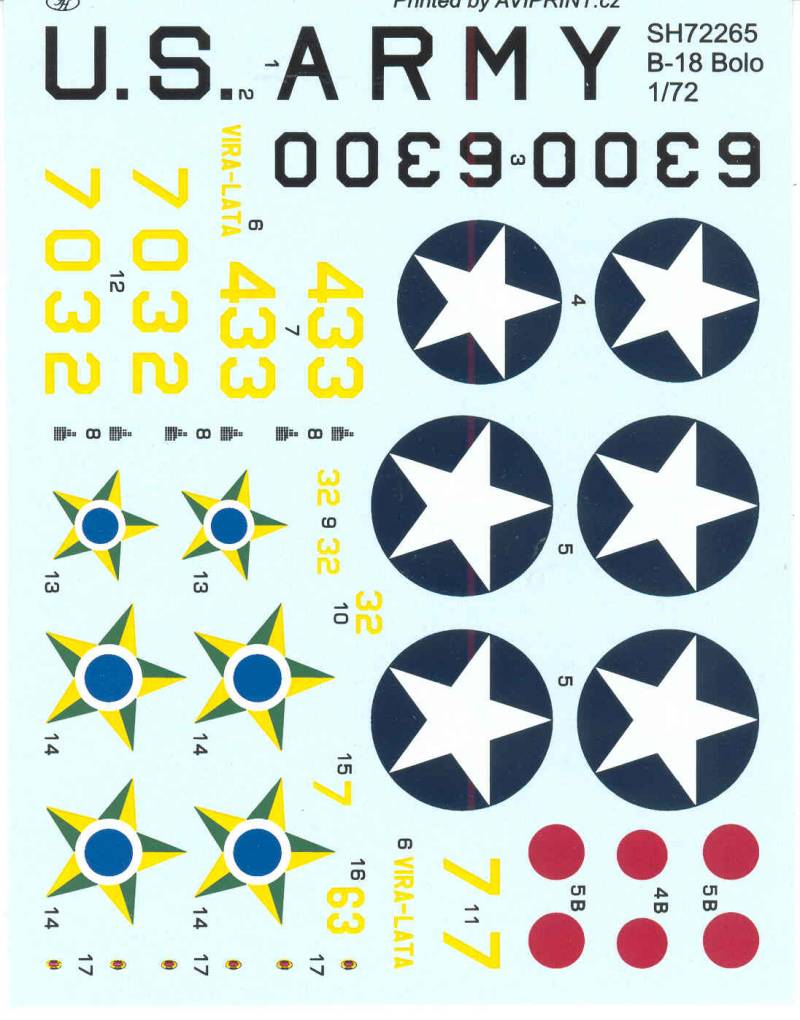
The decals are thin and glossy finished and are in register. Excess clear film is minimal. The sheet provides markings for two US aircraft and two Brazilian aircraft. All four feature multicolor camouflage that I have not seen before.
The instructions are typical for Special Hobby although the set in my kit featured some crazy misprinting that prevent you from assembling the booklet so it made any sense, it appears that the printing on the back of one of the sheets was done upside down. In any event all the pages are there and as usual they contain a brief history, a parts map and the usual warnings and icon keys as well as four pages of painting and marking instructions. Color call outs are in generic names and Gunze numbers.
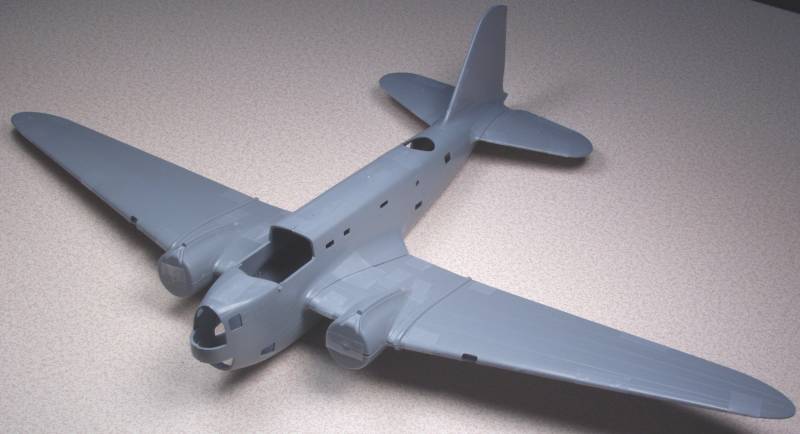
OK, lets take a quick look at a test fit. Shown altogether and from a distance it doesn't look too bad.
That said I was less than impressed with the wing to fuselage joins, I think they can be made better with some careful trimming and fitting. The fuselage halves mated up pretty well.
The upper wing cowling inserts fit better than expected. Once glued there should be little clean up in that area.
The horizontal tail planes fit a bit better than it looks here as the mounting tabs fit loose and it was tough to get the tape to hold them tight. Certainly better than the wing to fuselage fit.
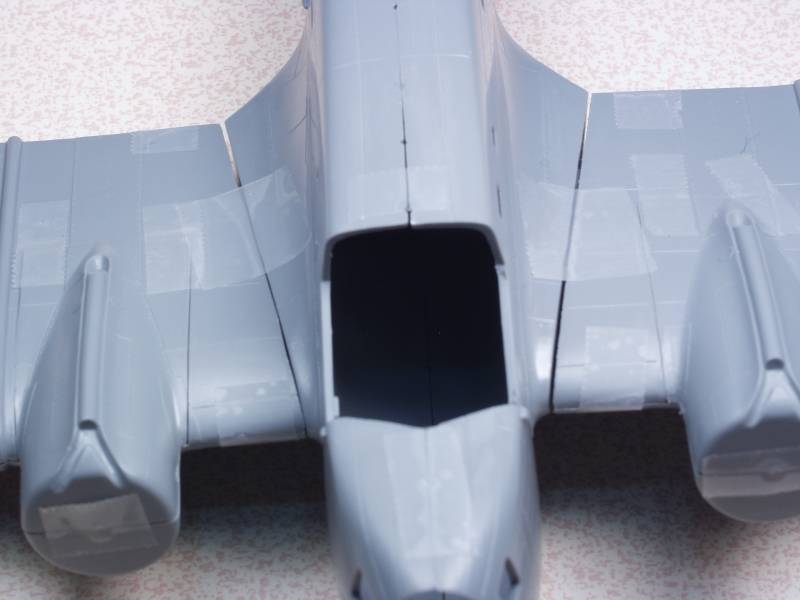
Bottom fuselage seam looks good, again the wings could stand some work to improve them.
In spite of some trial trimming I could not get the wing seam where the wing stiffener is to close up and it was the same on both wings. Not sure if its a warpage issue or something else, as it is it will certainly need to filling.
Conclusion
As I mentioned earlier most of the parts would fit better if the mating surfaces were given a light sanding. Special Hobby kits as a rule can be a tough build and over all I found this one to be a bit worse than others I have seen. Some experience dealing with kits of this nature are recommended if you are thinking of doing this one. I figure were not likely to see another B-18 anytime soon there are not a lot to chose from. I do hope since it would basically only require a different fuselage that we might eventually see a B-23 as well.
History:
Of all of the American bombers of World War II, the B-18 is probably the least known. The story of the airliner turned bomber has languished in obscurity. The few articles that have been written about it have only emphasized its faults and maligned it as a budget bomber with few virtues. The economy minded Congress of the mid thirties chose to fund the twin engined B-18 over the more promising and much more expensive B-17 which the prototype had the misfortune of crashing during testing. When the Air Corps received their speedy and comfortable B-18's in 1937 they seemed cutting edge compared to the Martin B-10 which had been the innovative bomber of the early thirties.
The B-18 had been built using contemporary but dead end design specifications and it soon showed itself to be what it was, an airliner bomber. It had little latitude for future development and thus would not measure up to the B-17, B-24 or the twin engined B-25 and B-26 and its mass production delayed development and production of these more modern bombers that could have made a difference in the grim days following Pearl Harbor. But at the time of Pearl Harbor the B-18 was the most numerous American bomber to be based overseas and proved itself to be useful as a stopgap bomber and jack of all trades until the more modern bombers could become operational. As a stopgap bomber the B-18 left an important legacy. At a time when the B-17 and B-24 could not be spared, it was available in numbers and played a significant role in America's early anti-submarine operations, first off the American and later in the Caribbean.
The Kit:
The Special Hobby kit comes in a medium sized traditional top opening tray top box with a thin cardboard top and a heavier corrugated cardboard bottom. The box top offers some nice artwork. Inside the box one finds a large resealable bag with all of the main sprues, a smaller resealable bag with the clear parts, a small zip lock bag with some resin parts and a small resealable bag containing the decals and a photo etch fret. The main parts are molded in a medium gray plastic and feature recessed panel lines and some rivet and fastener detail. The panel lines are quite fine and not at all like the deep trenches found on some other recent releases in this scale. The surface is reasonably smooth but not polished and a few areas show where the molds were not as smooth as they could have been but these should not show under a coat of paint. There is a light amount of flash on some parts and a medium level of mold separation seams to clean up on some of the smaller parts. There are no alignment pins to be found. As with many limited run kits the sprue attachment point are quite heavy in some places and the mating surfaces would benefit from a light sanding to remove irregularities I found no sink marks or other surface defects on the air frame parts. The fabric surface detail is restrained. All flight control surfaces are molded in the neutral position and the only complaint I have with these are that the joint lines for the control surfaces are a bit shallow which would be an easy fix if this bothers you. There is only one ejector pin tower that may show in the interior but it should be easy to remove.
The interior is provided with a good level of detail, especially the cockpit as can be seen in the excerpt from the instructions shown below. The instrument panel is done sandwich style and a lot of the photo etch and resin parts end up here. Some of them will prove to be a challenge to those vision impaired and ham fisted.
------------------------------------
There are a number of options available depending on which aircraft you are modeling so it will be wise to study the instructions in that respect. There are different turrets, engine cowling parts and upper wing parts. The landing gear are nicely depicted. The tires have nice tread detail. The wheels are molded in halves and the tires are not weighted. The propellers are one piece moldings and need a bit of cleaning up. The engines are a bit plain looking being just half cylinders molded on a firewall. These are fairly visible so some extra detail or after market parts would improve the overall look. OK, lets look at the parts.
This close up gives a good idea of the surface detail and finish.
The balance of the fuselage sprue that I cut off in the first photo.
There are two of these sprues.
The photo etch fret and clear film for the instrument panel.
A small bag of resin parts is supplied, it contains intake scoops for the engines, some interior parts and machine guns. Most were well molded with no defects but the machine guns will require a bit of clean up.
The clear parts include all noses used on later versions, the shark nose which came about as a results of complaints that the bombardiers position was too cramped on the pug nosed version and the later solid radar nose so theoretically three different versions could be made from this kit. The parts are reasonably thin and clear. The larger parts were better in this respect than some of the smaller ones and they all could benefit from a dip in Future.
The decals are thin and glossy finished and are in register. Excess clear film is minimal. The sheet provides markings for two US aircraft and two Brazilian aircraft. All four feature multicolor camouflage that I have not seen before.
The instructions are typical for Special Hobby although the set in my kit featured some crazy misprinting that prevent you from assembling the booklet so it made any sense, it appears that the printing on the back of one of the sheets was done upside down. In any event all the pages are there and as usual they contain a brief history, a parts map and the usual warnings and icon keys as well as four pages of painting and marking instructions. Color call outs are in generic names and Gunze numbers.
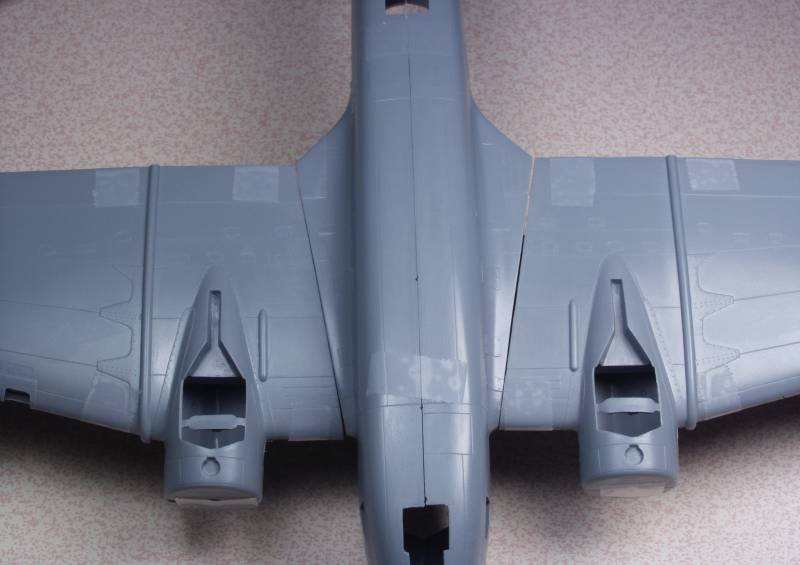
OK, lets take a quick look at a test fit. Shown altogether and from a distance it doesn't look too bad.
That said I was less than impressed with the wing to fuselage joins, I think they can be made better with some careful trimming and fitting. The fuselage halves mated up pretty well.
The upper wing cowling inserts fit better than expected. Once glued there should be little clean up in that area.
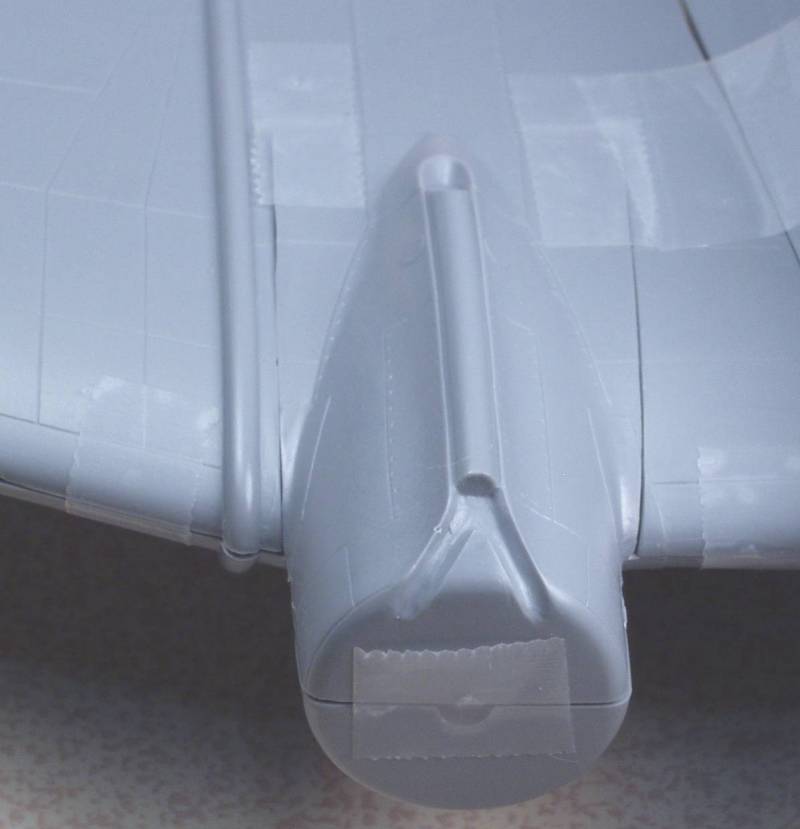
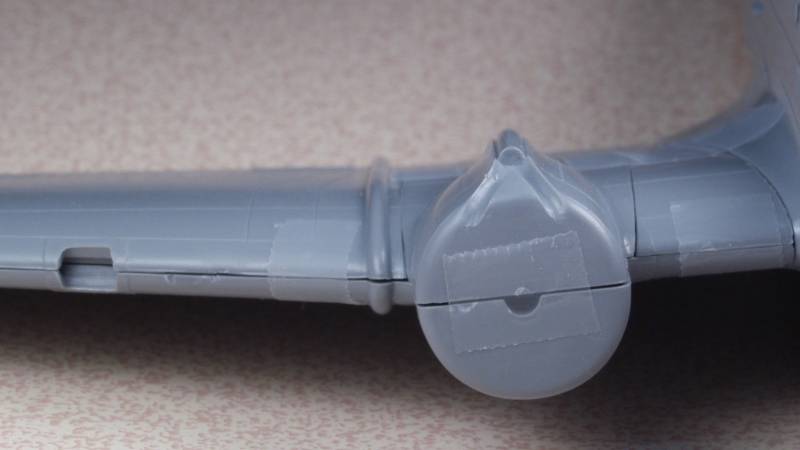
The horizontal tail planes fit a bit better than it looks here as the mounting tabs fit loose and it was tough to get the tape to hold them tight. Certainly better than the wing to fuselage fit.
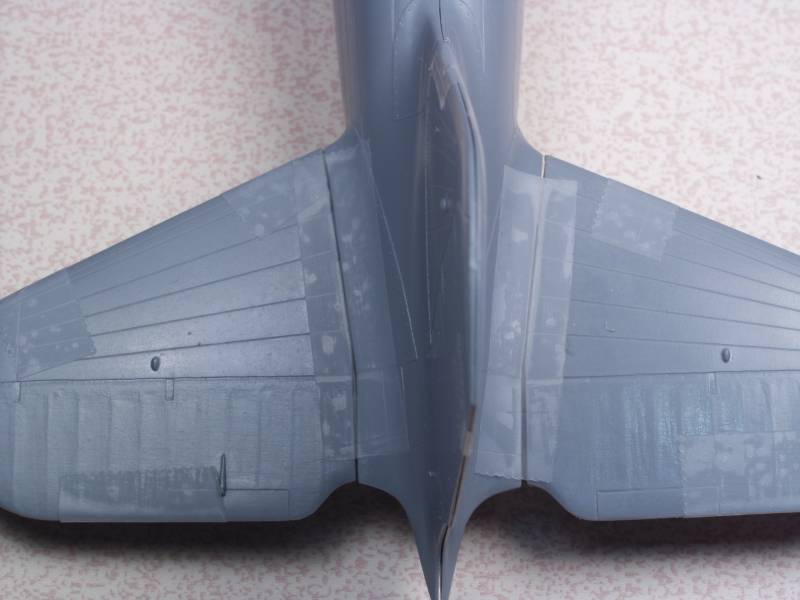
Bottom fuselage seam looks good, again the wings could stand some work to improve them.
In spite of some trial trimming I could not get the wing seam where the wing stiffener is to close up and it was the same on both wings. Not sure if its a warpage issue or something else, as it is it will certainly need to filling.
Conclusion
As I mentioned earlier most of the parts would fit better if the mating surfaces were given a light sanding. Special Hobby kits as a rule can be a tough build and over all I found this one to be a bit worse than others I have seen. Some experience dealing with kits of this nature are recommended if you are thinking of doing this one. I figure were not likely to see another B-18 anytime soon there are not a lot to chose from. I do hope since it would basically only require a different fuselage that we might eventually see a B-23 as well.
