paddy
Well-known member
I thought i would post this as I'm not building at the moment.
Lots of people admire the Aires detail sets but never give them a go !. They are of course not cheap but if you look at in terms of hours of entertainment compared with a trip to the cinema for example, then they start to look good value.
One of the problems i think that puts people off is having two sets of instructions , one for the kit and another for the details set ,which both contradict themselves as they go their different ways during the build. Its not easy to work out an order of construction and its easy to spend quite a bit of time on a kit part only to find it has a replacement in the Aires set (i know") ). some people dont like to take the inevatable "drastic cut" with the hobby kniofe which means no turning back as you cut a big hole in the wing.....or cut everything off forward of the cockpit hmy:
). some people dont like to take the inevatable "drastic cut" with the hobby kniofe which means no turning back as you cut a big hole in the wing.....or cut everything off forward of the cockpit hmy:
Well its easy for me to say but most of this is not a practical problem, its a mental problem and once you get over the fact that you need to totally wreck this perfectly good kit you just spent the wife's Birthday money on, before you can start to rebuild it, you will feel better about the whole thing
I have dug out some pictures of a build i did many moons ago now which might wet your appetites...?
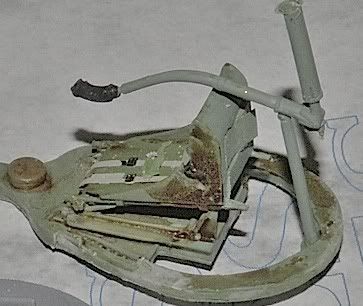
This was my first attempt... I sort of knew what i was aiming for but i was quite new to modelling, or should i say i had just had a 30 year break while i did wives and houses and work and stuff !! Once i realised that all that was a waste of time and modelling was the way forward in life i got down to business and made this !
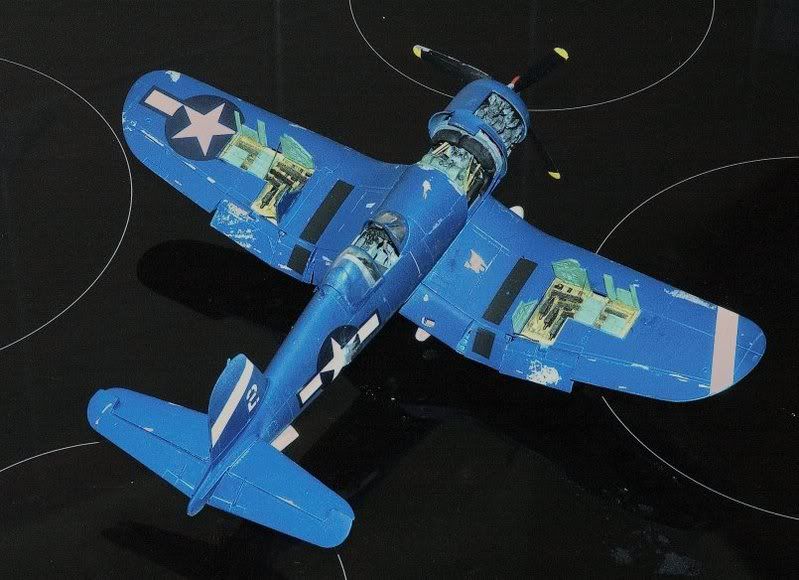
As i say i knew what i wanted to build and this was not quite it ! Those of you who know my builds will also know i like things to look well used, i've never been keen on museum quality restorations in real life so i dont do them in my models either.
Best thing to do was have another go !!
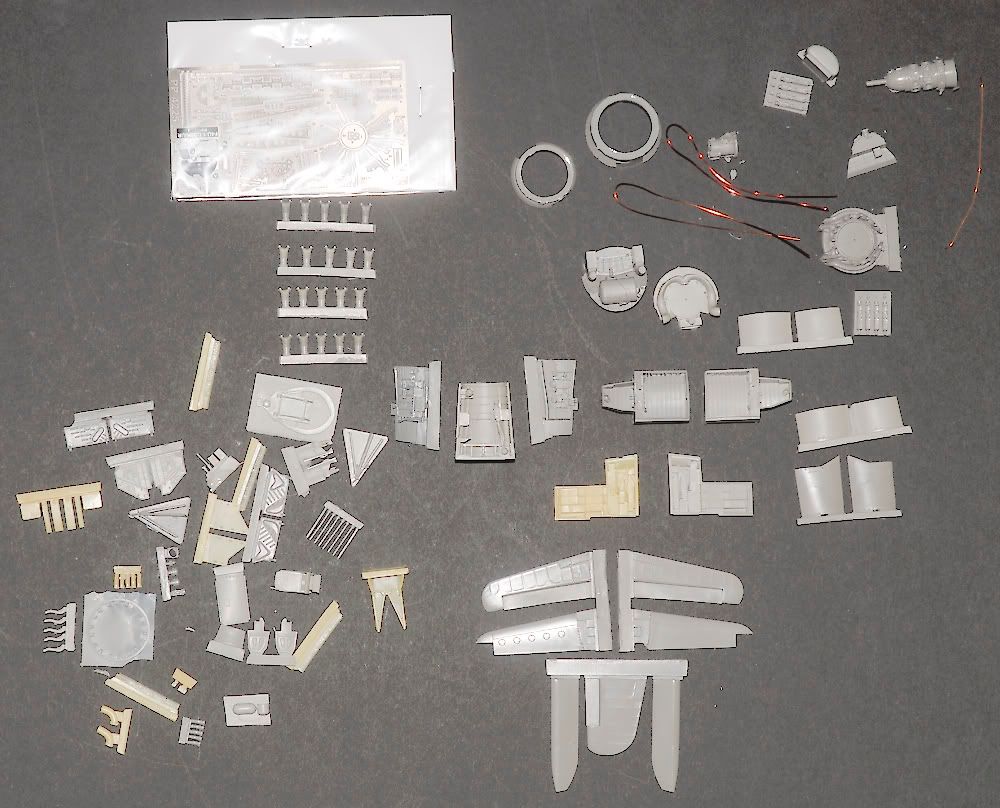
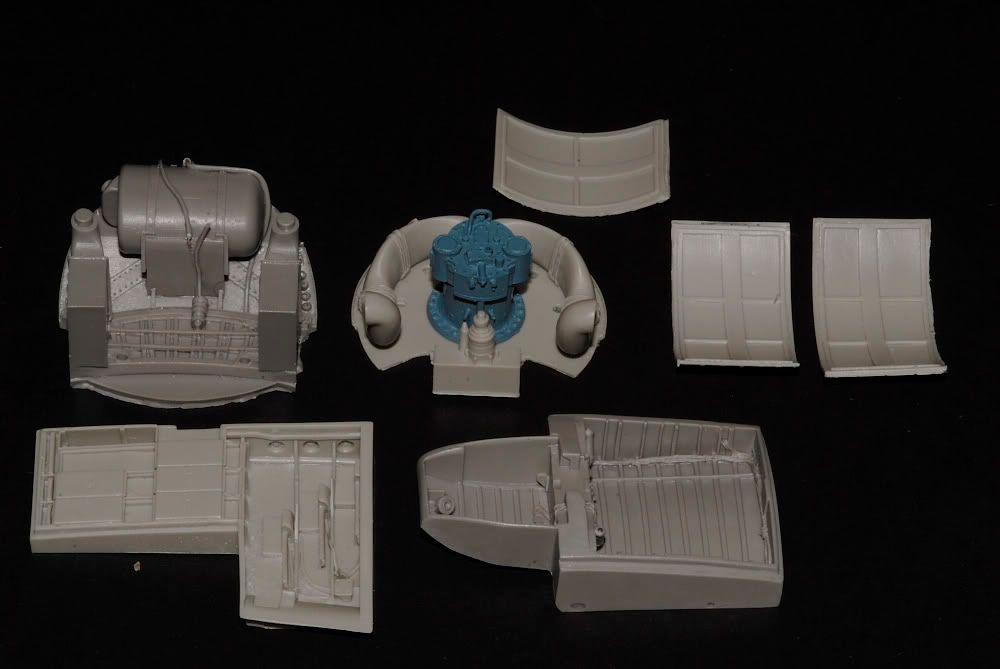
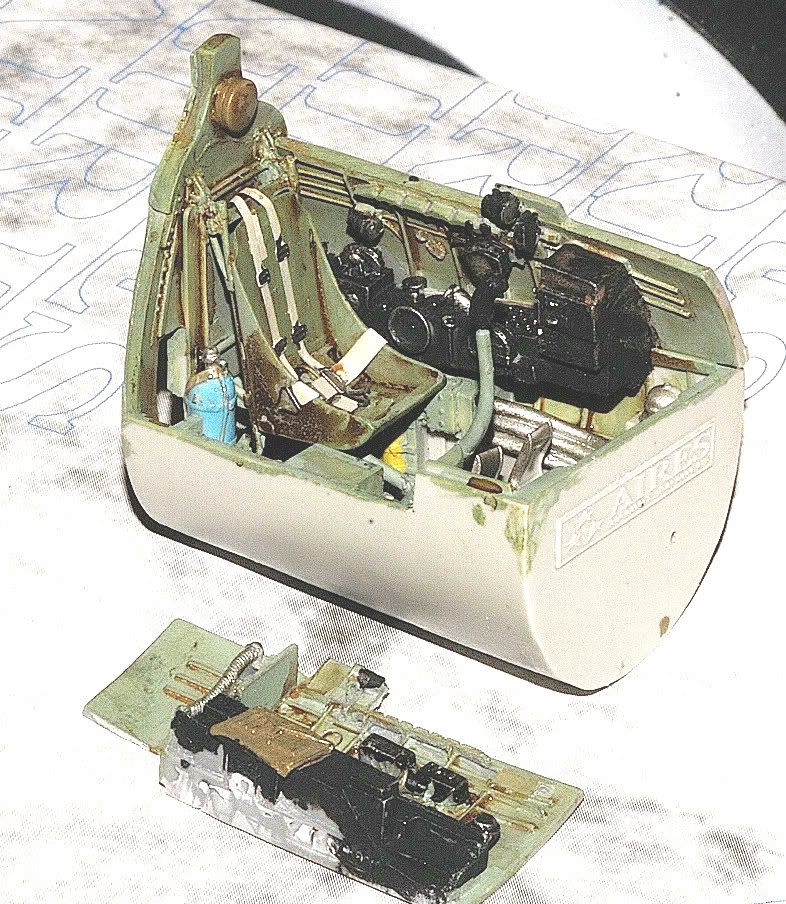
The Aires full detail set covers engine and fuel tank aria, cockpit and wheel wells and gun bays.
Cockpit sides
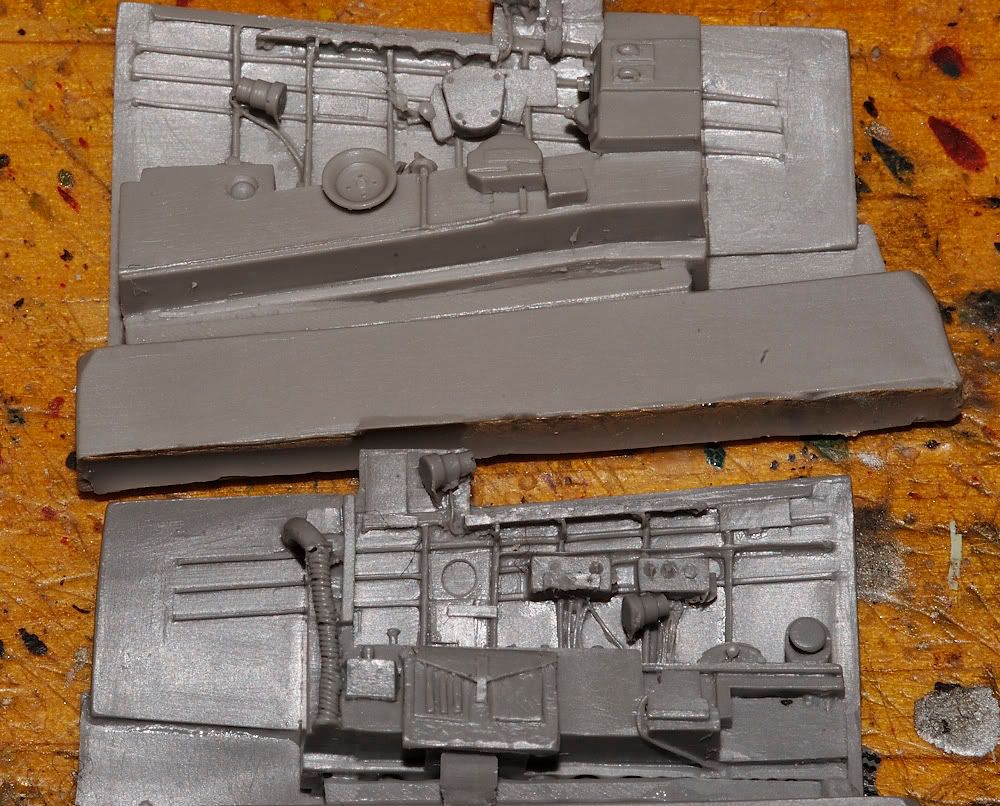
and floor
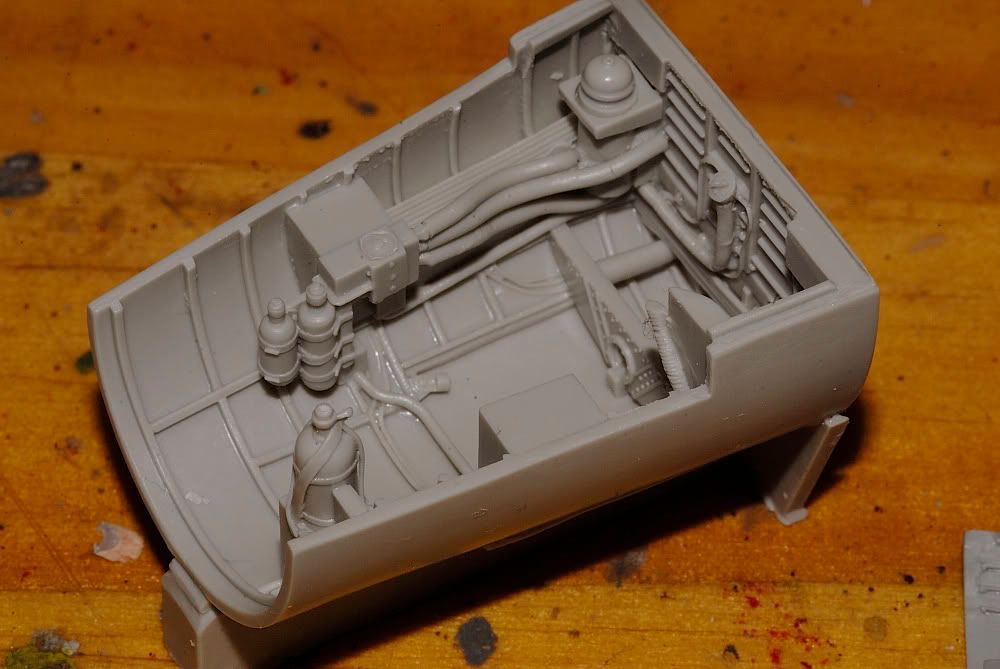
The detail is fantastic as you can see here on the cockpit bulkhead/firewall
Most of the resin part come attached to pouring block, the little reservoirs of resin that collect on top of the mould when the resin is poured, and these need to be sawn or cut off and sanded. Thinner parts like panels just have small amounts of flash that is easy trimmed. a word of warning if this is your first go at this stuff, Resin is very brittle. It needs to be cut not snapped. also watch the dust if you sand it, its not healthy stuff. Lay it in a line and snort it up a straw and you will get a nasty cough :laugh:
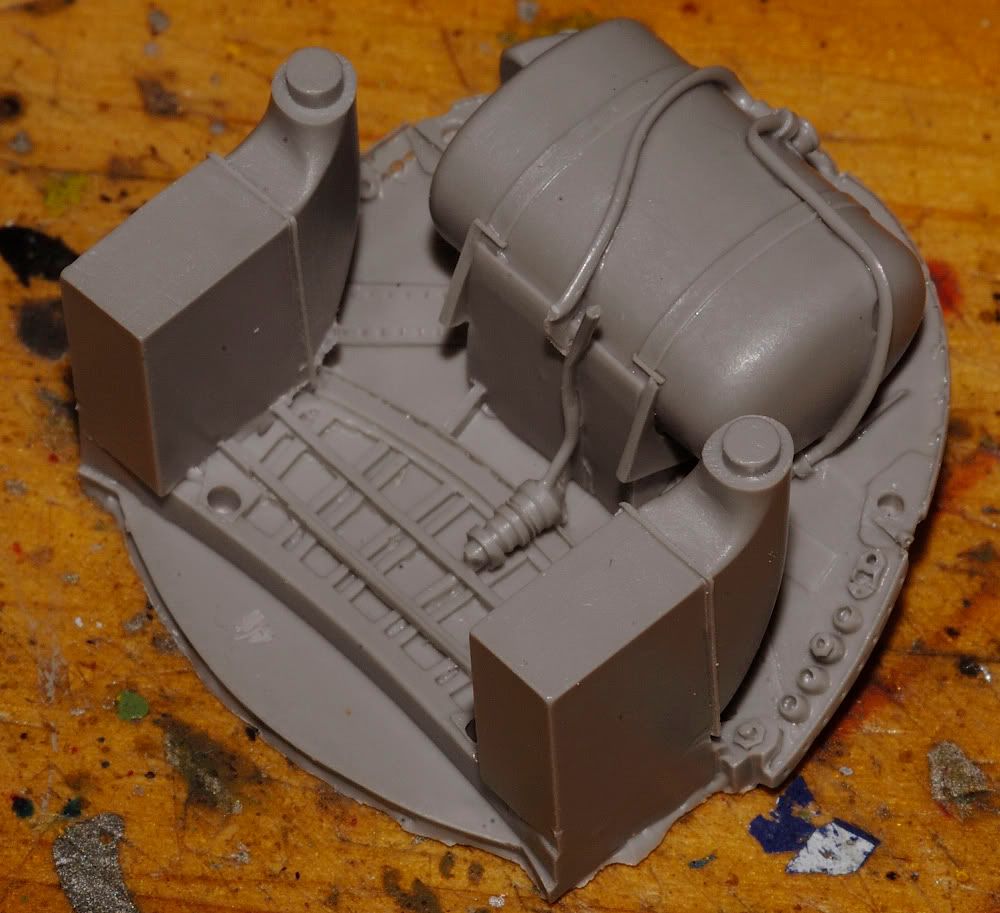
A few more parts, wheel well and gun bay and some engine panels.
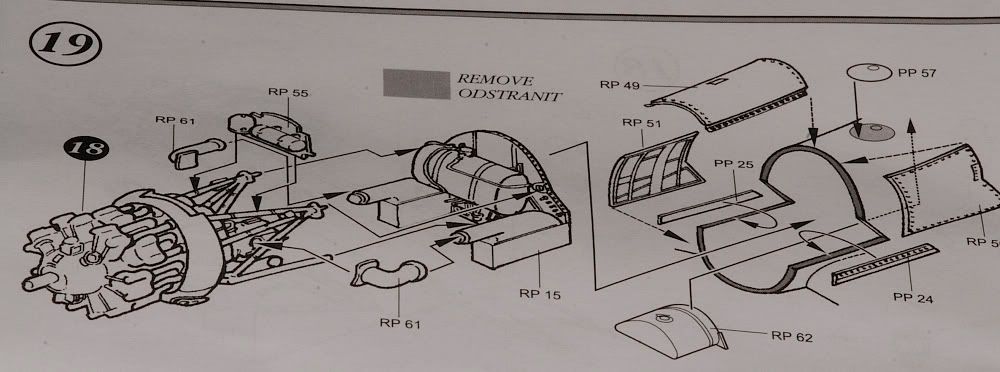
Typical example of Aires instructions.
I started with the engine if only because it put off attacking the kit with a saw

you have a central crankcase and individual cylinders. Its nega important at this stage to get the cylinders to fit down into the crankcase fully so the overall dia of the engine is spot on otherwise you will have imposable problems later not least with the ring that goes round the dia attached to the heads..
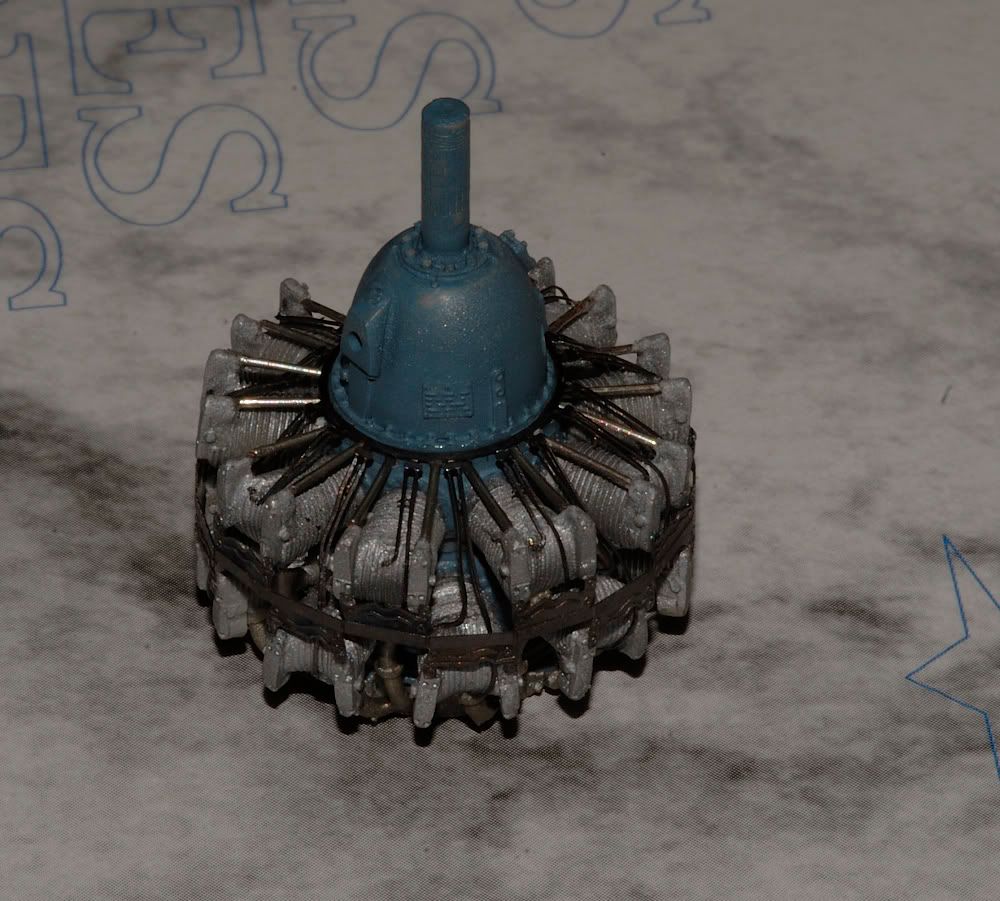
Note the PE plug leads and the PE heat shield that goes right round between the cylinders If you have your dia wrong then this is not going to fit !!

You can make your own push rod tubes etc or use the resin ones provided.
Your engine mounts on to the bulkhead
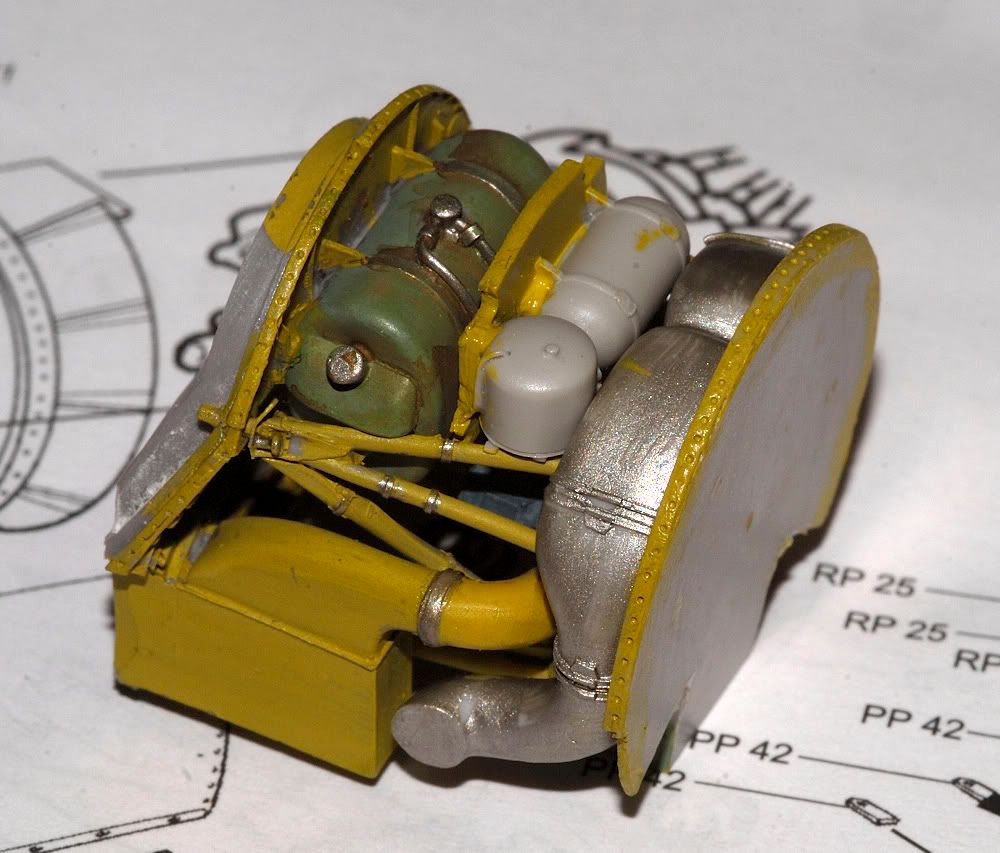
this gives you a finished unit that can then be mounted after 351 dry fits to the fuselage as a complete piece.
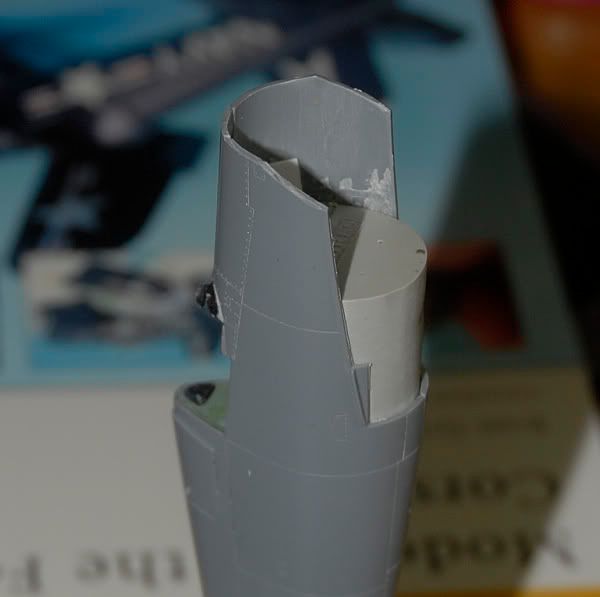
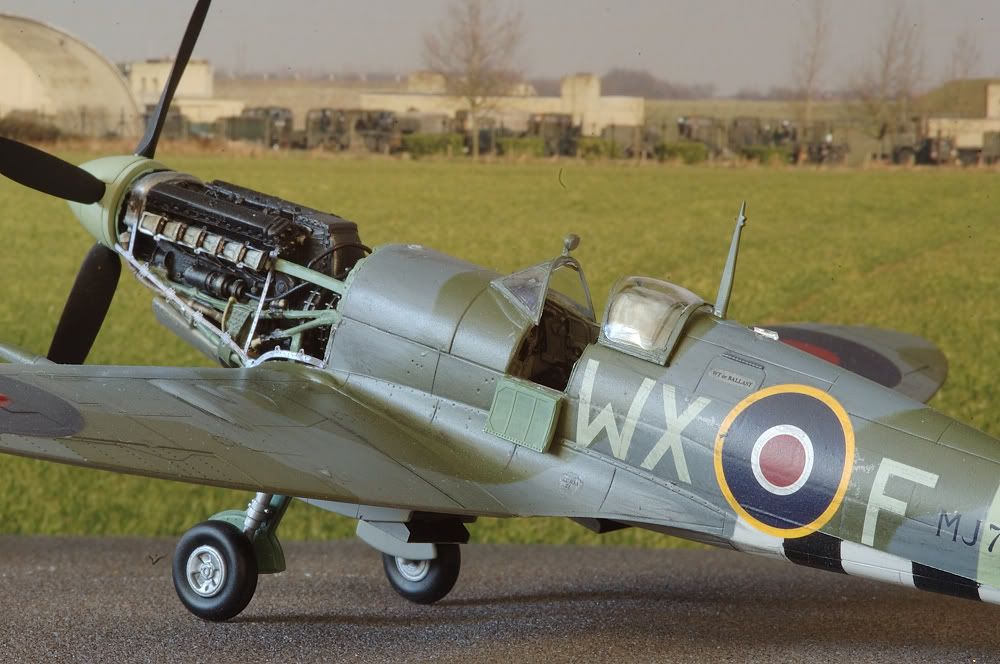
Eventually you are going to have to cut that fuselage !! and this is how it should look
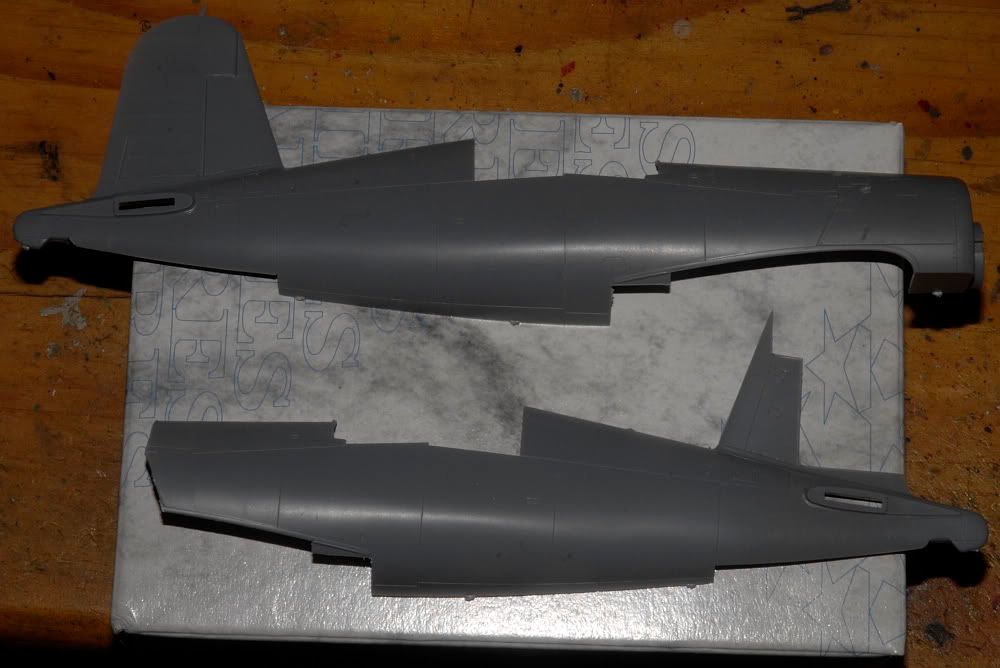
Top half cut showing how it looks against the bottom half. All cuts are made along panel lines so its easy to see where to drag your knife or saw. Obviously you are best to cut wide of the panel lines and then trim to size carefully with a super sharp scalpel.
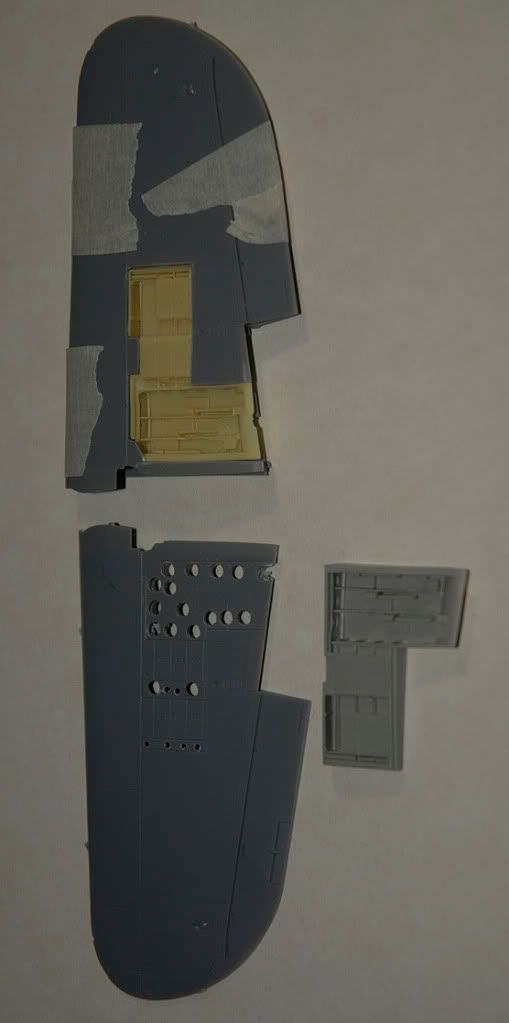
Kit part and resin part
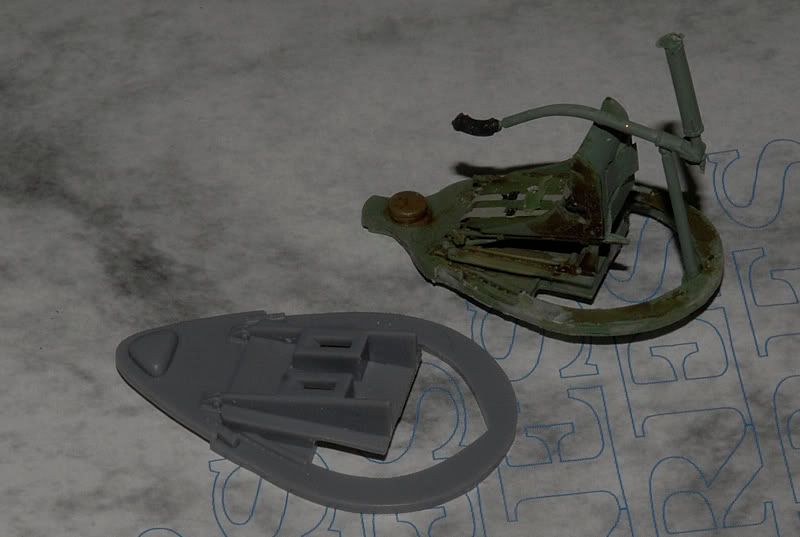
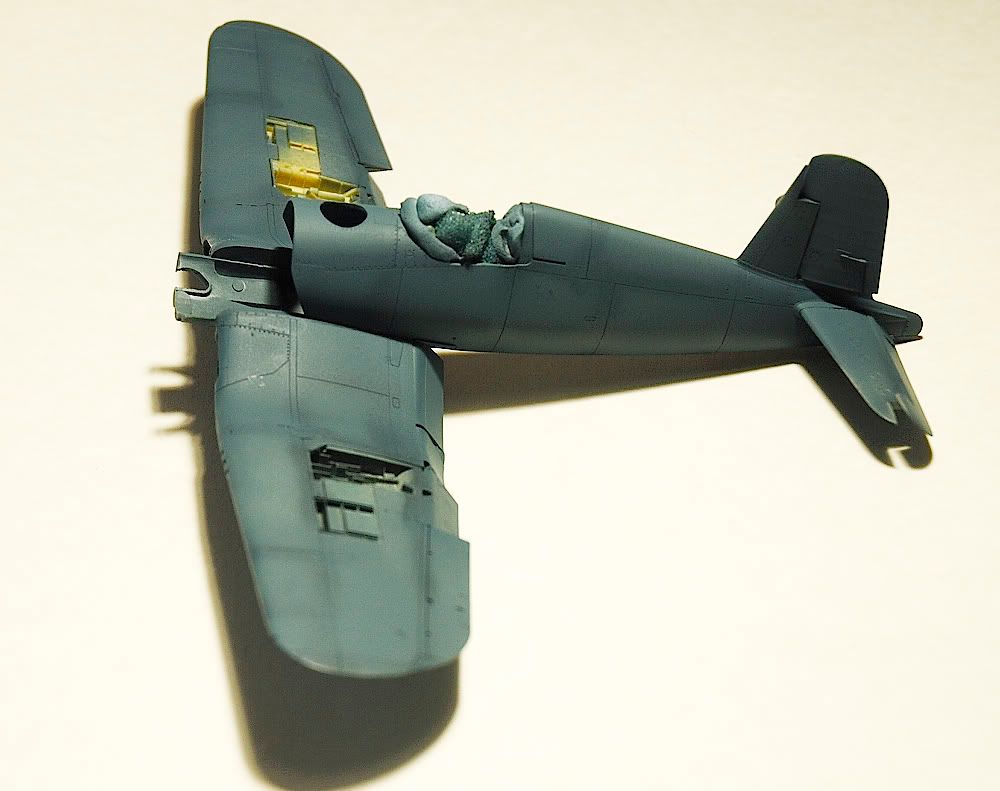
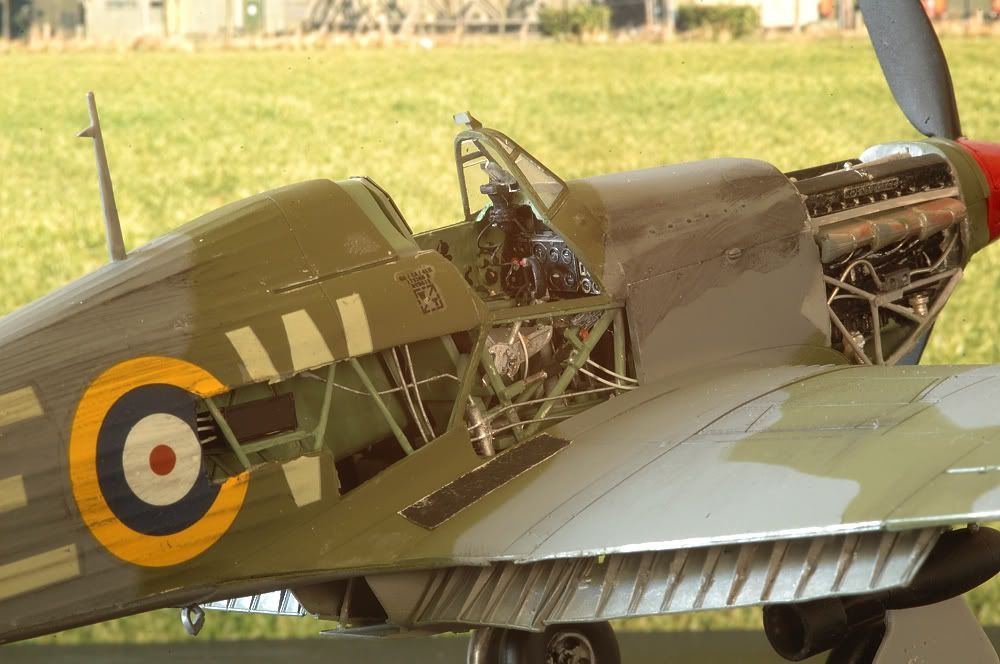
Cockpit can now be assembled like this and then after a lot !!! of thinning of both kit fuselage/cockpit sides and resin parts and anthe r183 dry fits it should all close up like this
Again you will need to cut the holes in the wings for the dun bays but again you can work to the panel lines and you will not be far off, make your cut out on the small size and then trim to fit the resin part which has a stepped edge and should fit nicely in your hole. Drill a series of holes to get you started like this
Once you have done that you can do a little assembly and add the wings to the fuselage and add some paint.
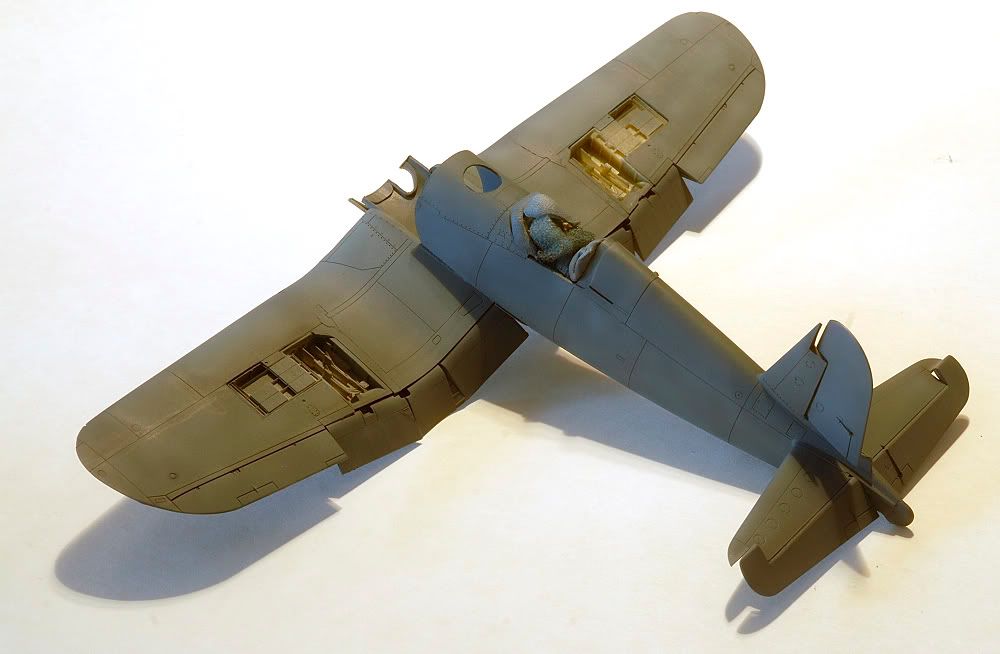
Hang on there !!! what about the under carrage bays ?? well if you can get them to fit with the gunbays above them then you are a better man than me :laugh: Fortunately the kit parts are excellent so no one will notice anyway ............unless you tell them like i just did....doh !!
Add your bulkhead making sure its absolutely square with the fuselage or your engine will stick out at an angle and your going to be flying in circles !!
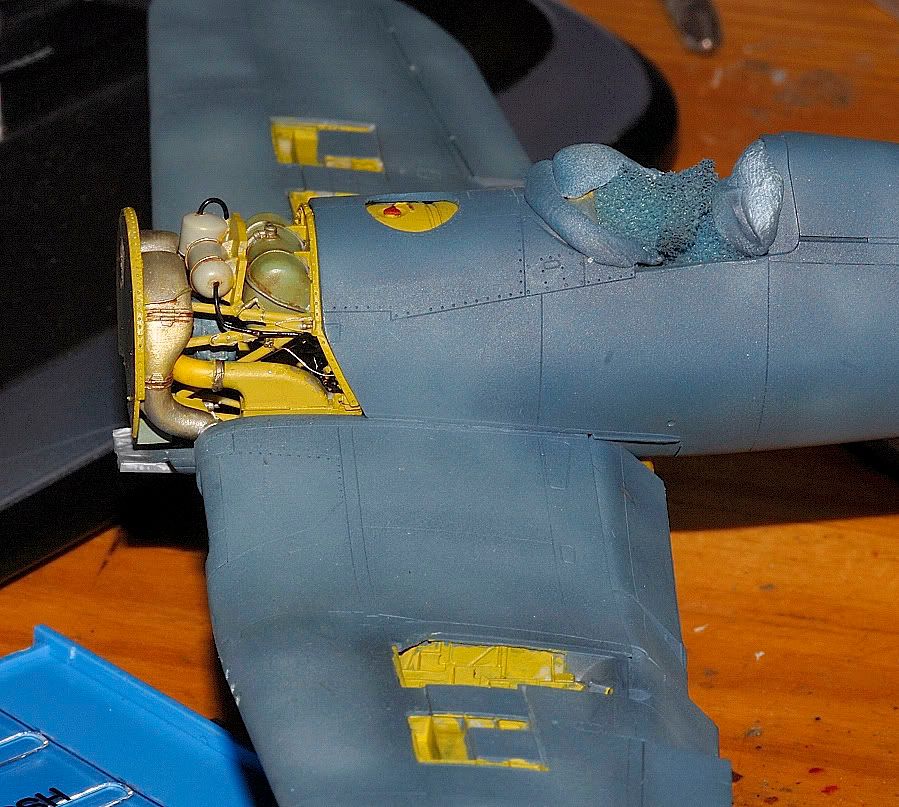
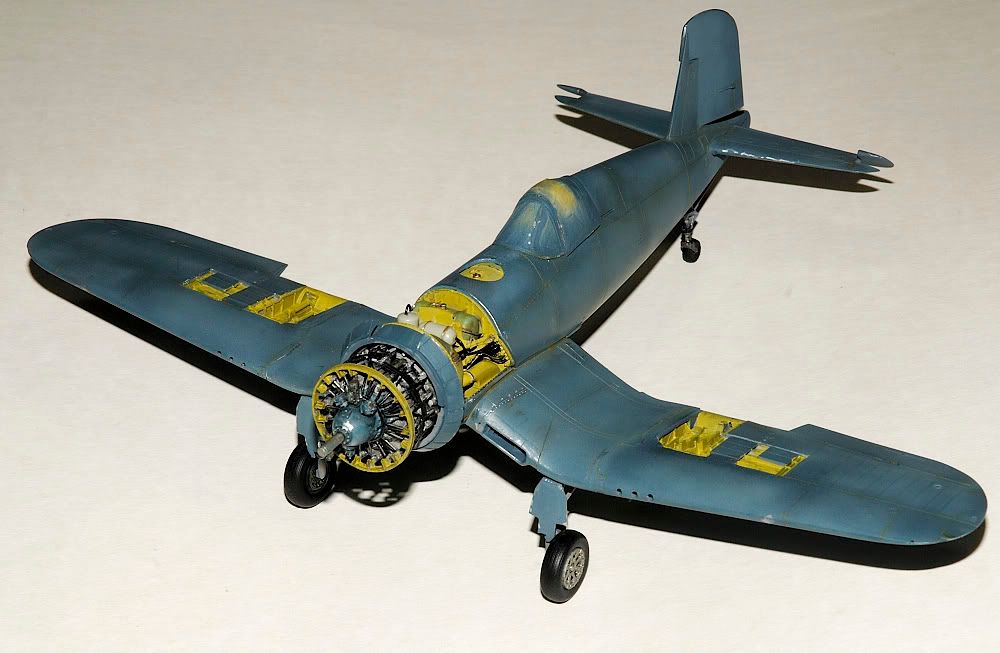
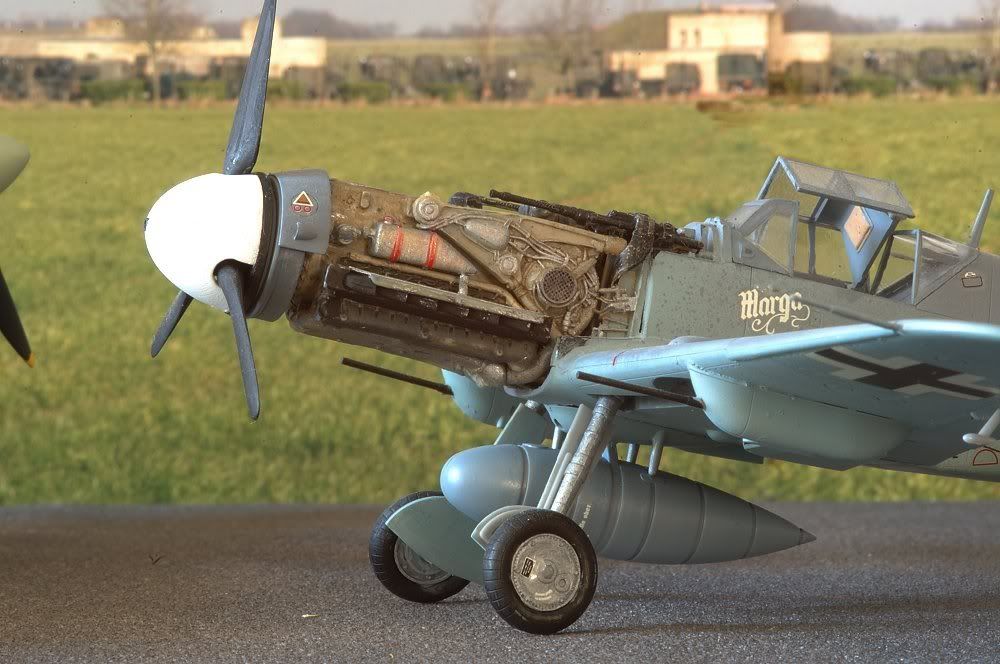
ayttach your engine and you are almost there !!
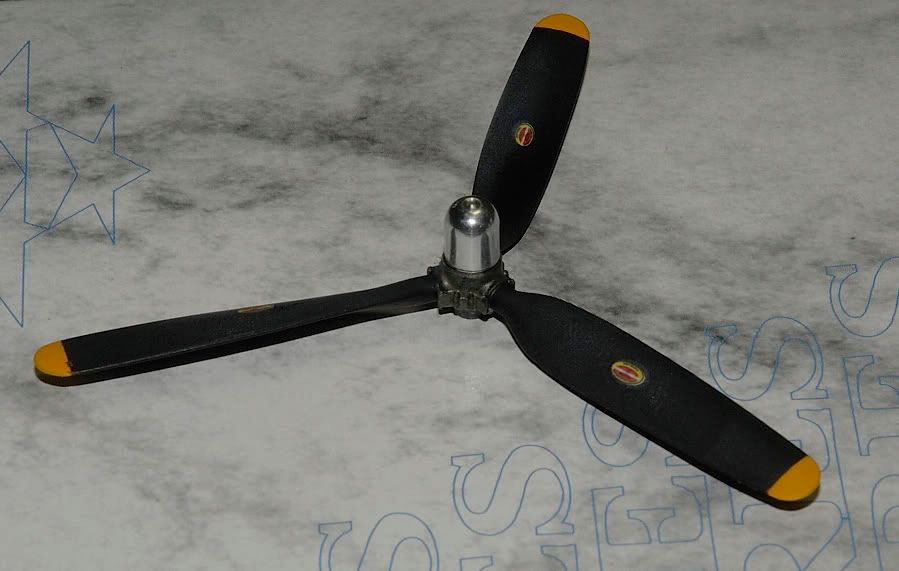
I made a nice polished alloy spinner hub for my prop but thats just showing off really
Now youi just need to add the fine detail like guns and weathering etc and your done......a walk in the park :cheer: give it a go.


The same basic build principles and order applies to all the detail kits


I hope this inspires someone to give these kits a go !! Once you have done one then the bug really bites :laugh:
thanks for looking.
Lots of people admire the Aires detail sets but never give them a go !. They are of course not cheap but if you look at in terms of hours of entertainment compared with a trip to the cinema for example, then they start to look good value.
One of the problems i think that puts people off is having two sets of instructions , one for the kit and another for the details set ,which both contradict themselves as they go their different ways during the build. Its not easy to work out an order of construction and its easy to spend quite a bit of time on a kit part only to find it has a replacement in the Aires set (i know
). some people dont like to take the inevatable "drastic cut" with the hobby kniofe which means no turning back as you cut a big hole in the wing.....or cut everything off forward of the cockpit hmy:Well its easy for me to say but most of this is not a practical problem, its a mental problem and once you get over the fact that you need to totally wreck this perfectly good kit you just spent the wife's Birthday money on, before you can start to rebuild it, you will feel better about the whole thing
I have dug out some pictures of a build i did many moons ago now which might wet your appetites...?
This was my first attempt... I sort of knew what i was aiming for but i was quite new to modelling, or should i say i had just had a 30 year break while i did wives and houses and work and stuff !! Once i realised that all that was a waste of time and modelling was the way forward in life i got down to business and made this !
As i say i knew what i wanted to build and this was not quite it ! Those of you who know my builds will also know i like things to look well used, i've never been keen on museum quality restorations in real life so i dont do them in my models either.
Best thing to do was have another go !!
The Aires full detail set covers engine and fuel tank aria, cockpit and wheel wells and gun bays.
Cockpit sides
and floor
The detail is fantastic as you can see here on the cockpit bulkhead/firewall
Most of the resin part come attached to pouring block, the little reservoirs of resin that collect on top of the mould when the resin is poured, and these need to be sawn or cut off and sanded. Thinner parts like panels just have small amounts of flash that is easy trimmed. a word of warning if this is your first go at this stuff, Resin is very brittle. It needs to be cut not snapped. also watch the dust if you sand it, its not healthy stuff. Lay it in a line and snort it up a straw and you will get a nasty cough :laugh:
A few more parts, wheel well and gun bay and some engine panels.
Typical example of Aires instructions.
I started with the engine if only because it put off attacking the kit with a saw
you have a central crankcase and individual cylinders. Its nega important at this stage to get the cylinders to fit down into the crankcase fully so the overall dia of the engine is spot on otherwise you will have imposable problems later not least with the ring that goes round the dia attached to the heads..
Note the PE plug leads and the PE heat shield that goes right round between the cylinders If you have your dia wrong then this is not going to fit !!
You can make your own push rod tubes etc or use the resin ones provided.
Your engine mounts on to the bulkhead
this gives you a finished unit that can then be mounted after 351 dry fits to the fuselage as a complete piece.
Eventually you are going to have to cut that fuselage !! and this is how it should look
Top half cut showing how it looks against the bottom half. All cuts are made along panel lines so its easy to see where to drag your knife or saw. Obviously you are best to cut wide of the panel lines and then trim to size carefully with a super sharp scalpel.
Kit part and resin part
Cockpit can now be assembled like this and then after a lot !!! of thinning of both kit fuselage/cockpit sides and resin parts and anthe r183 dry fits it should all close up like this
Again you will need to cut the holes in the wings for the dun bays but again you can work to the panel lines and you will not be far off, make your cut out on the small size and then trim to fit the resin part which has a stepped edge and should fit nicely in your hole. Drill a series of holes to get you started like this
Once you have done that you can do a little assembly and add the wings to the fuselage and add some paint.
Hang on there !!! what about the under carrage bays ?? well if you can get them to fit with the gunbays above them then you are a better man than me :laugh: Fortunately the kit parts are excellent so no one will notice anyway ............unless you tell them like i just did....doh !!
Add your bulkhead making sure its absolutely square with the fuselage or your engine will stick out at an angle and your going to be flying in circles !!
ayttach your engine and you are almost there !!
I made a nice polished alloy spinner hub for my prop but thats just showing off really
Now youi just need to add the fine detail like guns and weathering etc and your done......a walk in the park :cheer: give it a go.
The same basic build principles and order applies to all the detail kits
I hope this inspires someone to give these kits a go !! Once you have done one then the bug really bites :laugh:
thanks for looking.