
-
Modelers Alliance has updated the forum software on our website. We have migrated all post, content and user accounts but we could not migrate the passwords.
This requires that you manually reset your password.
Please click here, http://modelersalliance.org/forums/login to go to logon page and use the "Forgot your Password" option.
You are using an out of date browser. It may not display this or other websites correctly.
You should upgrade or use an alternative browser.
You should upgrade or use an alternative browser.
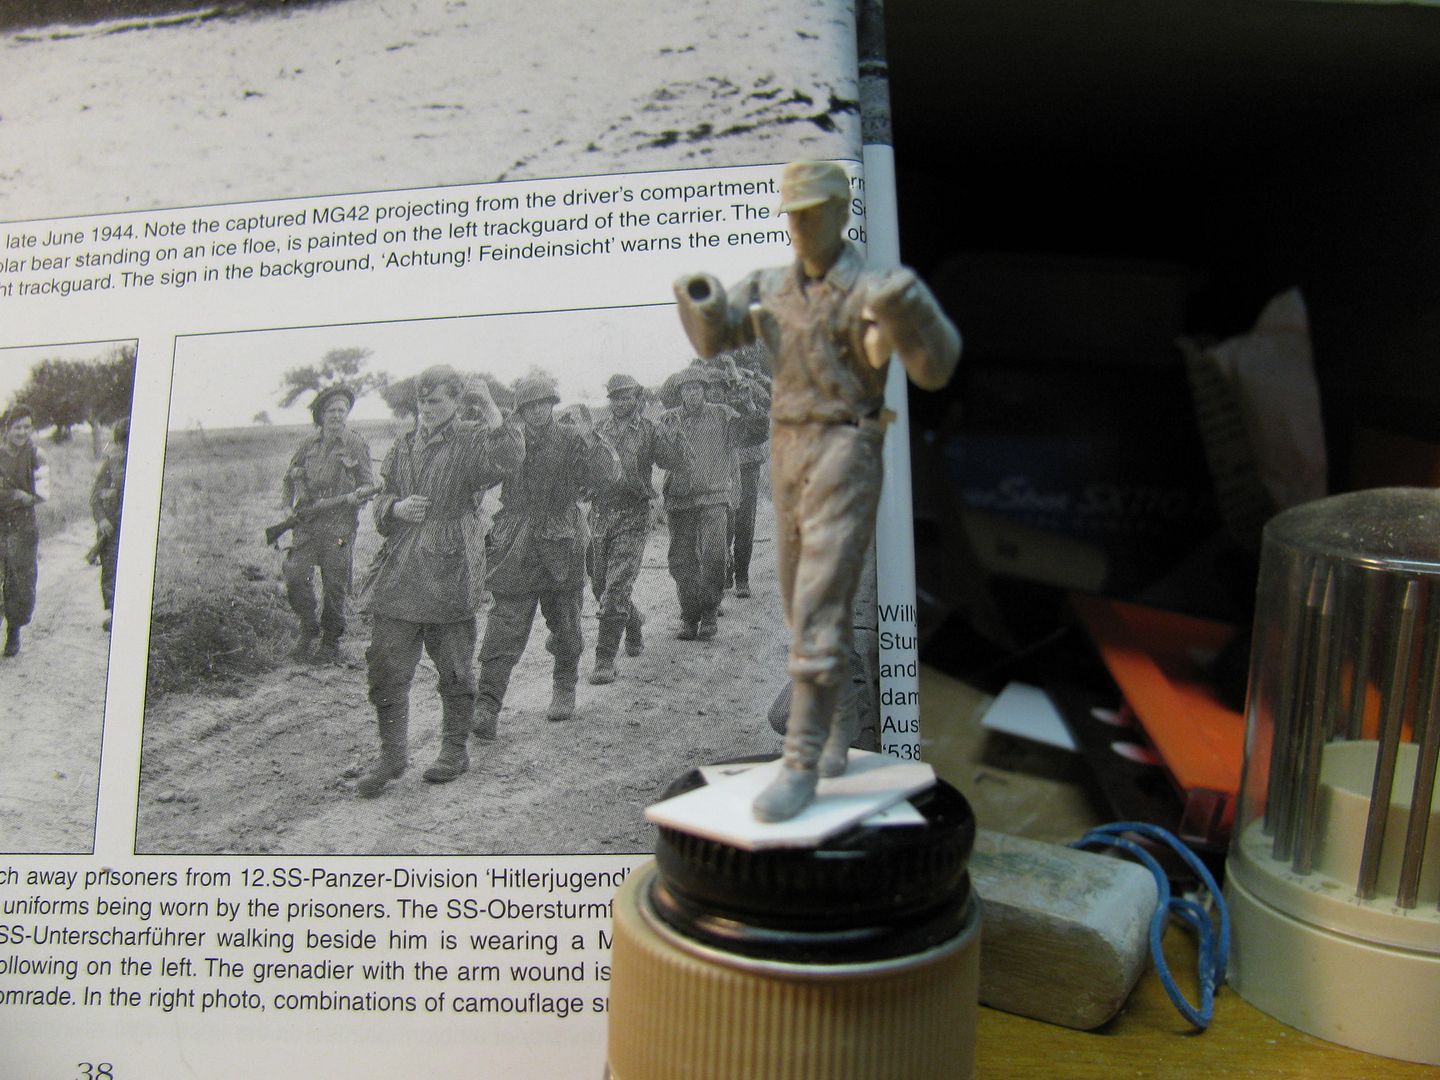
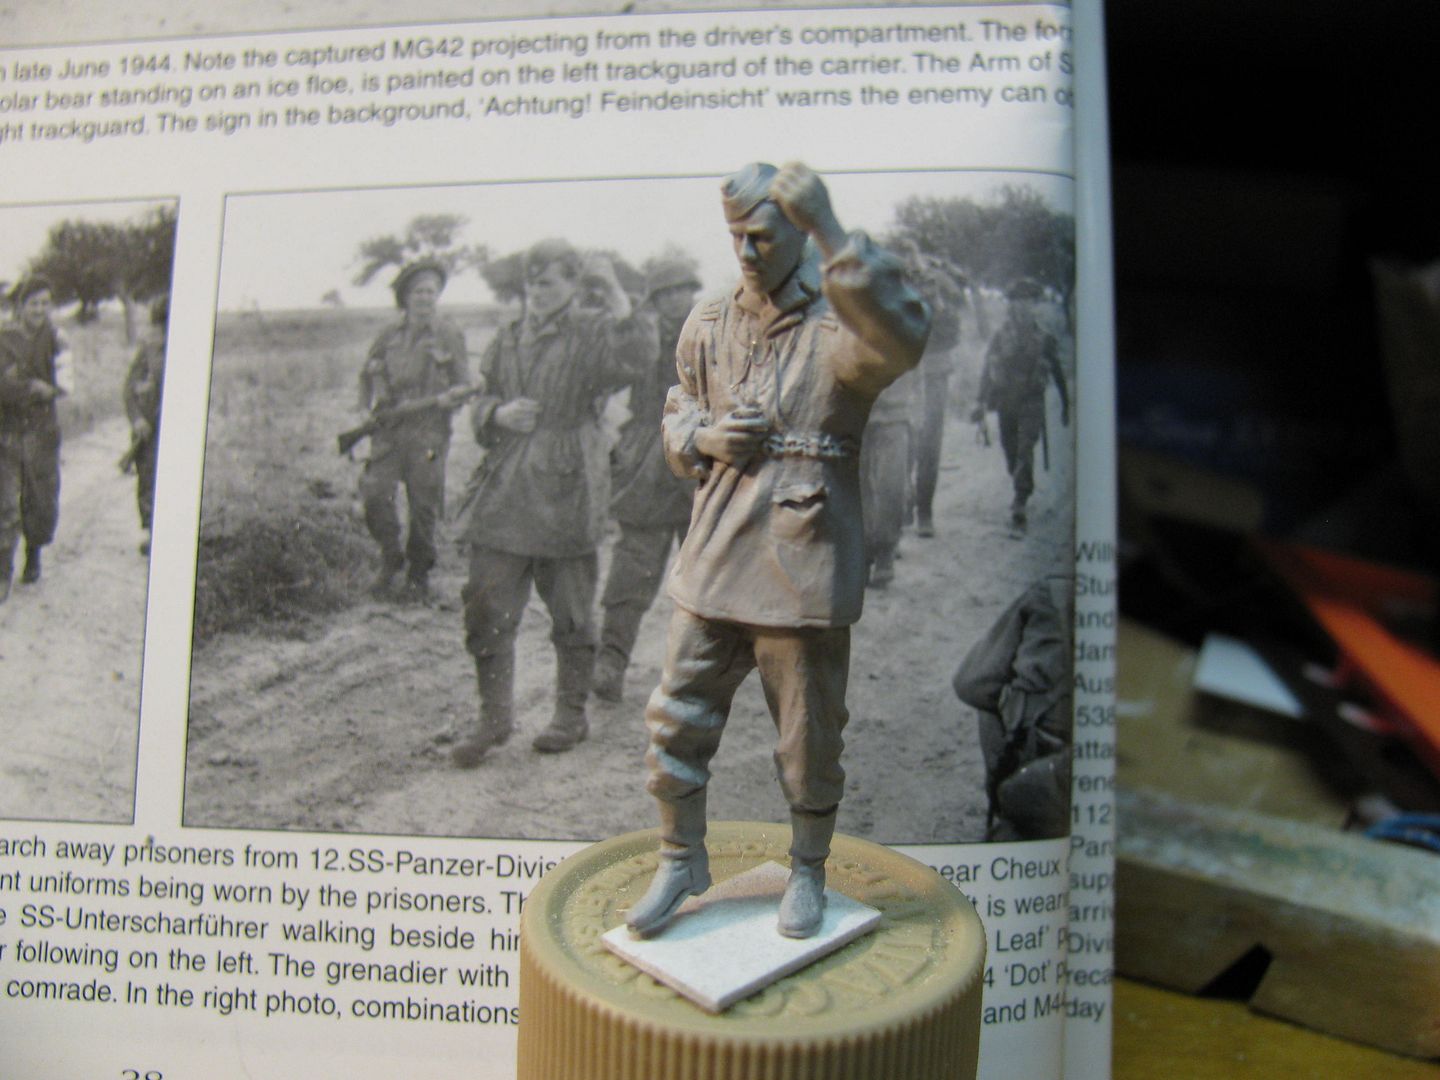
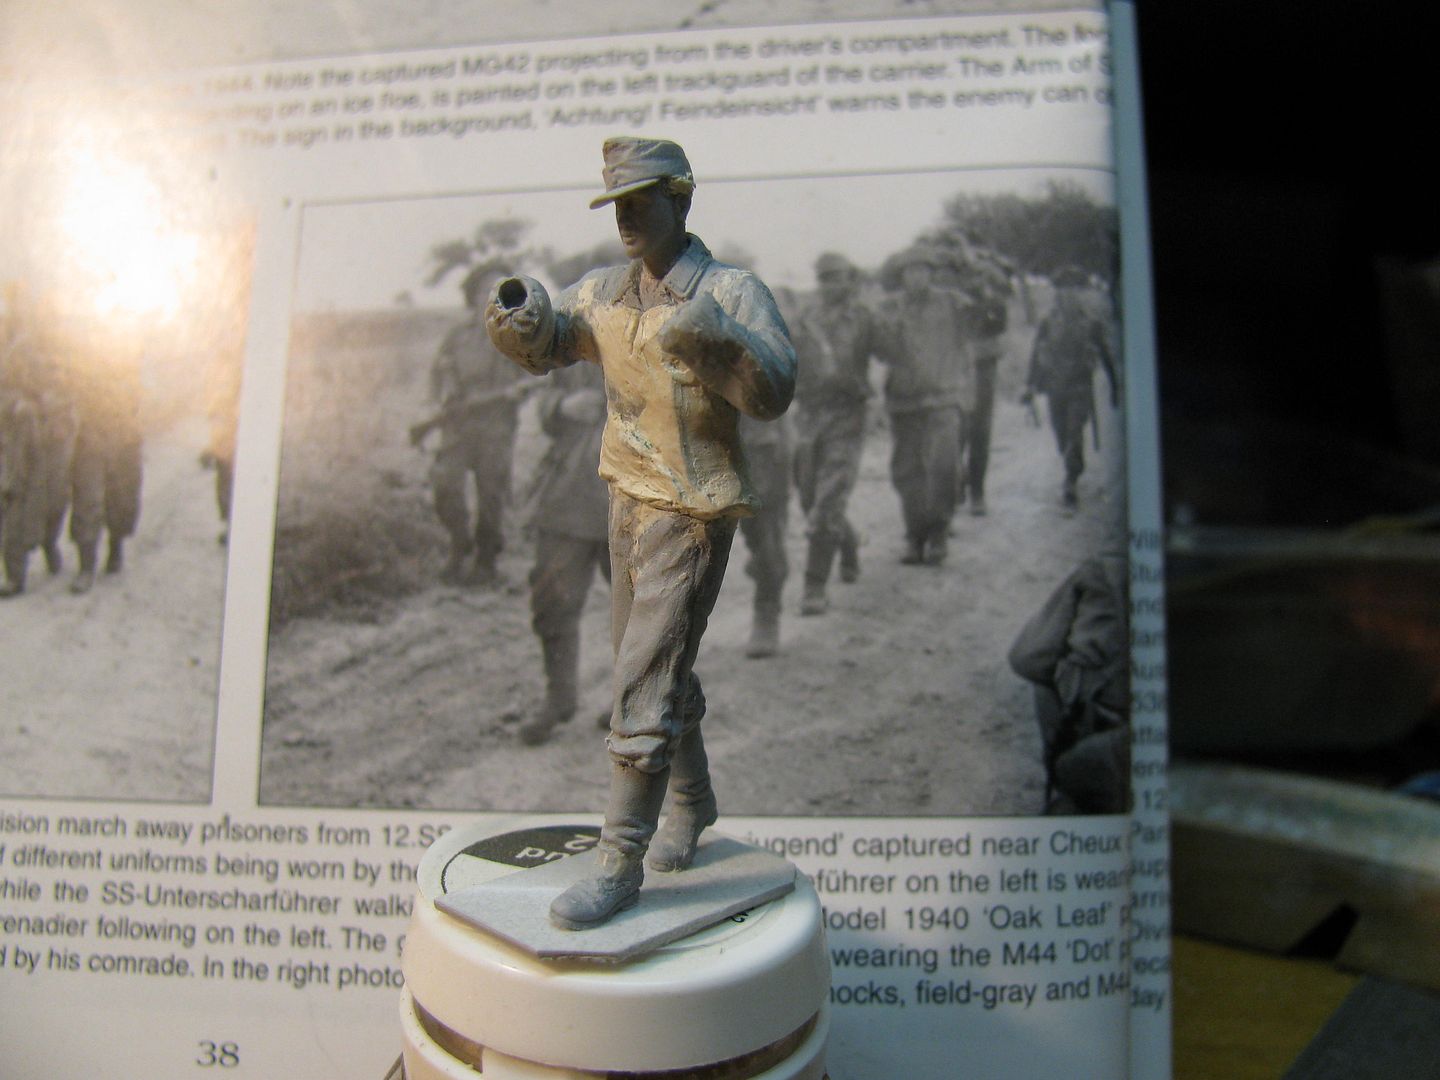
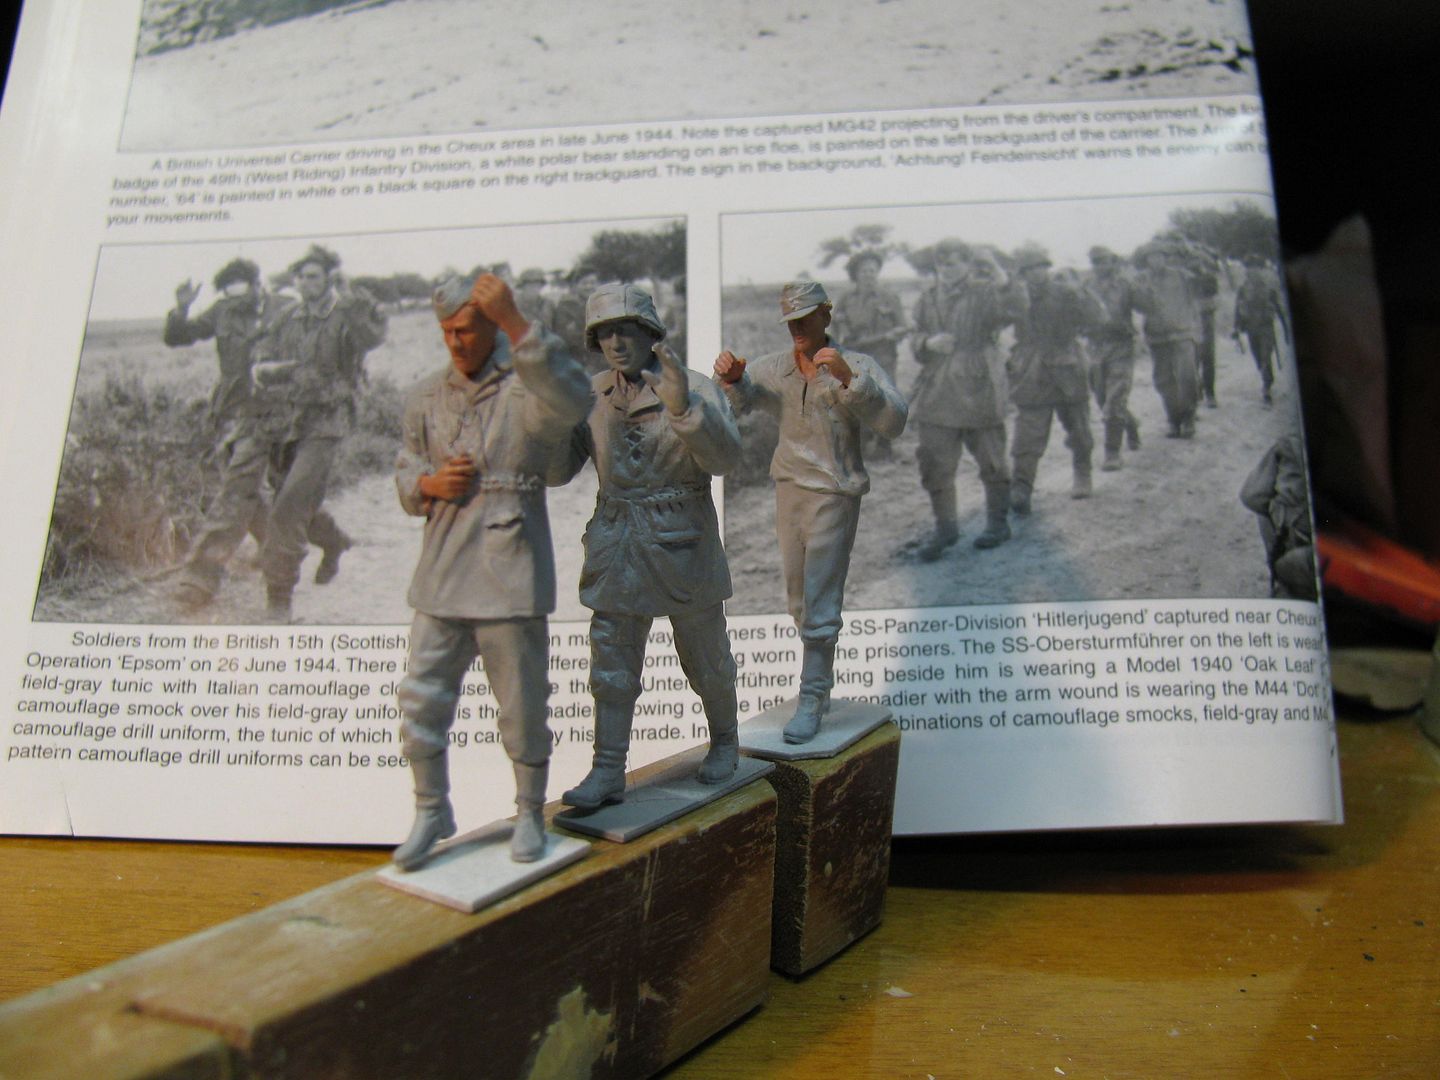
"Near Cheux" June 27,1944 new dio
- Thread starter jrutman53
- Start date

AndyFettes
Master at Arms
Excellent jerry !!! ")
Remarkable...you really captured the stance Jerry.
Art? I studied art about 2 months in Community college back in 1972. I do much better when I copy a live subject or drawing. If I do something free style it takes a lot longer. I use the Michaelangelo technique. You see the finished object in the block of stone and then simply remove everything that does not look like it belongs.
Here is the next application of putty
He is one of those rare waffenSS guys that tucked their smock into their trousers.
J
Here is the next application of putty
He is one of those rare waffenSS guys that tucked their smock into their trousers.
J
Here is a way to use short legs but with cool boots. Add length with plastic and then putty in the missing area. He is the missing man between the last two guys I built.
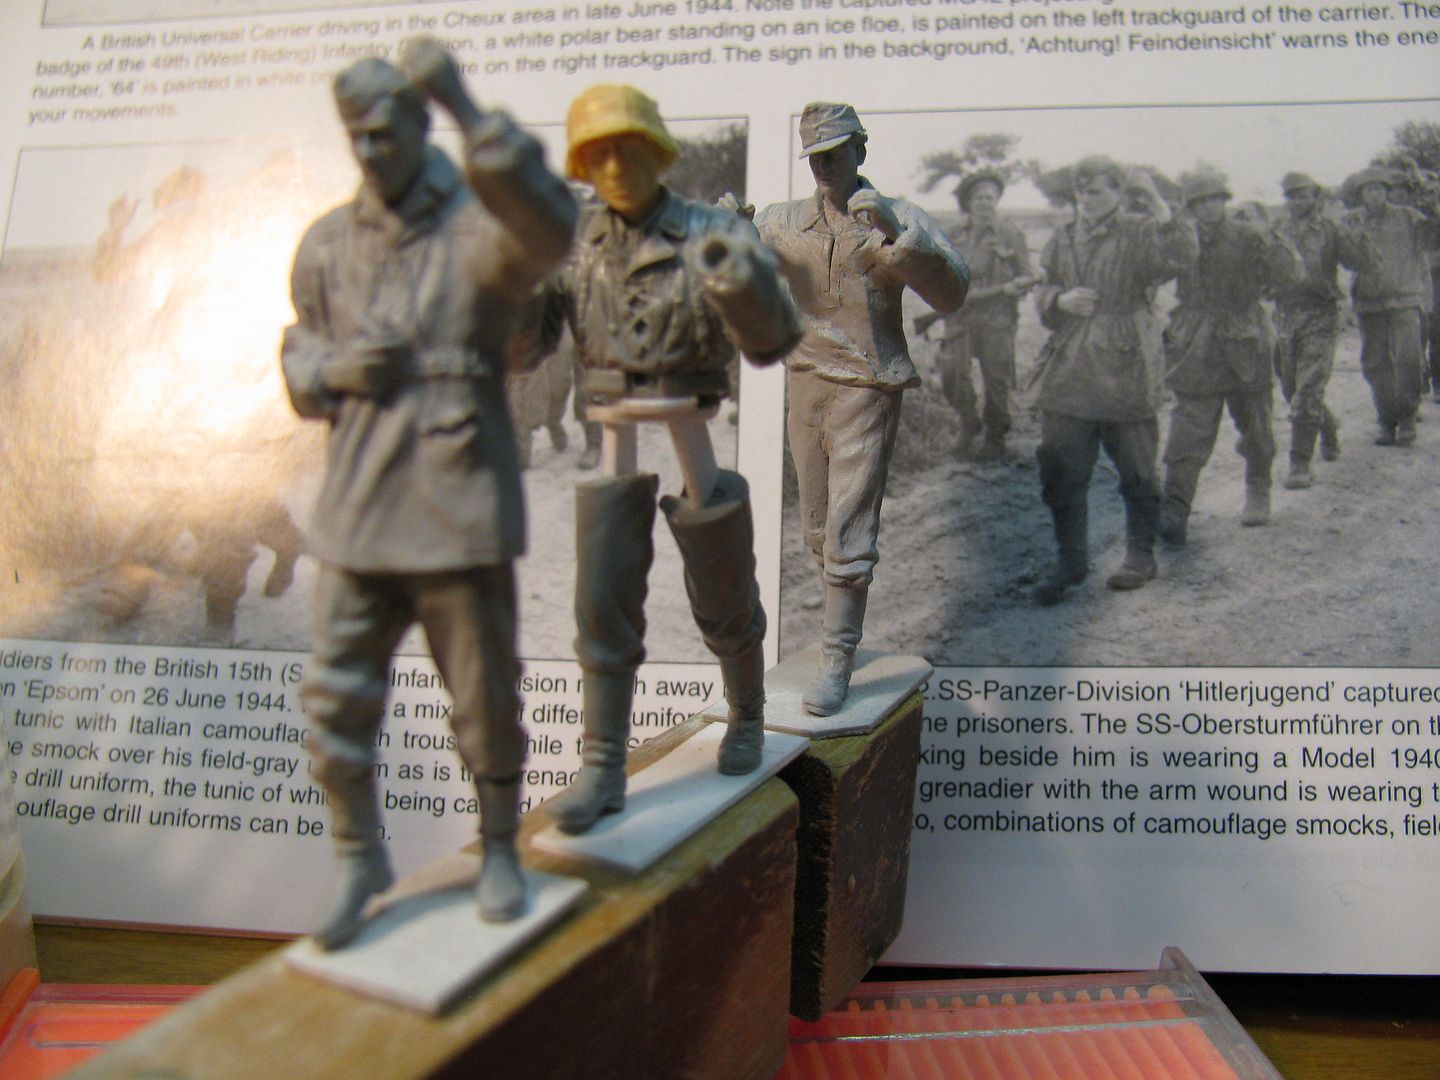
Maybe one more waffenSS guy and one more wee scotsman and I will be done with the frankenstein mode on this one.
J
Maybe one more waffenSS guy and one more wee scotsman and I will be done with the frankenstein mode on this one.
J
Filled in the missing areas on the middle guy.I have to get rid of excess primer still. It came out grainy from the can. Hate when that happens.

Here is how he fits in
Started to paint the base coats but I can't seem to find a decent black or white paint. My Tamiya paint will not mix and so I can't get a good shade of grey. I may have to change to Vallejo acrylics.
Here is how he fits in
Started to paint the base coats but I can't seem to find a decent black or white paint. My Tamiya paint will not mix and so I can't get a good shade of grey. I may have to change to Vallejo acrylics.

AndyFettes
Master at Arms
Agree excellent posing I hope you are going to show that picture along side the vignette when completed to show how good you recreated those poses
:drinks :drinks :drinks
:drinks :drinks :drinks
What they said, :drinks
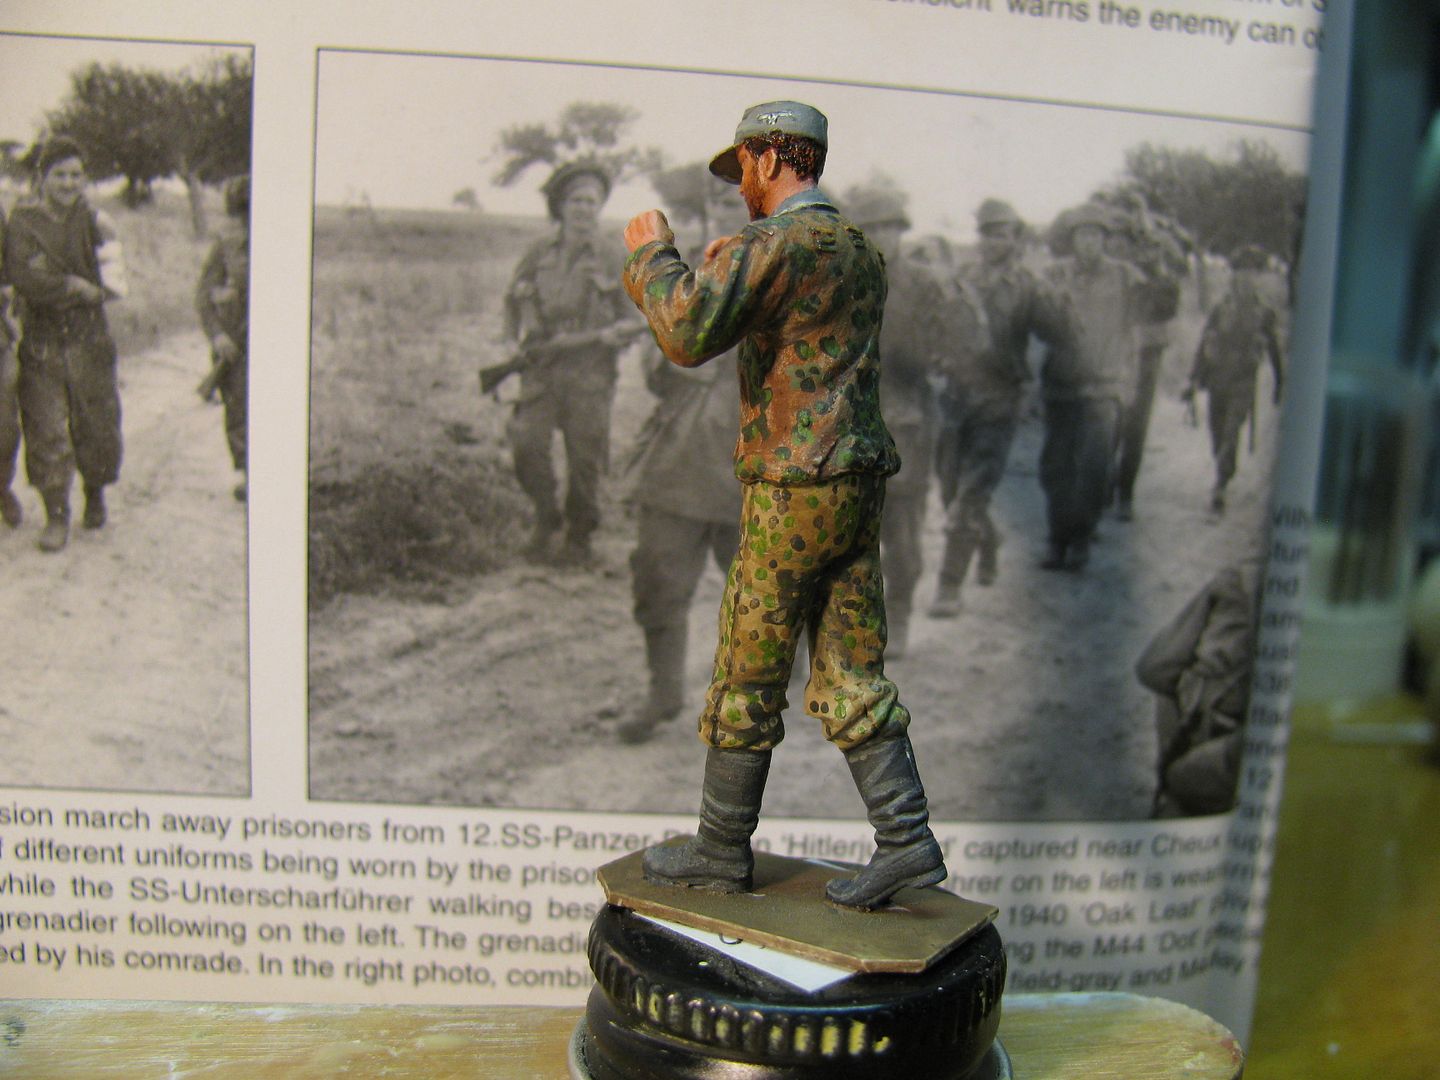
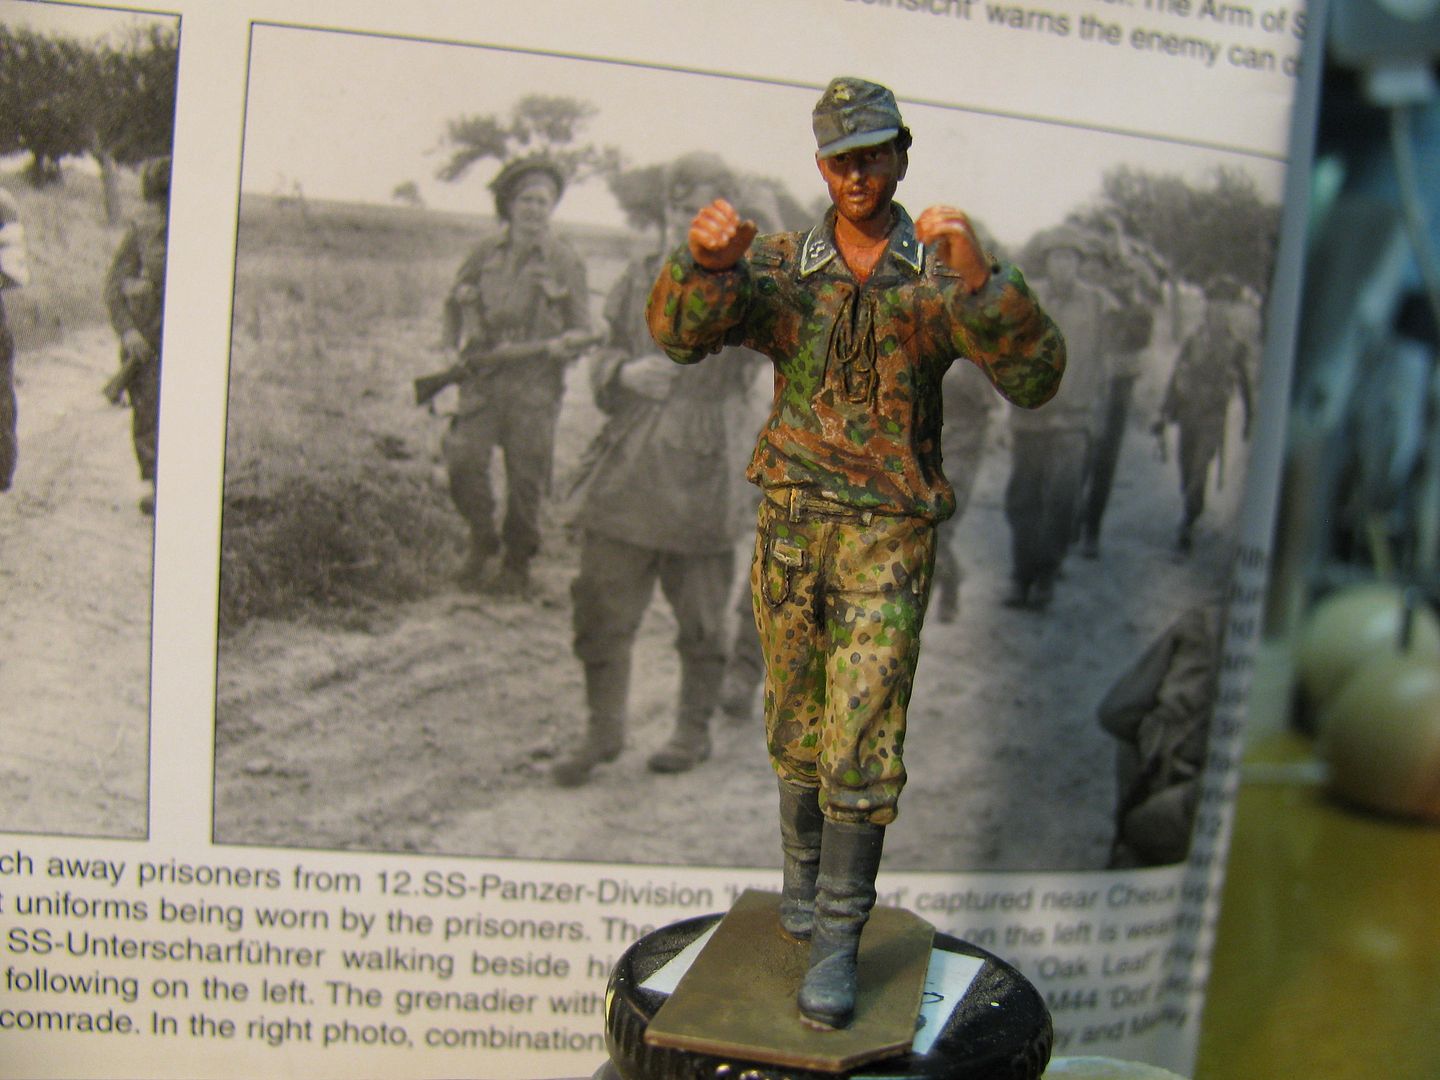
Thanks guys,for looking in and for the very generous compliments. Here is the first dude painted up.
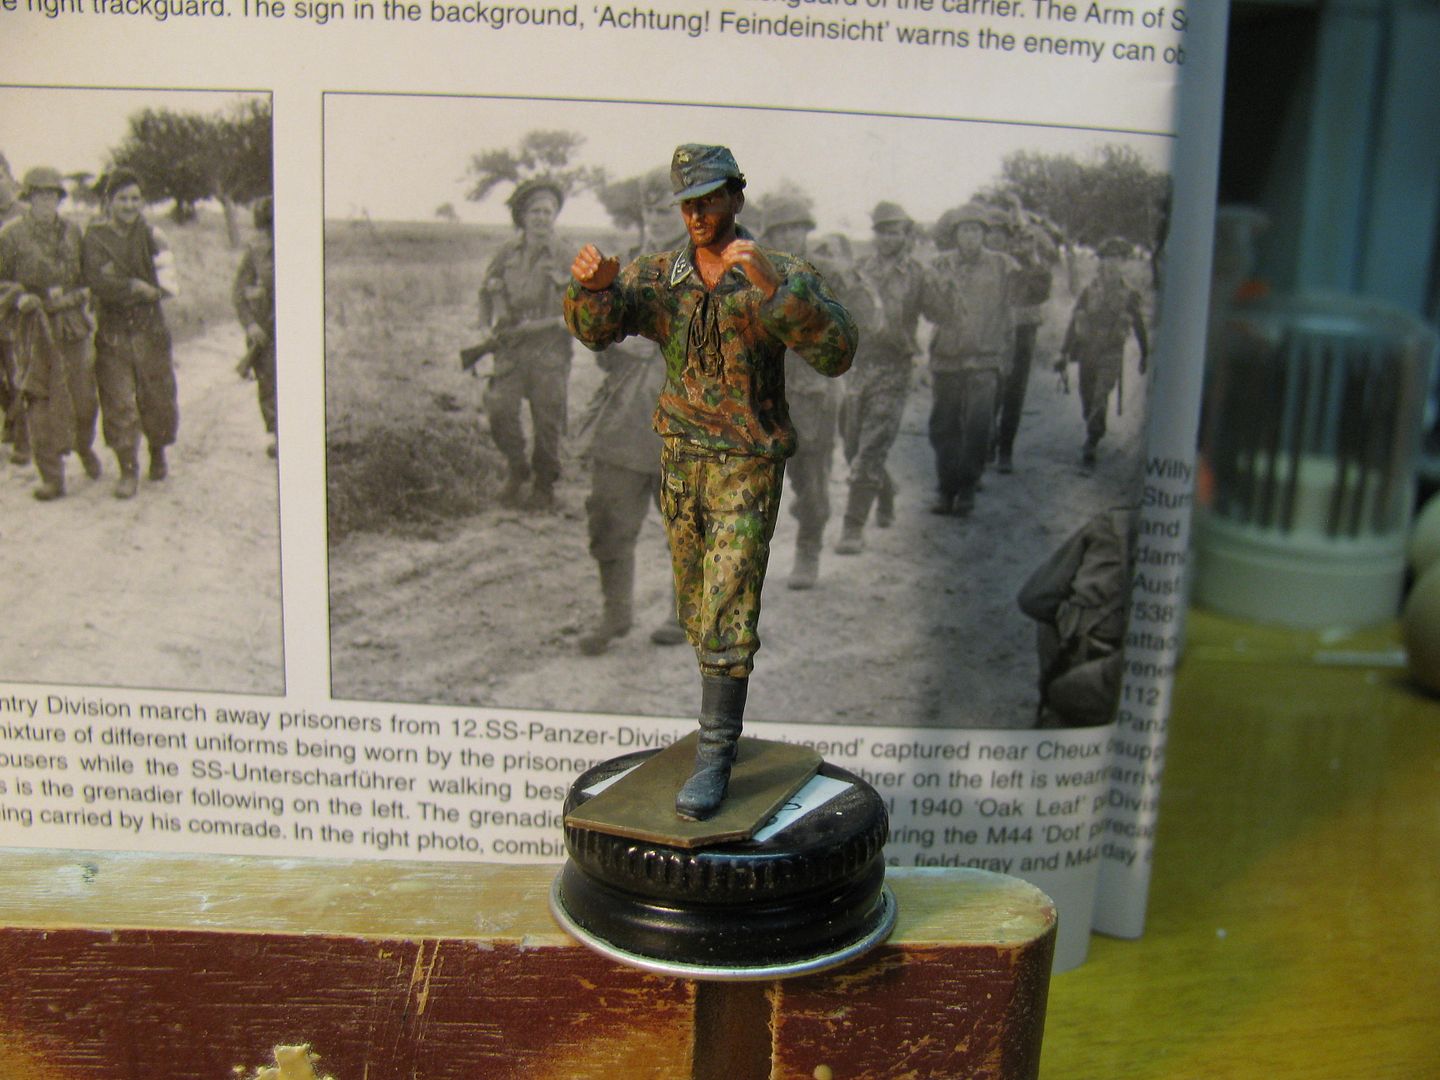
Here are 2 more of him from angles other than the original pic.
Hopefully by the tim I paint all of these guys my painting will improve.I loose these skills quickly if I don't do them all of the time.
J
Here are 2 more of him from angles other than the original pic.
Hopefully by the tim I paint all of these guys my painting will improve.I loose these skills quickly if I don't do them all of the time.
J
AndyFettes
Master at Arms
Oh yes !!!!
Love both camo
Top notch :drinks :drinks :drinks
Love both camo
Top notch :drinks :drinks :drinks
Similar threads
- Replies
- 39
- Views
- 11K
- Replies
- 120
- Views
- 39K