-
Modelers Alliance has updated the forum software on our website. We have migrated all post, content and user accounts but we could not migrate the passwords.
This requires that you manually reset your password.
Please click here, http://modelersalliance.org/forums/login to go to logon page and use the "Forgot your Password" option.
You are using an out of date browser. It may not display this or other websites correctly.
You should upgrade or use an alternative browser.
You should upgrade or use an alternative browser.
Maddog Manufacturing Production in 2019
- Thread starter Duke Maddog
- Start date
Heavens Eagle
Well-known member
It is amazing how you can assemble those kits so quickly Mark!

Mark, I just happened on this part of the site, and noticed that you are looking for ways to set up stained glass for a displaydio., and it occurred to me that you should try to get hold of some HO scale church buildings that are not workable by the owner, and see if you can get the window stickers from them. Usually they are stained glass reproductions that might be usable.
Dave
Dave
Duke Maddog
Well-known member
Thanks to everyone for all the awesome comments and compliments. Man, I feel like I haven't done anything in a very long time! I hope this week I can get back to the bench soon!
Thanks again to everyone for stopping in and commenting. It is always appreciated very much.
Thanks again to everyone for stopping in and commenting. It is always appreciated very much.
Duke Maddog
Well-known member
Mark, I just happened on this part of the site, and noticed that you are looking for ways to set up stained glass for a displaydio., and it occurred to me that you should try to get hold of some HO scale church buildings that are not workable by the owner, and see if you can get the window stickers from them. Usually they are stained glass reproductions that might be usable.
Dave
Dave that is a brilliant idea. Thanks for that; I'll be on the lookout for some HO scale church buildings.
Thanks also for stopping in on this Thread. Now you can see all my work as I do it... provided I get any decent bench time soon!
 :frantic
Duke Maddog
Well-known member
Wow, after a considerable time, I finally managed to get back to the workbench. Here's my latest progress on several models.
I'll start with the church. Since I was putting a brown wash on the Austratt turret base, I also experimented with it on the side of the church building:
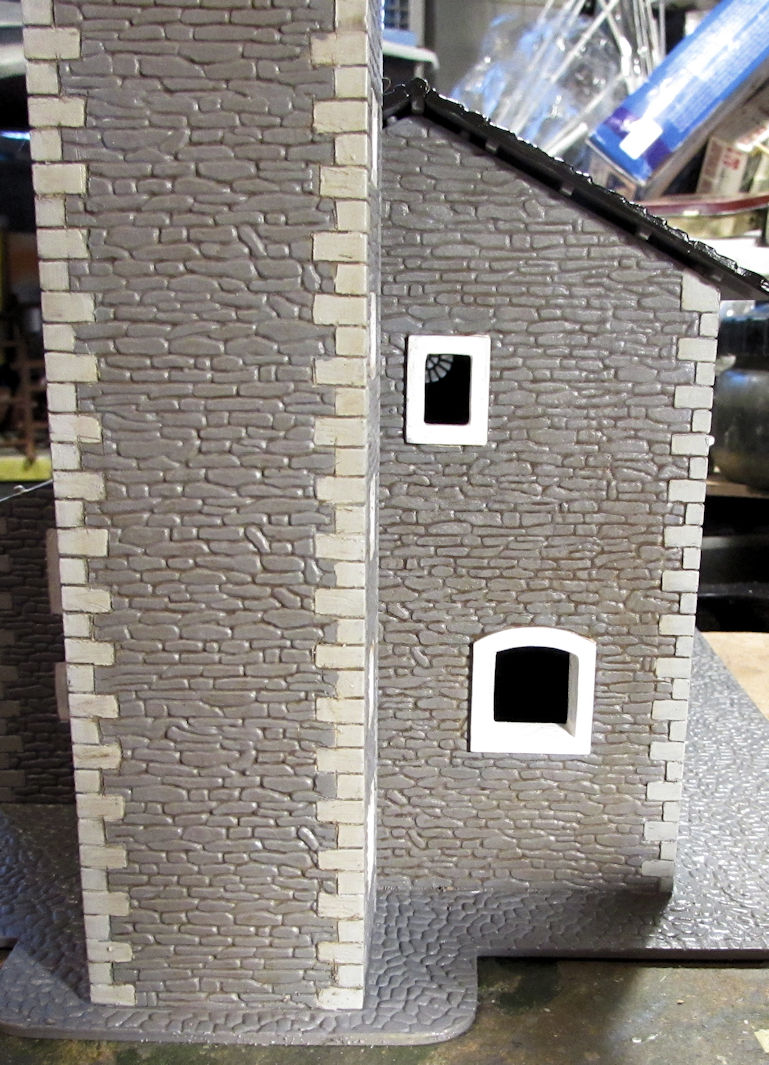
Later on I'll drybrush some lighter grey over that to see how it looks.
Speaking of the Austratt turret, here is the base with the brown wash on it. It can barely be seen in these pics but I assure you it is there and visible:
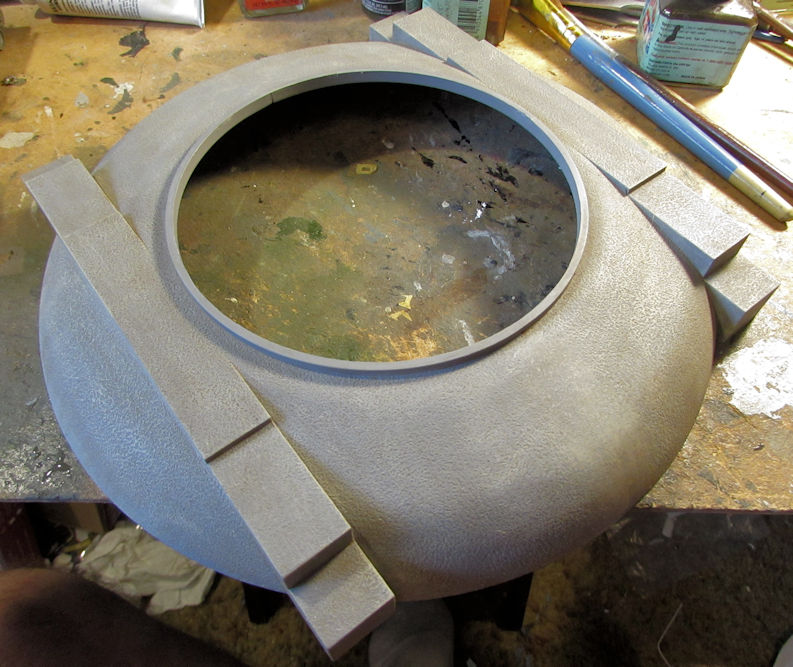
I had also tried a dot filter on the sides of the turret as well, but it is not very visible here either:
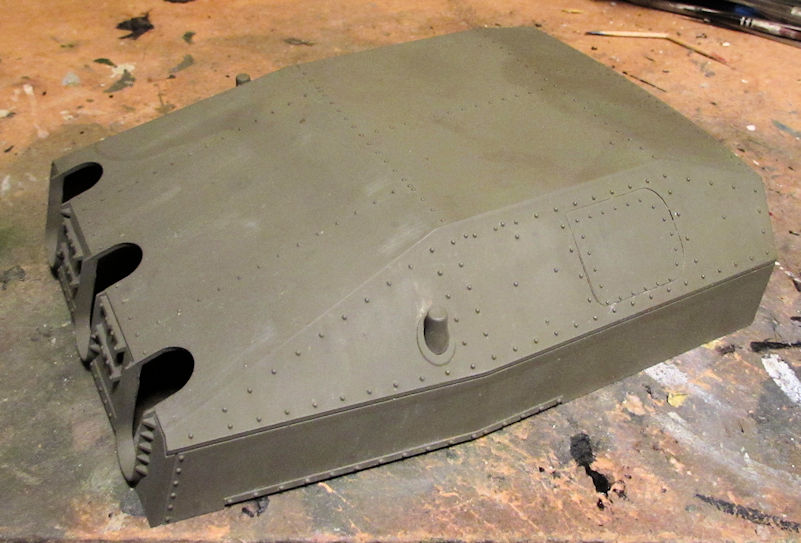
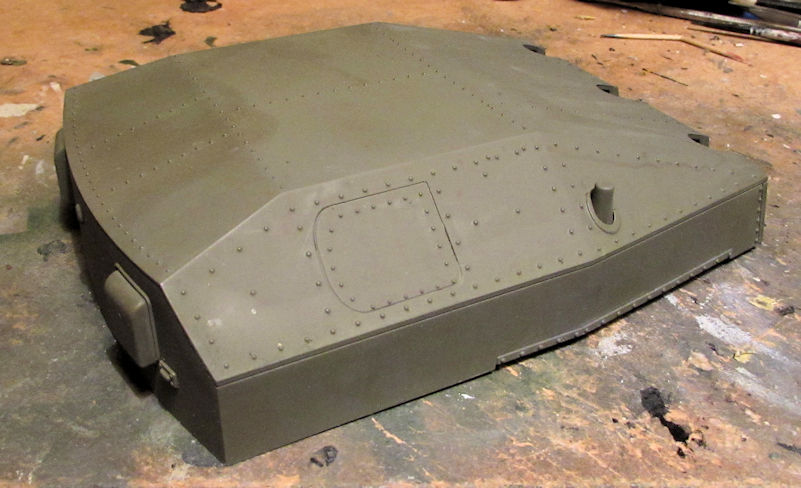
Later on I glossed this turret, then did a brown wash on the rivets, protrusions and seams and then dull coated this:
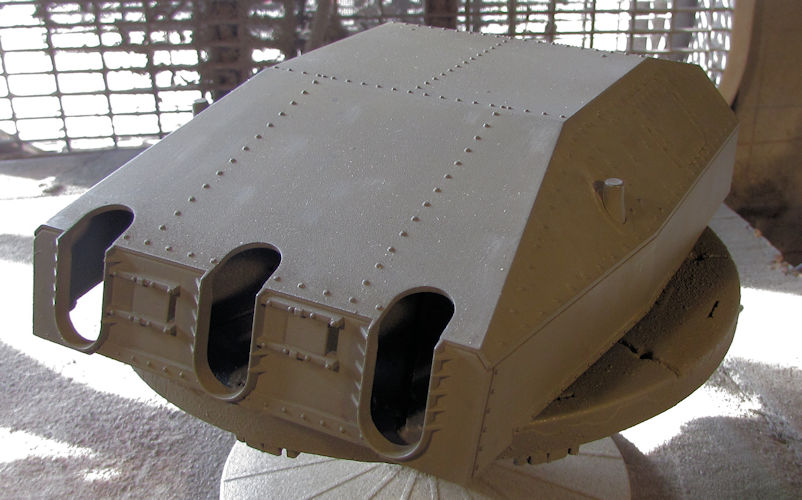
Again, not very visible in these pics; all the effects can be seen better in person. After all this, I've declared this beastie done.
Moving on, I experimented again with a dark earth drybrush on a portion of the church roof. The left side is not drybrushed, the right side is:
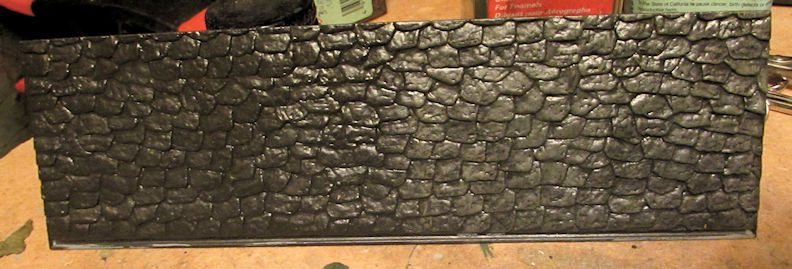
That drybrush was done over a base coat of Oily Black paint on the tiles.
Continuing on with ground elements, I was able to move forward on my George Creed Tribute Build for my friend. I first shot a modulation of a lighter green over the cab, trailer and missile:
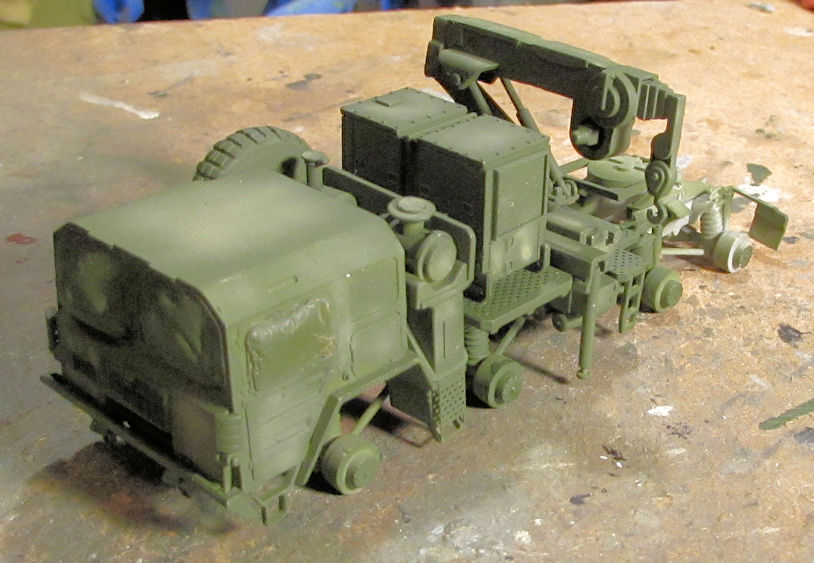
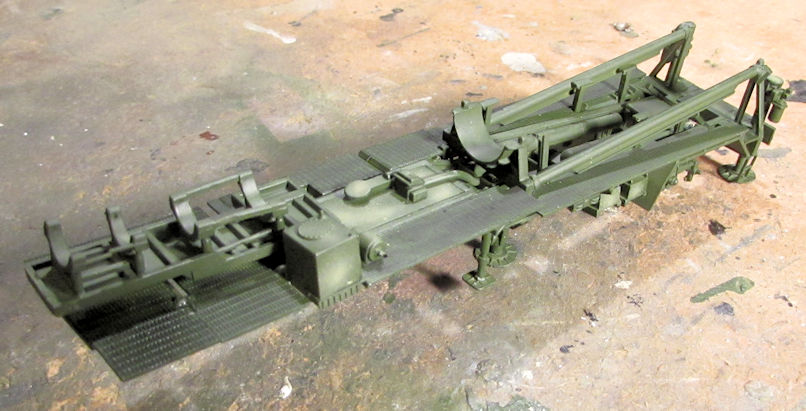
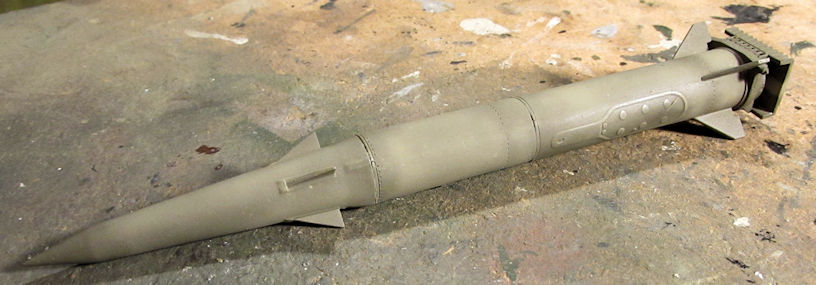
The missile was also drybrushed at this time. After that, just for fun I fitted the missile onto the trailer to see how it looks:
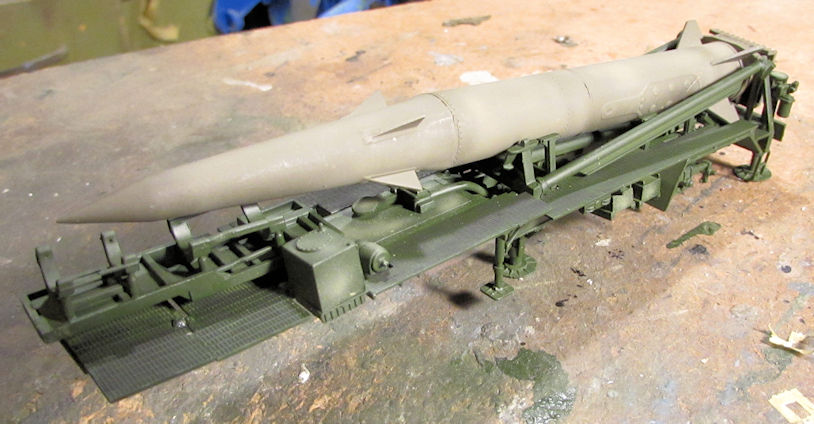
I then detail painted the tractor portion with some Oily Black on the chassis and suspension as well as finished off the painting on other parts:
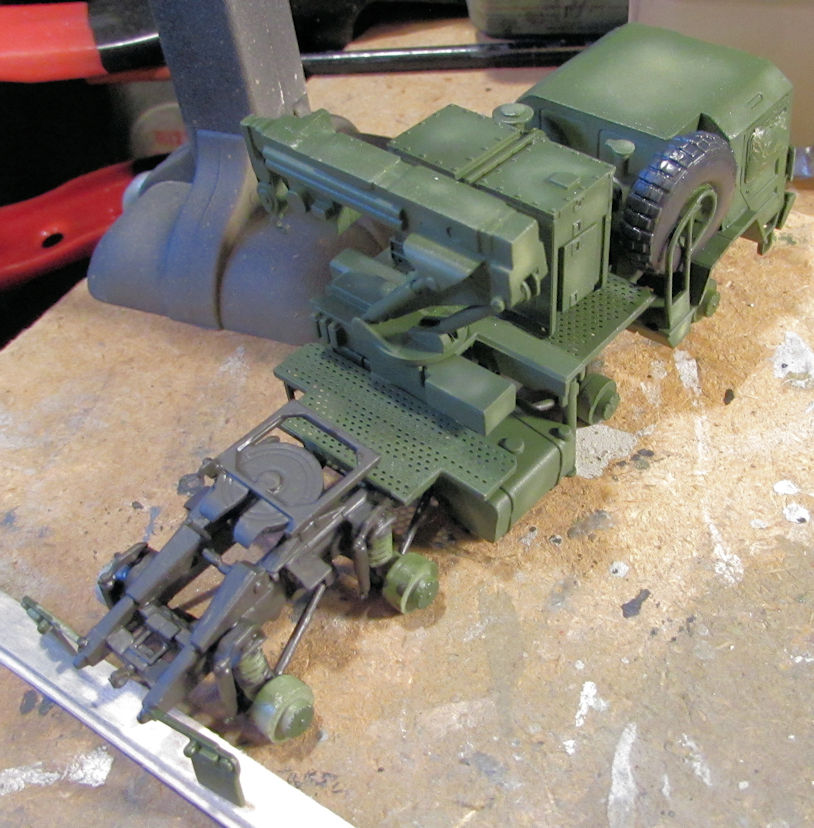
That chassis and suspension later got a dry brush of steel over it.
After that it got glossed for a wash. There seemed to be no markings on this tractor; at least the instructions didn't show any which I thought as odd, but I moved on. I wanted this done so I glossed the trailer and the missile and added the decals to both of them:
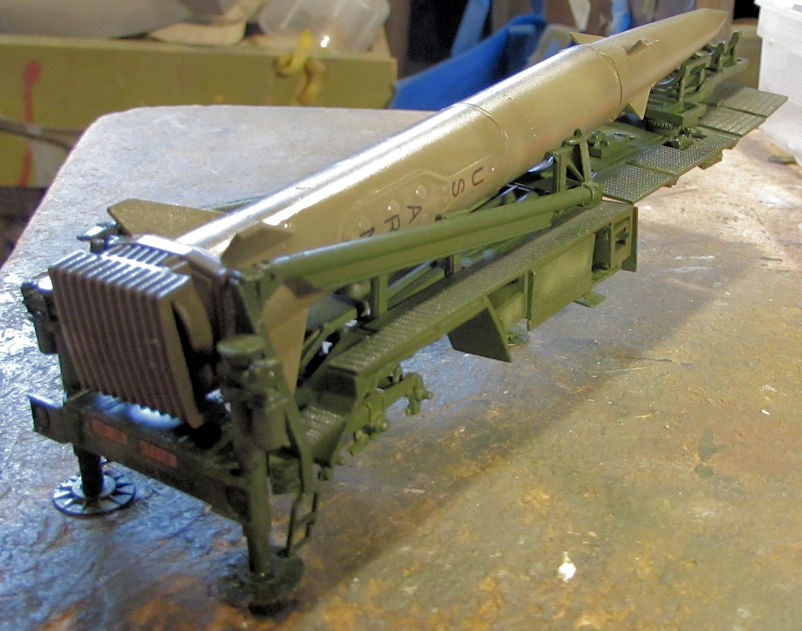
Here is the missile and trailer all dullcoated after the decals had dried:
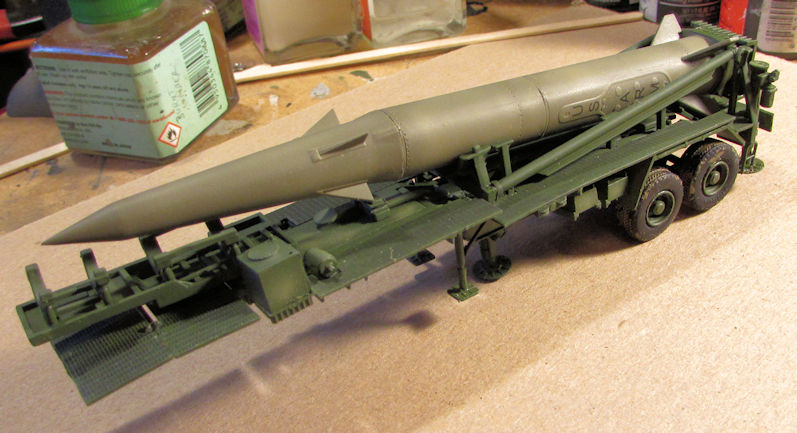
My George Creed Tribute Build is finally done.
After this I also moved ahead on my Israeli Nagmachon. There was a lot to before the photo etch went on. First off, I painted the photo etch. Then I glossed the model and added the decals plus a medium brown wash:
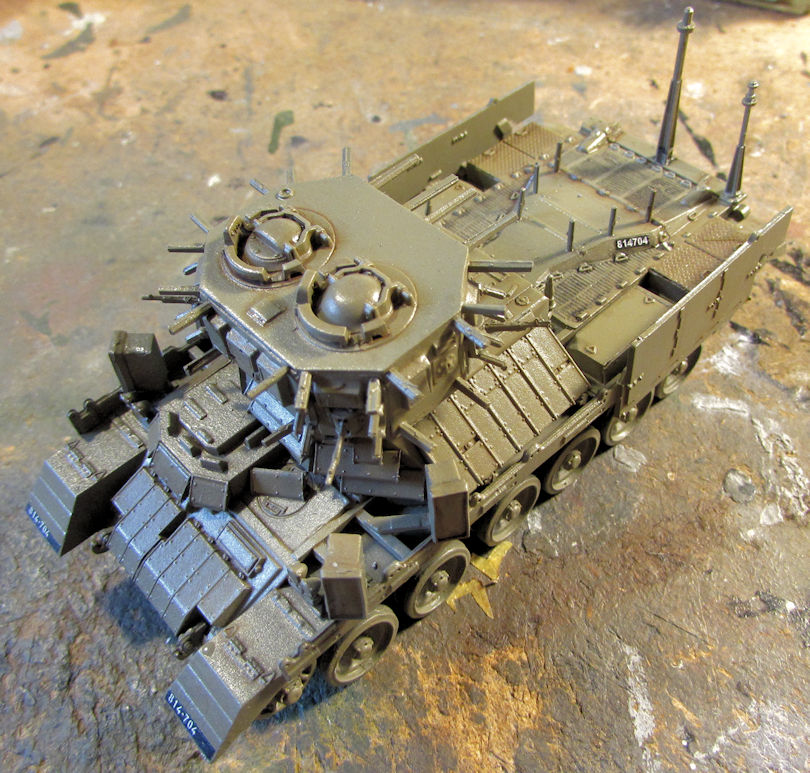
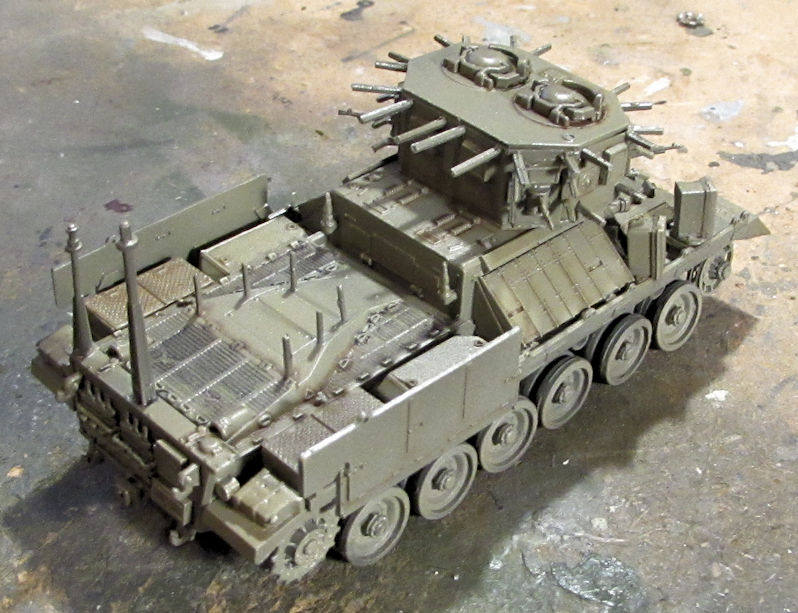
Next came the dull coat and drybrush of a light sand over the details, as well as the painting of the machine guns:
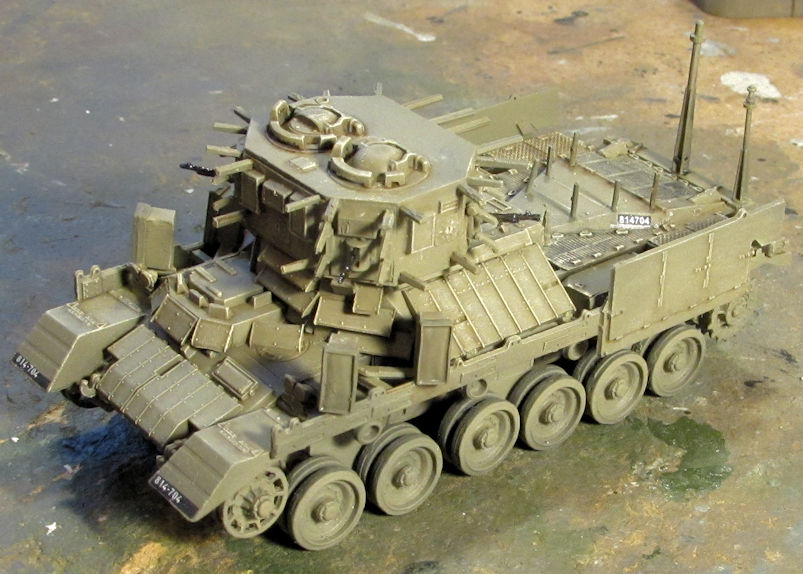
Finally the tracks and last side skirts were installed. This one is ready for the photo etch screens:
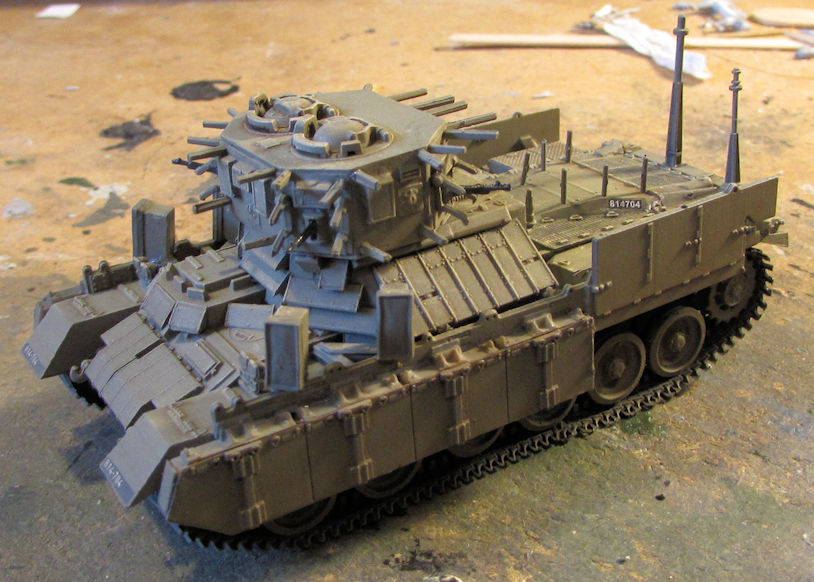
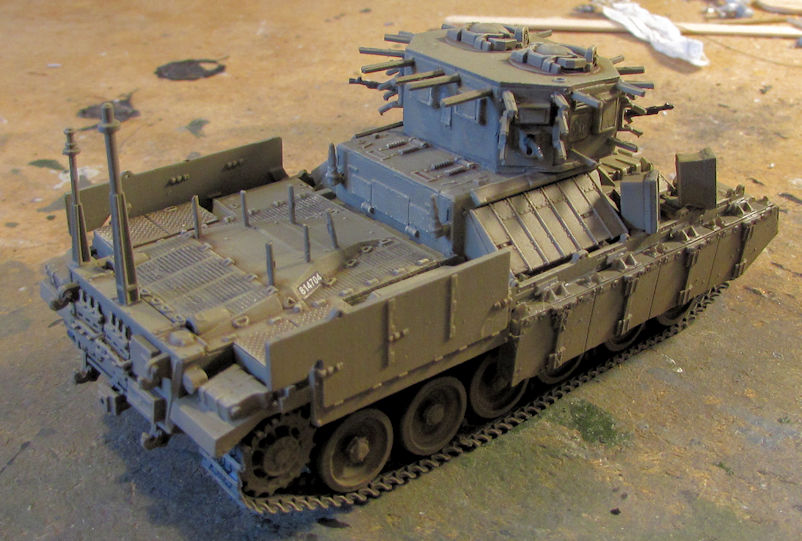
And finally, I did manage to get some progress done on one of my aircraft. The Israeli Sufa needed more seams and gaps filled so I added some more Mr. Surfacer 500 to them:
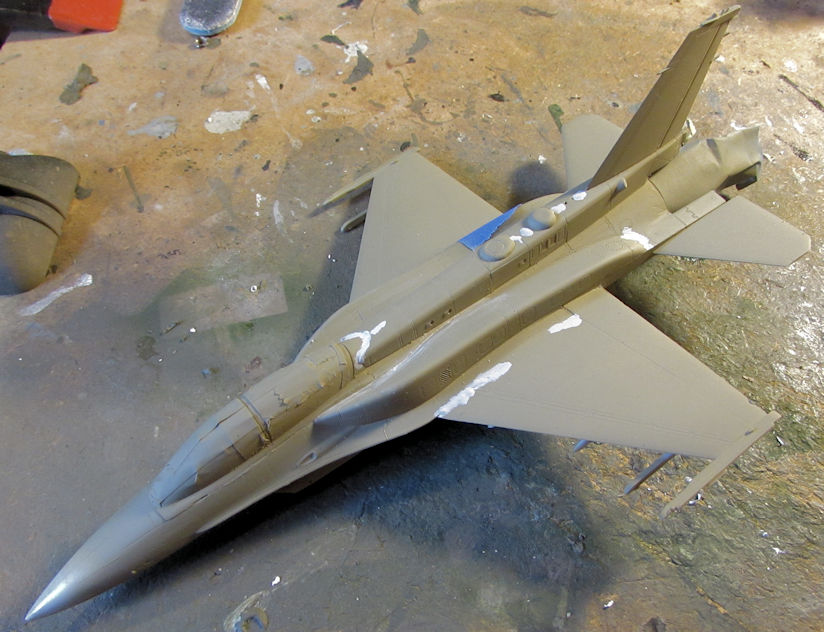
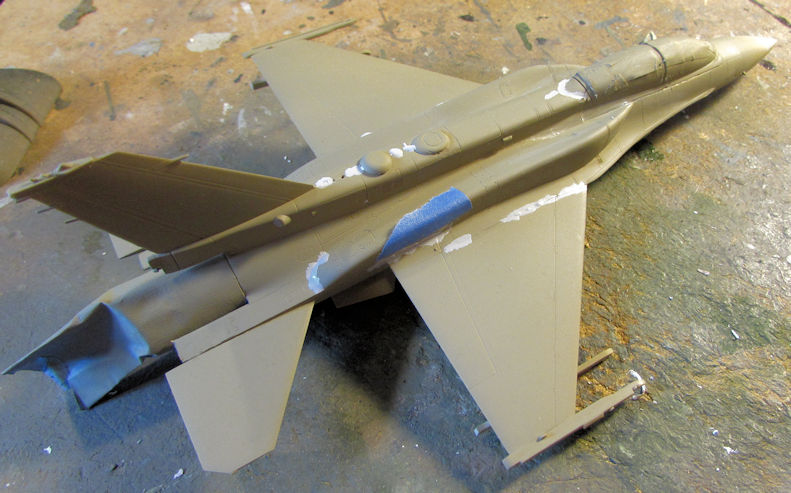
After some sanding and repainting, it looks much better. It still ain't perfect, but I'm far more happy with this:
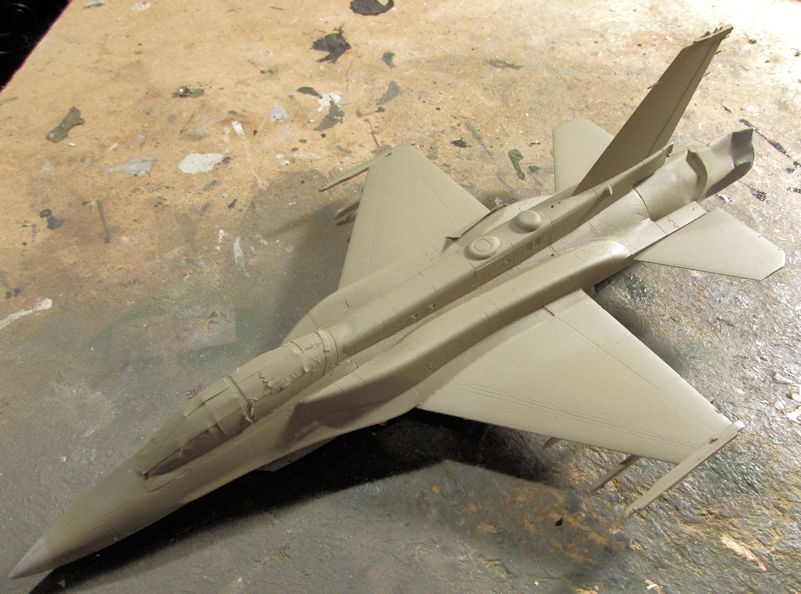
Next up will be the other two camouflage colors.
And that completes my progress for this month so far. Hopefully I can finish that Nagmachon and Sufa this week.
Thanks all for looking in, comments are most welcome.
I'll start with the church. Since I was putting a brown wash on the Austratt turret base, I also experimented with it on the side of the church building:

Later on I'll drybrush some lighter grey over that to see how it looks.
Speaking of the Austratt turret, here is the base with the brown wash on it. It can barely be seen in these pics but I assure you it is there and visible:

I had also tried a dot filter on the sides of the turret as well, but it is not very visible here either:


Later on I glossed this turret, then did a brown wash on the rivets, protrusions and seams and then dull coated this:

Again, not very visible in these pics; all the effects can be seen better in person. After all this, I've declared this beastie done.
Moving on, I experimented again with a dark earth drybrush on a portion of the church roof. The left side is not drybrushed, the right side is:

That drybrush was done over a base coat of Oily Black paint on the tiles.
Continuing on with ground elements, I was able to move forward on my George Creed Tribute Build for my friend. I first shot a modulation of a lighter green over the cab, trailer and missile:


The missile was also drybrushed at this time. After that, just for fun I fitted the missile onto the trailer to see how it looks:

I then detail painted the tractor portion with some Oily Black on the chassis and suspension as well as finished off the painting on other parts:

That chassis and suspension later got a dry brush of steel over it.
After that it got glossed for a wash. There seemed to be no markings on this tractor; at least the instructions didn't show any which I thought as odd, but I moved on. I wanted this done so I glossed the trailer and the missile and added the decals to both of them:

Here is the missile and trailer all dullcoated after the decals had dried:

My George Creed Tribute Build is finally done.
After this I also moved ahead on my Israeli Nagmachon. There was a lot to before the photo etch went on. First off, I painted the photo etch. Then I glossed the model and added the decals plus a medium brown wash:


Next came the dull coat and drybrush of a light sand over the details, as well as the painting of the machine guns:

Finally the tracks and last side skirts were installed. This one is ready for the photo etch screens:


And finally, I did manage to get some progress done on one of my aircraft. The Israeli Sufa needed more seams and gaps filled so I added some more Mr. Surfacer 500 to them:


After some sanding and repainting, it looks much better. It still ain't perfect, but I'm far more happy with this:

Next up will be the other two camouflage colors.
And that completes my progress for this month so far. Hopefully I can finish that Nagmachon and Sufa this week.
Thanks all for looking in, comments are most welcome.
Duke Maddog
Well-known member
Thanks Eric! No, can't move to Mexico... to expensive to move! LOL! I'm still here; just needing more time. Hopefully soon I'll be able to do more.
Thanks EJ! I'm trying to get that stonework looking good. I only hope it looks as good as it does in my head. I agree about the Nagmachon too. Very interesting vehicle.
Thanks EJ! I'm trying to get that stonework looking good. I only hope it looks as good as it does in my head. I agree about the Nagmachon too. Very interesting vehicle.
Duke Maddog
Well-known member
Well, after another week and a half, I have a good bit more progress done. It's been a good week so far.
Here is the latest progress I got done, starting with my aircraft.
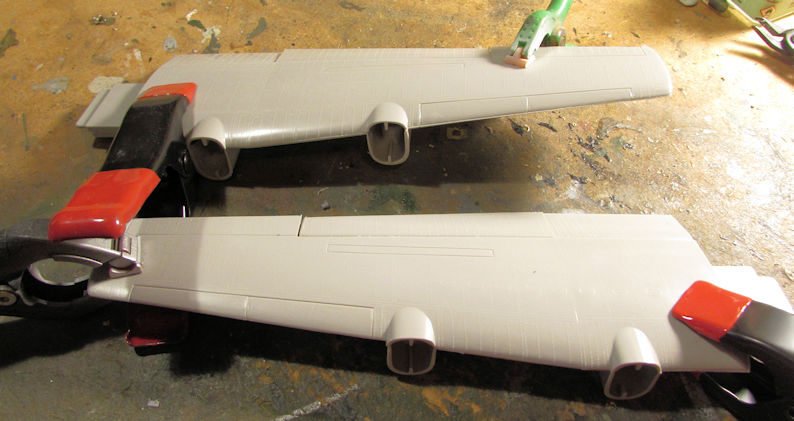
The Shinmeiwa was getting on my nerves so it was pulled out to move it along. I started with the inner flaps, trapping the hinge pieces inside with caps. You can see here where I had to improvise when one cap disappeared:
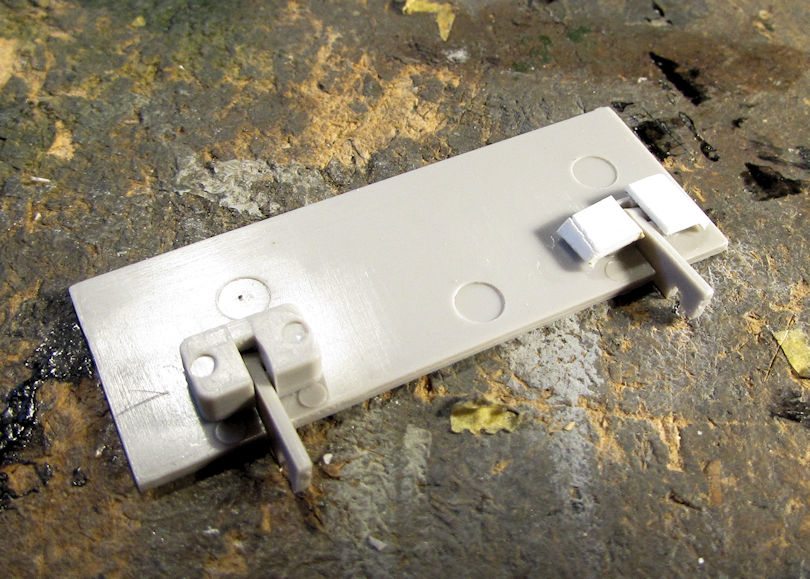
I then got the inner flaps assembled:
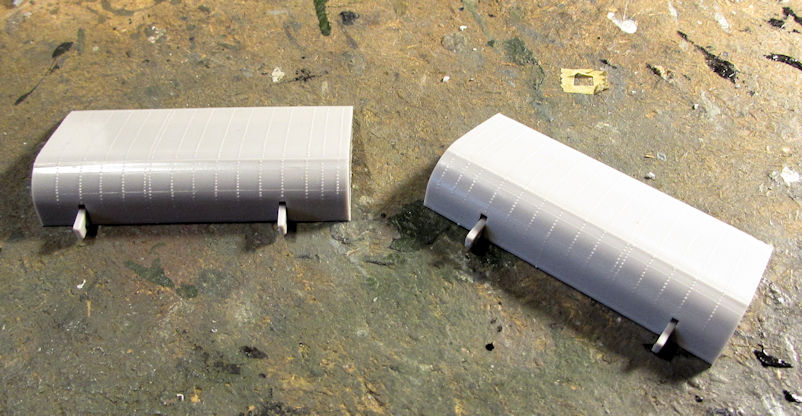
The outer flaps were assembled afterward the same way:
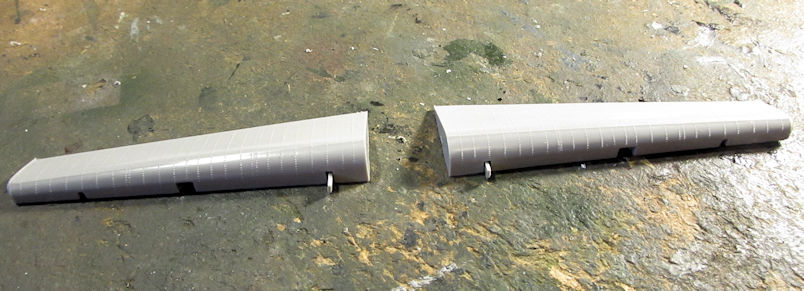
Then they were all dry, I trapped them inside the two wing halves when I assembled the wings. They move quite well in there:
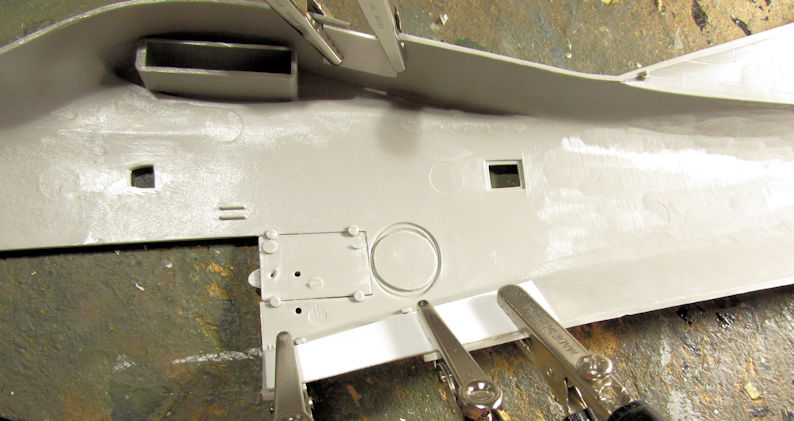
Later while looking at the instructions, I noticed that there were certain fuselage plates that had to be inserted and glued flush when the fuselage was assembled. Yet, there were no tabs or 'shelves' for the plates to sit on, making it too easy for them to fall into the fuselage. So, I glued some sheet styrene pieces to the openings to allow the plates to be placed in place without the threat of them disappearing inside the fuselage:
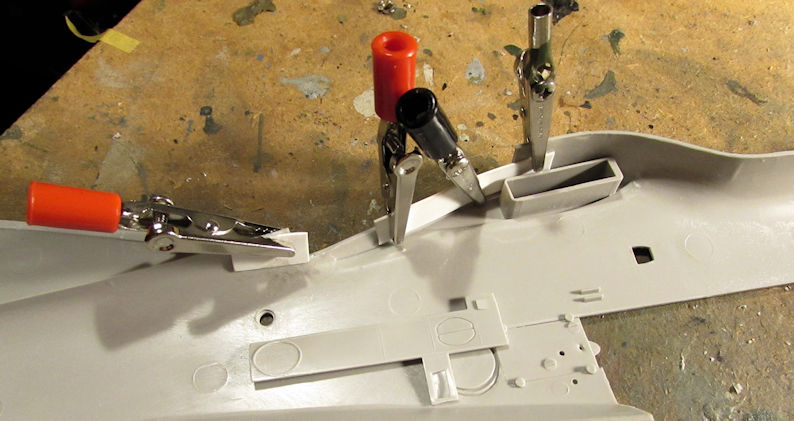
I was ready to move on by then.
Because of Frank's fantastic Huey helicopter builds, I decided to bring out one of my two UH-1D's I'd gotten at the recent game convention and start it. This one has special markings for a German SAR bird that looked very cool, so I decided on that one. First step of course was the cockpit and interior:
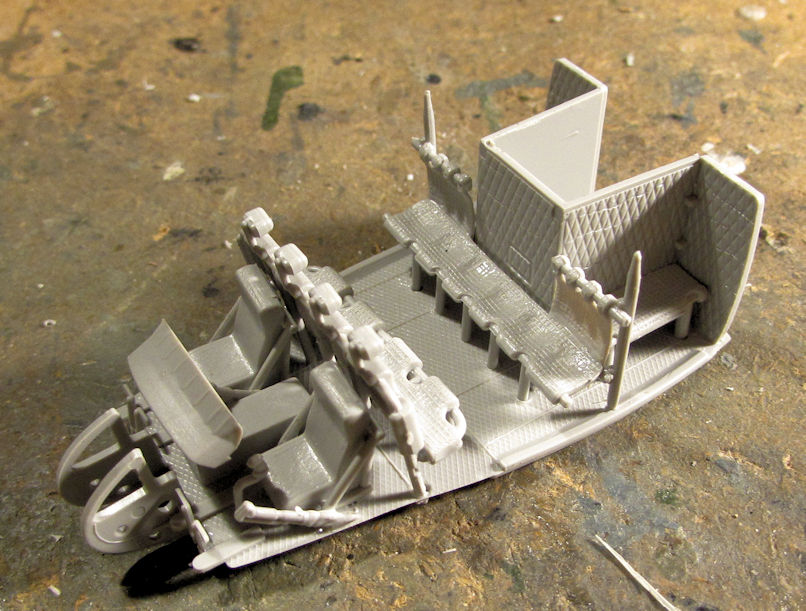
That was as far as I got before I started again on my armor.
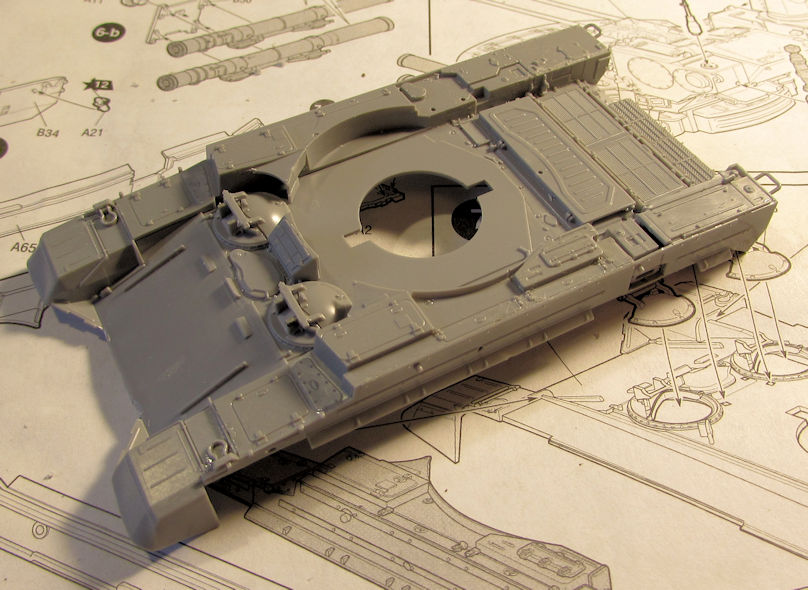
My first work on my armor was to assemble the main hull of the Terminator. Here it is with the side sponsons, hatches, and various detail bits on it:
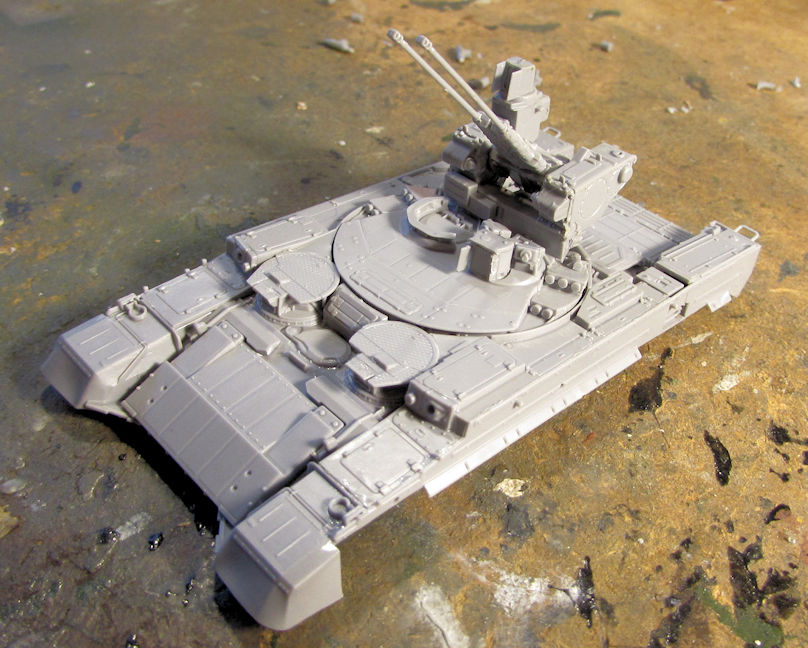
Next I test fit the turret onto this to see how well it turns. It turns well:
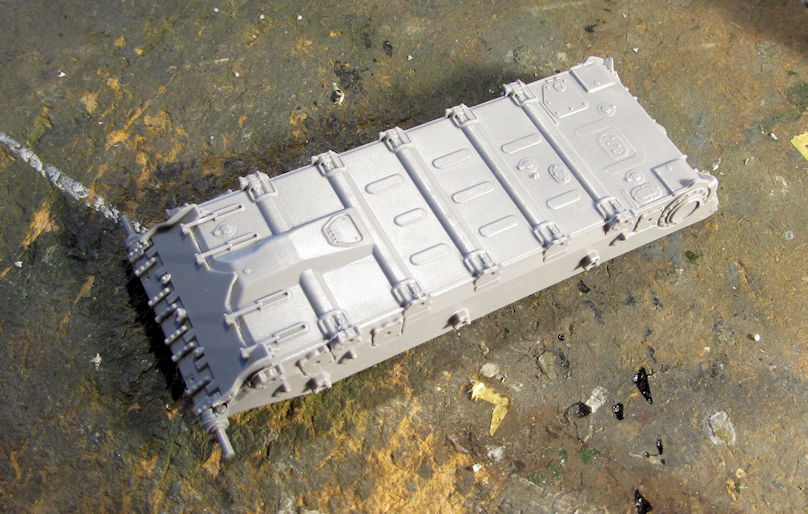
After that I assembled the five pieces of the lower hull:
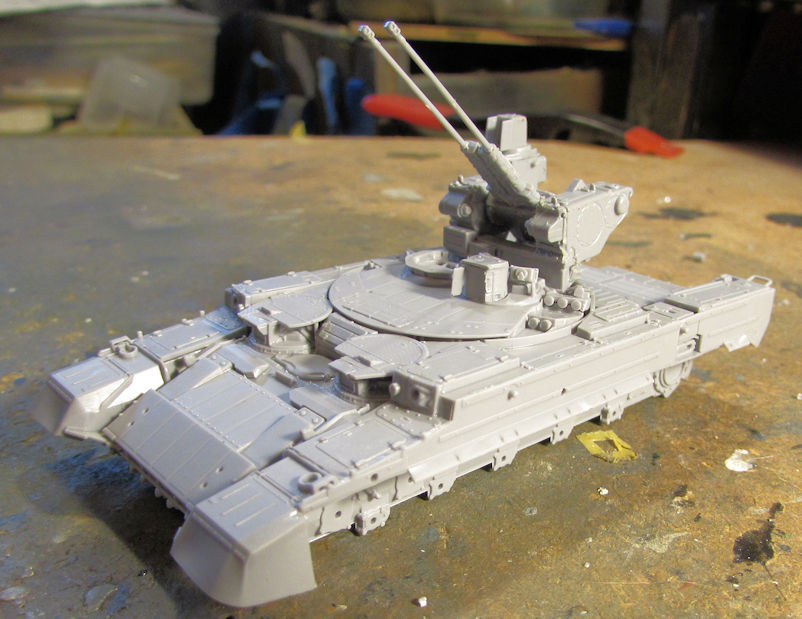
This thing is starting to look pretty good:
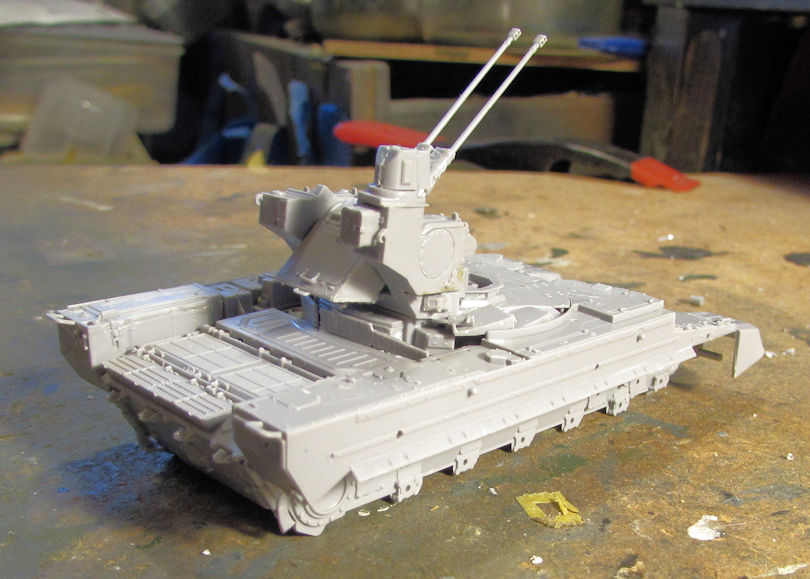
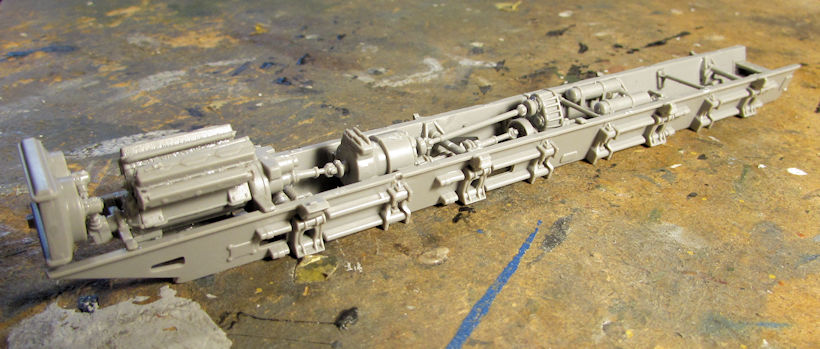
Next up, I decided to get back on my Bereg Coastal Defense Gun. I pulled out the parts to assemble the chassis and went to work, finally finishing when I got this much done:
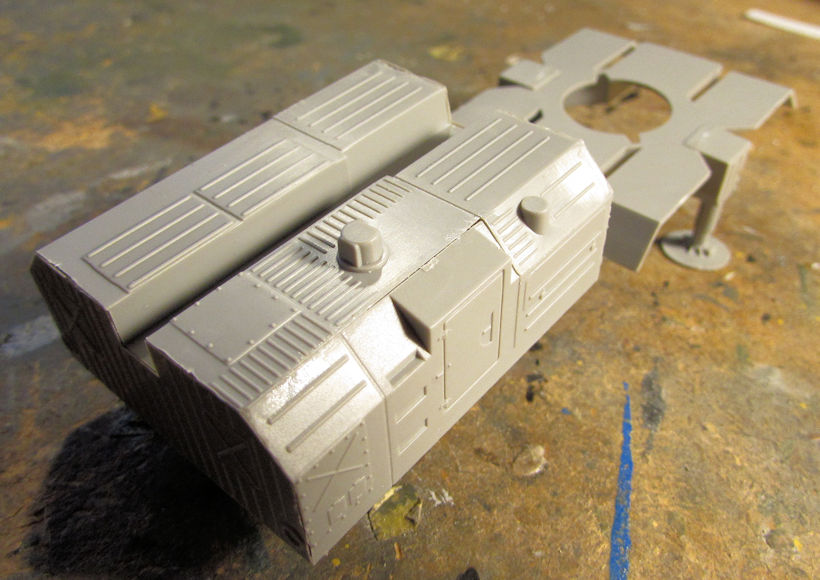
I then assembled the control cabin and floor, along with some bracing pylons:
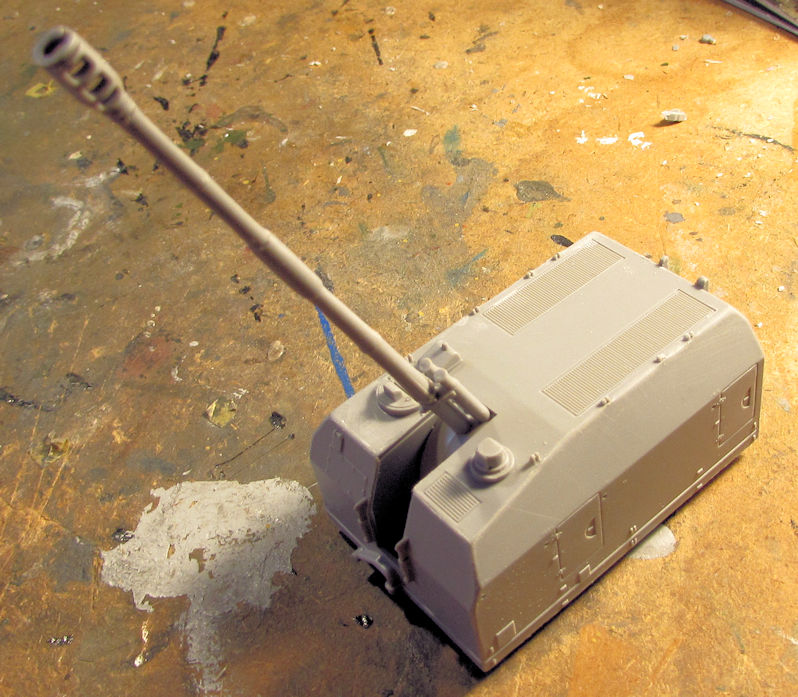
...followed by the gun barrel to the turret:
Here is the whole thing dry-fit together so far:
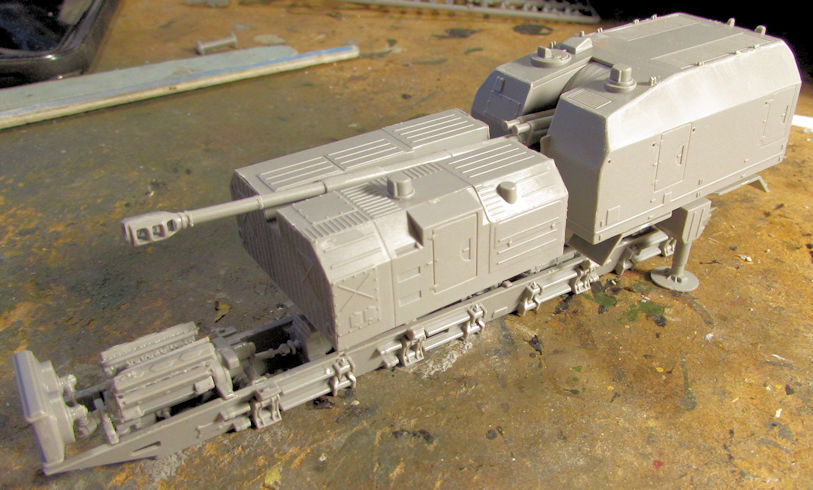
And then I realized, I have three other eight-wheeled Russian trucks I can build with the same chassis. That's when I got sucked in....
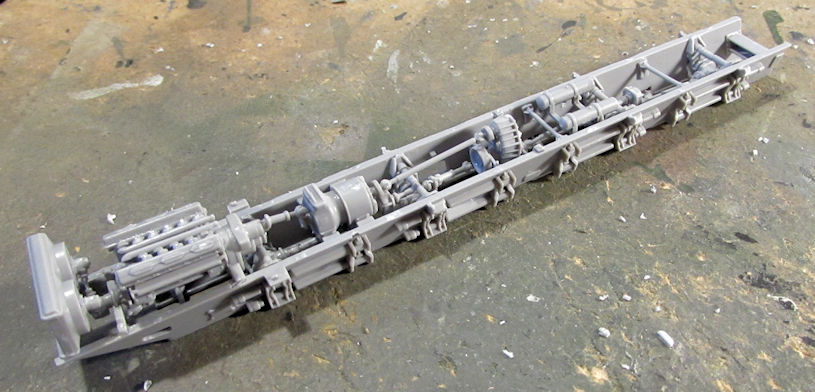
I pulled out another one, this time the MAZ Heavy Cargo Truck. I built that chassis:
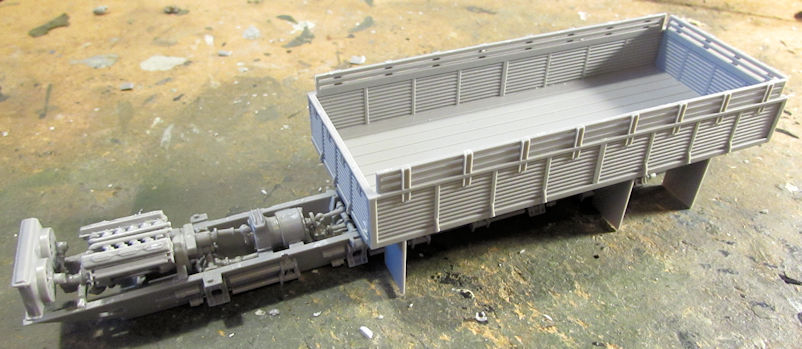
And then I built the cargo bed since it was so simple to do:
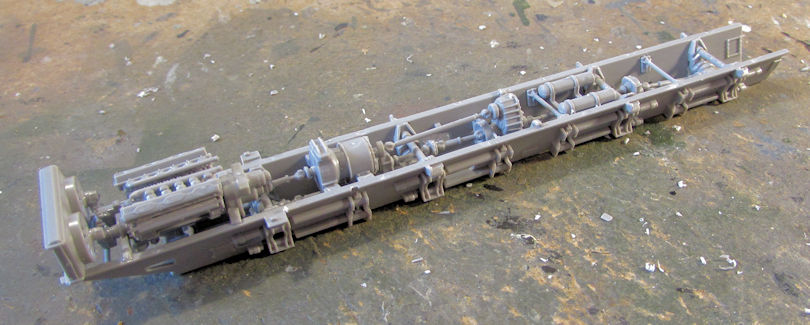
Next was the MAZ Command Post for the SA-10 Grumble SAM system. Yep, another MAZ chassis:
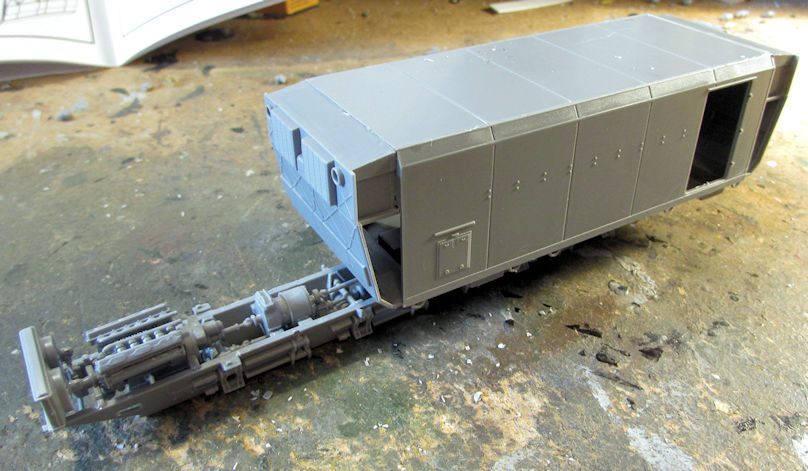
I then started the command post cabin. It wasn't as easy as the cargo bed, but still went together well enough:
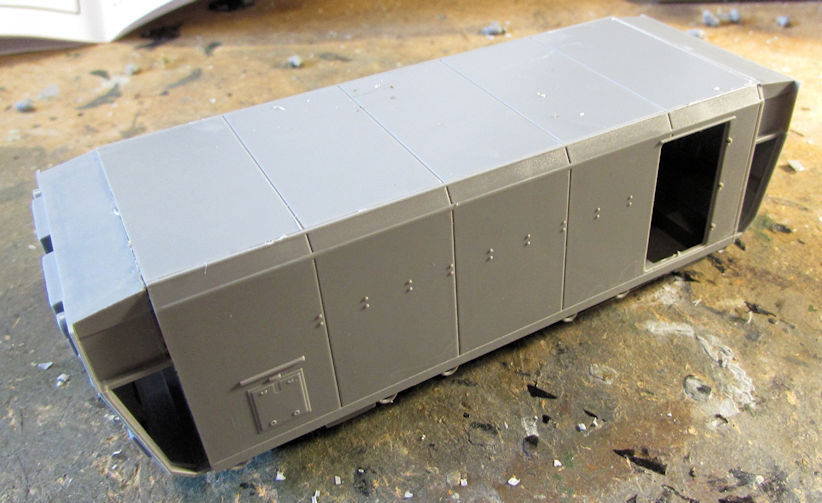
Still more to do on that but here it is dry-fit to the chassis:
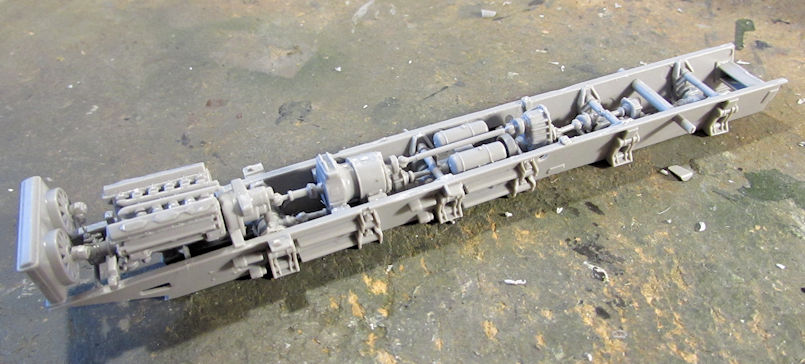
Oh, and here's another one! This is another MAZ chassis, but if you look closely; you'll see it is slightly shorter than the others. This one is for the MAZ Tractor pulling the trailer:
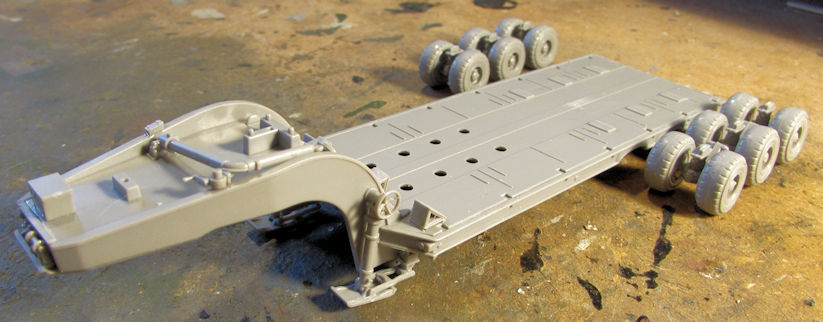
Since I had the tractor started, it was time to start the trailer too, so I assembled it to this stage. I have a few more detail parts to add before it's painted and then after that I'll add the wheels:
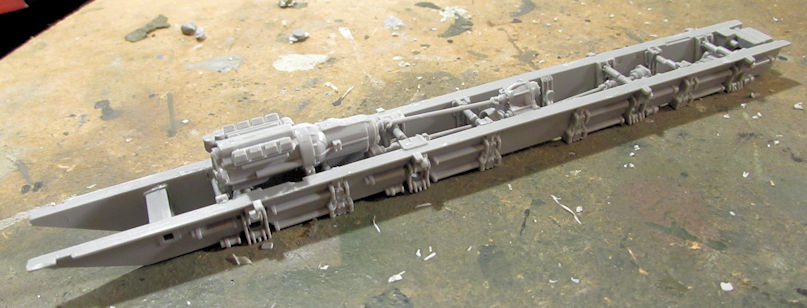
I then realized I had two more (at least) eight-wheeled Russian Trucks to do, but these were different trucks based on the KZMT series of trucks. I pulled out the first one, a KZMT Heavy Cargo Truck. Here's the completed chassis for that one:
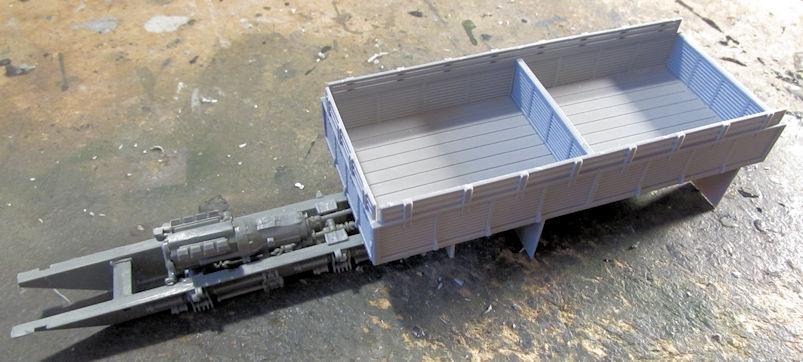
I then built the easy to assemble cargo bed again and dry fit it to the chassis:
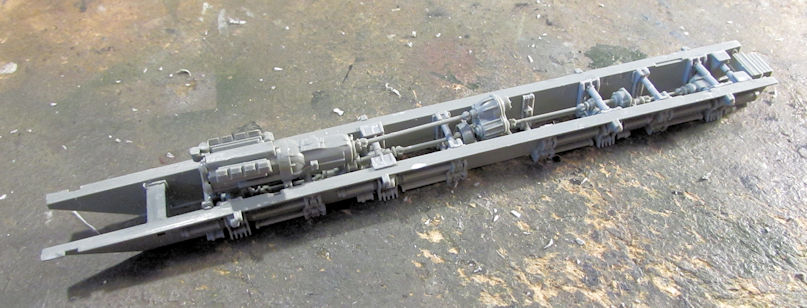
Last, I assembled another KZMT chassis; this one for the Iskandar missile system:
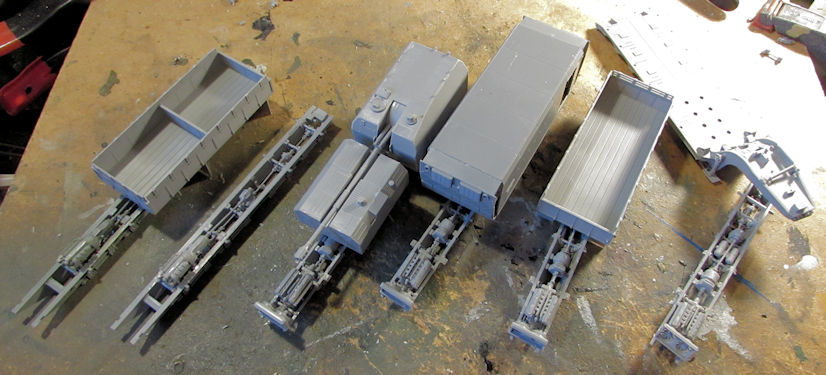
Just for fun, here are all the chassis all lined up for you to see:

This shot shows the extra sub-assemblies on them to show which one is for which truck:
But wait! I started a seventh eight-wheeled truck. This last one is the AA-60 Fire and Rescue truck on the MAZ chassis. This model company kept it real simple though, here is the chassis assembly:
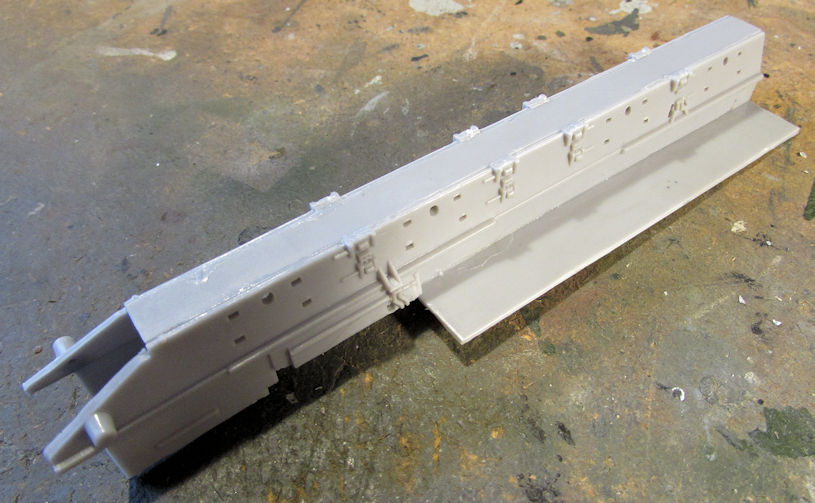
Well, I couldn't stop there. I had to build the rest of the rear body for this truck, but I started with the small cabin behind the driver's cab:
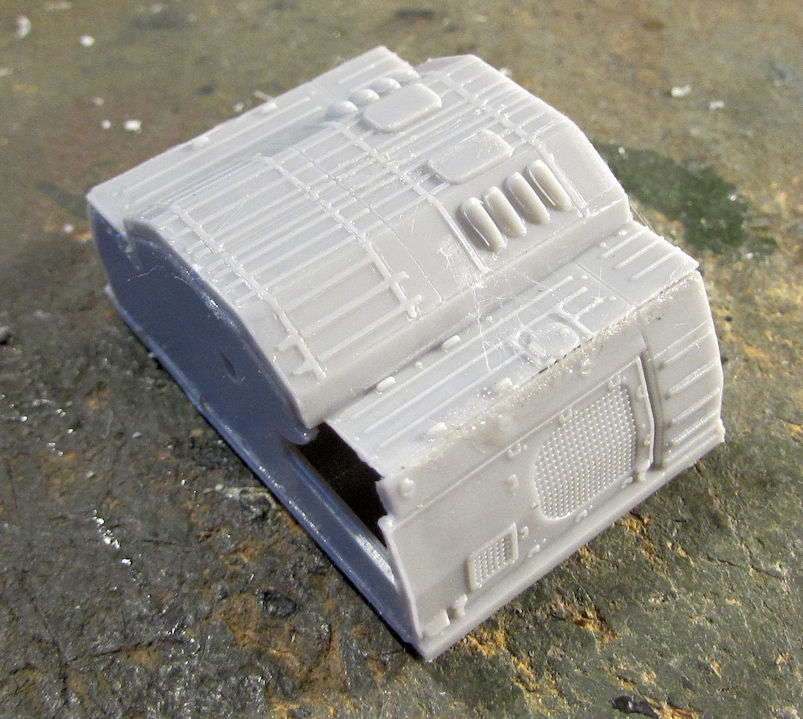
That didn't fit too well, but I moved on. Here is the rear body mostly assembled so far:
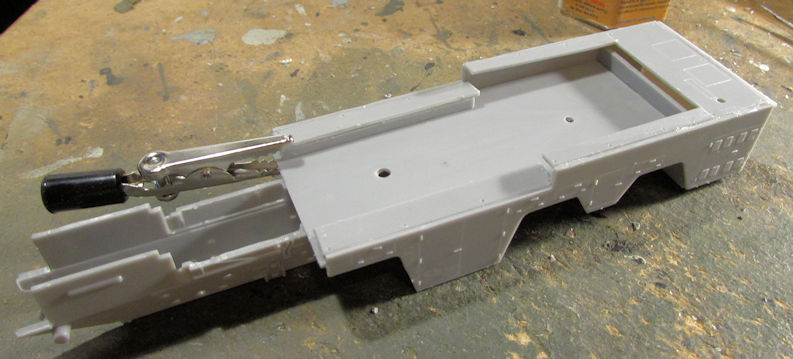
No need to worry about that gap in the back. It will be obvious why when I install this tank I also built:
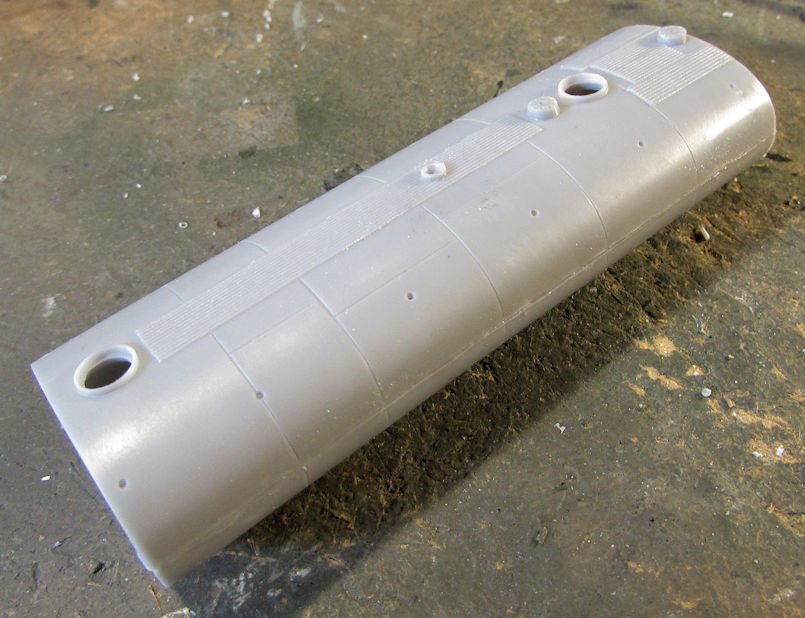
See? No gap, but there are other issues I will have to address. Still, this is looking quite impressive so far:
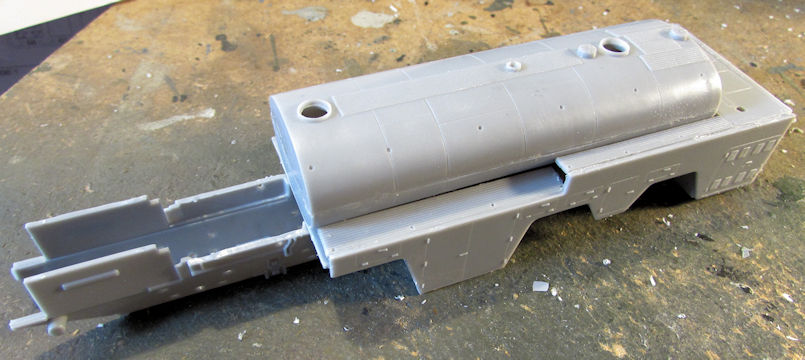
One of those issues was on the small cab; I got started on that one with some Mr. Surfacer 500:
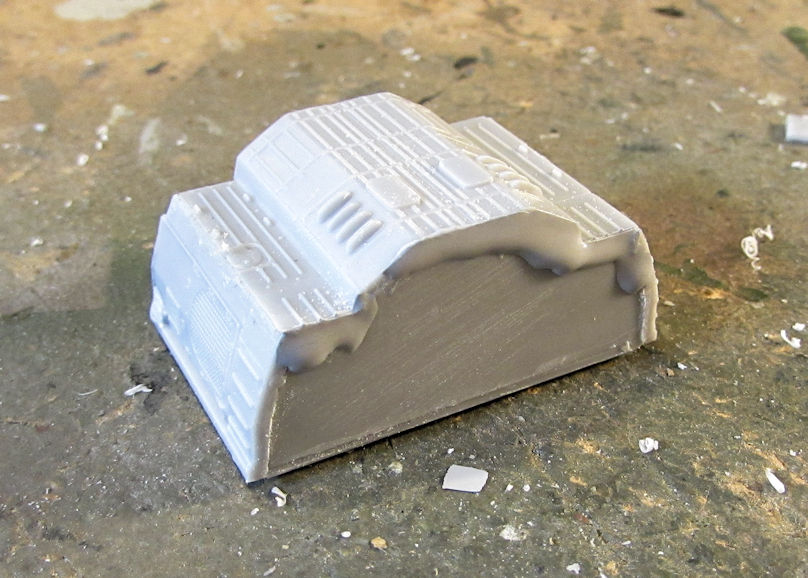
When that dries it'll be sanded down.
That's when I decided I'd done enough till now. So, I shall end this update here and I hope you enjoyed the latest tour. Thanks all for looking in, comments are welcome.
Here is the latest progress I got done, starting with my aircraft.
The Shinmeiwa was getting on my nerves so it was pulled out to move it along. I started with the inner flaps, trapping the hinge pieces inside with caps. You can see here where I had to improvise when one cap disappeared:

I then got the inner flaps assembled:

The outer flaps were assembled afterward the same way:

Then they were all dry, I trapped them inside the two wing halves when I assembled the wings. They move quite well in there:

Later while looking at the instructions, I noticed that there were certain fuselage plates that had to be inserted and glued flush when the fuselage was assembled. Yet, there were no tabs or 'shelves' for the plates to sit on, making it too easy for them to fall into the fuselage. So, I glued some sheet styrene pieces to the openings to allow the plates to be placed in place without the threat of them disappearing inside the fuselage:


I was ready to move on by then.
Because of Frank's fantastic Huey helicopter builds, I decided to bring out one of my two UH-1D's I'd gotten at the recent game convention and start it. This one has special markings for a German SAR bird that looked very cool, so I decided on that one. First step of course was the cockpit and interior:

That was as far as I got before I started again on my armor.
My first work on my armor was to assemble the main hull of the Terminator. Here it is with the side sponsons, hatches, and various detail bits on it:

Next I test fit the turret onto this to see how well it turns. It turns well:

After that I assembled the five pieces of the lower hull:

This thing is starting to look pretty good:


Next up, I decided to get back on my Bereg Coastal Defense Gun. I pulled out the parts to assemble the chassis and went to work, finally finishing when I got this much done:

I then assembled the control cabin and floor, along with some bracing pylons:

...followed by the gun barrel to the turret:

Here is the whole thing dry-fit together so far:

And then I realized, I have three other eight-wheeled Russian trucks I can build with the same chassis. That's when I got sucked in....
I pulled out another one, this time the MAZ Heavy Cargo Truck. I built that chassis:

And then I built the cargo bed since it was so simple to do:

Next was the MAZ Command Post for the SA-10 Grumble SAM system. Yep, another MAZ chassis:

I then started the command post cabin. It wasn't as easy as the cargo bed, but still went together well enough:

Still more to do on that but here it is dry-fit to the chassis:

Oh, and here's another one! This is another MAZ chassis, but if you look closely; you'll see it is slightly shorter than the others. This one is for the MAZ Tractor pulling the trailer:

Since I had the tractor started, it was time to start the trailer too, so I assembled it to this stage. I have a few more detail parts to add before it's painted and then after that I'll add the wheels:

I then realized I had two more (at least) eight-wheeled Russian Trucks to do, but these were different trucks based on the KZMT series of trucks. I pulled out the first one, a KZMT Heavy Cargo Truck. Here's the completed chassis for that one:

I then built the easy to assemble cargo bed again and dry fit it to the chassis:

Last, I assembled another KZMT chassis; this one for the Iskandar missile system:

Just for fun, here are all the chassis all lined up for you to see:

This shot shows the extra sub-assemblies on them to show which one is for which truck:

But wait! I started a seventh eight-wheeled truck. This last one is the AA-60 Fire and Rescue truck on the MAZ chassis. This model company kept it real simple though, here is the chassis assembly:

Well, I couldn't stop there. I had to build the rest of the rear body for this truck, but I started with the small cabin behind the driver's cab:

That didn't fit too well, but I moved on. Here is the rear body mostly assembled so far:

No need to worry about that gap in the back. It will be obvious why when I install this tank I also built:

See? No gap, but there are other issues I will have to address. Still, this is looking quite impressive so far:

One of those issues was on the small cab; I got started on that one with some Mr. Surfacer 500:

When that dries it'll be sanded down.
That's when I decided I'd done enough till now. So, I shall end this update here and I hope you enjoyed the latest tour. Thanks all for looking in, comments are welcome.
Heavens Eagle
Well-known member
As usual Mark it is amazing just how much you get done.


Duke Maddog
Well-known member
Thanks Paul! In a way, I feel like I should be further along on all these. However, like Bob I always seem to underestimate the amount of work that needs to be done.
Thanks again for the compliments! Stay tuned, more to come.
Thanks again for the compliments! Stay tuned, more to come.
Mark, your productivity amazes me!
Nice to see some floaters in the line up! Love the duck and the widgeon. Can’t wait to see them finished! I didn’t know you started your Shinmeiwa, mine is still in the box. Looks like there are several things that will be a pain in the kits assembly!
I also really like the Astratt turret and that Nagmachon looks totally strange

Duke Maddog
Well-known member
Thanks Warren! Wow, you went back a ways didn't you?
The Widgeon is on hold until I figure out how to replace the missing canopy. The Duck will be resumed when I find the box again! LOL! :facepalm And yeah, there are a few things in that Shinmeiwa that have me scratching my head. Of course; the fact they print everything in Japanese makes it even more difficult to understand what needs to be done. When you open yours, go through and determine which variant that you plan on building; then circle every step that has that version indicated. I did that myself after I realized that I was doing two different assemblies that could not both be installed on the plane.
Thanks also for the compliments on the turret and the Nagmachon. Yes, the Nagmachon does look strange and that's why I'm thrilled to get it in my collection. Just wait till I install the bar armor on this! Oh, and the Austratt turret is finished now too.
Thanks Dave! I'm just trying to get a few things done.
Thanks Warren! Wow, you went back a ways didn't you?
The Widgeon is on hold until I figure out how to replace the missing canopy. The Duck will be resumed when I find the box again! LOL! :facepalm And yeah, there are a few things in that Shinmeiwa that have me scratching my head. Of course; the fact they print everything in Japanese makes it even more difficult to understand what needs to be done. When you open yours, go through and determine which variant that you plan on building; then circle every step that has that version indicated. I did that myself after I realized that I was doing two different assemblies that could not both be installed on the plane.
Thanks also for the compliments on the turret and the Nagmachon. Yes, the Nagmachon does look strange and that's why I'm thrilled to get it in my collection. Just wait till I install the bar armor on this! Oh, and the Austratt turret is finished now too.
Thanks Dave! I'm just trying to get a few things done.
Mark, not sure it would be useful at this point but I have the english instructions with my kit, I could scan them if you like.
Duke Maddog
Well-known member
Warren, that would be most helpful. I haven't done much since that last update so English instructions would help tremendously.
Similar threads
- Replies
- 41
- Views
- 5K
- Replies
- 1
- Views
- 132
