• Modelers Alliance has updated the forum software on our website. We have migrated all post, content and user accounts but we could not migrate the passwords.
    This requires that you manually reset your password.
    Please click here, http://modelersalliance.org/forums/login to go to logon page and use the "Forgot your Password" option.

M109A6 Paladin

Hey there everyone, can’t believe its been a year since I last showed any progress on this build. Well a lot has happened in that year. I have been working this build in my free time, tinkering really and have made quite a bit of progress. Goal is to get assembly done before I pack up the model desk again in a few weeks, lets see if I make it.

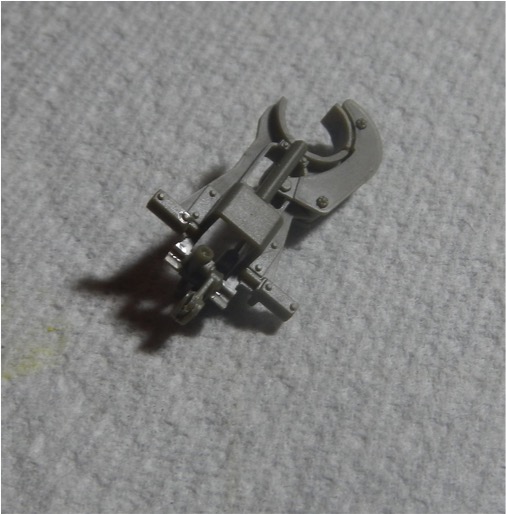
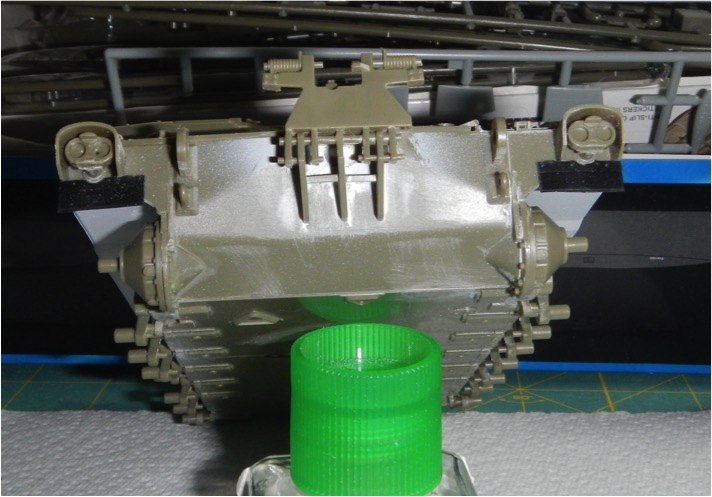
To get things rolling again I started on the hull. First I assembled and installed the lower half of the gun travel lock. I plan to display the model with the gun elevated to fire so the top half will be installed folded down in the stowed position. I’ll install it after painting the model because it will be in the way and difficult to paint the underside when its installed.

Post_4_1~1.jpg


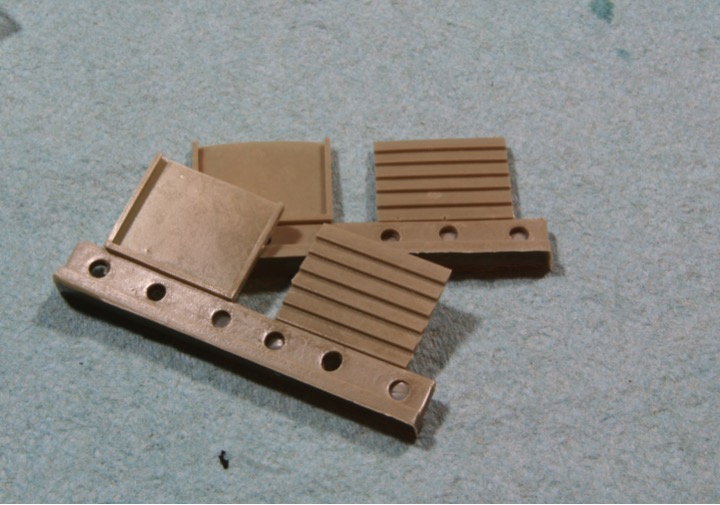
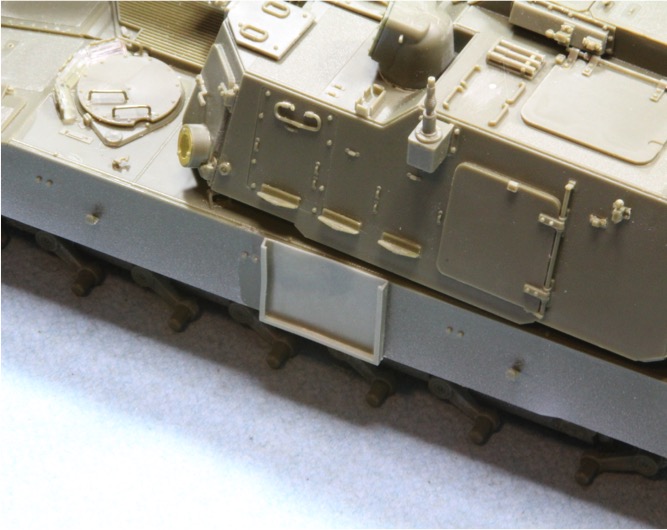
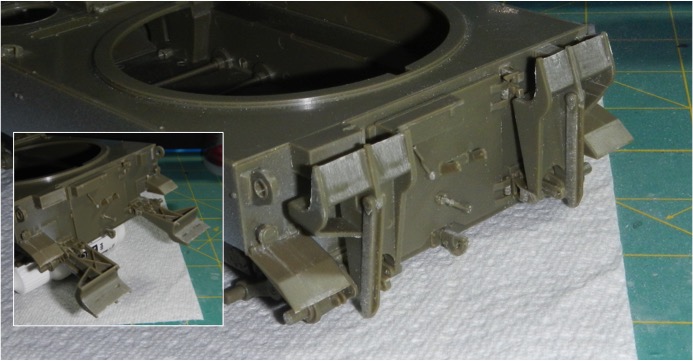
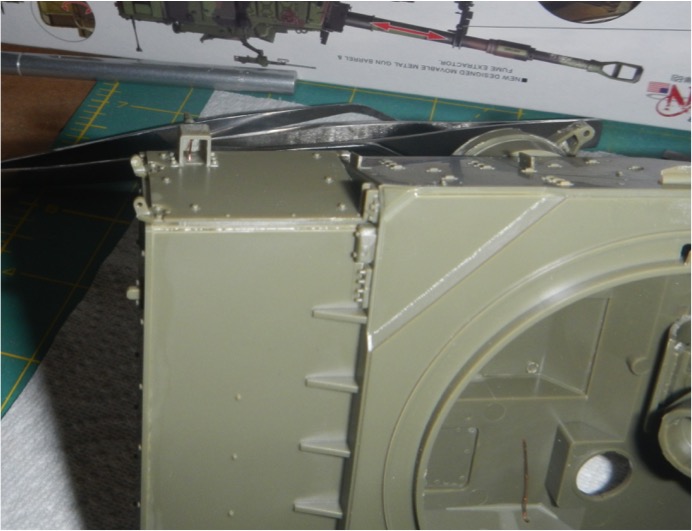
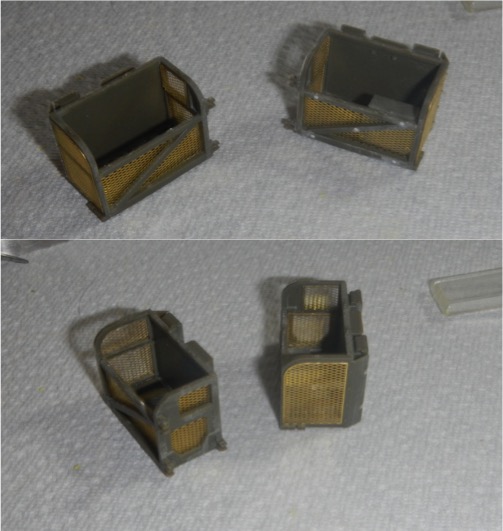
Next I finished the rear of the hull. This was all pretty straight forward, no problems with assembly. The braces on the rear hull are designed to be workable. I left them that way so I can get them out of the way when I paint. I’m also not sure if they will be in use or not when I display the finished build. Here they are, stowed and extended.

Post_4_2~1.jpg


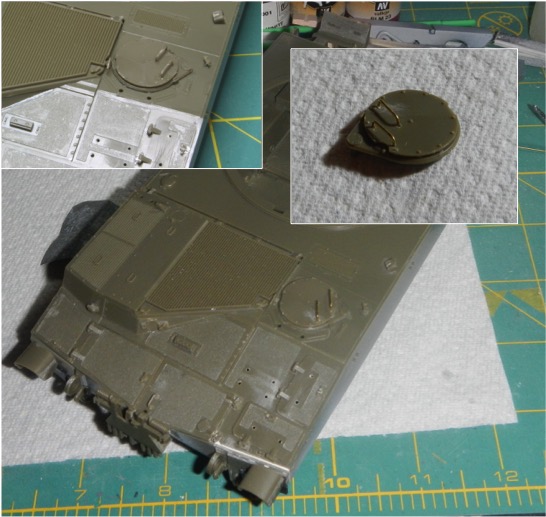
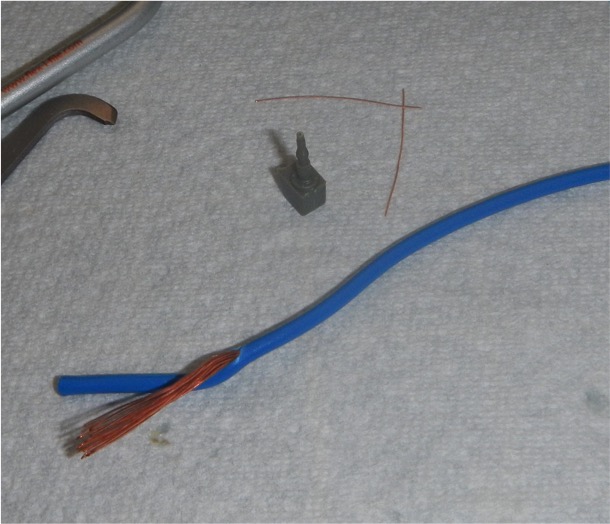
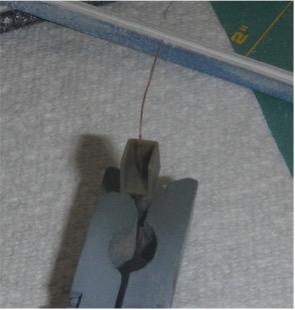
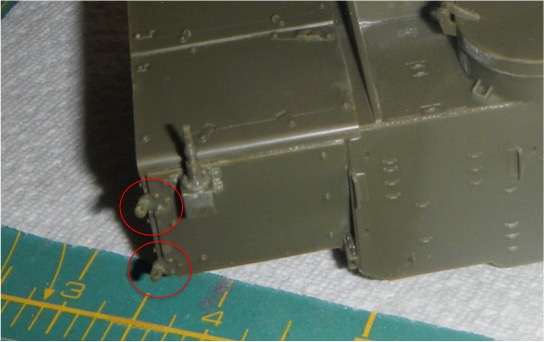
Last thing I needed to do was fix the handles on the drivers hatch. They both broke off while the kit was boxed up, so I drilled some holes, bent some copper wire and installed. Pretty quick and easy. Upper left corner shows the original kit handles.

Post_4_3~1.jpg


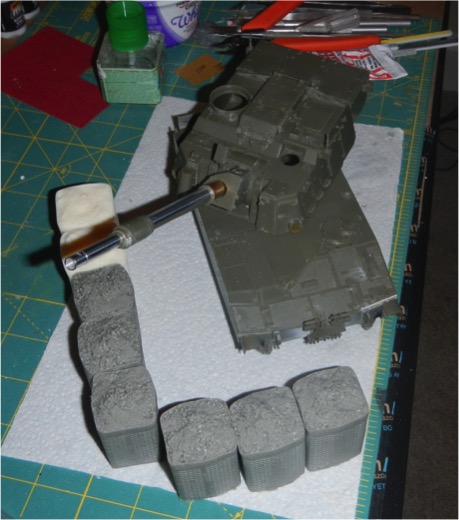
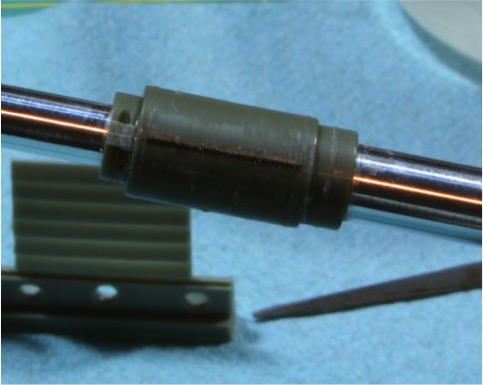
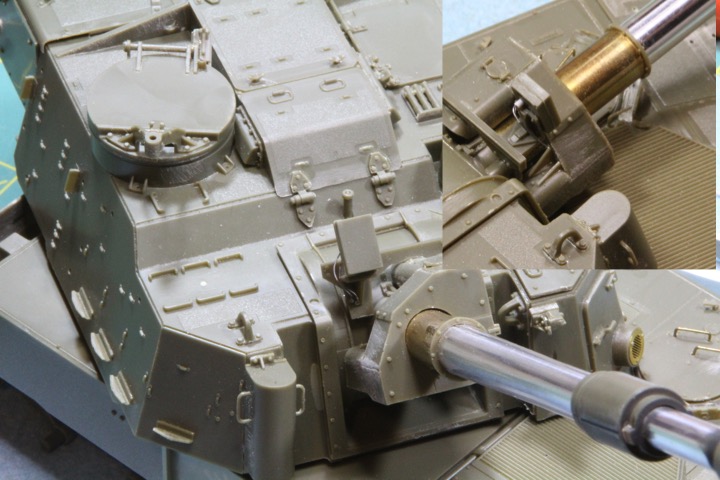
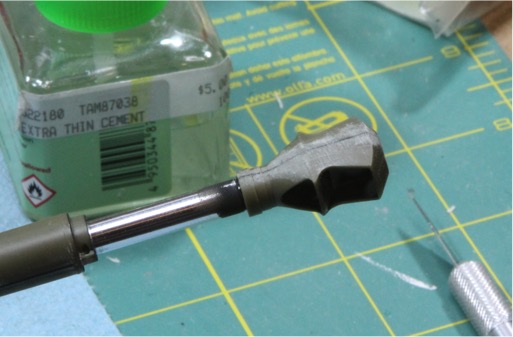
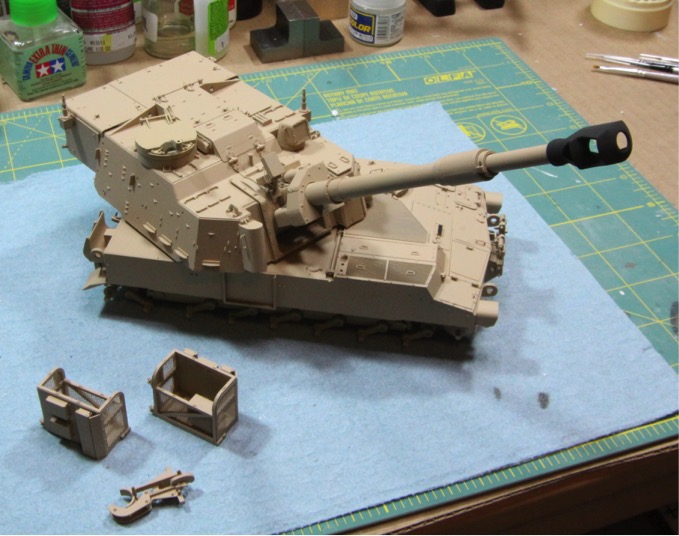
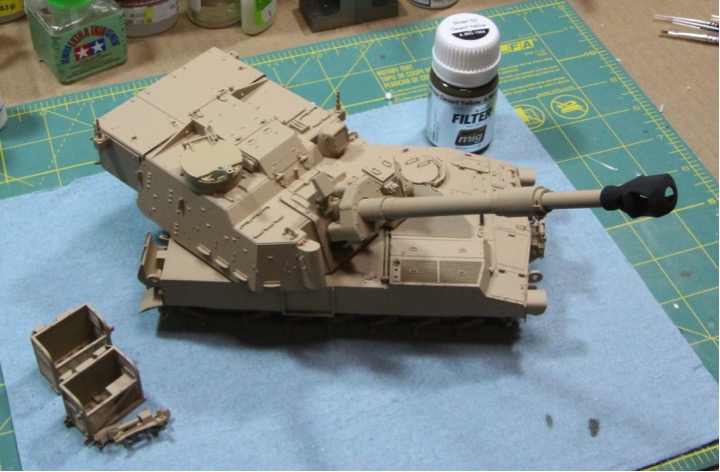
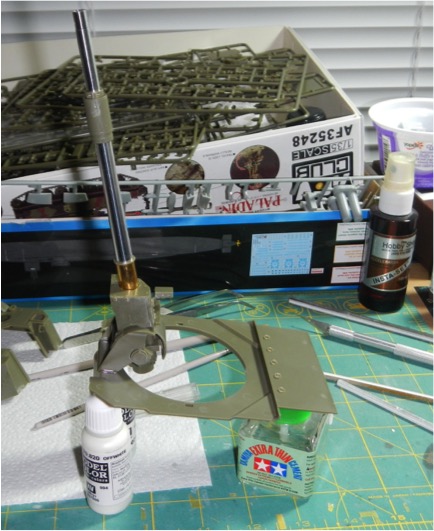
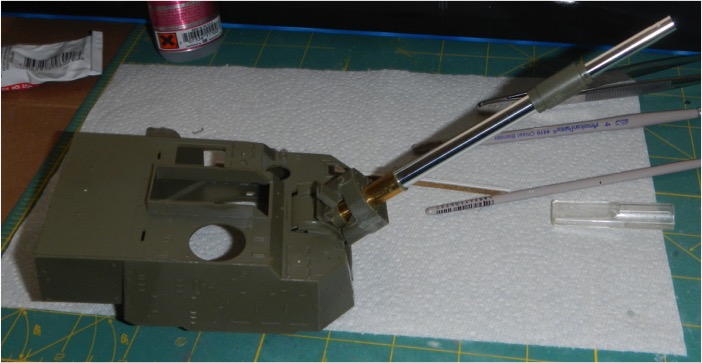
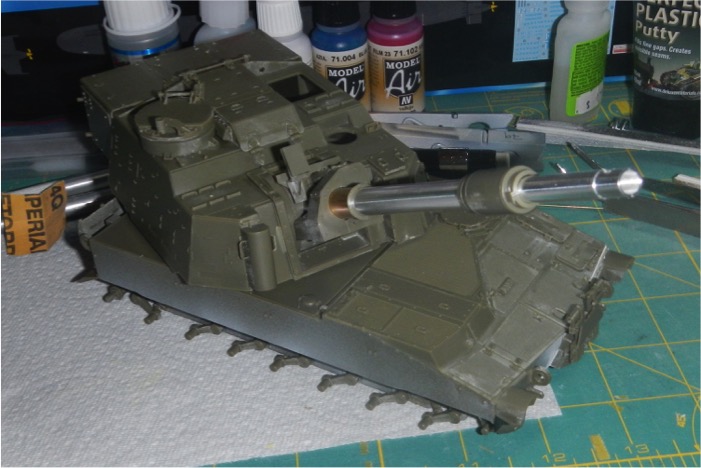
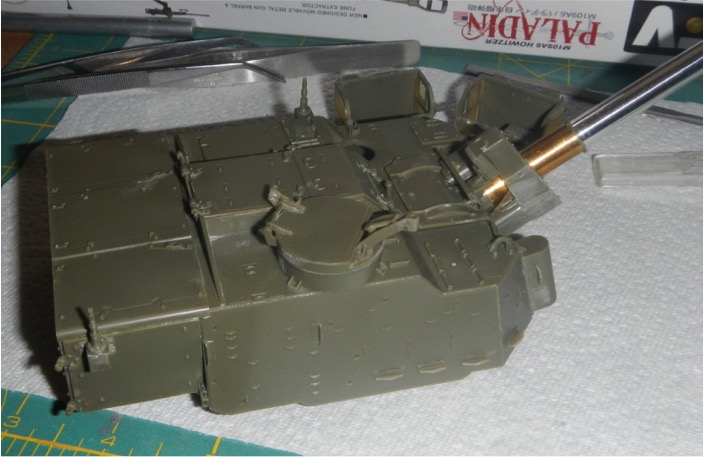
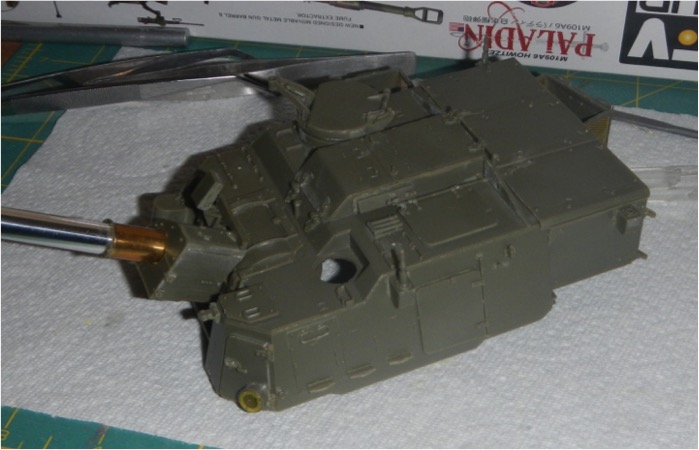
Next I moved onto the gun assembly. It’s a bit of a complicated assembly. The aluminum barrel is included in the kit. There is also a brass sleeve and a spring that when its all assembled, allows the gun to move in recoil. I ended up gluing the gun barrel in place because when elevated, the spring does not support the weight and the barrel sags a little bit. I left off most of the gun breech, because it won’t be visible on the end model anyway. The gun is mounted to the floor of the turret and uses polly-caps to allow it to be elevated. I left off the muzzle break because I am going to need to paint the inside prior to assembly so it will also be added later.

Post_4_4~0.jpg


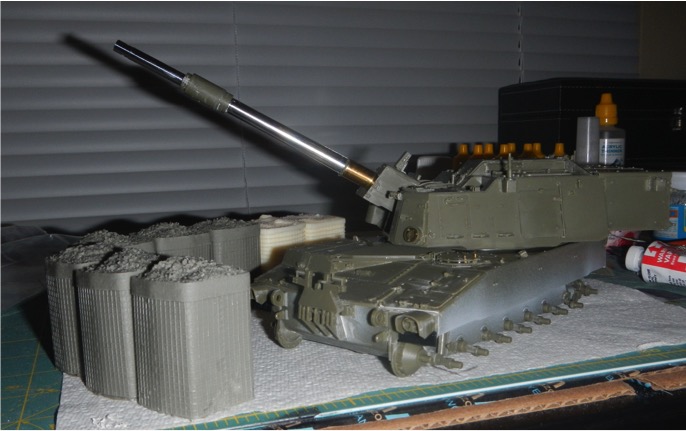
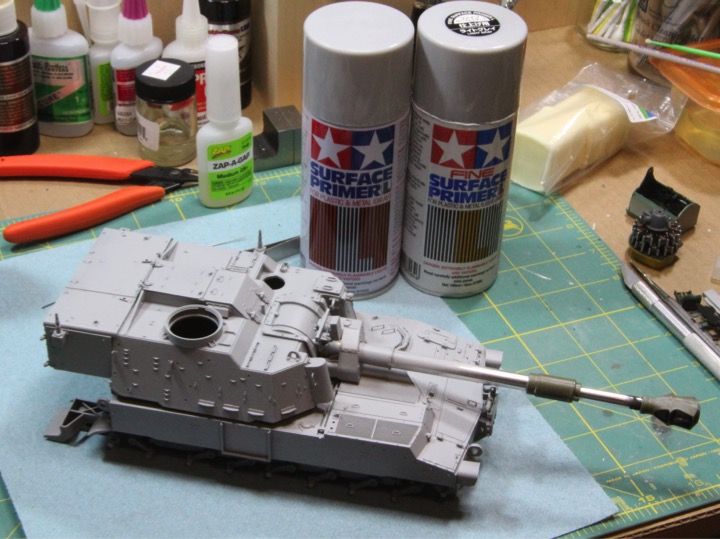
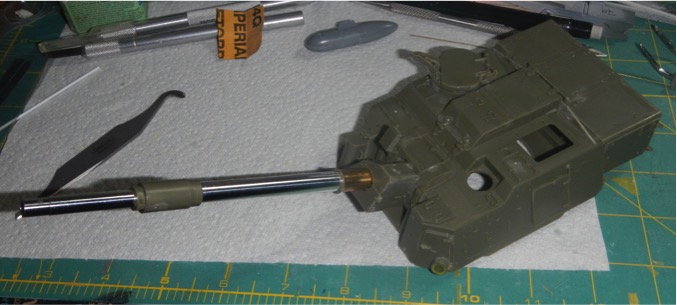
Then its just a matter of following the instructions, first I added the turret top.

Post_4_5~0.jpg


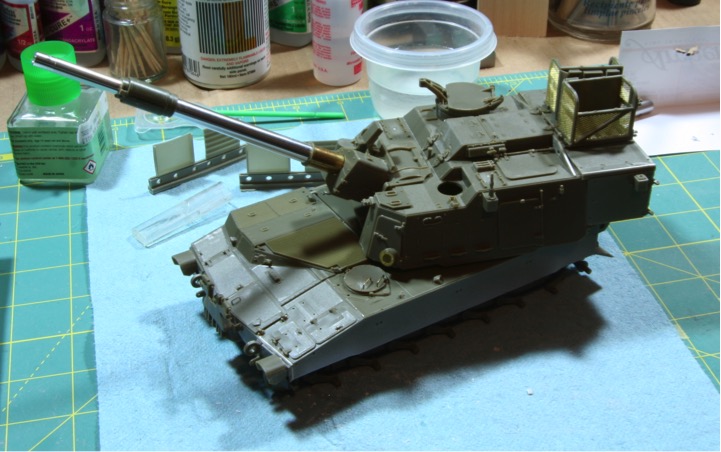
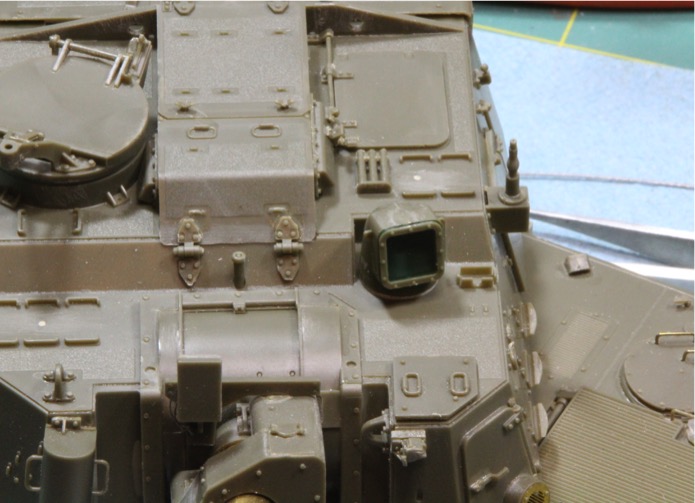
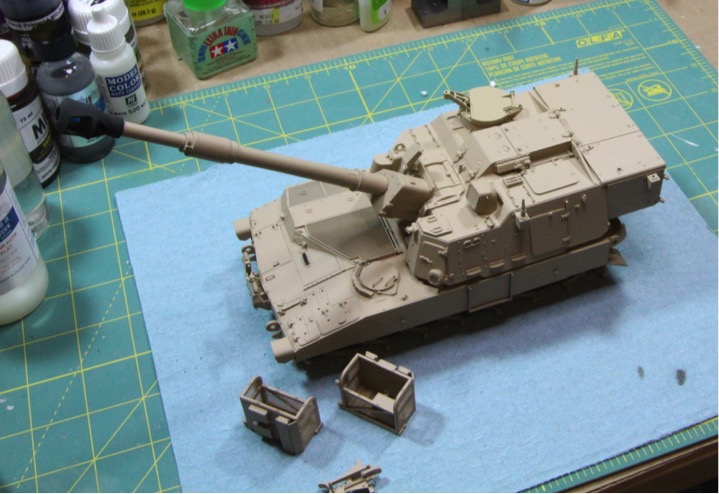
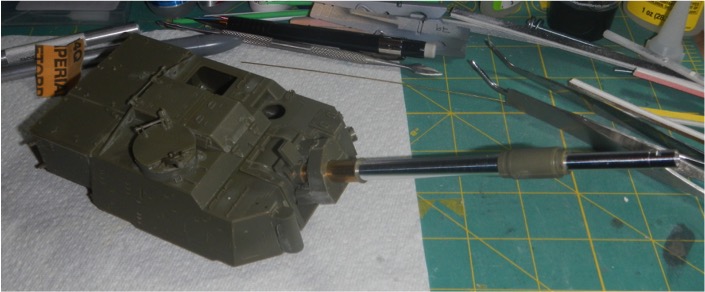
And then you start adding parts to it. I’m not quite done with the turret but I’ve at least got the commanders turret added. With all the optionally open or moveable hatches this thing screems for an interior. I’ve glued all the hatches shut, but if the aftermarket guys ever come out with an interior for the A6, I may consider building a second one all opened up.

Post_4_6~0.jpg


Post_4_7~0.jpg


Well that’s where I am. This has been a long time coming, and hopefully the next post will be a little sooner then the last!

Thanks all for looking in
Mike

Post_4_8~0.jpg
 
Mike that is one awesome looking piece of armor I'll be watching this as you continue your build sorry you didn't get the ribbon but it's going to be good ...... :soldier :popcorn
 
Hi folks! Back with some more progress.

The next couple of steps are just continuing to add all the parts to the turret sides. Not to complicated. I did liven up the antenna mounts though. My reference photos seem to indicate that the wire from the antenna to the inside of the tank, to the radio ultimately, is visible if you look up from underneath. So I added this feature using some copper wire.

Post_5_1~1.jpg


Drilled a hole in the bottom of the antenna mount and another in the side of the turret then attached the wire with a little CA glue.

Post_5_2~1.jpg


Then it was mounted to the turret.

Post_5_3~0.jpg


Then I repeated the procedure for the second antenna and mounted them to the turret. I also drilled out the top of the mount so I can add the antennas later. I’m going to leave those off until last, or I will break them.
All the other parts that I intend to install were all added and the turret is ready for paint. The tools were all left off because I plan to paint those off the kit and add them later.

Post_5_4~0.jpg


Post_5_5~0.jpg


Next up are the turret baskets. These are built up from plastic frames with photo etch screens. They went together fairly easily, but did take a little patience to make sure they were aligned properly. These will be added to the kit after everything is painted.

Post_5_6~0.jpg


One word of caution to anyone building this kit. There are four brackets added to the back of the turret, two on each side (circled in the picture below). These are the mounts for the turret baskets. If they are not aligned properly they basket will not attach correctly. I recommend leaving these off and adding them to the brackets on the turret baskets, then attach the assembly to the turret all at once. The alignment will be much better. Hope that makes sense. Mine went on following the instructions and I didn't realize what they were, they are not straight. :facepalm

Post_5_7~0.jpg


That’s where I am today on this big gun. Next up will be the top of the gun travel lock, another sub-assembly that will be added after paint, then the road wheels and the tracks.

Thanks for looking, and as always, comments and critiques are always welcome.
Mike
 
Thanks guys for all the encouragement! I’m back with what will be my last progress report on this kit for a few weeks. Fortunately the new house is nearly done and we will be moving in a couple of weeks. It will certainly be great to have my work bench and all my supplies back again but for now its time to pack up the travel box and get ready to go! :yipee

Onwards with the progress! :soldier

Not much is really left to do here. I finished up the top of the gun travel lock. This is the part that folds back over the front of the hull when the gun is in the firing position. This is made up of 8 or so parts and while great for detail, its really finicky to get together. Mine also suffered from a huge sink mark right in the seat for the gun. Not difficult to fill with some Squadron White putty and some sanding, but it was just in an bit of an awkward spot. :S

Post_6_1~0.jpg


Next up are the road wheels. I had already started painting and weathering these, just needed to finish up and assemble. They were painted with Polly Scale US Desert Storm Sand. Fortunately I still have a few bottles of this color sitting around. Next was a coat of future and then a wash with AK US Vehicle Wash from the OEF & OIF Weathering Set. The set comes with a jar of AK paint, US base color, which is a Sand color and the appropriate wash and streaking effects from the AK range. Then a flat coat. The road wheels sat until I pulled them out again and I brush painted all the rubber wheels using Vallejo Panzer Aces Dark Rubber, thinned with a little bit of water. Once all the halves were done being painted, I assembled the front and back halves. A poly-cap is sandwiched in between each half.

Post_6_2~0.jpg


I also assembled the idler wheel halves and the drive sprockets. They still need to be painted. Here is the pile of wheels!

Post_6_3~0.jpg


I did have a bit of a problem with my wash. When I cleaned out the wash from the road wheels, a couple of the wheels looked like the pigment wouldn’t come out. I forgot all about it when I set everything aside. While I was assembling the wheels I noticed it again. On further inspection, what I think happened is that I didn’t have a good future coat on the wheels and rubbing at the wash, took off the sand paint, leaving the green plastic underneath visible. Looking at some photos of real US tanks in sand paint, it appears that a similar thing is occurring in real life, the sand is wearing away in the wheels to reveal the base green underneath. I decided it was a happy little accident and decided to keep it.

Post_6_4~0.jpg


And with that, pre-painting assembly is completed. There is still lots to do and lots of parts to finish up during the paint process, but I set a goal and finished it and am pleased with the result.

I did take a look at potential ideas for displaying the Paladin. Reference photos show them in gun emplacements built up using the big cages filled with dirt. I picked up some packs of the Bastion cages from Accurate Armor and Pro-Art Models. Here is a quick layout to see how it might look.

Post_6_5~0.jpg


I have more, was just trying to get the scale of it down. I think it’ll look pretty cool when all said and done.

Thanks for looking, and as always, comments are welcome!
Skinny Mike
:snoopy

Post_6_6~0.jpg
 
I would still seal up the plastic some how and get something over it. Having it exposed I think it will weaken the bond around the edges and you'll end up with a larger peeling spot over time. Looks good so far. :soldier
 
Love these SPG'S since I saw an Israeli one at the British Nationals a few years back. They always seem to have so much 'presence' your eyes just seem to be drawn to it.

Ian.
 
Thanks for all the kind words guys, really appreciate it.

Bob - that's probably some good advice. I'll be sure to seal it all in before the dust start to fly!
 
I spent a little time this weekend, cleaning up this post. Fixing the bad pictures and links, etc. I'm also going to move over the old treads, with a time stamp from the posts. Then I'll catch you up on the new stuff.

Hang tight, more is on the way!
 
September 4, 2015

Hey Everybody!

I pulled out the M109A6 that I originally started for the Modern Armor Campaign and had worked on quite a bit over the last few months and decided that this would be the perfect place to finish up, and get the campaign ribbon!

In case you forgot where we are, here’s a link to the build topic over in Armor Fury:

M109A6 WIP Link

Not much new to show, but here is some quick progress I made tonight. First a picture of the beast.

Post_7_1~0.jpg


I’ve been doing some research on the Paladin and learned that the fume extractor on the barrel has a weld seam that runs along each side. I had originally filled the seam and sanded it smooth. To replicate the weld bead, I used the Archer resin decals for weld seams. I had them laying around and was curious how they would turn out.

Post_7_2~0.jpg


For those that haven’t seen these yet, they are raised resin affixed to a waterslide backing that are applied just like decals. Turned out pretty good. All I had to do was cut the appropriate length. I applied some Solveset once they had dried a bit, as recommended in the instructions.

I also added the Combat ID Panel from the Legend stowage set to the back of the turret. Nothing too complicated here, just cleaned of the resin and attached with some super glue.

Post_7_3~0.jpg


I was going to also add CID panels to the hull sides, but I’m not sure if I should. I have some left over from the Accurate Armor set and they would fit, but I haven’t seen many reference photos with the panels on the M109A6. Anyone have any thoughts?
Here is a shot of the panels. They really are quite good.

Post_7_4~0.jpg


Well there we go, hopefully I’ll start picking up some momentum here on this and a few other builds because I really want to get the bench cleared for some of these campaigns that are coming.

Thanks for looking and as always comments are welcome!
Mike
 
Oct 25, 2015

Hi Folks!

I set myself a small goal for this weekend, to get this paladin in the paint booth, at least get it primered. I didn’t really have much to do to get there, just needed to spend a little time on this kit. Well here is the update.
First up I wanted to get the cable built and installed for this device, I’m not 100% sure what it is but I assume its some sort of radar system.

ref1.jpg


Unfortunately I had already installed it to the kit before I realized I need to add the cables to it. I drilled out the two connectors on the front of the unit but I couldn’t get a drilled on the connector in the back. Just not enough room. I ended up building the Y cable off the tank, using a piece of plastic rod, drilled out to accept the wire, as the rear connector and then I trimmed off the molded on connector end and attached my home made cable, connecting the wire to the front two connectors. I used 0.2mm lead wire for the cables. Its not perfect, but it does look the part.

Post_8_1~0.jpg


Next up was the huge muzzle brake. It comes as three pieces, a left and right half and the inner baffle. I painted the interior parts Tamiya NATO Black and then assembled them around the end of the barrel. Then I cleaned up the top and bottom seams with some ZAP CA glue.

Post_8_2~0.jpg


Next was the range finder assembly. The interior was painted, and the whole thin was assembled. I used Alclad armored glass for the green window. It seemed to turn out pretty well, and you can adjust the tint depending on the number of layers you spray on.

Post_8_3~0.jpg


I‘ve seen pictures of Paladins with the tow cable strapped to the side of the hull using some makeshift brackets. These tanks always have a pile of stowage on top of the turret, which would make the tow cable inaccessible. I’m going to have the Legend stowage set on mine so I figured why not add the cable to the side. I took a couple of the left over tow cable brackets from the turret and I glued then straight onto the side of the hull. Pretty simple mod. The ends will use the standard tie downs and it should look pretty good in the end. Here are the added brackets.

Post_8_4~0.jpg


That gets me to the point of priming the beast. I got the first primer session in. Unfortunately it wasn’t the epic build day I hoped for today, but I least I got close to my goal… :soldier

Post_8_5~0.jpg


Thanks for looking everyone
Mike
 
November 28, 2015

Hi guys!

Short update on the big gun today, basically got the base color on. My favorite paint for the sand color has been Polly-S US Desert Storm Sand. Polly-S was bought by Testors and then discontinued a few years ago. While they were still available I bought up all the Polly-S paints I could from my local hobby shop. But I ran into a problem with this paint. I just couldn’t get the thinning ratios right using distilled water. It was either to wet or it clogged up the airbrush. I’m afraid the paint is just old and not very shelf stable. Oddly enough I used the same paint for the road wheels, way back when, and had no issues. :idonno Fortunately I have found a couple of alternatives that will work for future projects.

After the struggle with the paint, here are the results.

Post_9_1~0.jpg


Post_9_2~0.jpg


Post_9_3~0.jpg


The muzzle break is Tamiya Nato Black. Next up is some detail painting and filters and washes. Focusing on a some other things right now so this one will continue to be a little slow.

Thanks for looking
Mike
 
Back
Top