
-
Modelers Alliance has updated the forum software on our website. We have migrated all post, content and user accounts but we could not migrate the passwords.
This requires that you manually reset your password.
Please click here, http://modelersalliance.org/forums/login to go to logon page and use the "Forgot your Password" option.
You are using an out of date browser. It may not display this or other websites correctly.
You should upgrade or use an alternative browser.
You should upgrade or use an alternative browser.
He 162D
- Thread starter Old Dog
- Start date

phantom II
Master at Arms
Ah, go ahead. if you mess it up, just add more paint and after a while it starts to look like a mottle paint job ! ")
Cheers, Christian B)
Cheers, Christian B)

OK, lets get on with this lawn dart :laugh: My first move was to remove all the parts I wasn't going to be using...

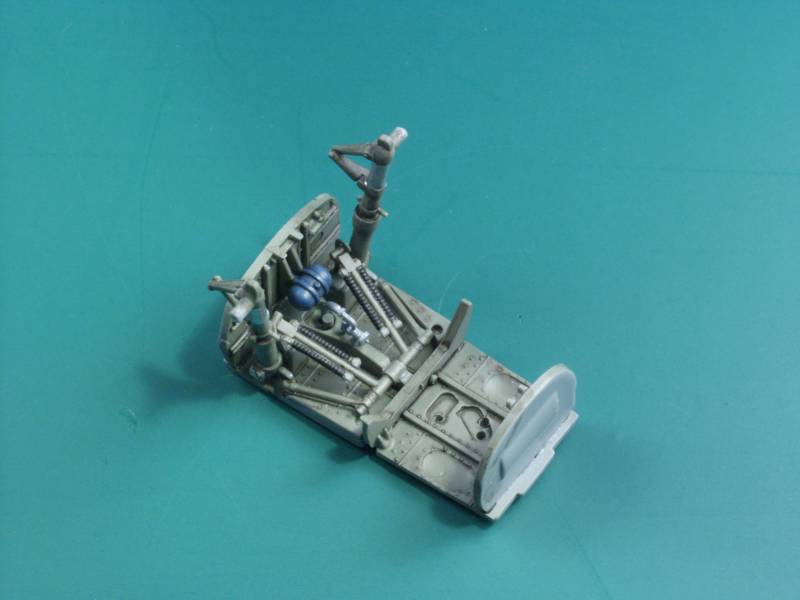
Uhhh, wait a minute are there any parts left to build ? OK, yeah there are a few. Dragon kits although they appear to be main stream in actuality they are closer to short run kits as far as fit go especially the re-branded Trimaster kits so a bit of time was spent cleaning up parts and removing mold alignment seams. When that was done the interior parts were painted the appropriate colors. I then started with the main gear bay assembly. I wanted it done so I could trap it inside the fuselage and determine how much weight would be needed to prevent tail sitting. The gear bay is quite well detailed and has more parts than the cockpit. There are still five other parts to be added after it's in the fuselage.
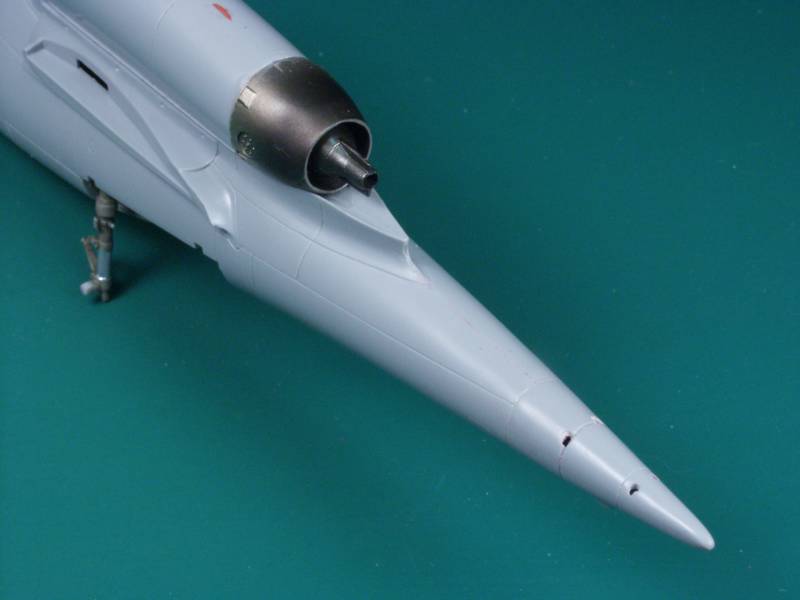
I did find it necessary to sand a bit off the fore and aft bulkheads to get the fuselage to close properly. While the glue was hardening up I went ahead and assembled the engine housing. The kit provides an alternate base piece if you don't want to display the engine. It has an intake and exhaust plug that allows you to leave the engine body out. I found this to be a bit fiddly to assemble as there are no alignment pins and only two shallow ridges to glue the doors to, I finally taped the doors together until I got them attached to the base then glued the top seam.
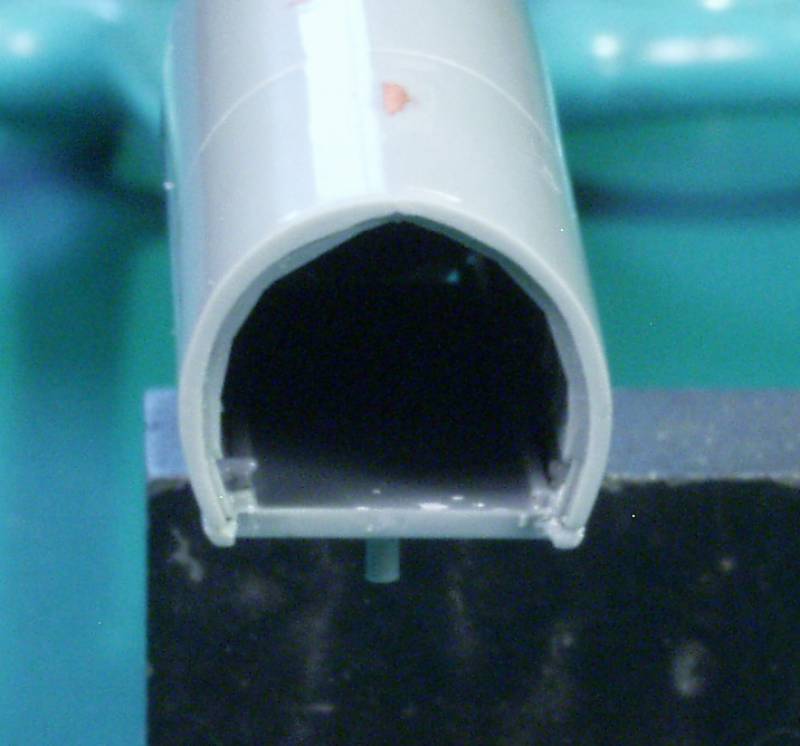
I had planned to leave the intake and exhaust parts off to eliminate some hard masking later but found when I fitted the intake it was larger than the housing, so I glued it on and sanded it to fit...

I should have investigated as to why the fit was poor but didn't and it would come back to haunt me later.
Once the gear bay was solid I taped the fuselage together to see what weight I would need. As it turned out with the solid forward swept wings and smaller tail assembly I think I could have gotten by without any weight but not wish to temp fate I glued in a couple of nuts that together weighed 8 grams, the instructions say 9 but I suspect that is for the A variant.
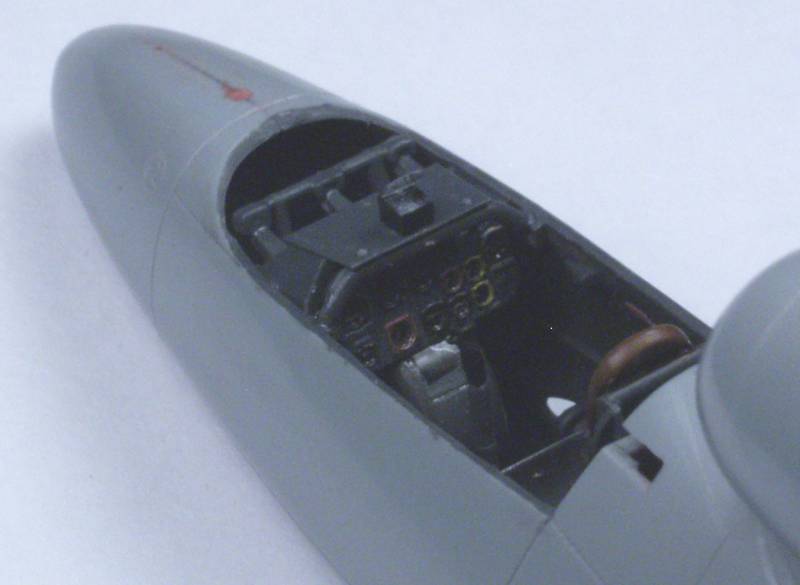
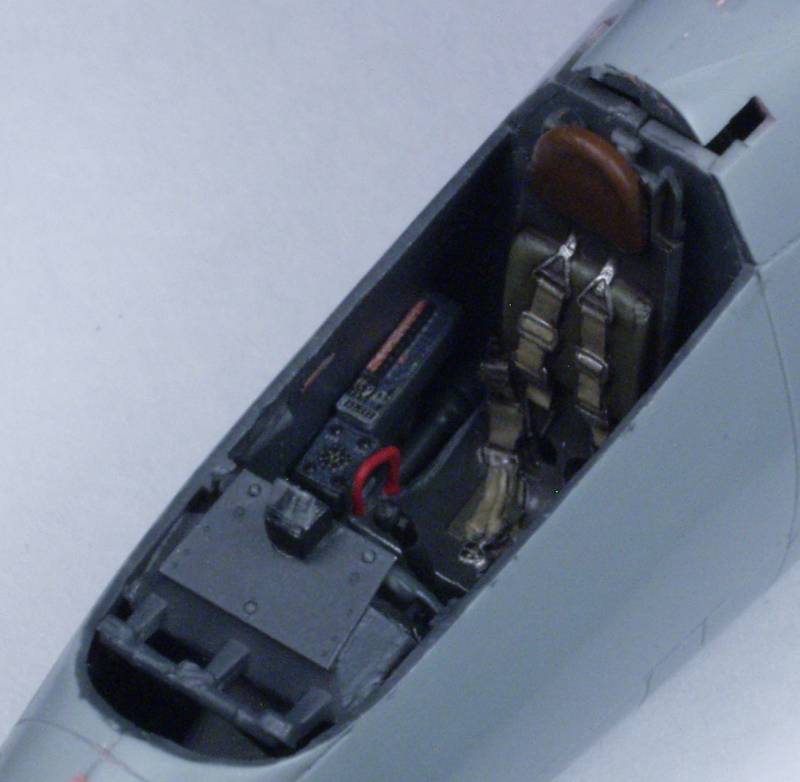
Next the cockpit side wall bits were added. The cockpit was fairly spartan on the real thing and the bulk of the cockpit doesn't go in until later. There were a few PE parts I didn't install either because they just looked to one dimensional or they were just too freaking small for me to deal with.
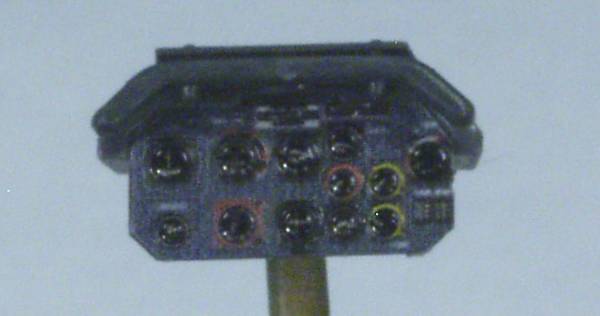
I have an "A" model one of these in 1/32 that I will dress to the nines someday, this one is all about the outside appearance. The instrument panel is tiny but looks OK...
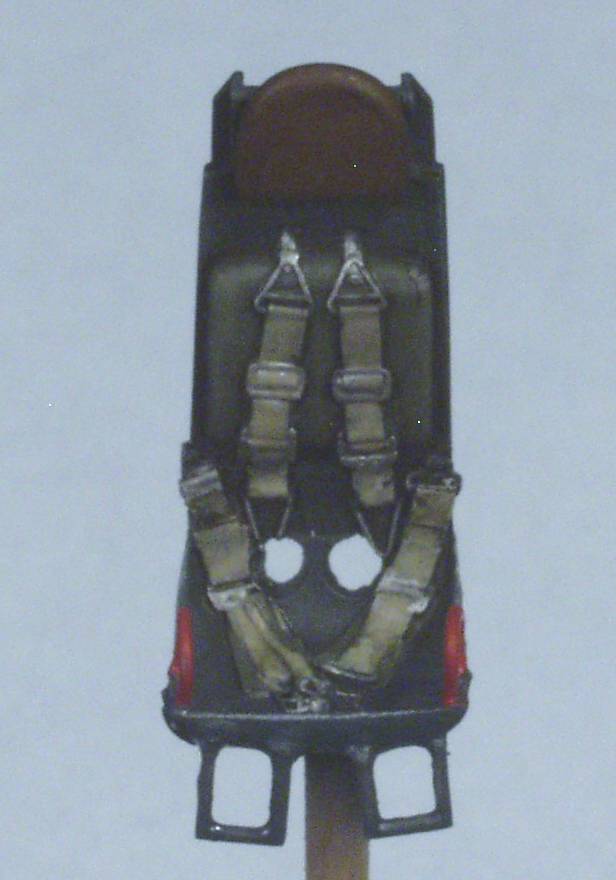
The bang seat painted up nice and it sure beat struggling with PE belts. The down side was there were no positive locators for the stirrups or the actuation handles. I drilled holes for the stirrups but in the end they wouldn't clear the wheel well housing and I had to cut them off.
I then glued the fuselage together. It actually fit pretty good and only required a minimal amount of seam work. When I went to attach the engine housing I found that at the front I had some rather nasty ridges...
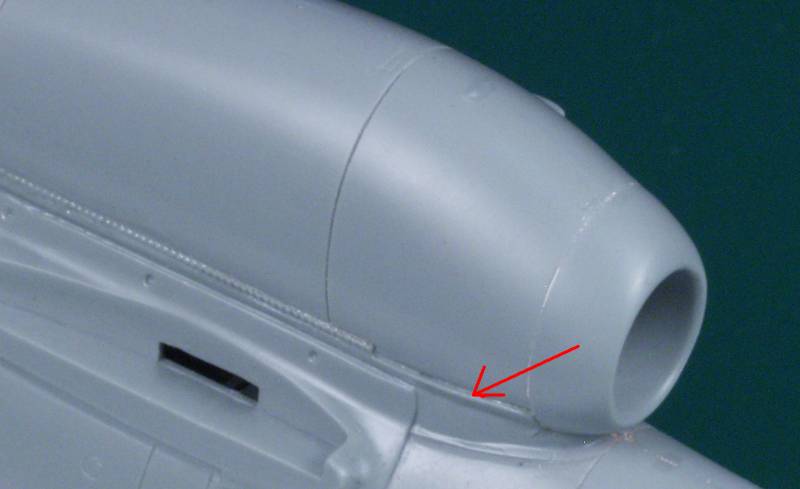
I suspect a better plan would have been to glue the doors to the intake, then to the base. It would have resulted in less sanding on the intake and probably would have eliminated most of the ridges. I feel that the alignment ridges on the base part were too close together at the front. The exhaust housing fit pretty well.
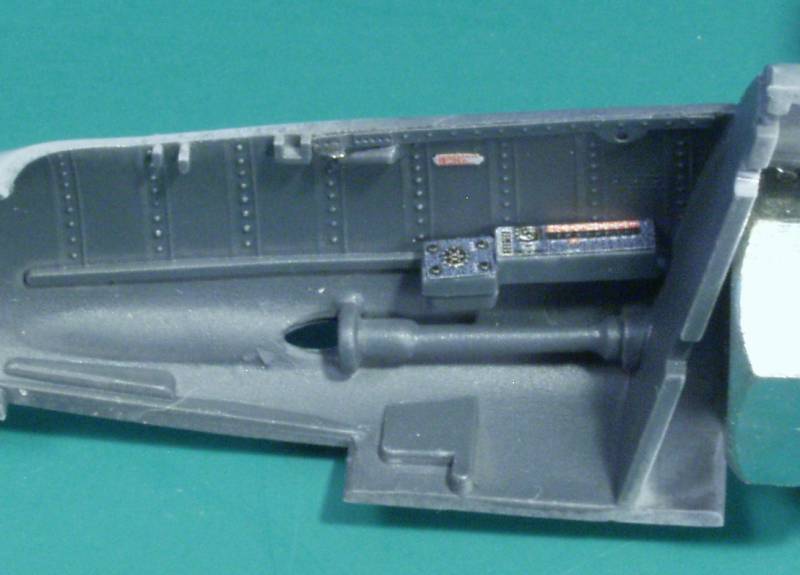
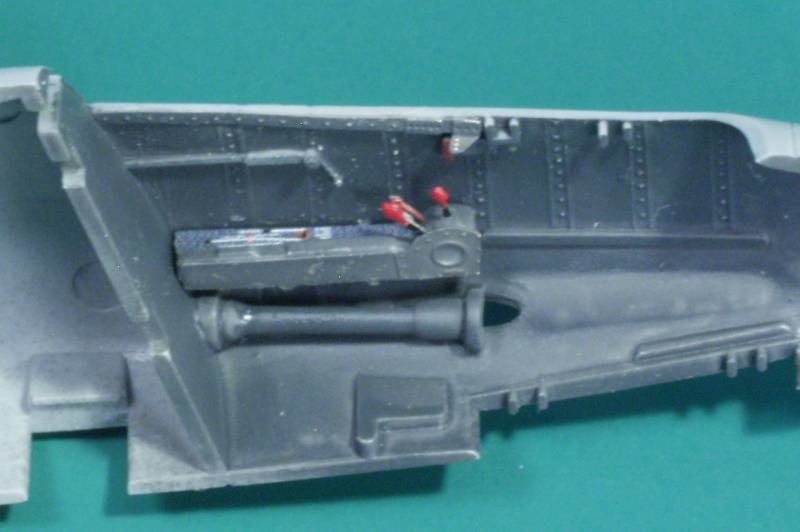
With the fuselage together and the worst of the seam work taken care of the balance of the cockpit parts were added...
The worst part of the fuselage assembly was the tail cone. The cone had a square peg and the fuselage a square hole but the hole was nearly double the size of the peg and neither surface was flat. I cut the peg off and worked on the mating surfaces for a long time before finally achieving a good fit that also aligned with the fuselage. A lot of eyeball work required as other than the tail skid there wasn't much of a reference for alignment.
The mounting holes for the 'V' tail are a lot larger than the pins on the tail parts so mounting those should be fun as well.
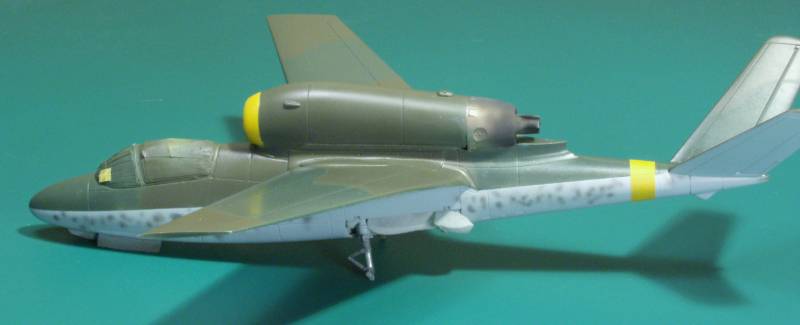
So here is where it stands now...

Once the wings and tail go on we'll be ready for some paint. Speaking of wings I was dubious as to how well the Dragon made wings would fit the Trimaster parts. Well, not all that great, but I guess it could be worse. I spent some time tweaking and here is how they look at the moment, note they will fit tighter when glued, they are just sitting in place for this photo...

They did create one rather odd area, I assume the real aircraft would have had a fairing here, nothing some Milliput won't fix...

so once the wings a tail are on and I get the canopy masked we should be good to go for paint ! Thanks for looking in !
Tried building the straight wing version last year and the fit of the wing was just as bad. But looks like you are doing a great job on it
OK, touch ups complete, mottles added, as soon as the paint has had time to cure it's on to clear coat and decals. Should be all down hill from there !

Sherman 18
Master at Arms
phantom II
Master at Arms
See :coolio I told you , you could do it
Cheers, Christian B)
Cheers, Christian B)
Old Dog
Well-known member
OK, stickers on along with the nose gear and main wheels. The decals were Cartograph and gave no problems what so ever and I only used a couple dabs of Microsol on one or two of them. No swastikas were supplied and I used some from Aeromaster which also worked well, except for one that silvered a bit, of course in the process of trying to get it settled I screwed it up and in the process of trying to remove it, lost some paint as well, so it was a three day detour to get back to this point.
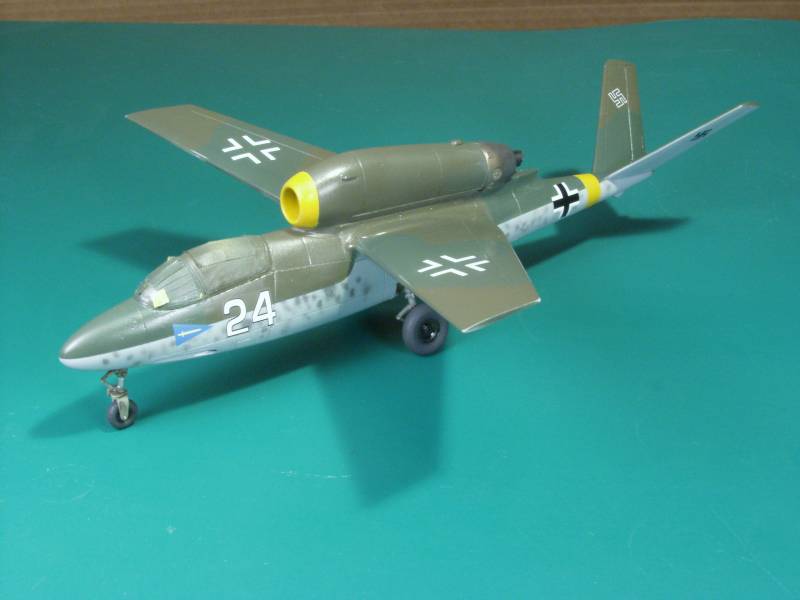
Final overcoat, some minor weathering and the fiddly bits and this one should be done. Thanks for looking in.
Final overcoat, some minor weathering and the fiddly bits and this one should be done. Thanks for looking in.
Nice and clean Gary, can't tell any troubles. 
Sherman 18
Master at Arms
Similar threads
- Replies
- 4
- Views
- 205
- Replies
- 54
- Views
- 8K