• Modelers Alliance has updated the forum software on our website. We have migrated all post, content and user accounts but we could not migrate the passwords.
    This requires that you manually reset your password.
    Please click here, http://modelersalliance.org/forums/login to go to logon page and use the "Forgot your Password" option.

GAVIA 1/48 Albatros D.I (last build details)

GAVIA 1/48 Albatros D.I (calling it done 4-13)

Top build !
Excellent Sperrholz / paint finish (y)
 
GAVIA 1/48 Albatros D.I (calling it done 4-13)

For me; I cannot find the words to express my overwhelming appreciation for the indescribable quality of this model. Congrats on the well-deserved First Place; I would have expected nothing less for such a magnificent masterpiece.
 
GAVIA 1/48 Albatros D.I (calling it done 4-13)

Thank you for your kind comments Piet and Mark! They are much appreciated as always.

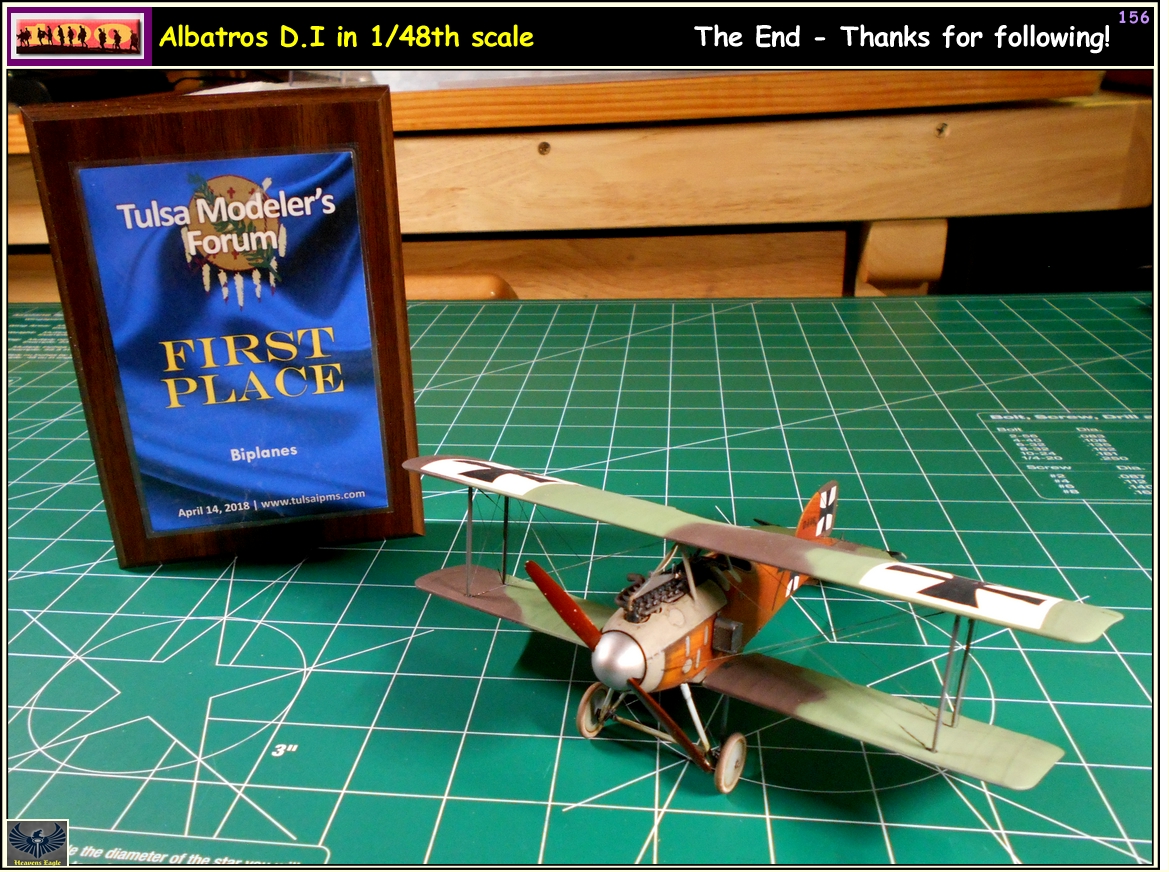
This build was intended as a learning build for me. It ended up being a little more involved than I had originally thought it would be, but unlike some others I have started in recent years the kit wasn't really all that bad. There were a few inaccuracies and things I changed, but they were for the most part fairly few and simple. I had a few small missteps but they were only slight and I learned a lot from them.

Mostly it was a painting experiment. I needed to see what I needed to do and how to do the plywood paneling. The end result turned out beyond my hopes so that is a good thing. The next builds with plywood should be faster and easier with less guesswork.

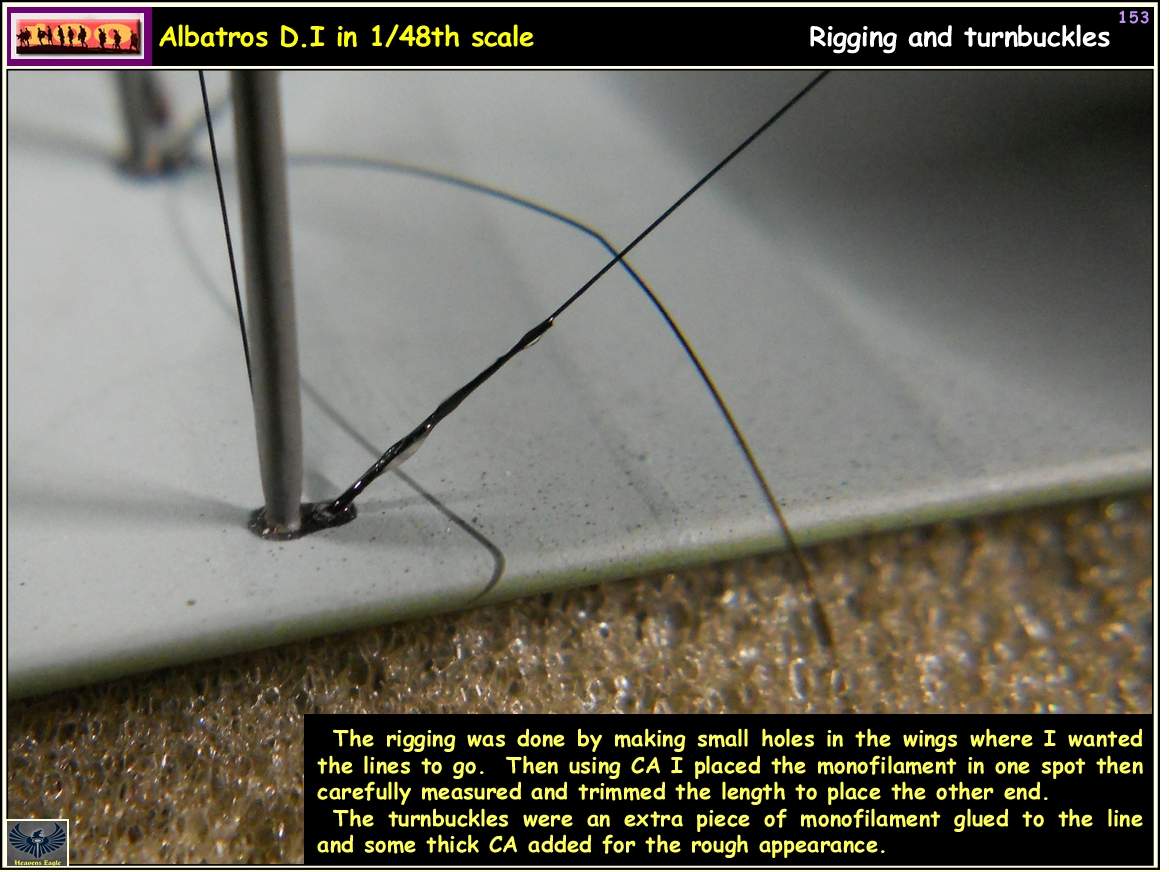
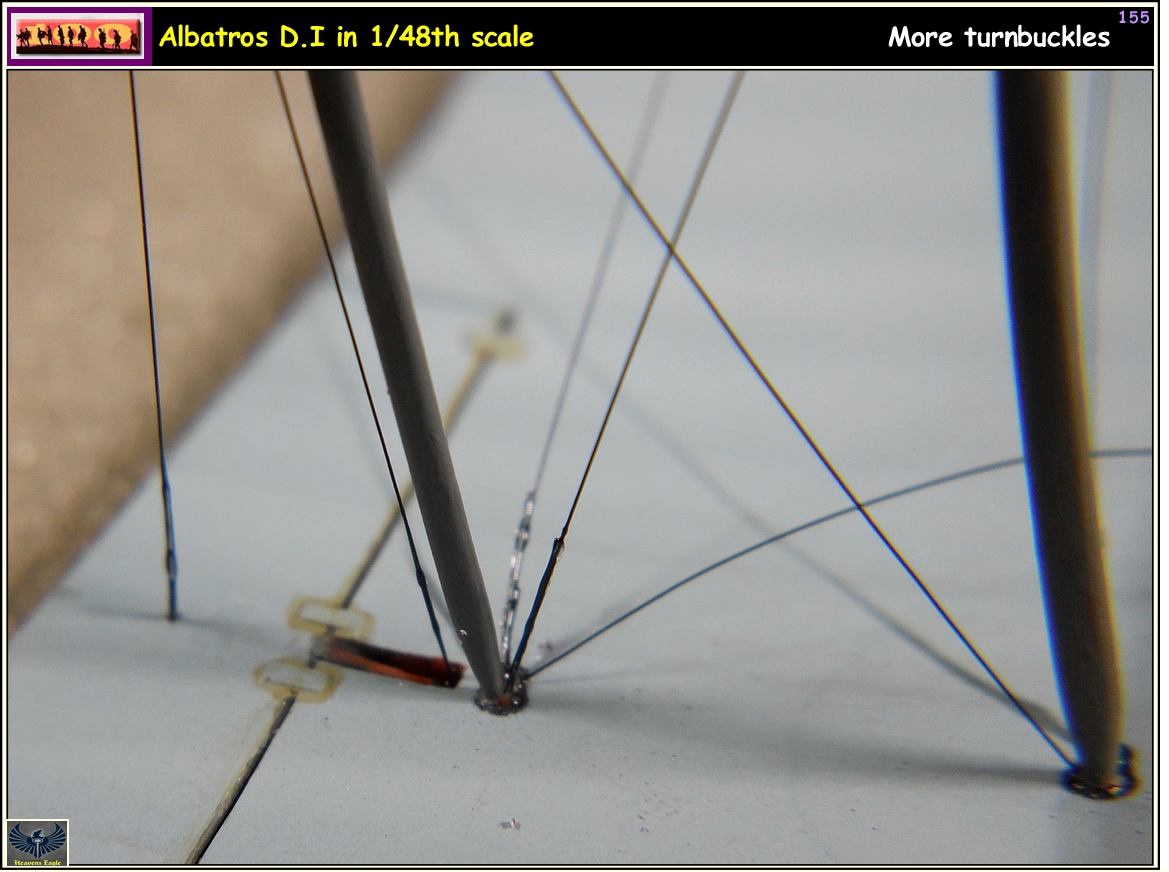
The rigging was also an experiment. I had some black monofilament nylon thread that was purchased at Hobby Lobby. It is .003 inch thick (that's .08mm) and is fairly strong and has a slight amount of stretch to it. From some things I built many years ago, I knew that it would bond into some small holes quite well with good super glue. None of the lines is tight as that can pull things out of alignment. They are all pulled just snug enough to be straight and will give slightly if pushed on without breaking. A flat coat and a brush with some alclad adds the nice silvery coating that looks more like cable than a single wire strand.

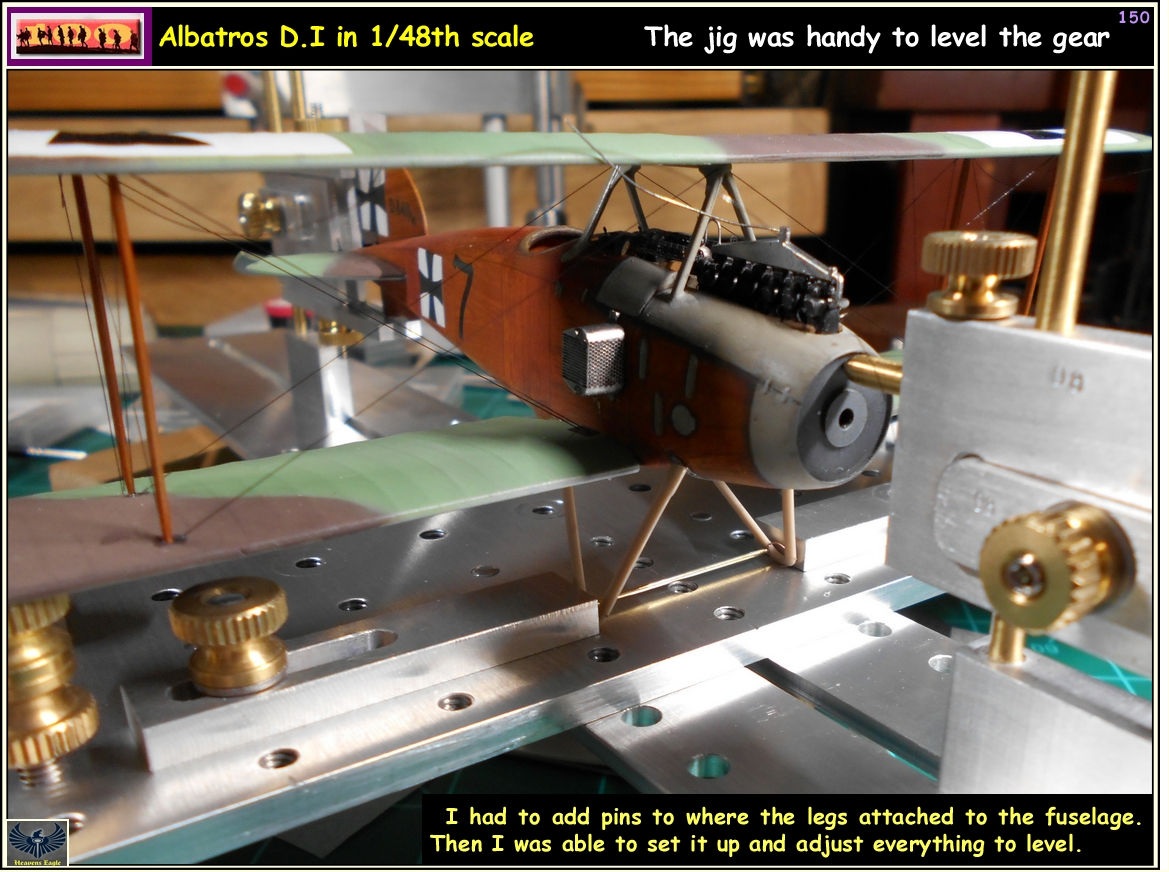
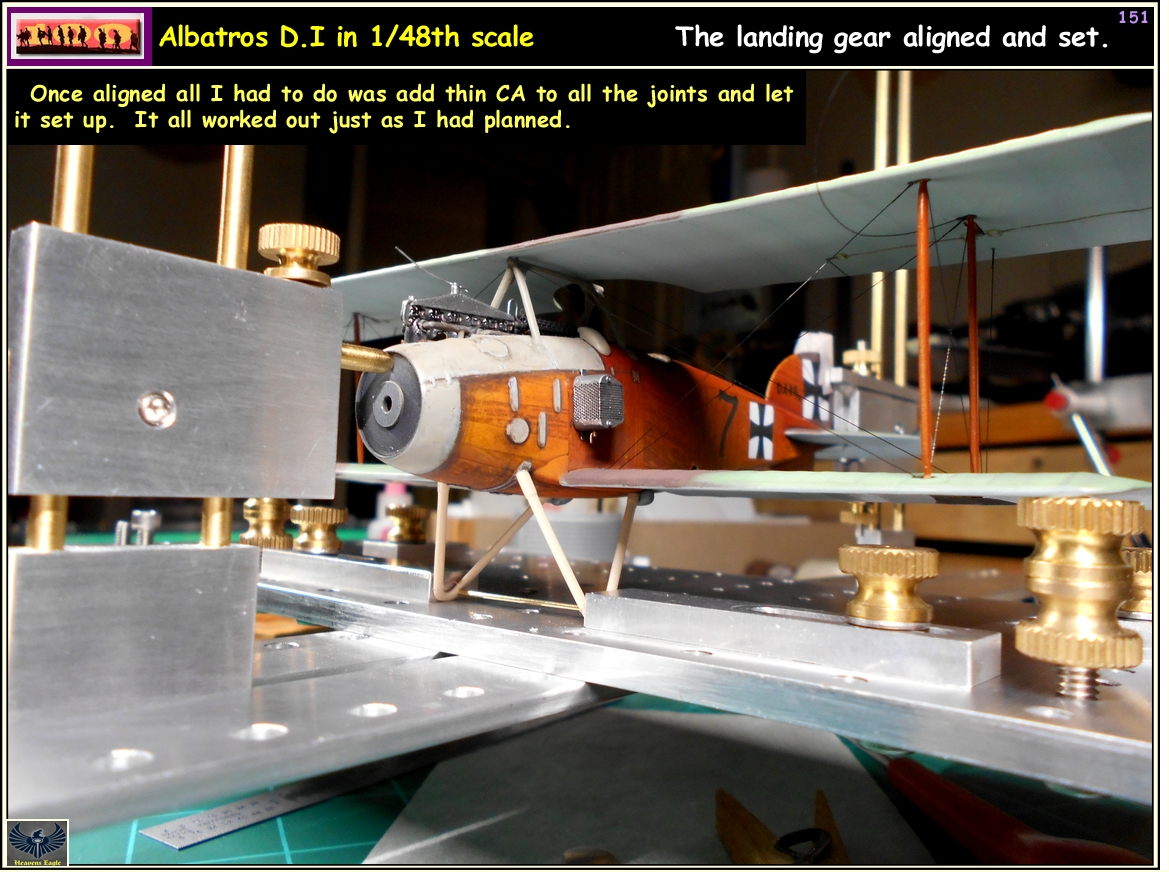
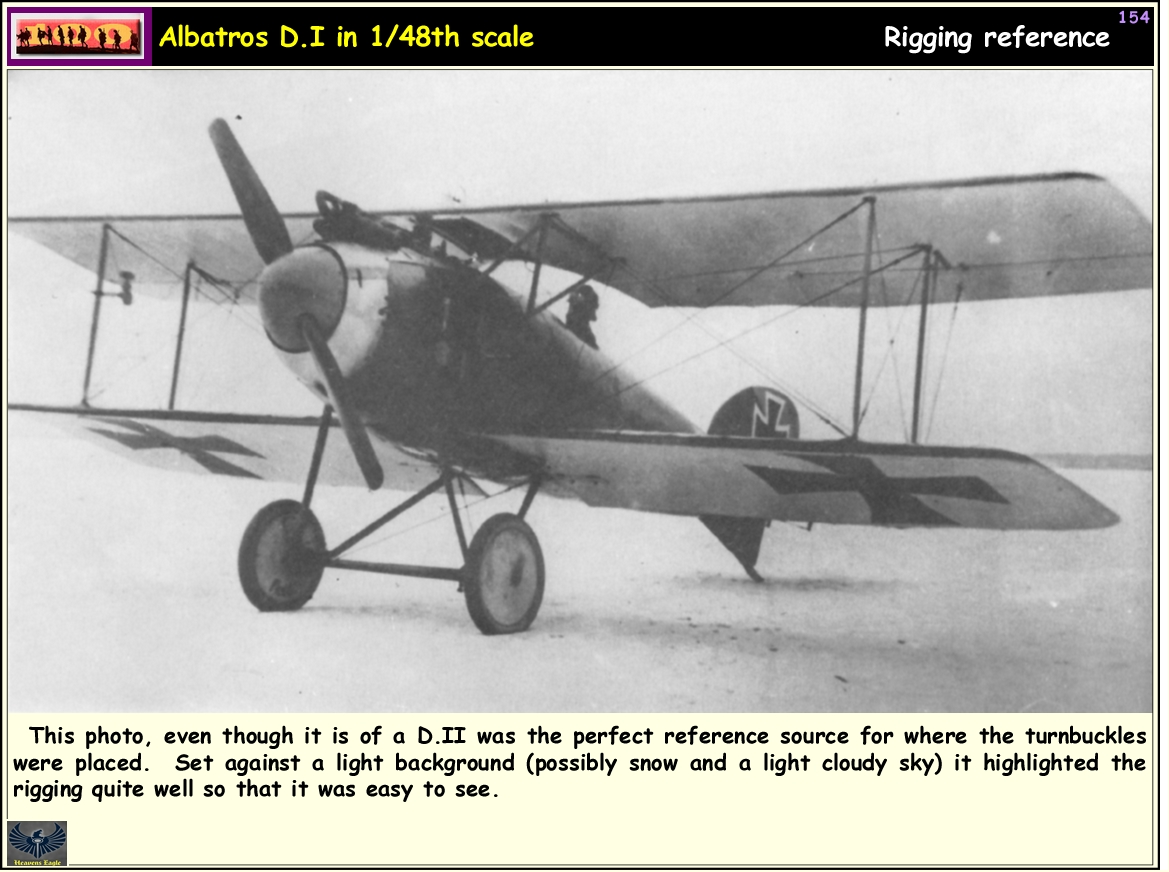
It was also an experiment for making and using my jig for mounting the wing and for setting up the landing gear. I have seen a number of WWI aircraft where either the wings were misaligned or the landing gear wasn't set right and the plane canted at an angle. This worked out well for a first usage and paved the way for when I will be building my Wingnut kits. It will also help with some of the other large kits I have in the stash.

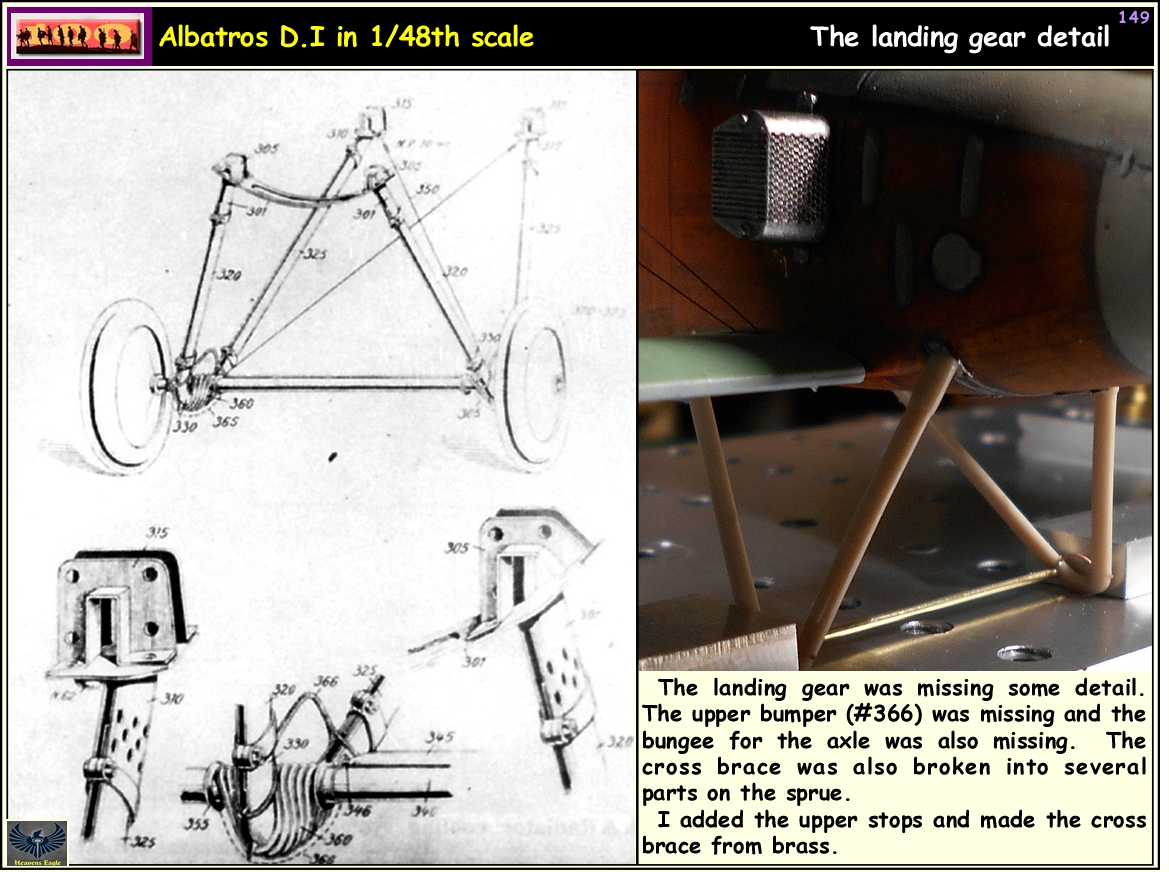
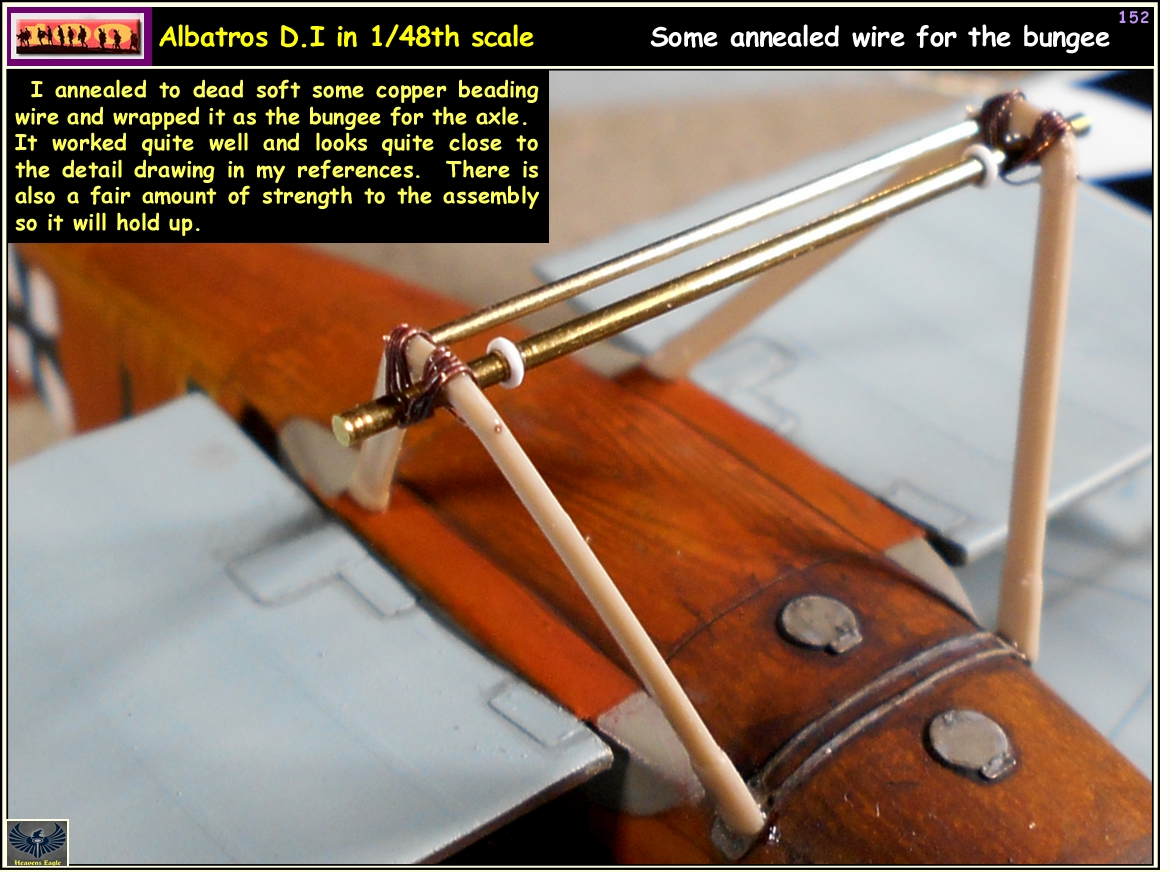
Here is the final installment. These are the rigging and landing gear details. If you have any questions please ask and thanks for following along.

ALb_D-I_149.jpg


ALb_D-I_150.jpg


ALb_D-I_151.jpg


ALb_D-I_152.jpg


ALb_D-I_153.jpg


ALb_D-I_154.jpg


ALb_D-I_155.jpg


ALb_D-I_156.jpg


Thanks again for following along!
 
GAVIA 1/48 Albatros D.I (calling it done 4-13)

Great finish Paul and congrats on the win! Well deserved. (y)
 
That is one real beauty Paul, well deserved recognition.

It's great to see your jig put into service.

(y) :notworthy :notworthy :notworthy
 
Dear Paul, no words. What a beautiful airplane! Amazing!

As soon as I can I will retrace your steps and read the whole Topic. So much to learn here.

Congratulations. Well deserved first prize! :salute :salute :salute

Cheers

Alex
 
Everyone, thank you so much for your kind comments! :notworthy

While I entered it in a contest which I told myself many years ago I would never do again, it was mostly for a lark. I built this as a learning experience and to try out a number of things I had not done before. Overall I am happy with it. Yes there are a few little things that could have been done better and a couple of errors in the kit that were not really feasible to correct. The fact that most folks would be very hard pressed to figure out what they are also made it rather a waste of time to try and make a correction.

The great things about it were that I really enjoyed this build. While there were a few things to change and correct, for the most part it was just a fun build and something that allowed me to experiment. The fact that it turned out so nice was just the icing on the cake. With a little more practice, it will be easier on the next build.

Thanks for looking in!

thank-you.gif
 
Part of the fun was the fact that the kit wasn't a total POS. While it had some minor issues, to fix those were small challenges that made it worthwhile.

Thanks again everyone!
 
Back
Top