
-
Modelers Alliance has updated the forum software on our website. We have migrated all post, content and user accounts but we could not migrate the passwords.
This requires that you manually reset your password.
Please click here, http://modelersalliance.org/forums/login to go to logon page and use the "Forgot your Password" option.
You are using an out of date browser. It may not display this or other websites correctly.
You should upgrade or use an alternative browser.
You should upgrade or use an alternative browser.
Bachem Ba 349 Natter 1/48 Dragon kit
- Thread starter MichelC
- Start date
jknaus
Administrator
Fantastic paint job. The squiggle pattern is awesome. I like the base you're making also. I think when I did mine I made a fantasy base using only my imagination. It was cement with a compass rose with the post in the center. I will have to try and find that book also. I have a Fly Natter to do one day.
")
James
James

Thanks a lot for the comms! :drinks
@James, there was indeed a compass rose around the concrete pad. If you look at the diagram above, the word "Seitenwinkelteilung" means "compass bearing scale. If you do the Fly kit you'll have to scratch the pole launcher, though, as it's not included in the kit. If you need any reference materials about specific aspects of the Natter just PM me.
@James, there was indeed a compass rose around the concrete pad. If you look at the diagram above, the word "Seitenwinkelteilung" means "compass bearing scale. If you do the Fly kit you'll have to scratch the pole launcher, though, as it's not included in the kit. If you need any reference materials about specific aspects of the Natter just PM me.
Heavens Eagle
Well-known member

Nuff said!

The decals sheet I ordered has arrived!
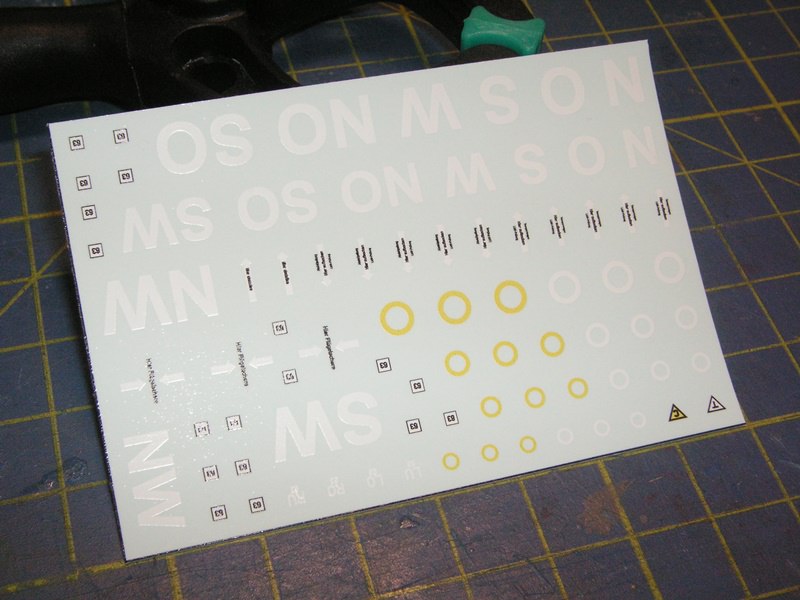
I knew from the start that the the kit’s decals sheet would have to be discarded as it has crosses, although the Natter didn’t have any markings, and lacks most of the stencils. As already mentioned, I decided to do my own research using contemporary documents as found in several books and designed my own decal sheet based on what I found. BTW, the swastikas seen on some pics of the Natter were most probably applied after the a/c were captured by the Allies, so I omitted those too.
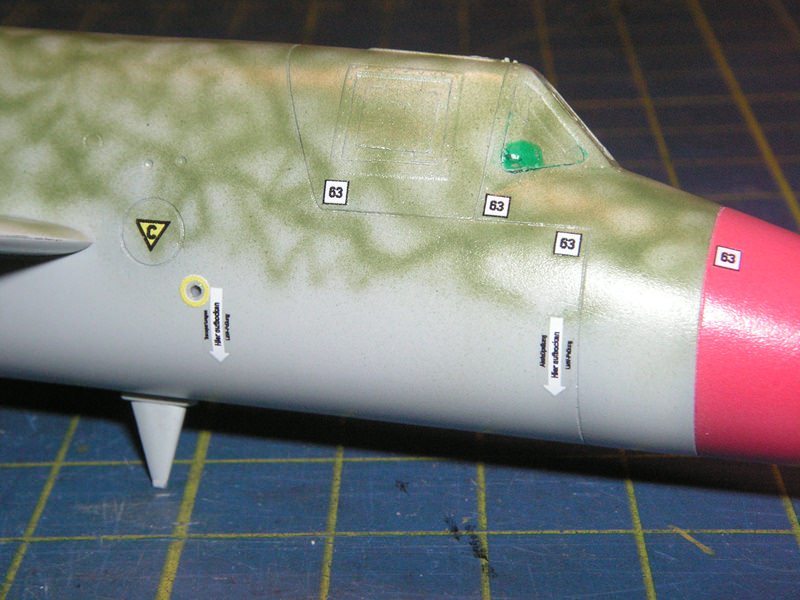
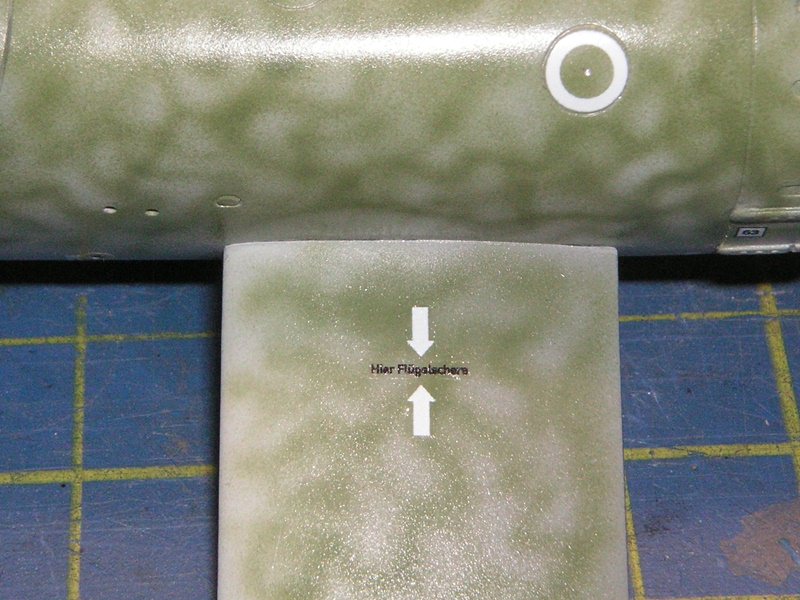
The sheet includes all of the Natter’s stencils, and I believe it is quite accurate. LM Decals did a good job of making the decals for me and applying them gave me great satisfaction, knowing that I have done some original work.
Decals were applied over a coat of Future using Micro Set/Sol. Cutting out of the individual decals was done as close as possible to the design because the carrier film extends over the entire sheet. Despite that there was some silvering on the edges that did not entirely disappear even when Daco Strong was applied. If one discounts this and the fact that the yellow is pixelated, the decals were OK and exactly as ordered. Thanks, LM Decals!
More soon!
I knew from the start that the the kit’s decals sheet would have to be discarded as it has crosses, although the Natter didn’t have any markings, and lacks most of the stencils. As already mentioned, I decided to do my own research using contemporary documents as found in several books and designed my own decal sheet based on what I found. BTW, the swastikas seen on some pics of the Natter were most probably applied after the a/c were captured by the Allies, so I omitted those too.
The sheet includes all of the Natter’s stencils, and I believe it is quite accurate. LM Decals did a good job of making the decals for me and applying them gave me great satisfaction, knowing that I have done some original work.
Decals were applied over a coat of Future using Micro Set/Sol. Cutting out of the individual decals was done as close as possible to the design because the carrier film extends over the entire sheet. Despite that there was some silvering on the edges that did not entirely disappear even when Daco Strong was applied. If one discounts this and the fact that the yellow is pixelated, the decals were OK and exactly as ordered. Thanks, LM Decals!
More soon!
Heavens Eagle
Well-known member
Those are some very nice decals Michael, they look custom made. Where did you order them from?
The decals sheet I ordered has arrived!
I knew from the start that the the kit’s decals sheet would have to be discarded as it has crosses, although the Natter didn’t have any markings, and lacks most of the stencils. As already mentioned, I decided to do my own research using contemporary documents as found in several books and designed my own decal sheet based on what I found. BTW, the swastikas seen on some pics of the Natter were most probably applied after the a/c were captured by the Allies, so I omitted those too.
The sheet includes all of the Natter’s stencils, and I believe it is quite accurate. LM Decals did a good job of making the decals for me and applying them gave me great satisfaction, knowing that I have done some original work.
Decals were applied over a coat of Future using Micro Set/Sol. Cutting out of the individual decals was done as close as possible to the design because the carrier film extends over the entire sheet. Despite that there was some silvering on the edges that did not entirely disappear even when Daco Strong was applied. If one discounts this and the fact that the yellow is pixelated, the decals were OK and exactly as ordered. Thanks, LM Decals!
More soon!
jeaton01
Well-known member
As you know, Michel, it's very difficult to do greys and yellows on the ALPS printers. Orange yellows are especially hard. Unless you settle for the color the ink ribbon has, it's going to look dot screened. I use my color laser printer for most color work now and just use the ALPS for white.
The Natter looks great.
The Natter looks great.
Those are some very nice decals Michael, they look custom made. Where did you order them from?
They're custom made by a fellow modeler here in Greece but he ships international. The website is: LM Decals
As you know, Michel, it's very difficult to do greys and yellows on the ALPS printers. Orange yellows are especially hard. Unless you settle for the color the ink ribbon has, it's going to look dot screened. I use my color laser printer for most color work now and just use the ALPS for white.
The Natter looks great.
Thanks, J! Didn't know that but I take note for future orders!
M
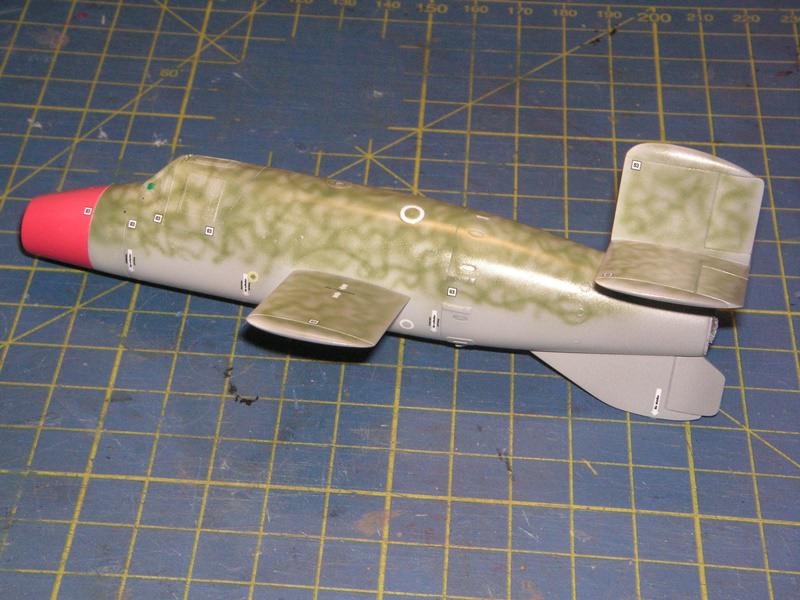
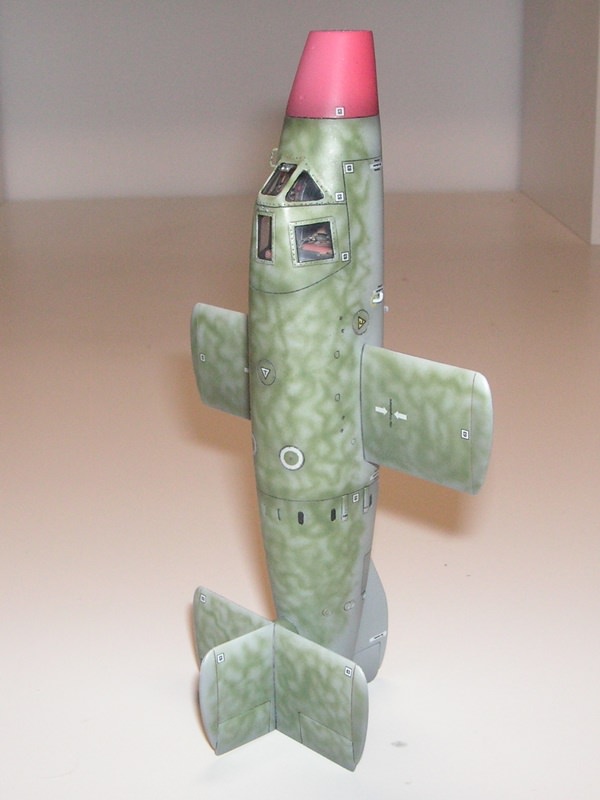
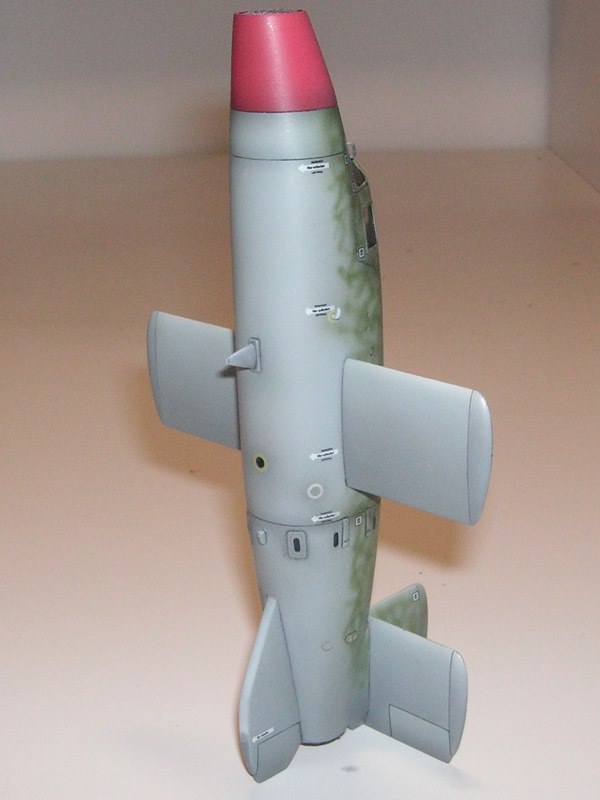
The airframe is finished!
After sealing the decals with a coat of Future, I continued with the next steps.
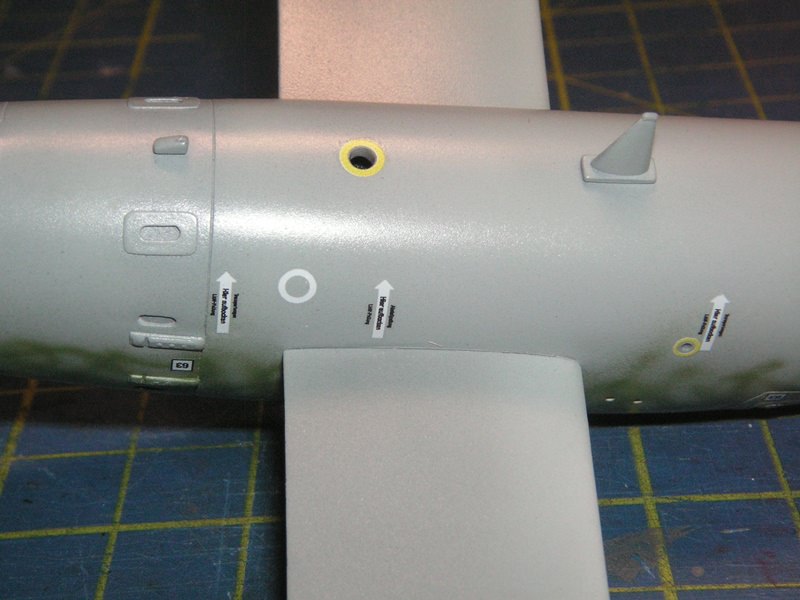
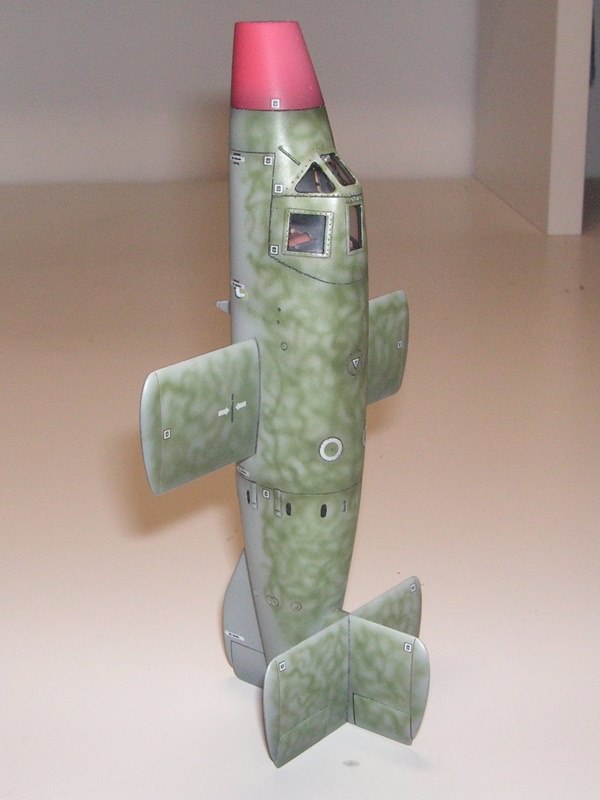
I used Tamiya X-19 Smoke for shading purposes, accentuating the overhead lighting effect where needed e.g. on the darker upper side, picking up panel line shading and making some doors and hatches stand out by darkening them.
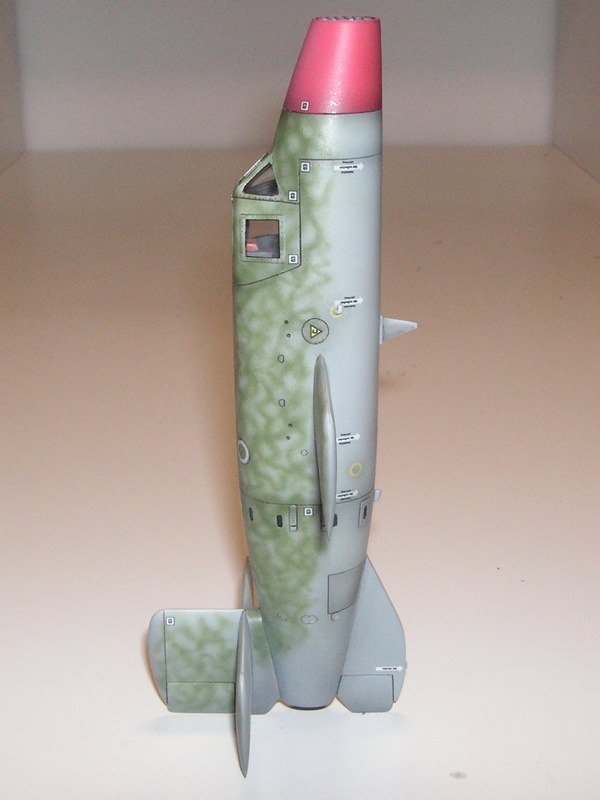
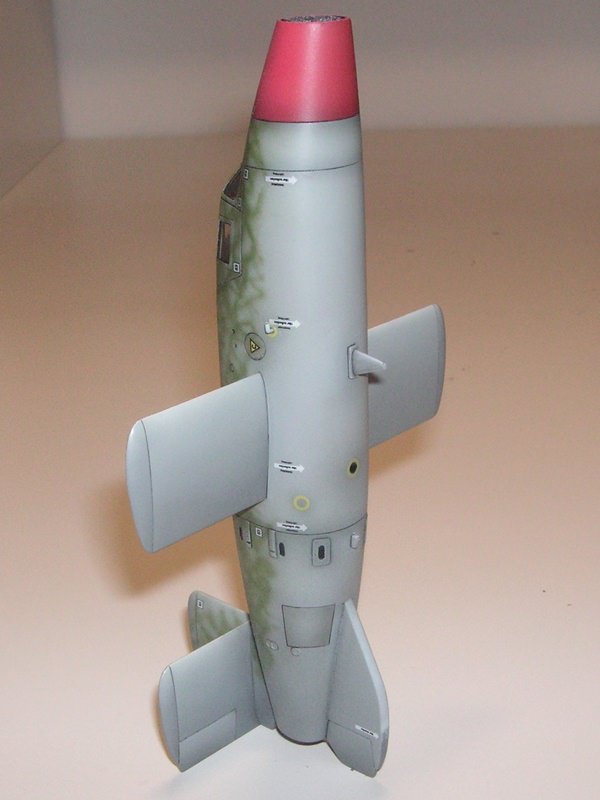
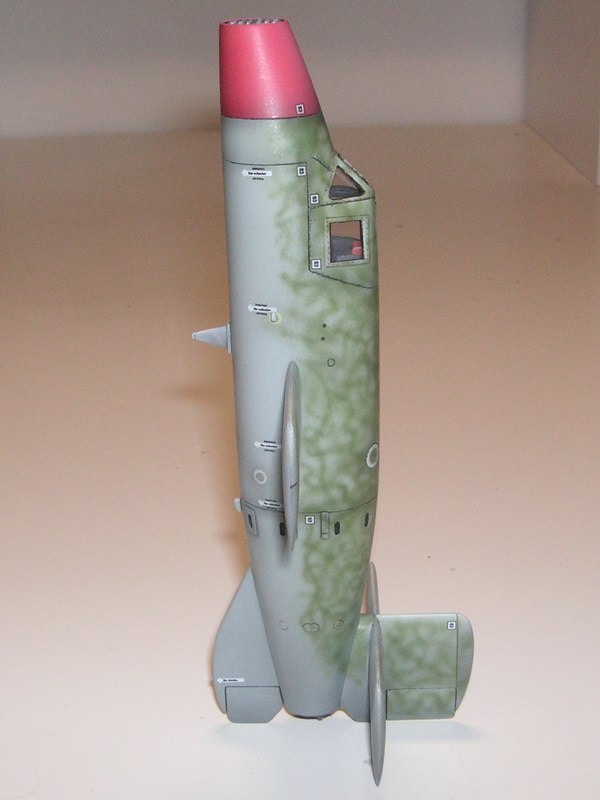
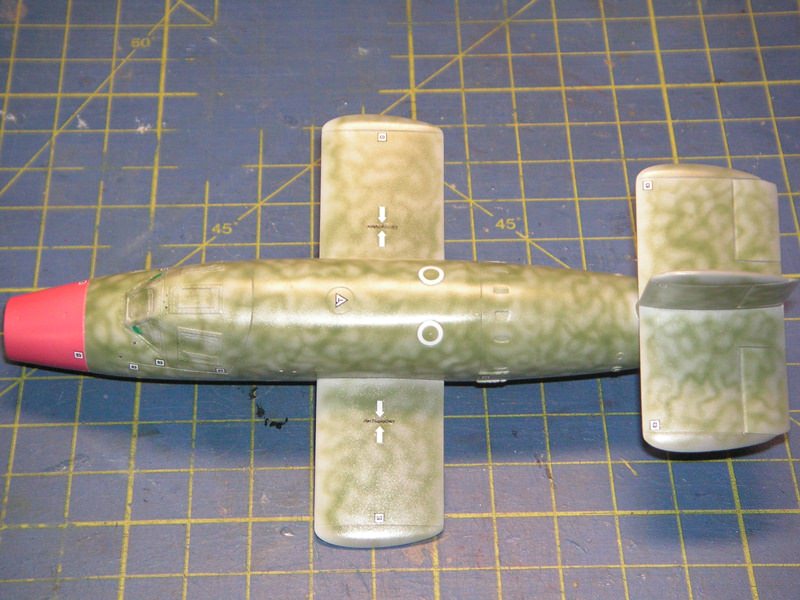
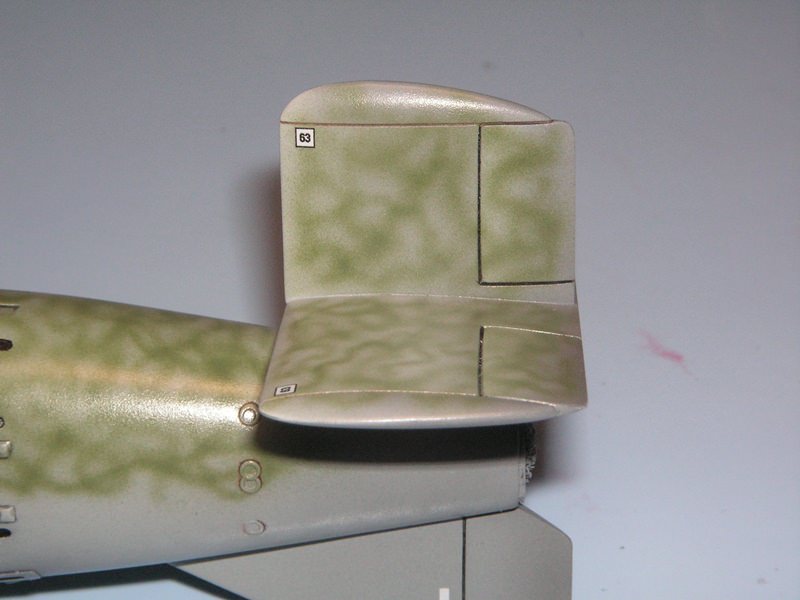
A light colored wash was applied to the (very few) panel lines, brown on top and gray on the underside. The movable parts, such as elevators and canopy, as well as the joints between the fuselage sections designed to separate before landing, received a black wash to show dark shadow rather than accumulated dirt. Oil paints thinned with lighter fluid were used. In areas where the wash wouldn’t grip, e.g. around raised detail, I used a propelling pencil sharpened on a piece of sandpaper to produce the effect. It is easy to follow the raised edge with the pencil and any mistakes are easily removed with an eraser.
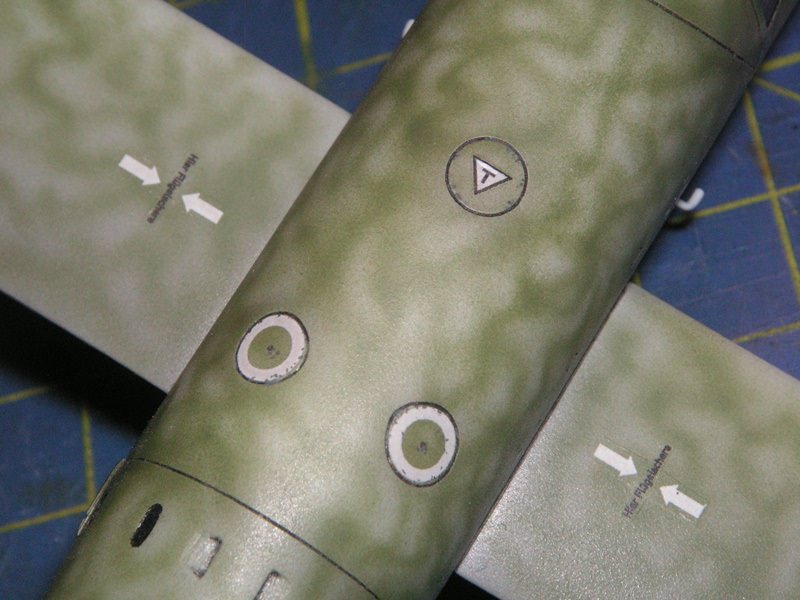
An oil filter was applied to the engine inspections hatches, tank caps and a few other areas that are naturally dirtier, as a means to add some variation. The oil was thinned with lighter fluid to the same consistency as a wash, applied with a brush and once dry a clean brush was used to blur it and lighten the effect. Filters were further used to accentuate the light and shadow effect in some areas, using white and dark gray.
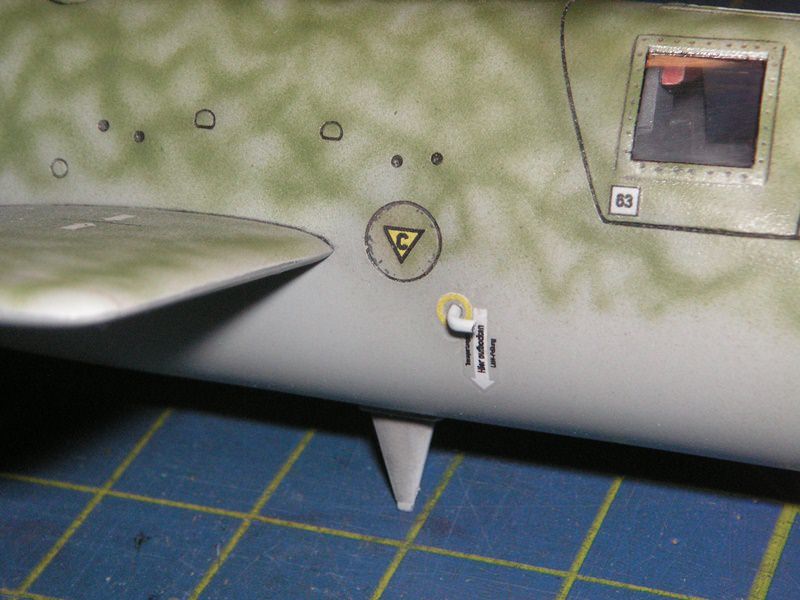
The tank caps and engine inspection hatches got some chipping, partly to add realism and partly to hide some misalignment between the decals and the edges of the hatches.
The canopy edges were chipped a little as well. I applied Vallejos with a brush and used a toothpick to erase or tweak the chippings when too big.
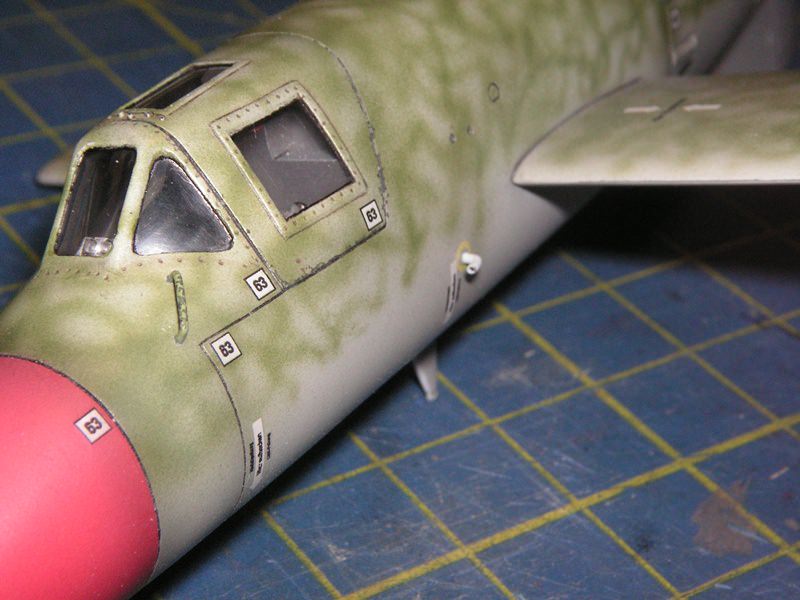
The kit’s pitots made of flat pieces of PE were replaced with lengths of hypodermic needle and a grab rail was made with a piece of copper wire and installed near the windshield as can been seen on reference photos.
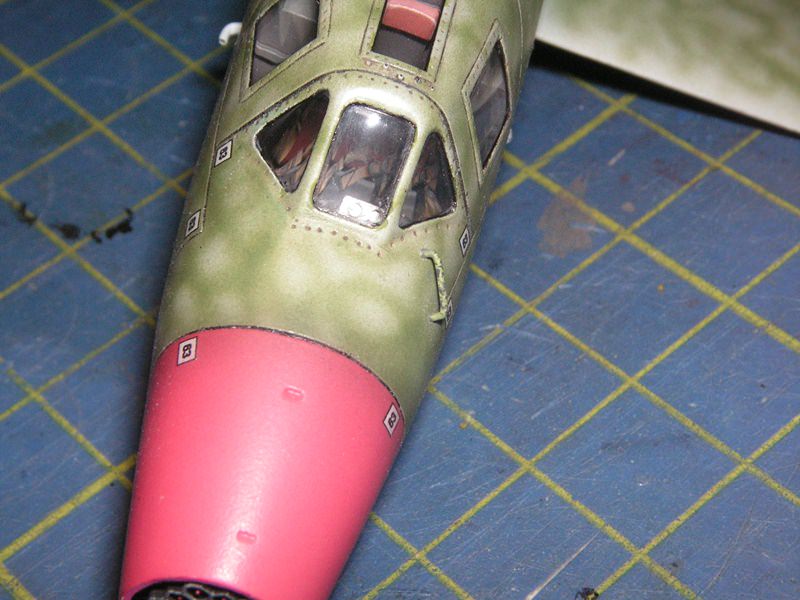
The canopy frames were outlined with black ink to give them a cleaner, sharper look.
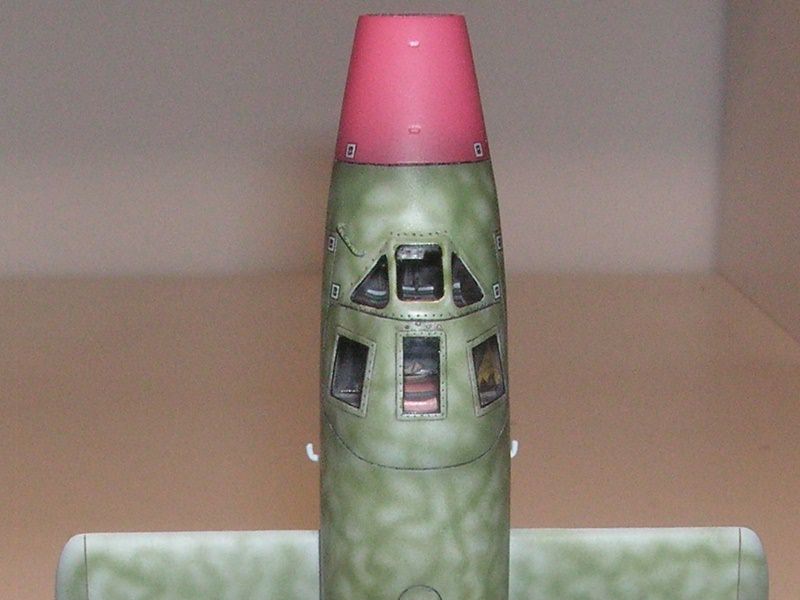
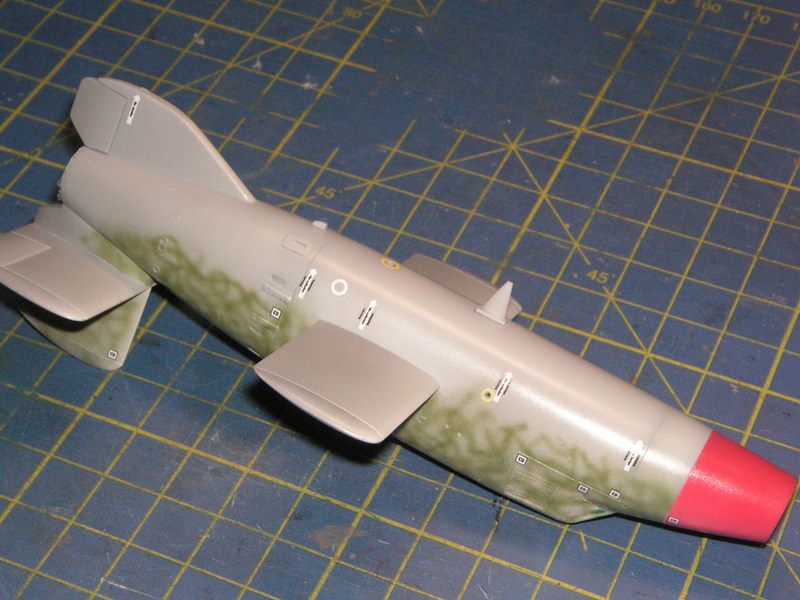
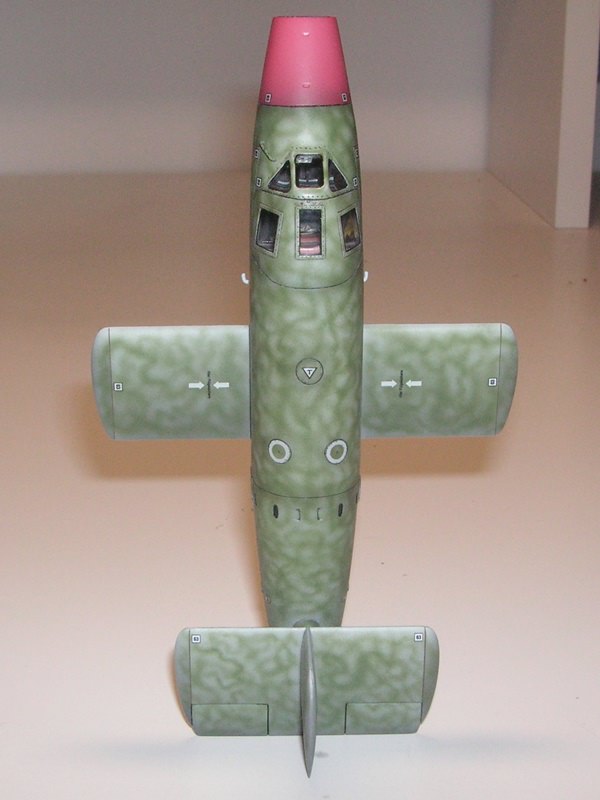
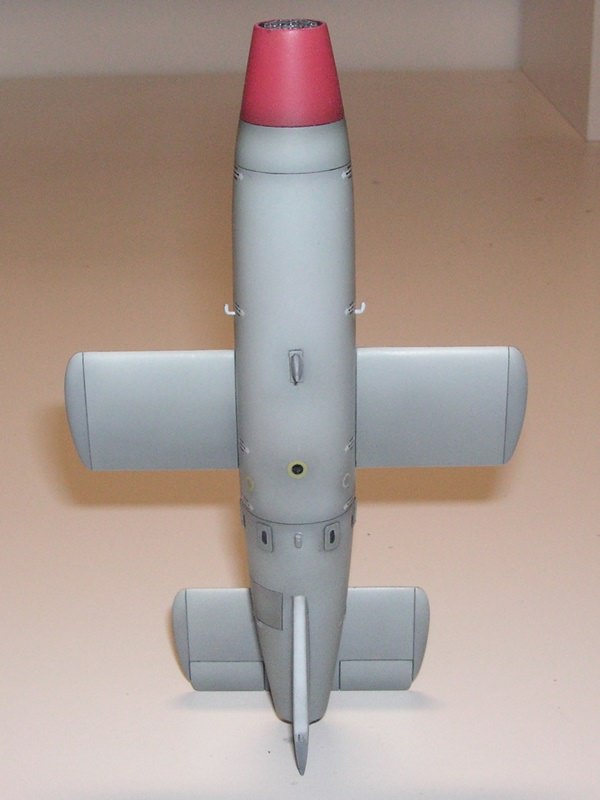
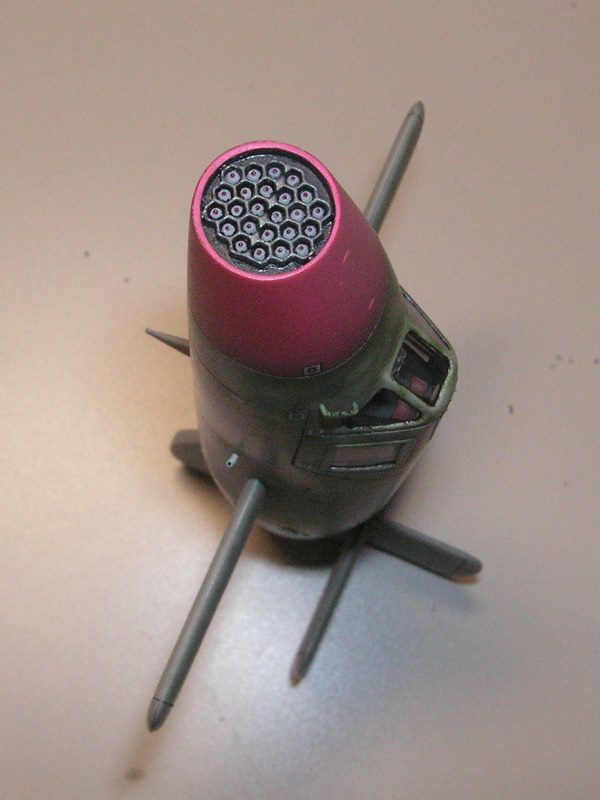
The Natter's business end was given a lot of attention as it will be a focus point in view of the fact that it will be sitting on its tail. The gray honeycomb wase “metalized” by lightly going over the ridges with a soft lead pencil. This allowed for more control than rubbing with a brush or cotton bud dipped in lead pencil powder, the usual method.
Chipping and weathering overall were kept to a minimum as the Ba 349, while not exactly disposable, wasn’t meant to last very long and I don’t think a very weathered operational Natter would have been a common sight had it entered into service.
Next: the Schmidding rocket boosters.
M
After sealing the decals with a coat of Future, I continued with the next steps.
I used Tamiya X-19 Smoke for shading purposes, accentuating the overhead lighting effect where needed e.g. on the darker upper side, picking up panel line shading and making some doors and hatches stand out by darkening them.
A light colored wash was applied to the (very few) panel lines, brown on top and gray on the underside. The movable parts, such as elevators and canopy, as well as the joints between the fuselage sections designed to separate before landing, received a black wash to show dark shadow rather than accumulated dirt. Oil paints thinned with lighter fluid were used. In areas where the wash wouldn’t grip, e.g. around raised detail, I used a propelling pencil sharpened on a piece of sandpaper to produce the effect. It is easy to follow the raised edge with the pencil and any mistakes are easily removed with an eraser.
An oil filter was applied to the engine inspections hatches, tank caps and a few other areas that are naturally dirtier, as a means to add some variation. The oil was thinned with lighter fluid to the same consistency as a wash, applied with a brush and once dry a clean brush was used to blur it and lighten the effect. Filters were further used to accentuate the light and shadow effect in some areas, using white and dark gray.
The tank caps and engine inspection hatches got some chipping, partly to add realism and partly to hide some misalignment between the decals and the edges of the hatches.
The canopy edges were chipped a little as well. I applied Vallejos with a brush and used a toothpick to erase or tweak the chippings when too big.
The kit’s pitots made of flat pieces of PE were replaced with lengths of hypodermic needle and a grab rail was made with a piece of copper wire and installed near the windshield as can been seen on reference photos.
The canopy frames were outlined with black ink to give them a cleaner, sharper look.
The Natter's business end was given a lot of attention as it will be a focus point in view of the fact that it will be sitting on its tail. The gray honeycomb wase “metalized” by lightly going over the ridges with a soft lead pencil. This allowed for more control than rubbing with a brush or cotton bud dipped in lead pencil powder, the usual method.
Chipping and weathering overall were kept to a minimum as the Ba 349, while not exactly disposable, wasn’t meant to last very long and I don’t think a very weathered operational Natter would have been a common sight had it entered into service.
Next: the Schmidding rocket boosters.
M

Sweet job! Really dig the shading. 
ij001
Well-known member
Sweet job! Really dig the shading.
Agreed 100%, that hint of scorching aft of the rocket bay is just perfect. - looking at the shot of the rocket tubes you can see the direct line to the wingtip pods on the F-89 Scorpion series. Operation Paper Clip right there !
Ian.