
-
Modelers Alliance has updated the forum software on our website. We have migrated all post, content and user accounts but we could not migrate the passwords.
This requires that you manually reset your password.
Please click here, http://modelersalliance.org/forums/login to go to logon page and use the "Forgot your Password" option.
You are using an out of date browser. It may not display this or other websites correctly.
You should upgrade or use an alternative browser.
You should upgrade or use an alternative browser.
1/18 scale Flettner Fl-282V21 Kolibri scratchbuild
- Thread starter Nick_Karatzides
- Start date
Nick_Karatzides
Member
1/18 scale Flettner Fl-282 V21 Kolibri scratchbuil
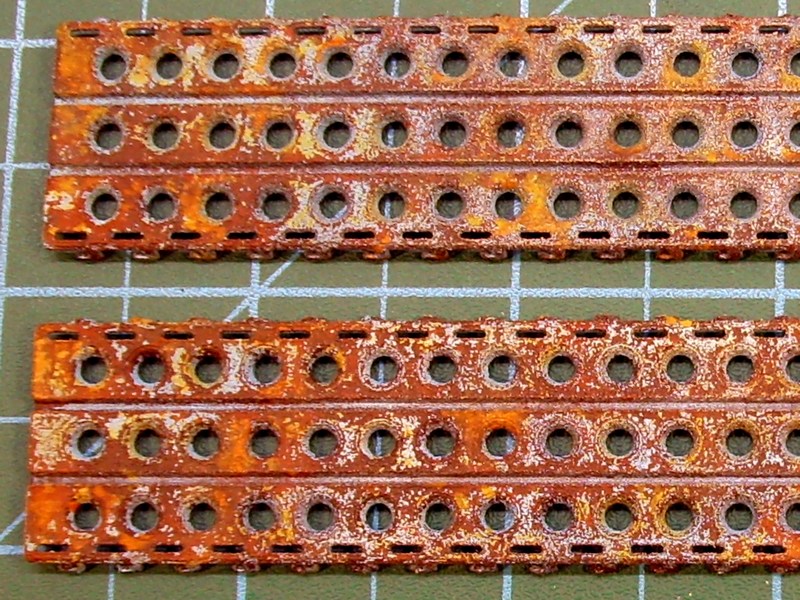
Keep in mind that you should first dip the sponge in acrylic paint and then remove the excess on a paper towel - otherwise it would end up with large blobs of paint on surface instead of a chipping effect. Anyway, if you are interested to have a look on a complete rusting / chipping effect (easy) method, feel free to click HERE (it's the "CHAPTER VIII - Terse abandonment" part of my previous "1/18 scale Instytucie Szybownictwa IS-A Salamandra 53 scratchbuild model" topic, also uploaded into this forum).Thanks for the tip on the W&N Fixative. Also neat simple trick for "rusting" of the barrel w/ the bit of foam/sponge.
Nick_Karatzides
Member
1/18 scale Flettner Fl-282 V21 Kolibri scratchbuil
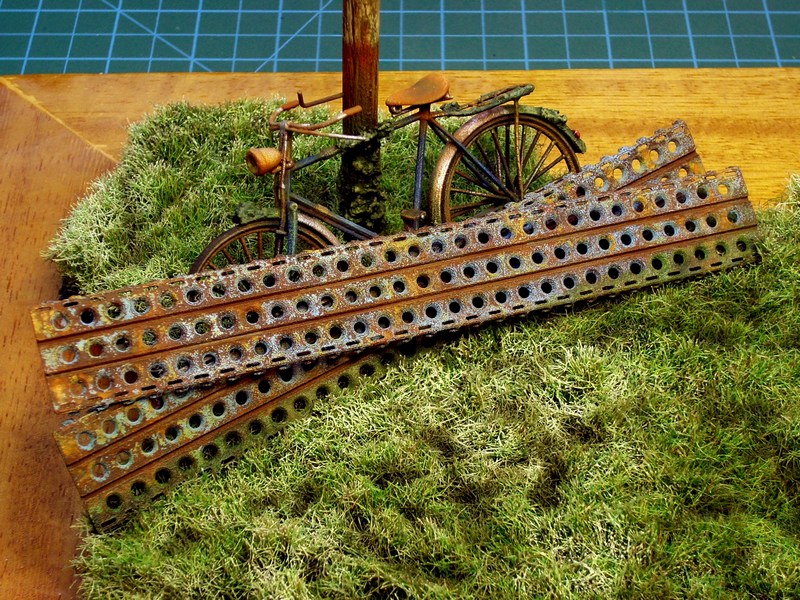
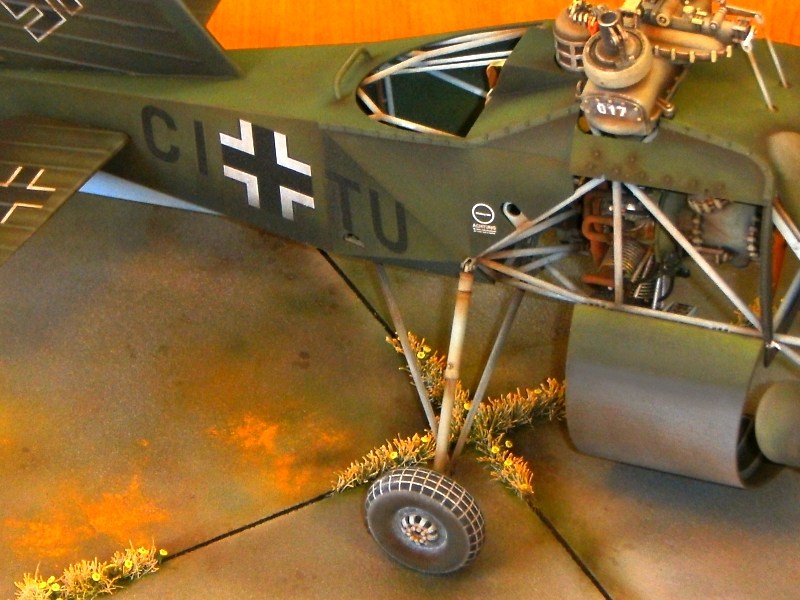
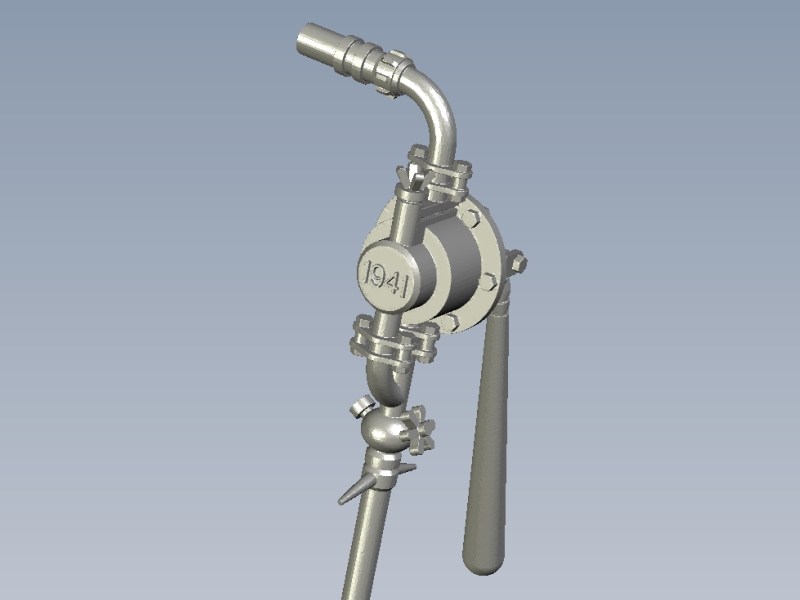
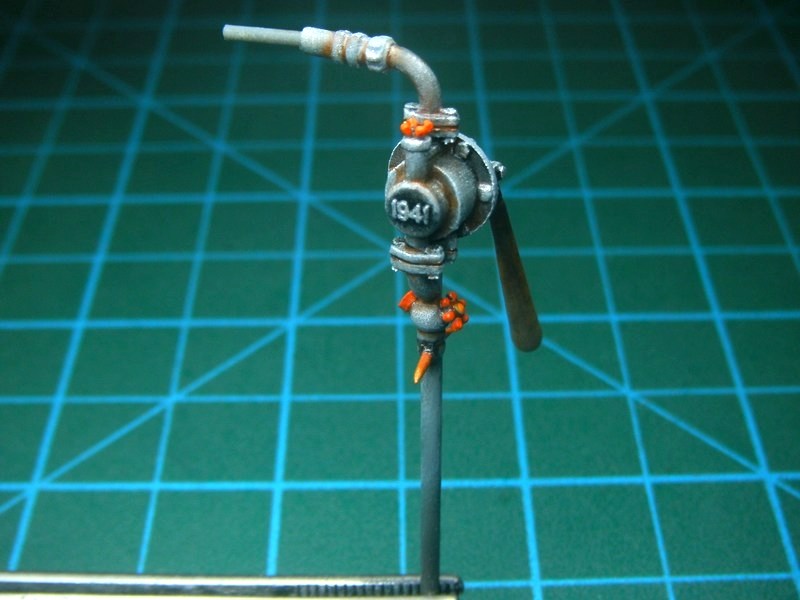
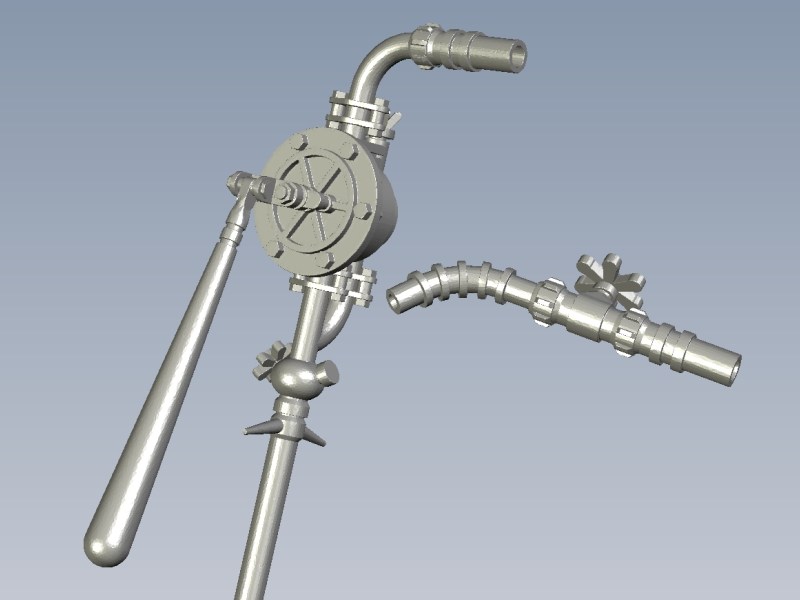
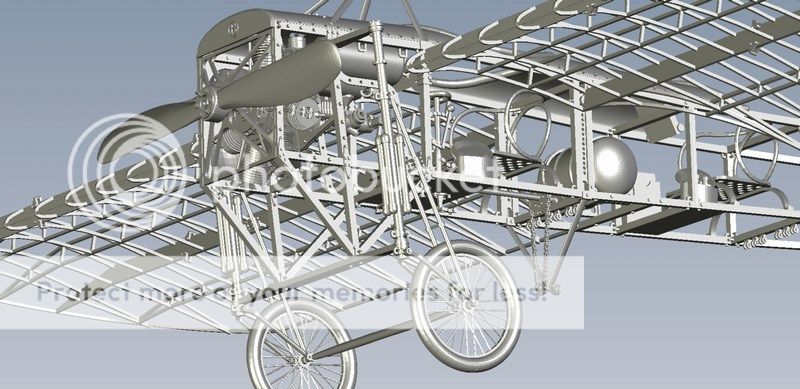
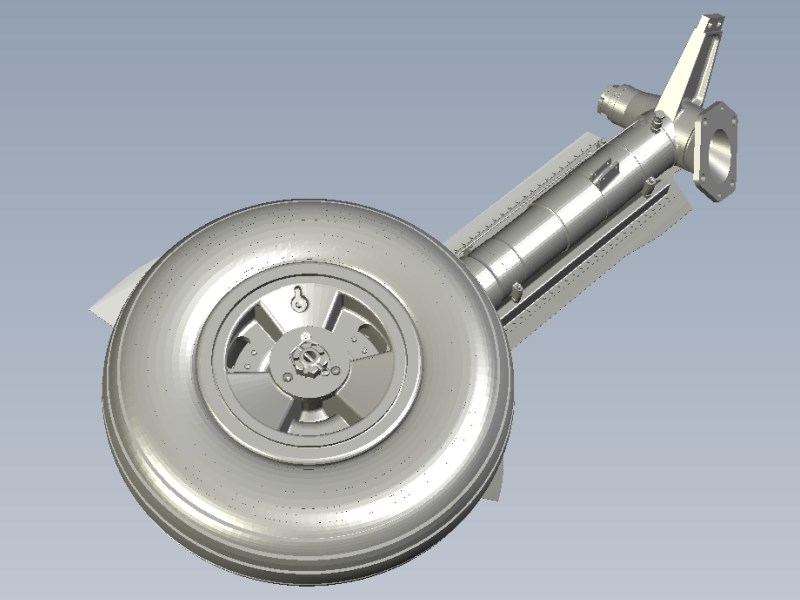
The helicopter model secured in place, by wedging the pins under the wheels into holes that had been already opened on concrete (that's the reason wheels had pins underneath). Once the Kolibri placed on display, each one of all these previously mentioned 1/18 scale items & diorama accessories also secured on ground with hidden metal pins and glued with transparent silicon. Finally, few more “maintenance & refueling area” related items (such as one 1/18 scale WWII era fuel hand pump, a set of 1/18 scale wheel chocks, some 1/18 scale wooden crates and a couple of 1/18 scale water buckets) also prepared to be placed on concrete display base. A last moment’s addition, an also 3D printed 1/18 scale WWII era Fahrrade M30 reconnaissance duty bicycle model, prepared for the diorama display.
All the above mentioned diorama accessories are listed into Anyuta 3D products catalog and available for sale under various scales and sizes.
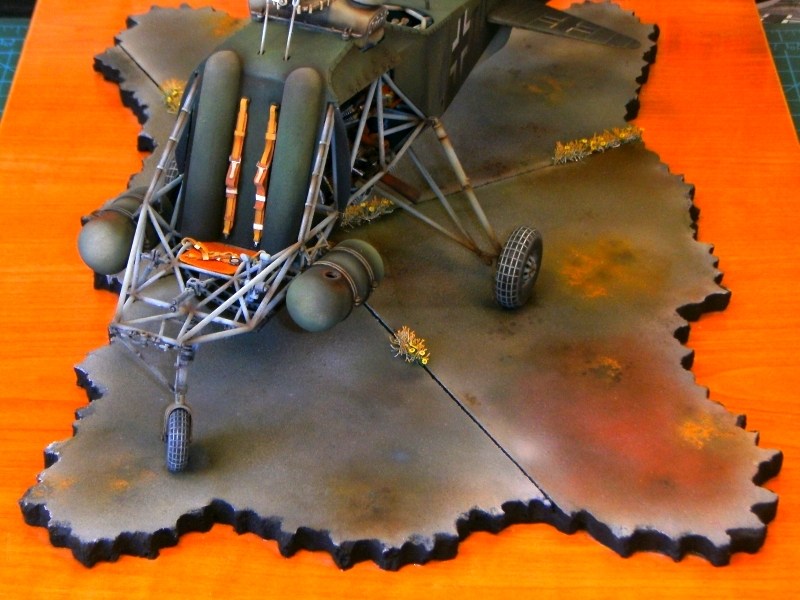
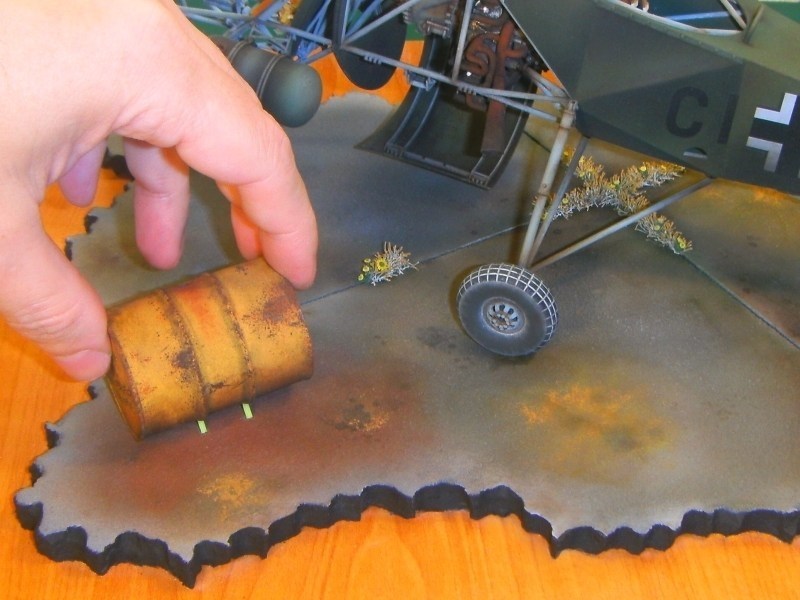
Nick_Karatzides
Member
1/18 scale Flettner Fl-282 V21 Kolibri scratchbuil
Been long time since last visit, huh? Well, let's remember some hobby fun again.")
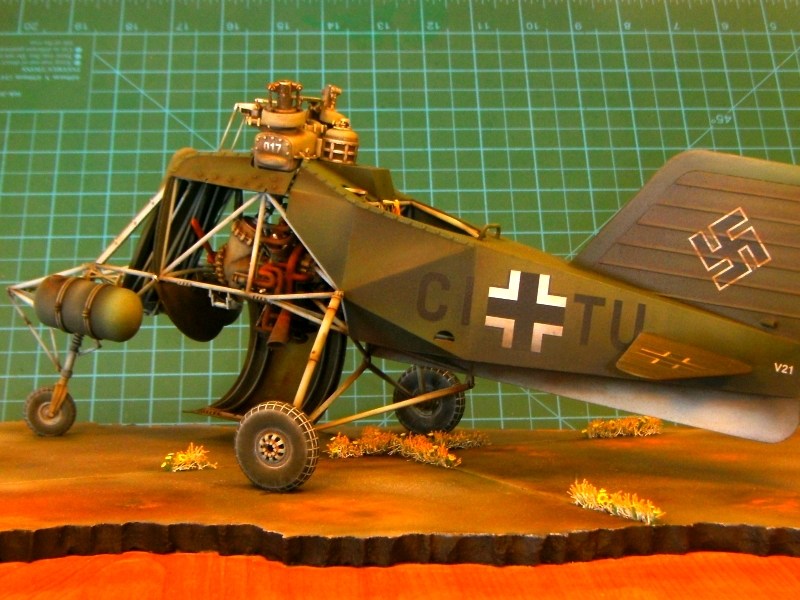
The objective is to build two different diorama scenes for two different versions of the same helicopter:
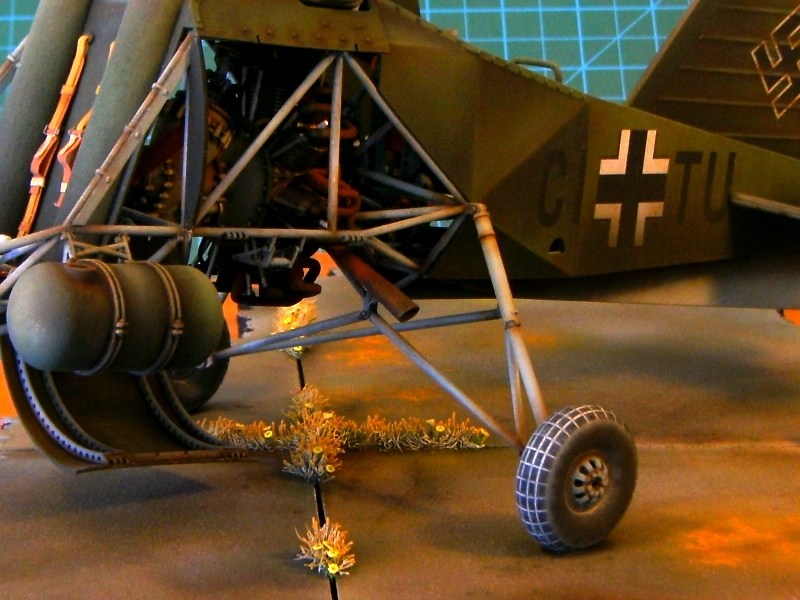
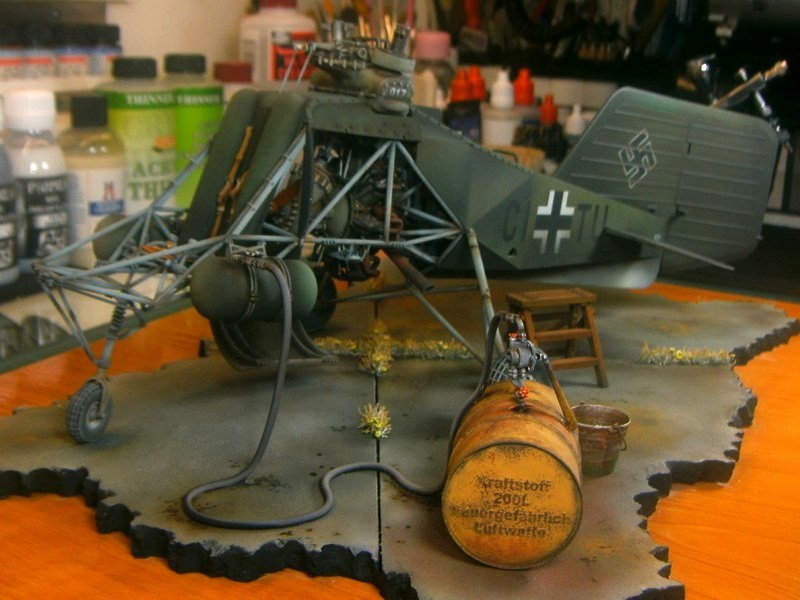
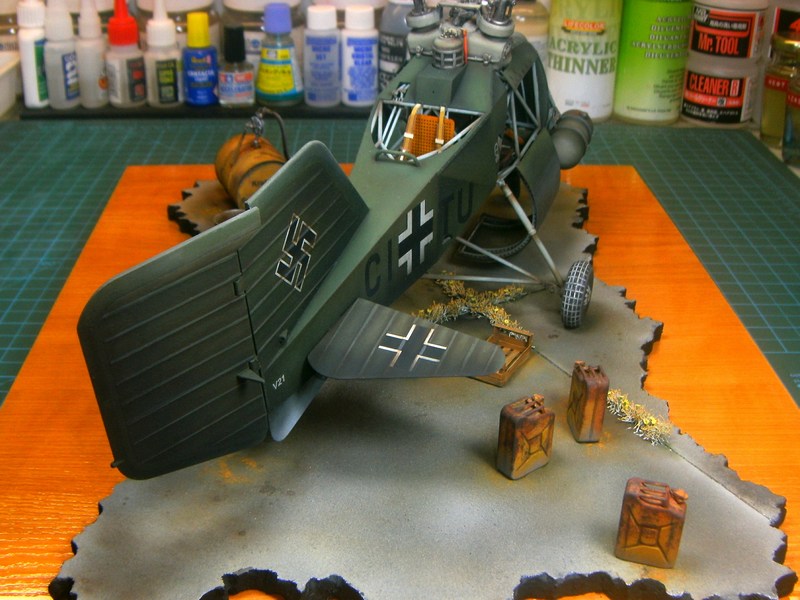
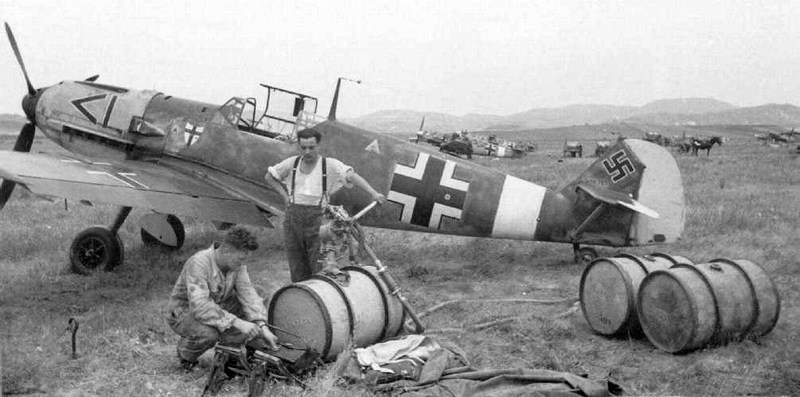
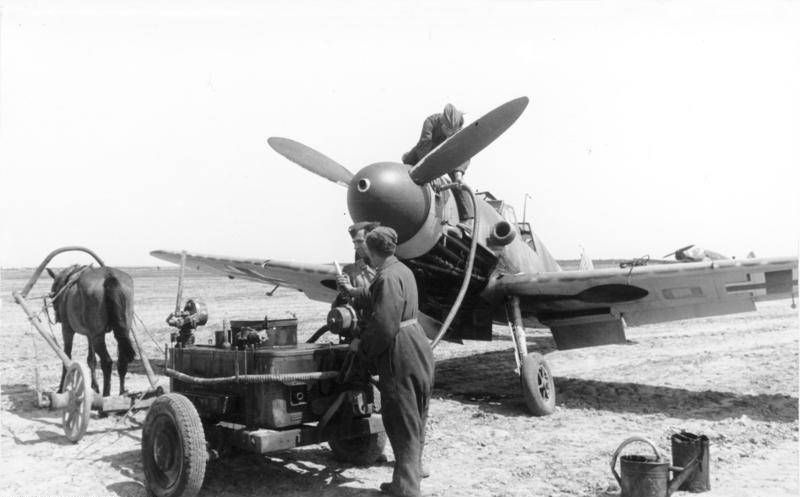
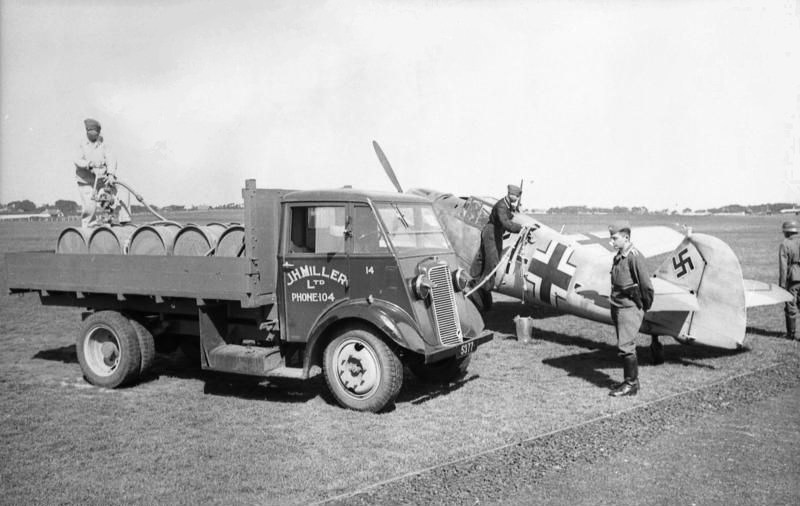
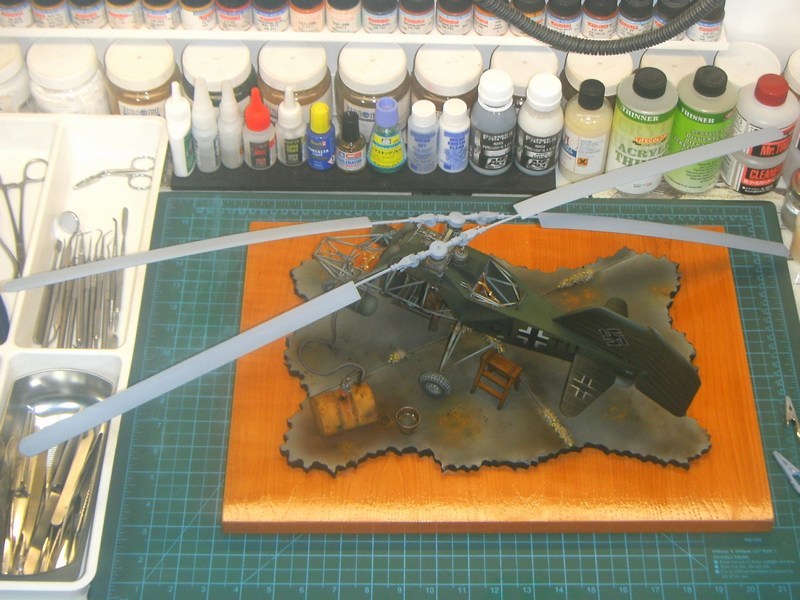
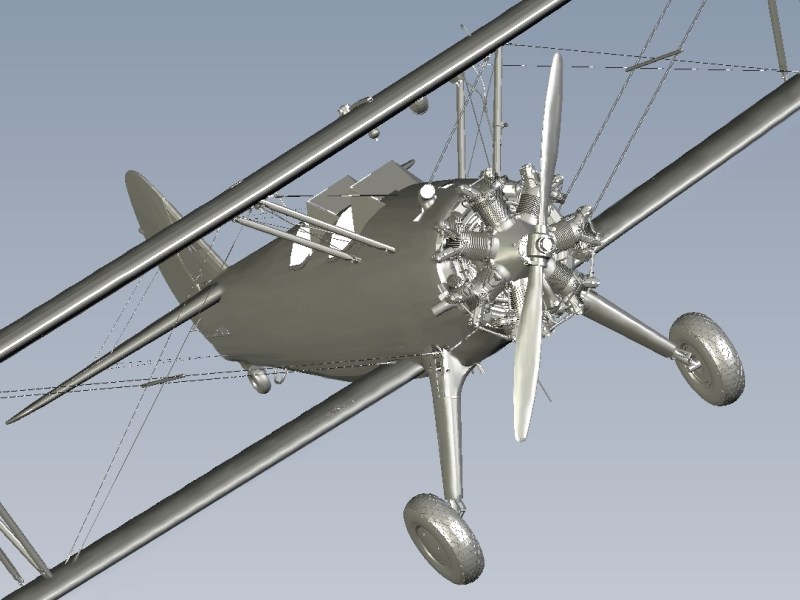
According to plan, both of them would include few additional features without distracting viewer's attention, keeping the Kolibri helicopter as the main protagonist of the story. Starting with the full fuselage version, the addition of a WWII era Luftwaffe's 200 litres fuel drum with a handpump attached, few 20 litres canisters and a filled bucket left on ground, seemed good idea to me in order to present a short refueling scene.


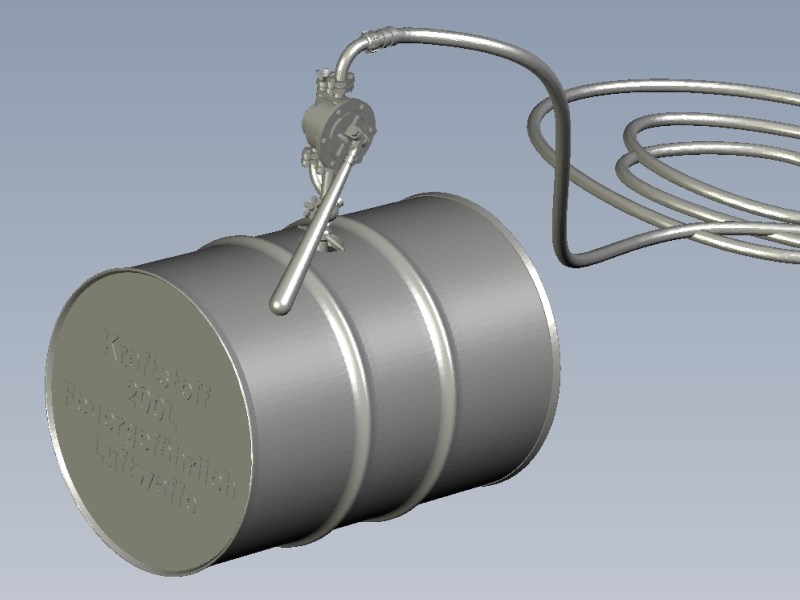

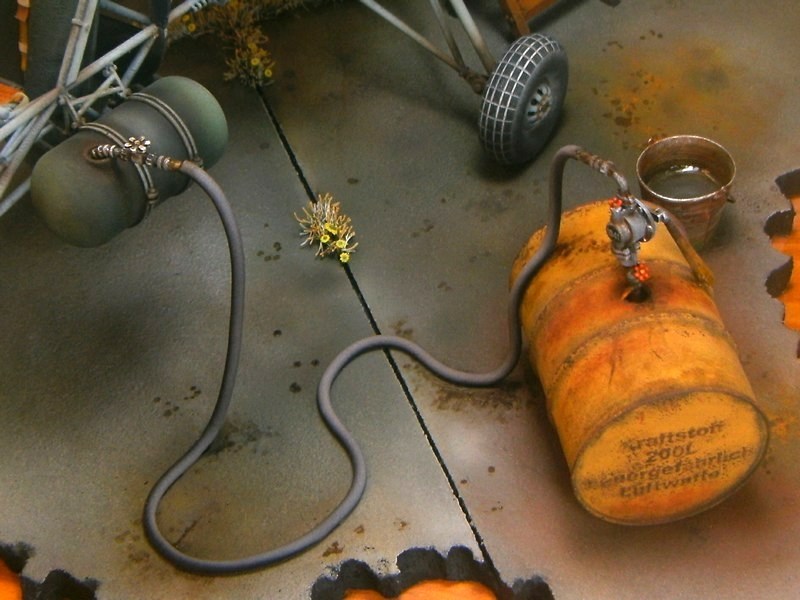
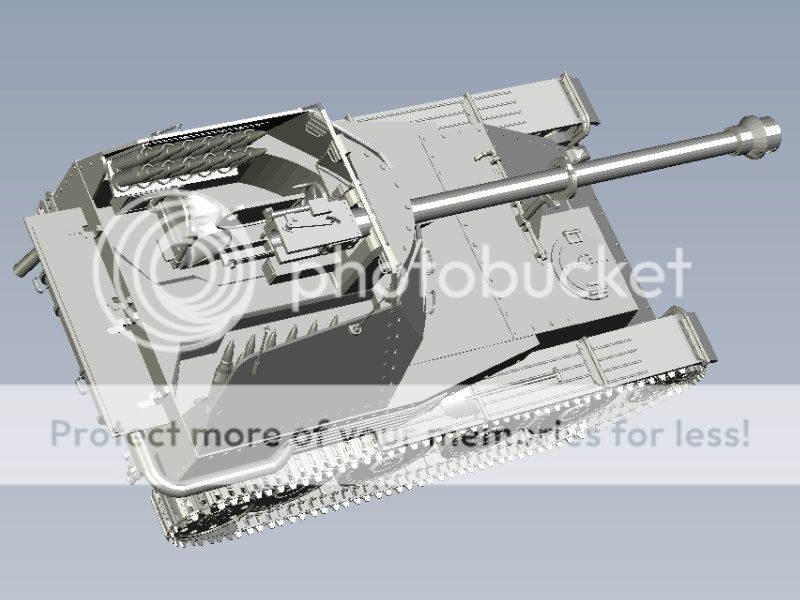
Rivet counters may say that the presence of a 200 litres fuel drum right next to the helicopter may look unreal or “too much”. Well, considering that the twin seat Fl-282 V21 helicopter had two 25 litres cylindrical fuel tanks mounted externally on both sides of the pilot seat (while the main 105 litres fuel tank installed on previous versions removed to host observer’s rear seat), a number of only 2 or 3 fuel canisters could be just enough to do the job. I am not sure about the official refueling procedures followed by Luftwaffe for the Kolibri helicopter during operational conditions & which were the appropriate method followed by engineers & maintenance personnel.
IMHO, all the above (and many others) sound quite possible scenarios. Since we all have seen WWII era pics showing airfield ground personnel using a big variety of methods, from operating Opel refueling trucks, to mule / donkey driven carts or poor maintenance personnel carrying 20 litres canisters by hands, I think that having few 20 litres canisters left into the diorama scene and same time a 200 litres fuel drum feeding the helicopter tanks directly through a hose, could be considered as realistic and not just an “artistic accepted” option.
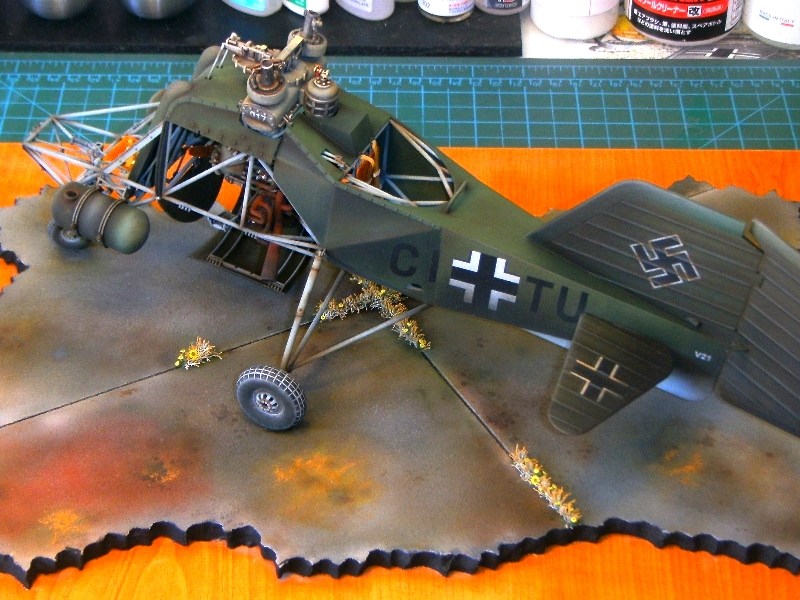
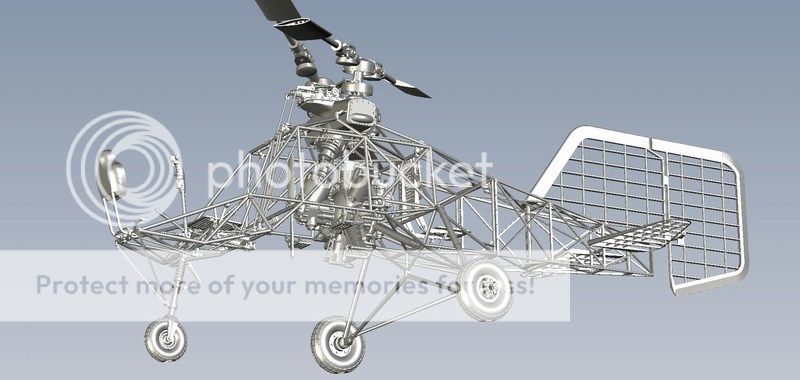
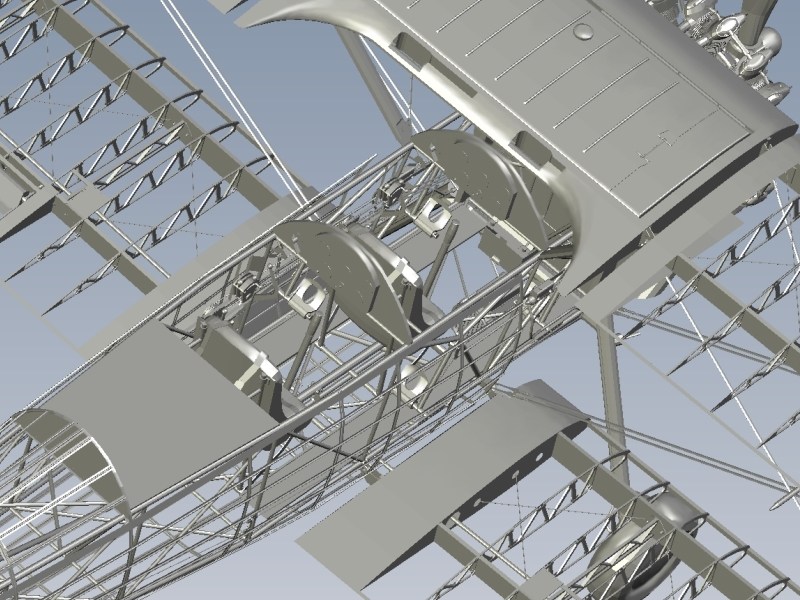
Meanwhile, the rotor blades for both versions attached on their rotor heads as described into the building manual (click HERE for the PDF formated file) through pages #88 to #94. Parts sprayed over with AK interactive AK768 primer to spot mistakes and prepare for paintjob. I did a visual inspection and shot some pictures.
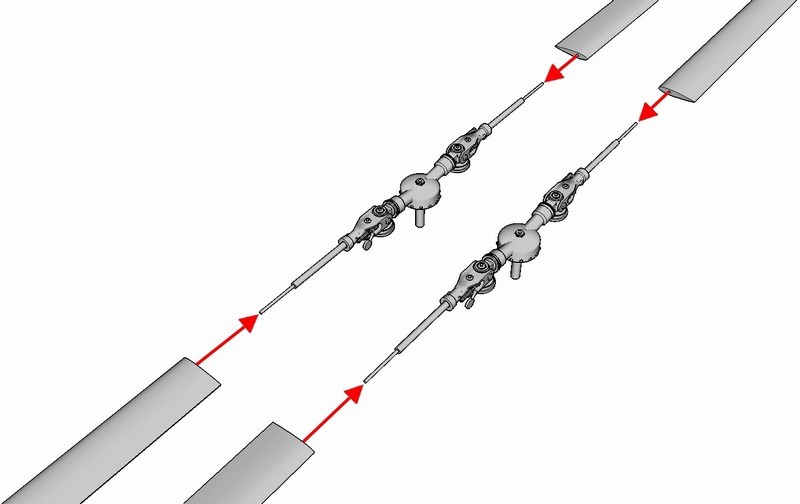
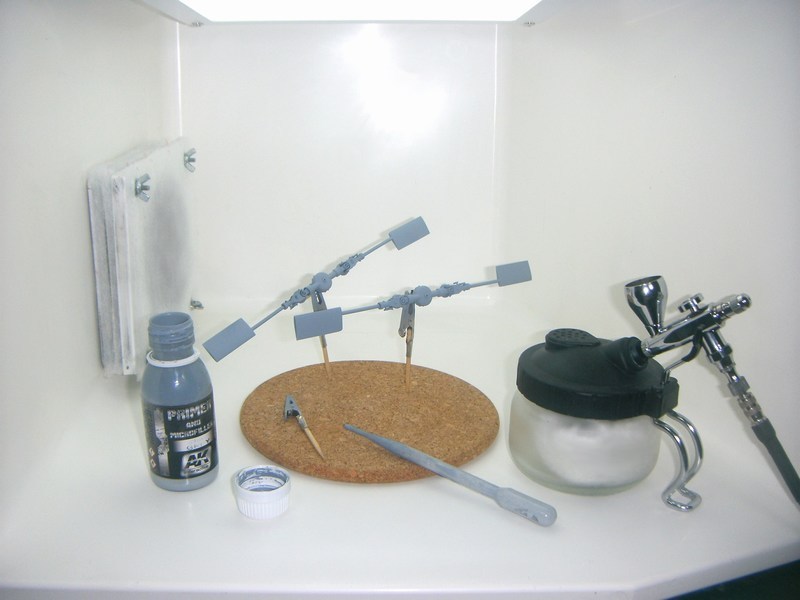
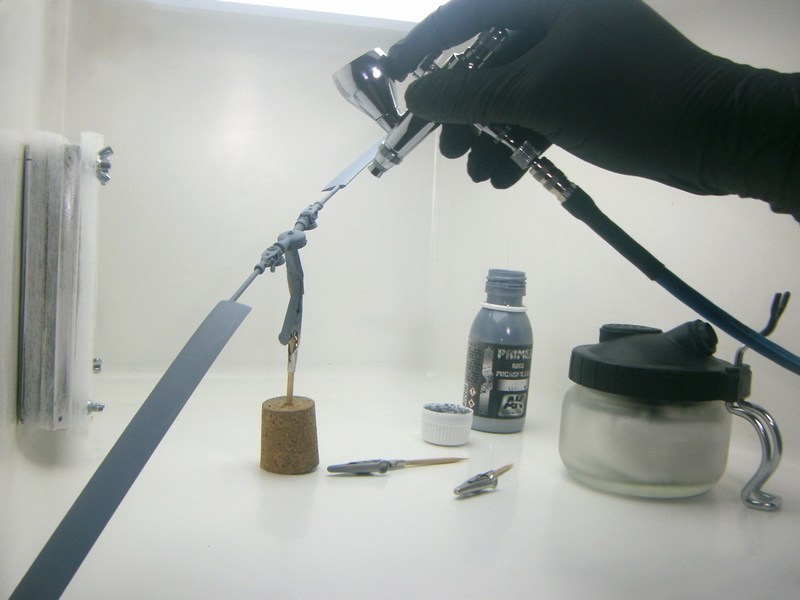
After overall primer, rotor blades dry fit tested to ensure that all individual components could be later combined together as an overall built model. I admit that it’s not easy to handle Kolibri scale model and find best angle for photoshoot on bench, while having the rotor blades (measuring approx 70 cm from one wingtip to the other) attached.
Been long time since last visit, huh? Well, let's remember some hobby fun again.
The objective is to build two different diorama scenes for two different versions of the same helicopter:
- One for the full fuselage version of the 1/18 scale Flettner Fl-282 V21 Kolibri model kit and,
- A second for the cutaway / fabric stripped version of the 1/18 scale Flettner Fl-282 V21 Kolibri model kit.
According to plan, both of them would include few additional features without distracting viewer's attention, keeping the Kolibri helicopter as the main protagonist of the story. Starting with the full fuselage version, the addition of a WWII era Luftwaffe's 200 litres fuel drum with a handpump attached, few 20 litres canisters and a filled bucket left on ground, seemed good idea to me in order to present a short refueling scene.
Rivet counters may say that the presence of a 200 litres fuel drum right next to the helicopter may look unreal or “too much”. Well, considering that the twin seat Fl-282 V21 helicopter had two 25 litres cylindrical fuel tanks mounted externally on both sides of the pilot seat (while the main 105 litres fuel tank installed on previous versions removed to host observer’s rear seat), a number of only 2 or 3 fuel canisters could be just enough to do the job. I am not sure about the official refueling procedures followed by Luftwaffe for the Kolibri helicopter during operational conditions & which were the appropriate method followed by engineers & maintenance personnel.
- Did they park the Kolibri close to area where 200 litres fuel drums stored and later pumped fuel directly into helicopter’s tanks through a hose?
- Did they move (carrying on a truck / cart) the 200 litres fuel drums next to the helicopter’s parking area and later pump fuel inside tanks?
- Did they fill helicopter’s tanks with hand-carried smaller 20 litres canisters & funnels, brought from main fuel storage area, next to parked Kolibri?
IMHO, all the above (and many others) sound quite possible scenarios. Since we all have seen WWII era pics showing airfield ground personnel using a big variety of methods, from operating Opel refueling trucks, to mule / donkey driven carts or poor maintenance personnel carrying 20 litres canisters by hands, I think that having few 20 litres canisters left into the diorama scene and same time a 200 litres fuel drum feeding the helicopter tanks directly through a hose, could be considered as realistic and not just an “artistic accepted” option.
Meanwhile, the rotor blades for both versions attached on their rotor heads as described into the building manual (click HERE for the PDF formated file) through pages #88 to #94. Parts sprayed over with AK interactive AK768 primer to spot mistakes and prepare for paintjob. I did a visual inspection and shot some pictures.
After overall primer, rotor blades dry fit tested to ensure that all individual components could be later combined together as an overall built model. I admit that it’s not easy to handle Kolibri scale model and find best angle for photoshoot on bench, while having the rotor blades (measuring approx 70 cm from one wingtip to the other) attached.
phantom II
Master at Arms
1/18 scale Flettner Fl-282 V21 Kolibri scratchbuil
Very nice. I really like the colors used .
I suppose any of these refueling procedures could have been used.
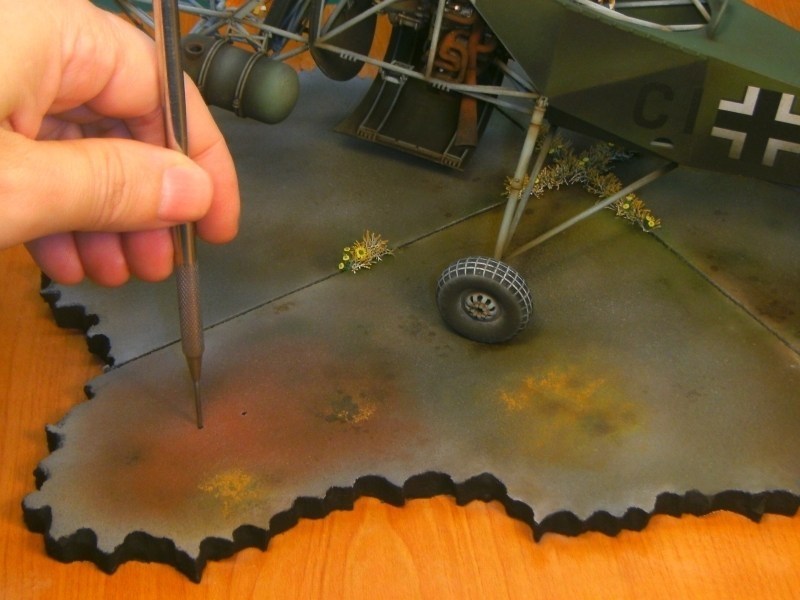
The only thing I have issues with are the really colorful flowers growing in the concrete even though there are a lot of obvious signs of contaminants on the ramp.
I have never witnessed that on any maintenance facility .
Just my 5 cent's worth.
Cheers, Christian B)
Very nice. I really like the colors used .
I suppose any of these refueling procedures could have been used.
The only thing I have issues with are the really colorful flowers growing in the concrete even though there are a lot of obvious signs of contaminants on the ramp.
I have never witnessed that on any maintenance facility .
Just my 5 cent's worth.
Cheers, Christian B)

Nick_Karatzides
Member
1/18 scale Flettner Fl-282 V21 Kolibri scratchbuil
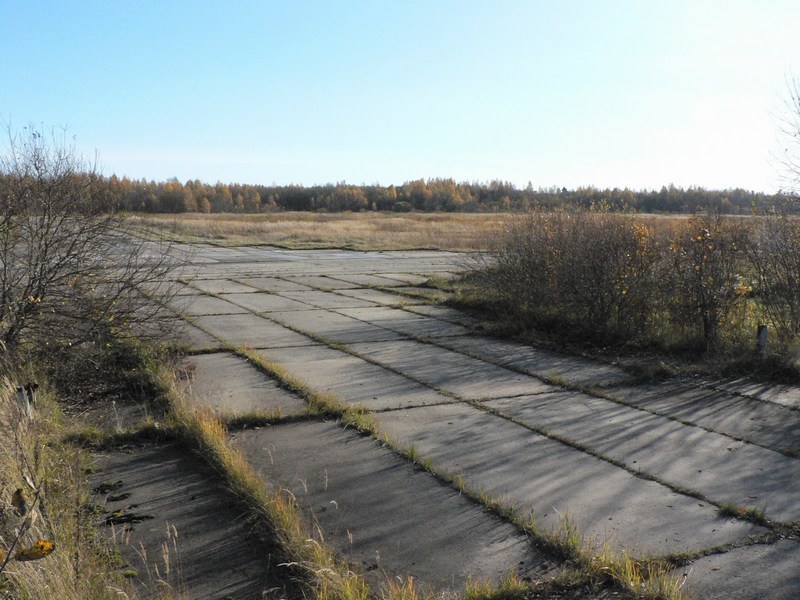
I fully appreciate your advice and thanks for sharing your opinion. I think that scale modeling is a well balanced combination of realism & artistic view. Right? IMHO human-built concrete / asphalt ground cannot beat mother Nature - especialy during Spring. Considering we are talking about a WWII-era airfield appron where refueling or short maintenance work is done, I thought good idea to present the diorama having these little yellow flowers & weed just grown through the concrete plates. Right? Wrong? Who knows? I hope the following pics could possibly justify my decision:


Need more wide angle view to also have a look on the airfield appron?


...not to mention some more extreme cases.

@ Christian,The only thing I have issues with are the really colorful flowers growing in the concrete. I have never witnessed that on any maintenance facility.
I fully appreciate your advice and thanks for sharing your opinion. I think that scale modeling is a well balanced combination of realism & artistic view. Right? IMHO human-built concrete / asphalt ground cannot beat mother Nature - especialy during Spring. Considering we are talking about a WWII-era airfield appron where refueling or short maintenance work is done, I thought good idea to present the diorama having these little yellow flowers & weed just grown through the concrete plates. Right? Wrong? Who knows? I hope the following pics could possibly justify my decision:
Need more wide angle view to also have a look on the airfield appron?
...not to mention some more extreme cases.
phantom II
Master at Arms
1/18 scale Flettner Fl-282 V21 Kolibri scratchbuil
It's whatever pleases you but if you look closely at those pictures, they show no sign of chemicals .
A few drops of gasoline will kill even the happiest of Dandelion .
Sure it will come back in due time without more chemicals .
Cheers, Christian B)
It's whatever pleases you but if you look closely at those pictures, they show no sign of chemicals .
A few drops of gasoline will kill even the happiest of Dandelion .
Sure it will come back in due time without more chemicals .
Cheers, Christian B)
1/18 scale Flettner Fl-282 V21 Kolibri scratchbuil
Outstanding work Nick
Outstanding work Nick
Nick_Karatzides
Member
1/18 scale Flettner Fl-282 V21 Kolibri scratchbuil
Hmmm yeah your point sounds right. Seems like growing weed and fuel cannot stand together. The problem is that the pictured diorama is already built and these pics are quite old - just upload them now. What I can do, is not to make same mistake in future.
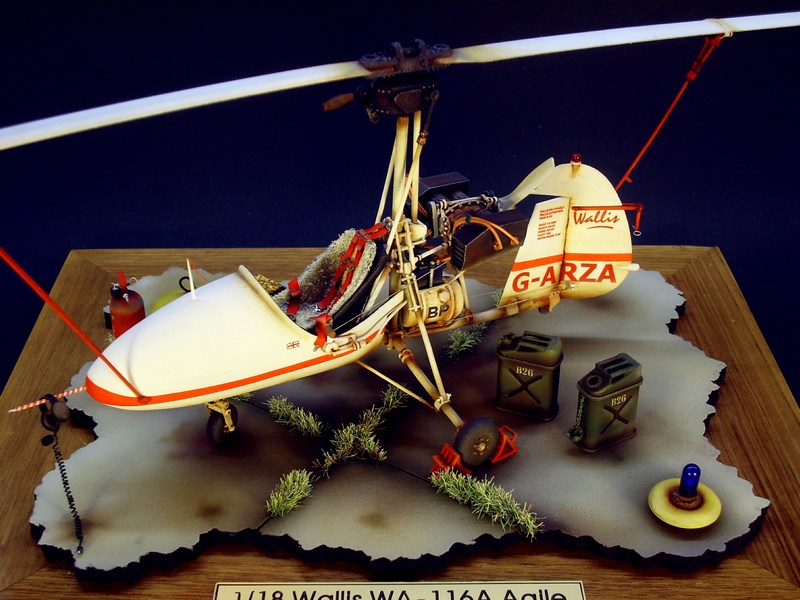
PS. I just remembered, that I did same mistake (planting weed and placing fuel canisters within same area in diorama) into my 1/18 scale Wallis WA-116 Agile autogyro built, also presented into forum few years ago.
@ Christian,It's whatever pleases you but if you look closely at those pictures, they show no sign of chemicals. A few drops of gasoline will kill even the happiest of Dandelion. Sure it will come back in due time without more chemicals.
Hmmm yeah your point sounds right. Seems like growing weed and fuel cannot stand together. The problem is that the pictured diorama is already built and these pics are quite old - just upload them now. What I can do, is not to make same mistake in future.
PS. I just remembered, that I did same mistake (planting weed and placing fuel canisters within same area in diorama) into my 1/18 scale Wallis WA-116 Agile autogyro built, also presented into forum few years ago.
Heavens Eagle
Well-known member
1/18 scale Flettner Fl-282 V21 Kolibri scratchbuil
It still looks quite well done Nick!


It still looks quite well done Nick!
phantom II
Master at Arms
1/18 scale Flettner Fl-282 V21 Kolibri scratchbuil
Ooooh that is a beauty .
Don't worry Nick there's only one of me . The dandelions are very cool as well
Just keep that thought in mind.
Cheers, Christian B)
Ooooh that is a beauty .
Don't worry Nick there's only one of me . The dandelions are very cool as well
Just keep that thought in mind.
Cheers, Christian B)
jknaus
Administrator
1/18 scale Flettner Fl-282 V21 Kolibri scratchbuil
Absolutely fantastic work Nick. I really like these. At first I would have wondered about the 200 Gal fuel drum beside the aircraft but with the ref pictures it is fully plausible. I have never seen that picture before but it changes a lot of things in my mind and I am sure I will use something like it if I ever build another a/c vignette. As for the weeds growing, well its not something I have seen on a modern airfield. But it is something I have seen on secondary airfields where there is not much traffic. I really like it as it adds colour and ambiance to your vignettes. Really nice work. Seeing your builds is one of the main reasons I got the Miniart FL-282 kit. Awe inspiring.
James
Nick_Karatzides
Member
1/18 scale Flettner Fl-282 V21 Kolibri scratchbuil

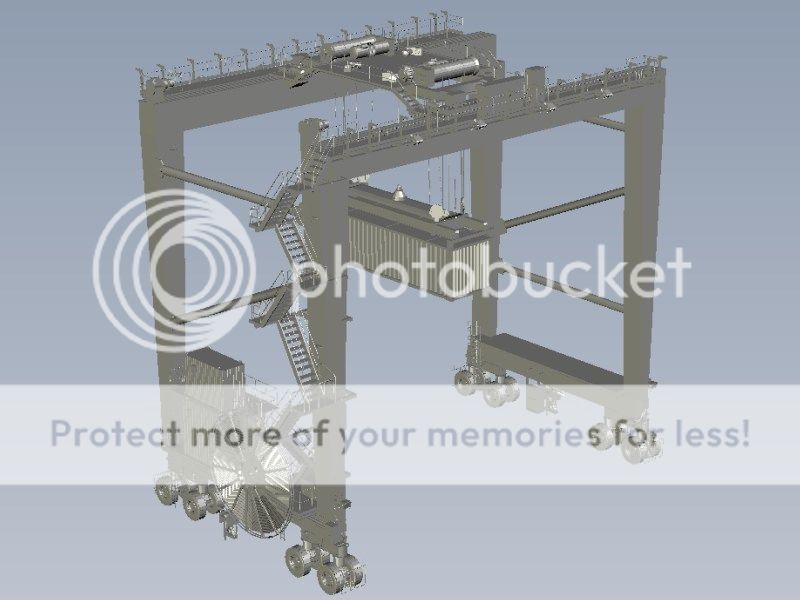
Nowdays, Anyuta 3D is a multinational team of hand-picked professional 3D designers from all over the World - an almost 24/7 operating network with one task: To accurately 3D design and build scale model master prototypes (complete 3D printed scale model kits or partial 3D digital designs / after market parts) in behalf of well known international scale model companies to be used as master prototype miniatures and later get produced as injection molded model kits, available for sale into your local hobby shop. So, the next time you open the box of a kit just purchased from your local hobby shop, keep in mind that it was possibly first designed and built by Anyuta 3D team.
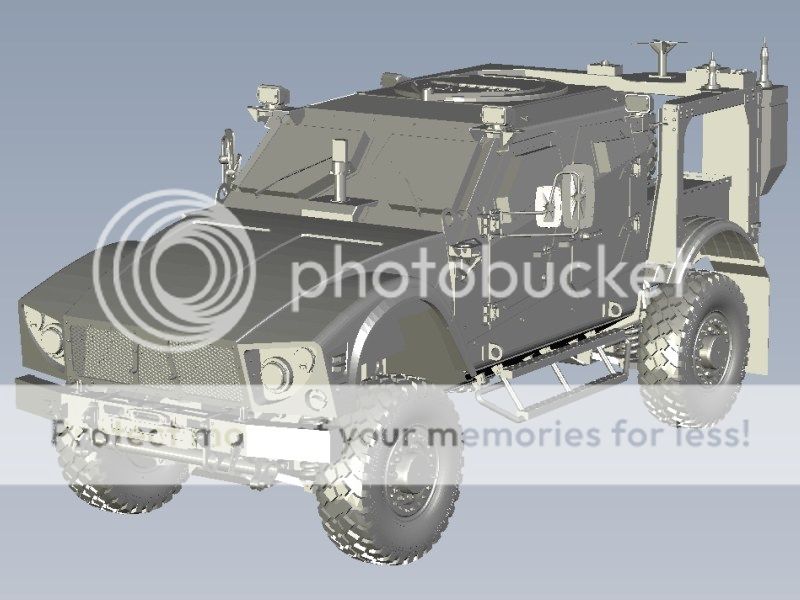

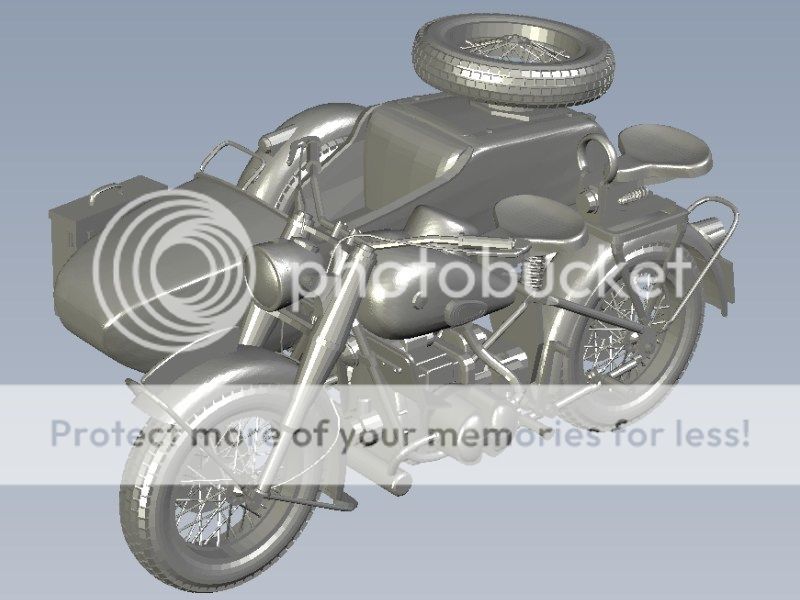

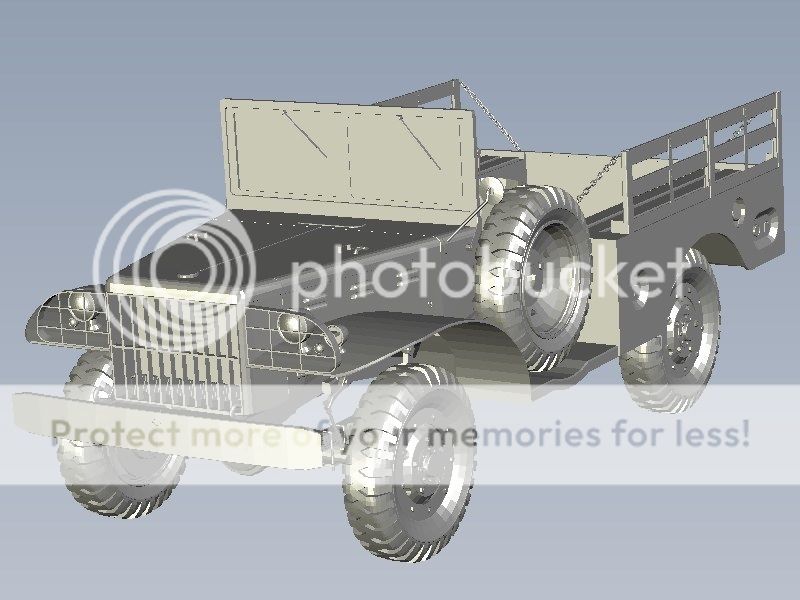
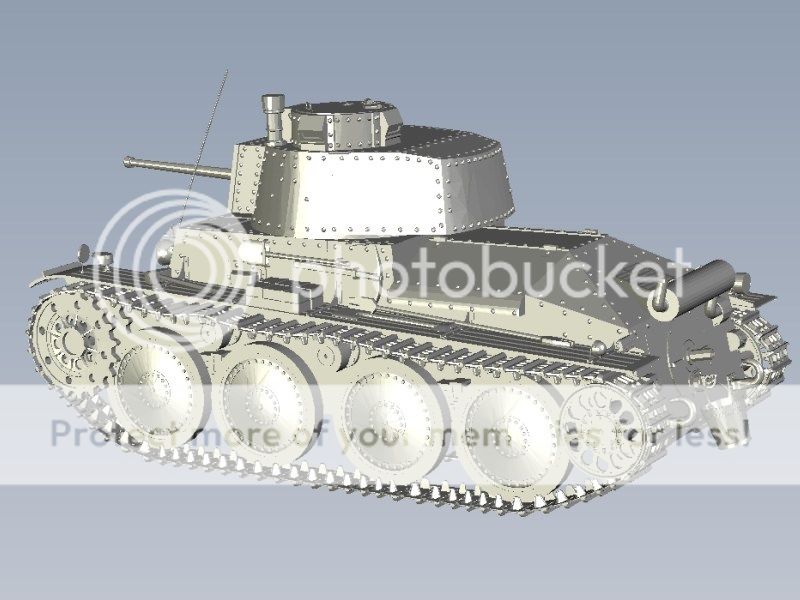
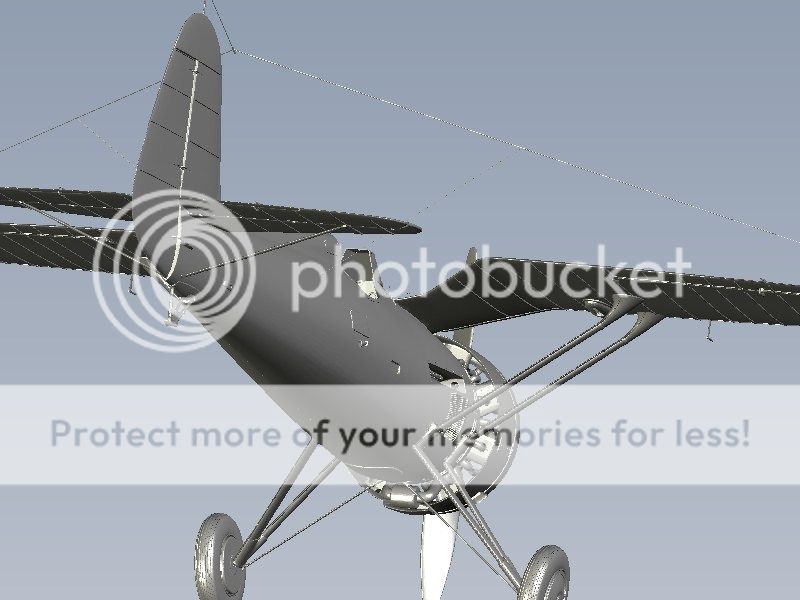

 www.anyuta3d.com
As most of you already know, I am founder & owner of the Anyuta 3D which started almost 10 years ago originally operated solely on digital projects for use in industrial construction. Later, on 2012, Anyuta 3D expanded into the scale modeling hobby too by designing & manufacturing complete scale models, after market kits & accessories, so I hired a number of highly skilled 3D designers to support me completing the requested orders (a really huge workload) applied by scale model factories.Absolutely fantastic work Nick. Seeing your builds is one of the main reasons I got the Miniart FL-282 kit.
Nowdays, Anyuta 3D is a multinational team of hand-picked professional 3D designers from all over the World - an almost 24/7 operating network with one task: To accurately 3D design and build scale model master prototypes (complete 3D printed scale model kits or partial 3D digital designs / after market parts) in behalf of well known international scale model companies to be used as master prototype miniatures and later get produced as injection molded model kits, available for sale into your local hobby shop. So, the next time you open the box of a kit just purchased from your local hobby shop, keep in mind that it was possibly first designed and built by Anyuta 3D team.
Paulw
Well-known member
1/18 scale Flettner Fl-282 V21 Kolibri scratchbuil
I have been a fan of your modeling for quite a few years now, Nick. Only to sit here behind my computer screen dreaming of the day that I would be able to model 1/10 as fine as you do. You are an exceptional artist and have a true talent at what ever you put your hand to.
Seeing that you have expanded your business I am duly impressed at your success and truly wish you well with what ever you put your talents to. Looking at those 3D renderings only reminds me of my frustrations trying to learn how to produce those my self and my attempts at printing such models was beyond my capabilities. The driving force behind my search for such adventures is one aircraft in particular, the Northrop Gamma A2. One of these days I will be able to see one in a larger scale than 1/72 but until then I will only dream and be awed by the artistry that is at your modeling bench.
Cheers
Paul
1/18 scale Flettner Fl-282 V21 Kolibri scratchbuil
Amazing work you all have done Nick
Amazing work you all have done Nick