• Modelers Alliance has updated the forum software on our website. We have migrated all post, content and user accounts but we could not migrate the passwords.
    This requires that you manually reset your password.
    Please click here, http://modelersalliance.org/forums/login to go to logon page and use the "Forgot your Password" option.

Beechcraft 18

Hmmmm , don't recall a complicated structure back there . :hmmm I think the ancient Lockheed Hudson had a similar arrangement :idonno

Maybe I can find somthing.

Cheers, Christian B)
 
In order to install an interior in this thing, major surgery was called for. Once I had decided to cut the top off, it was a matter of deciding whether to cut along the top of the cabin window line or the bottom. Top it was.

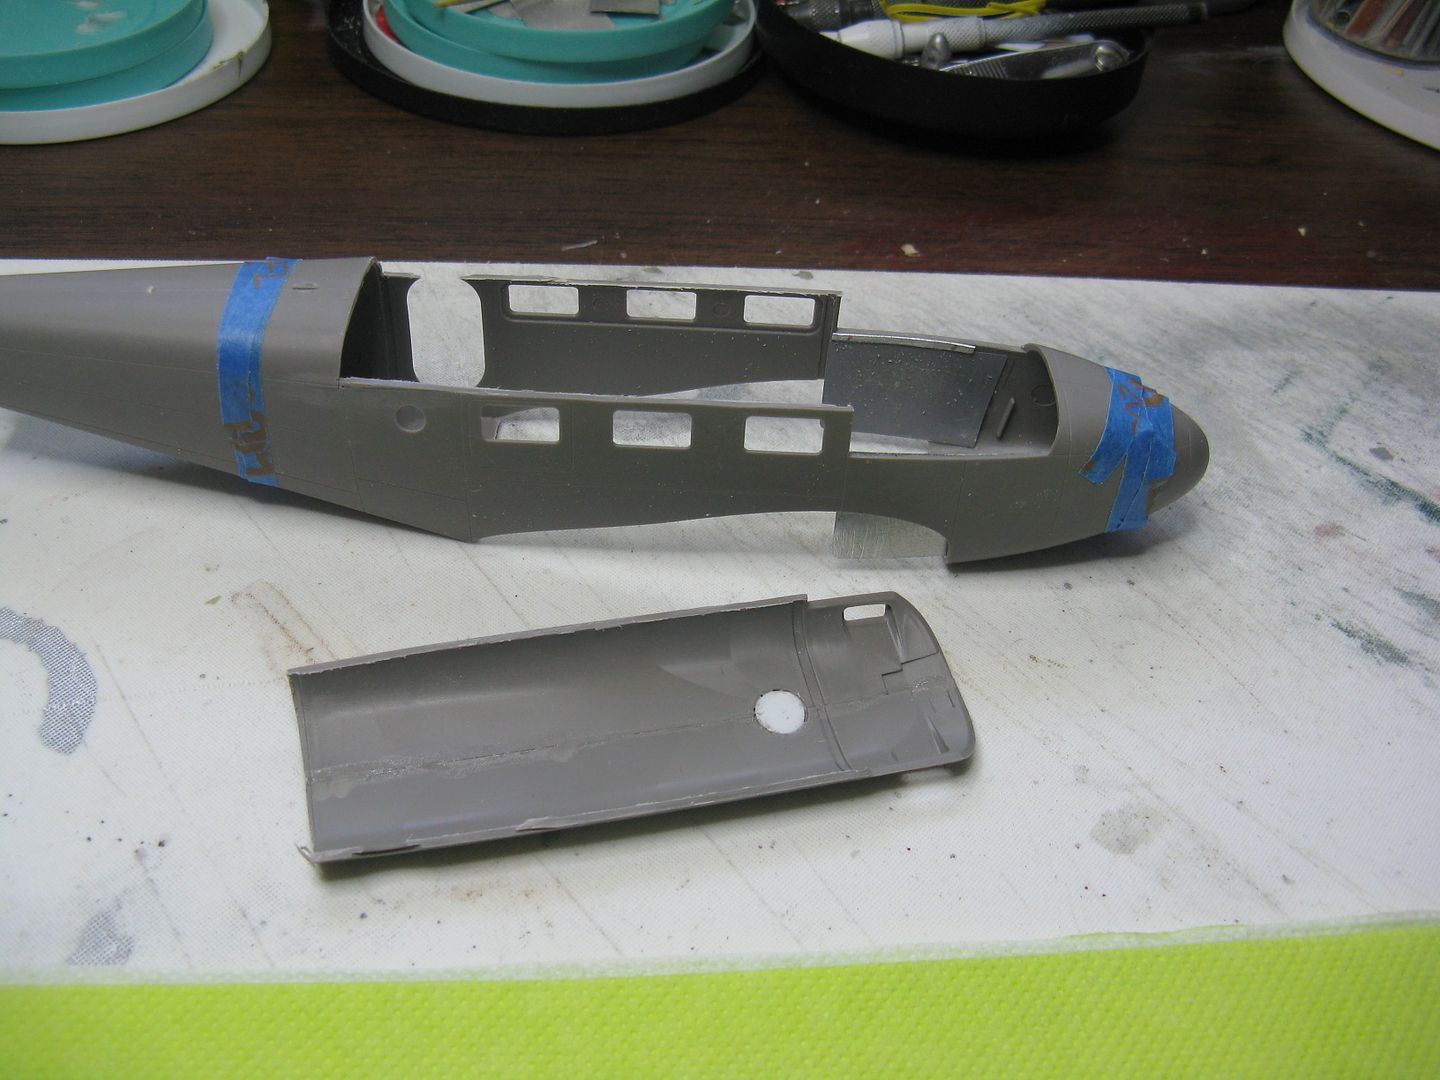
What I did was, I glued the fuselage halves together only at the roof seam, from the rear of the windshield to just aft of the cabin door...
006_zps56r64evd.jpg


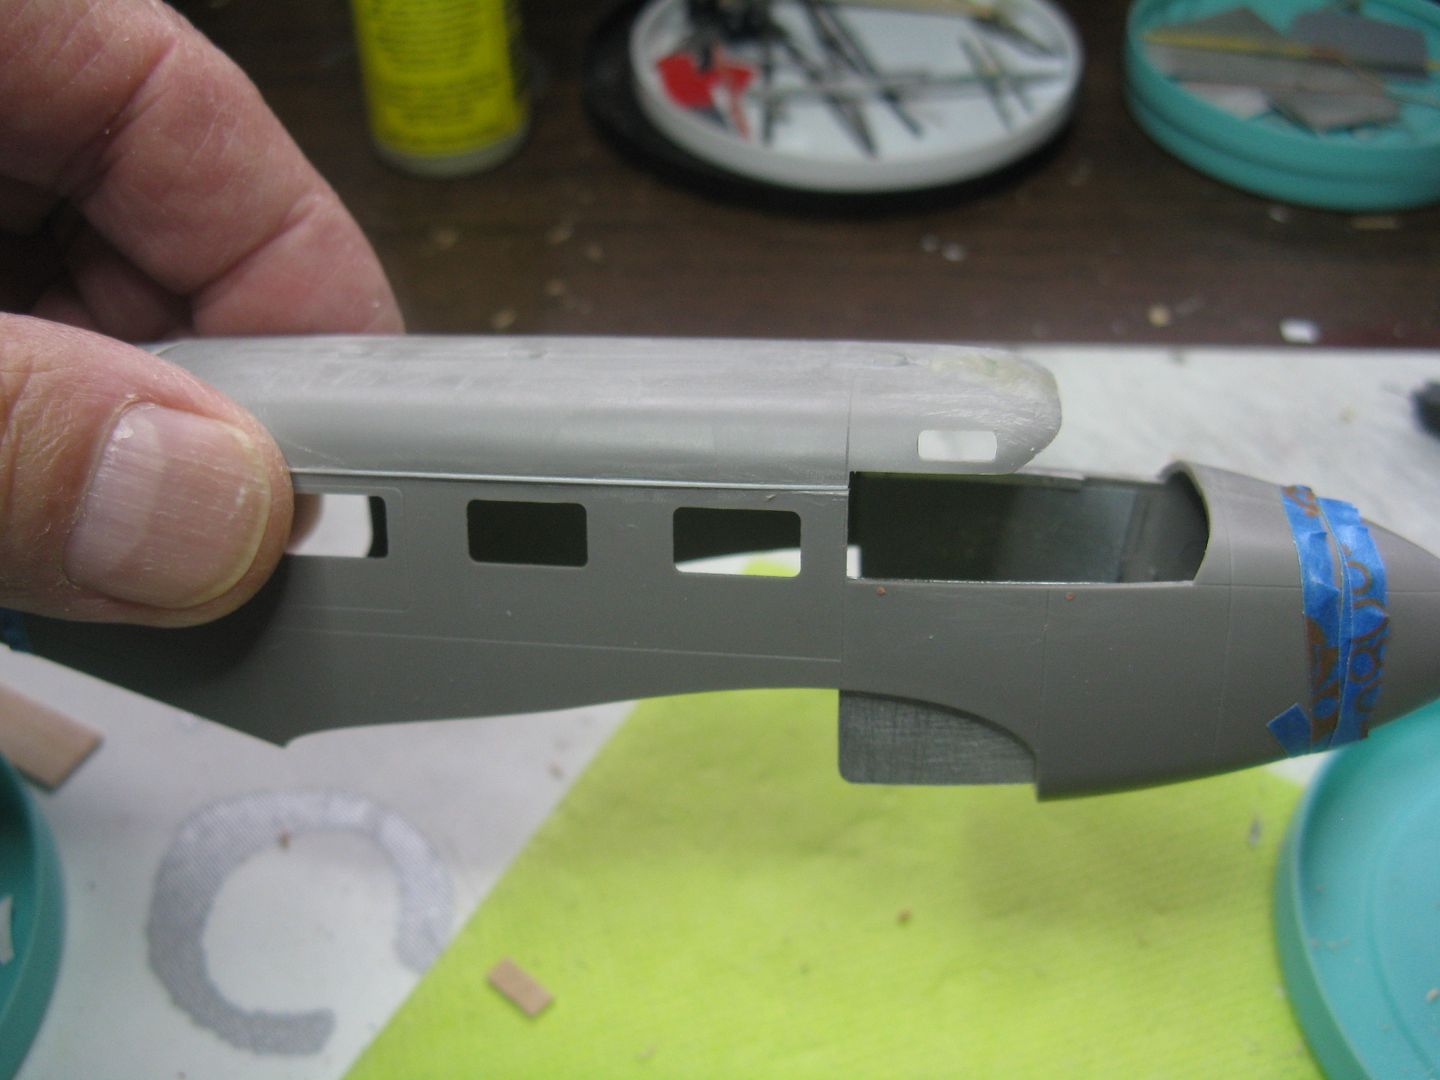
...Then, using a razor saw, cut the roof off as a complete unit along the fuselage panel line at the top of the cabin windows.
002_zps0disq0dp.jpg


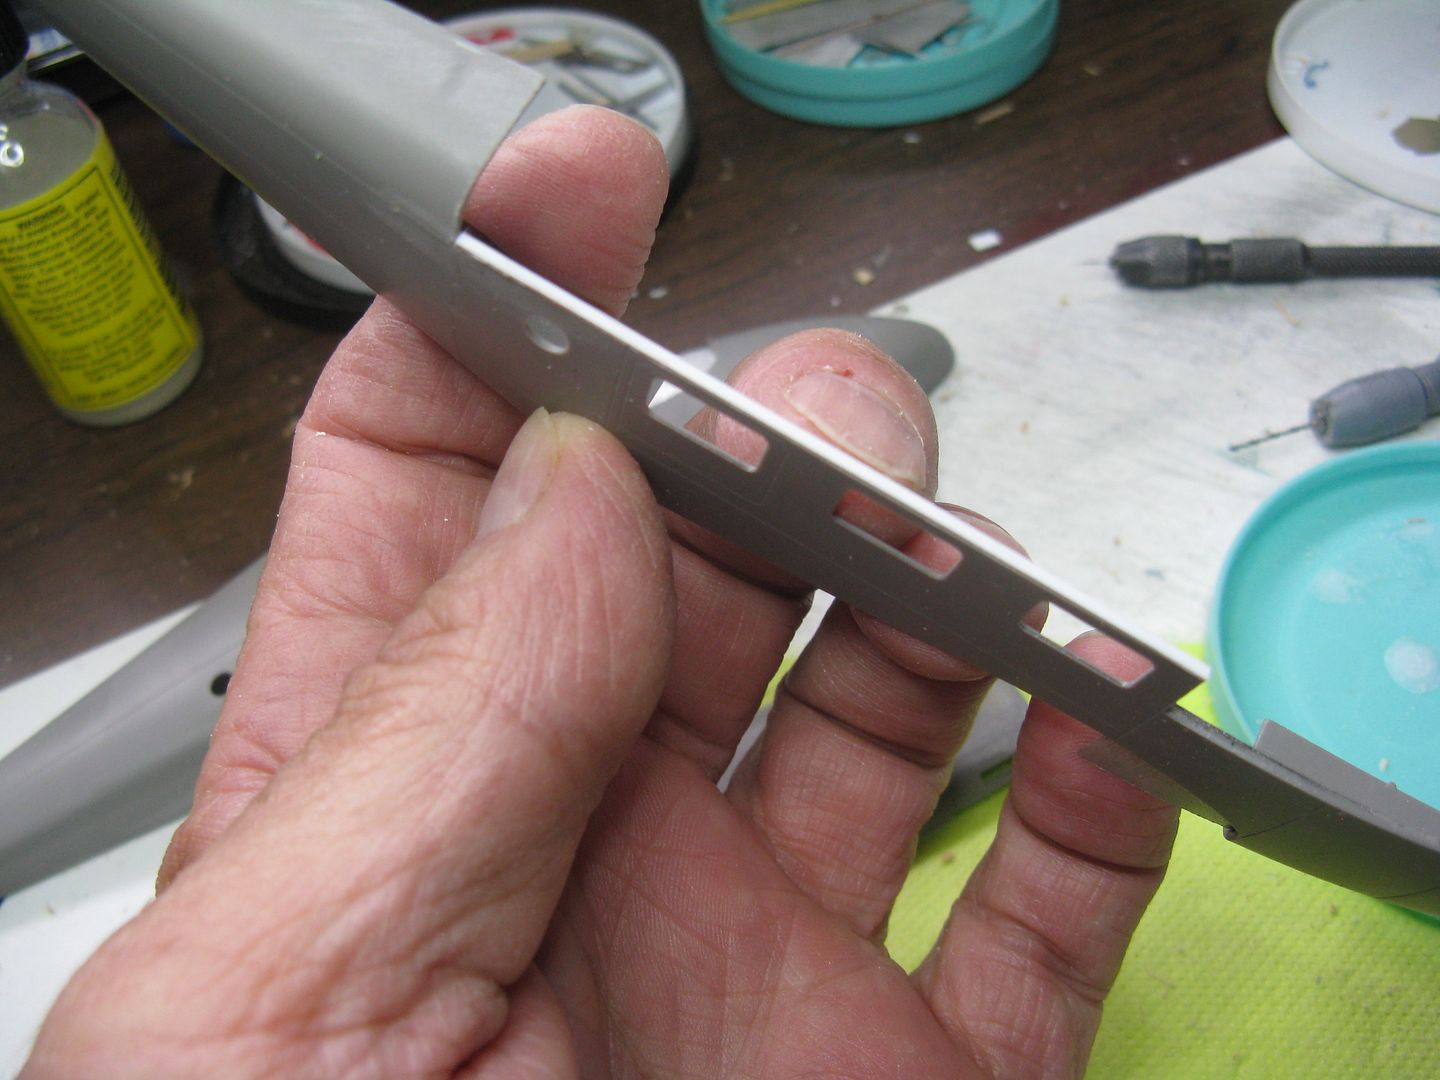
After the cut was sanded smooth I added a strip of .010 x .040 styrene to the top of the fuselage...
003_zpsp6bygvu5.jpg


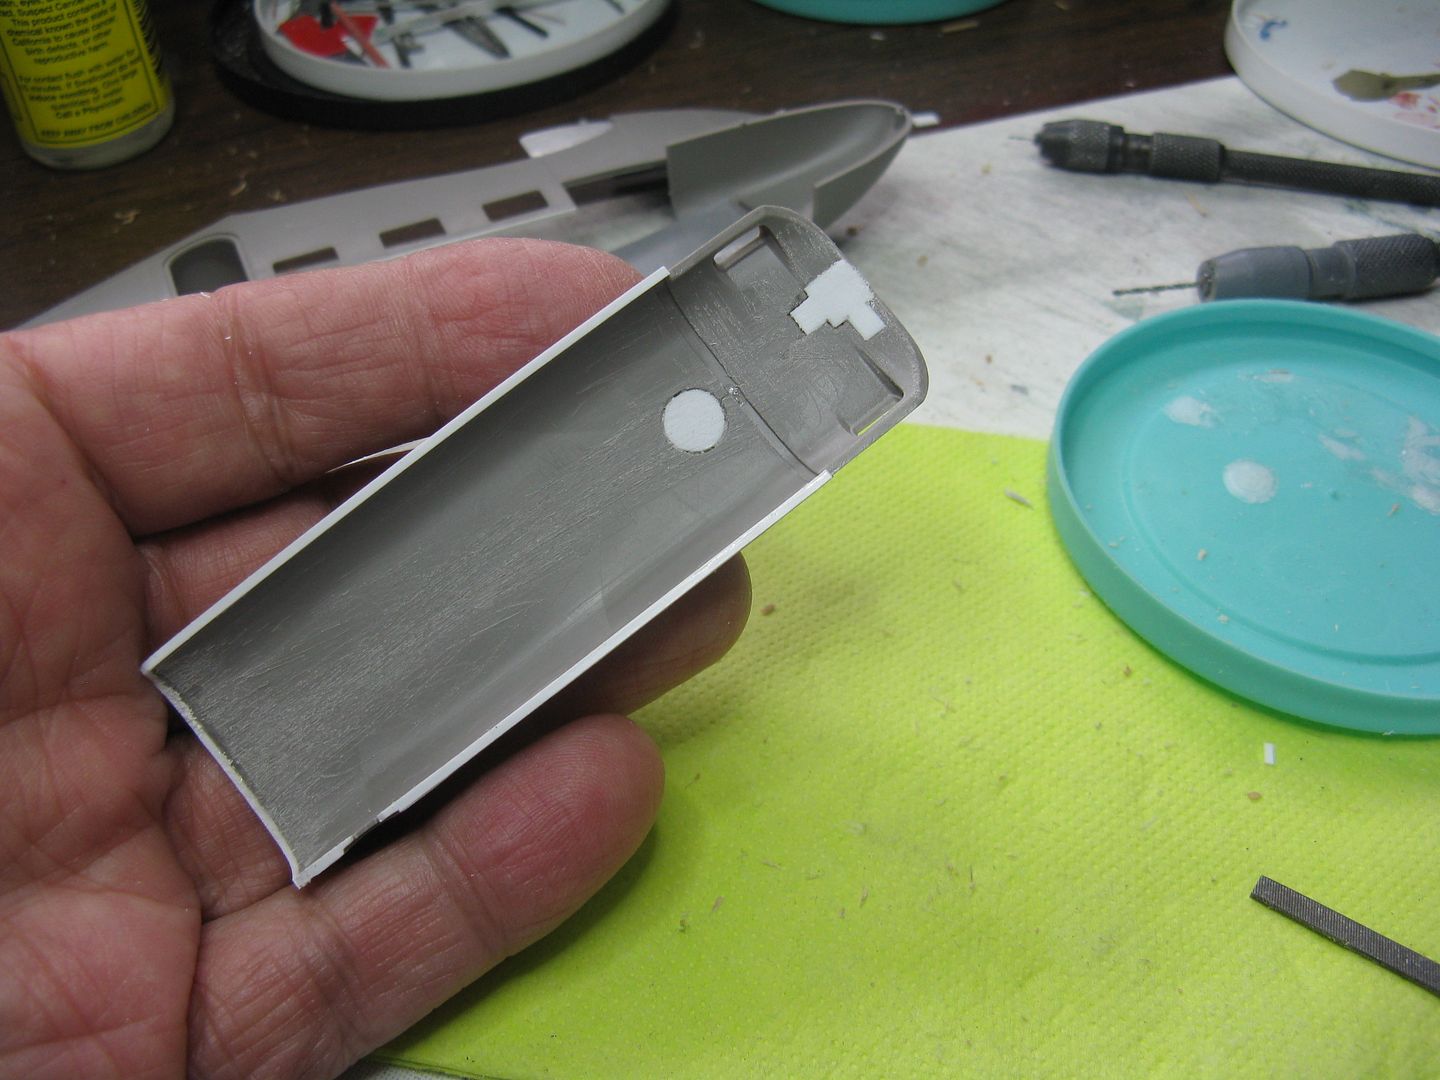
...And the bottom of the roof to replace the material lost in the cut and sanding. I added a round of scrap styrene to the indentation where the astrodome was supposed to go, and more scrap styrene to fill another indentation where a cockpit overhead panel was supposed to go. This airplane has a cockpit roof hatch in this location, so no overheads.
004_zpsos4cqdk2.jpg


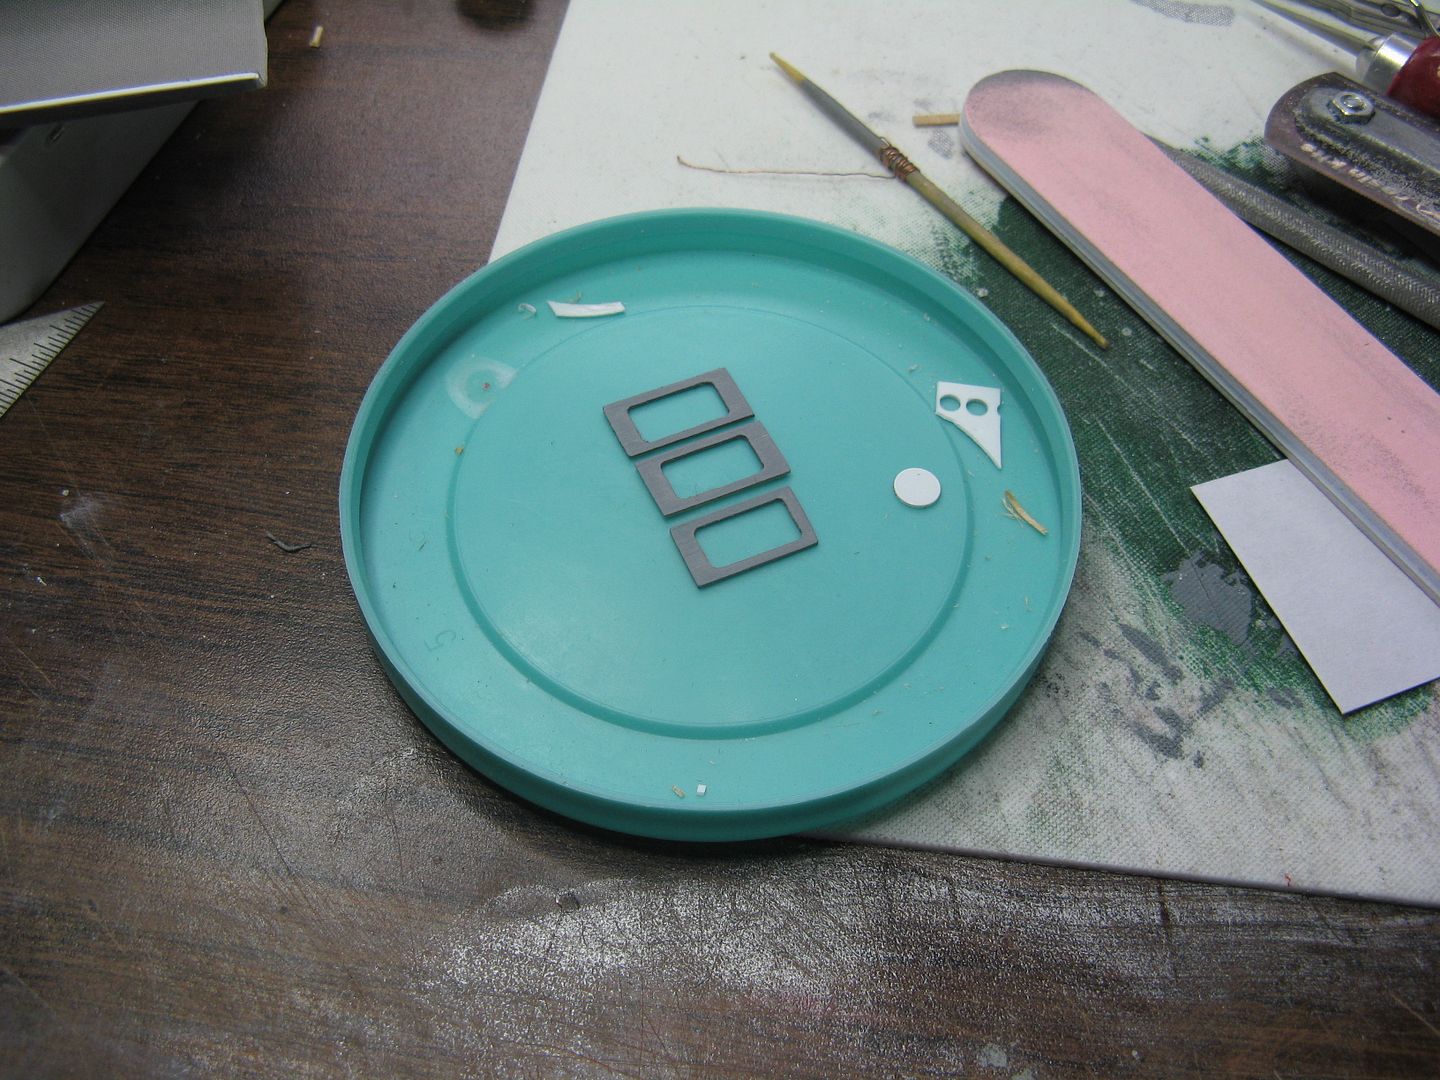
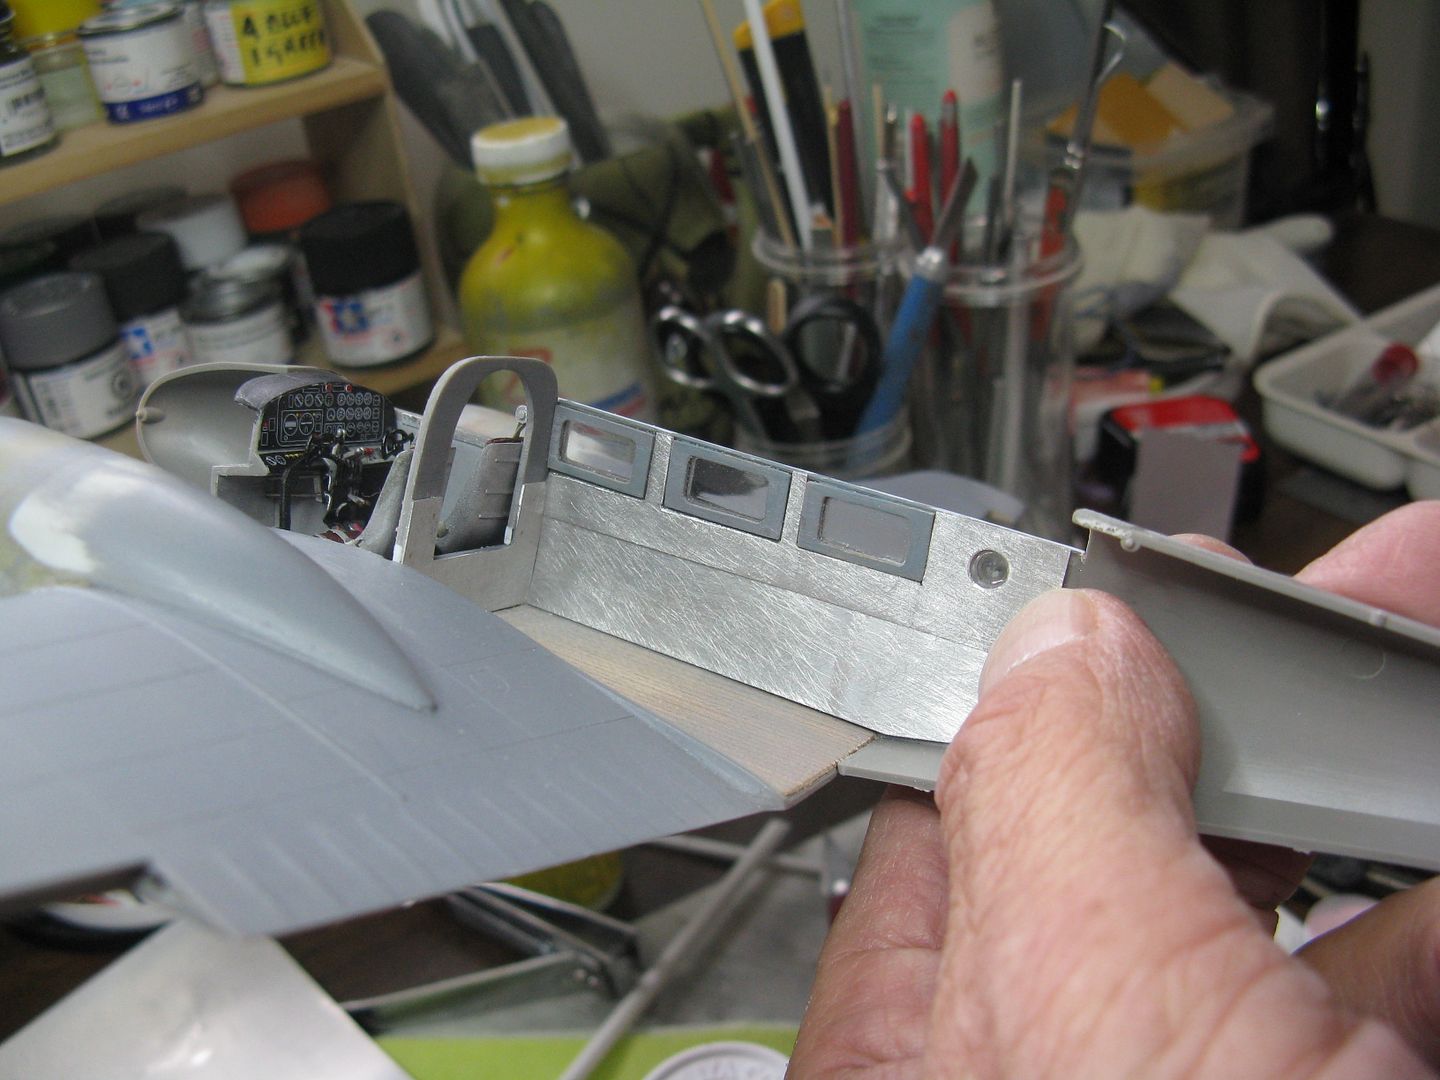
I checked with my friend and he likes the idea of bare aluminum cabin sidewalls, so bare aluminum it is. First I made some nifty PE window frames using genuine wood. They were painted grey and installed.
002_zpsohswplyg.jpg


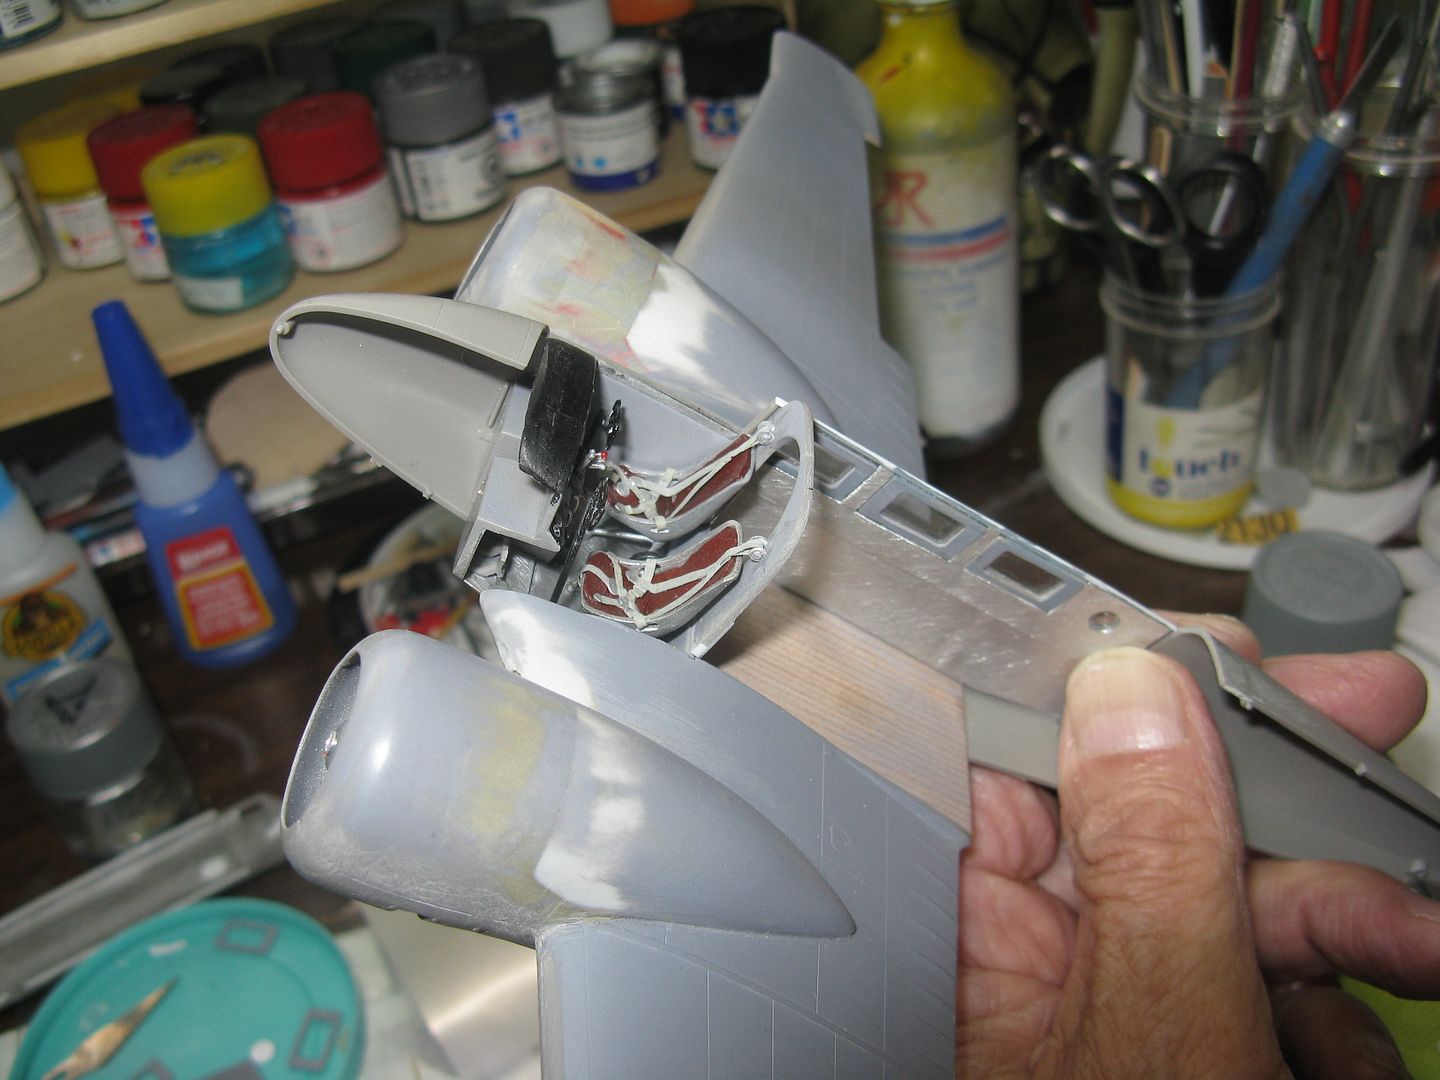
I cut some masking tape to the outline for the panel and transferred that to some scrap aluminum I had laying around and glued the panels in place. I used Weldbond All Purpose glue and clamped it overnight..
003_zpsc9g9egtt.jpg


004_zps8opctxd8.jpg


004_zpsvxfpt0dx.jpg


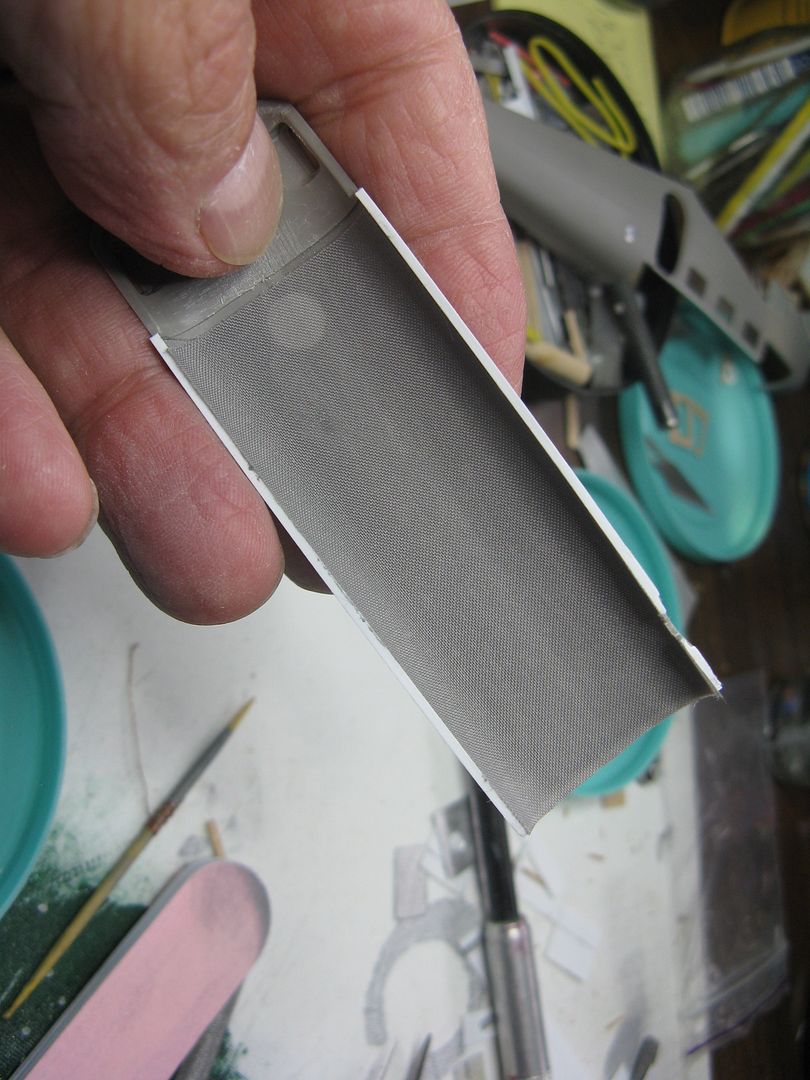
I used some grey material as a headliner, it has adhesive on one side so it was applied directly to the cabin roof. It began life as elbow patches, available at Wal Mart for a modest sum.
003_zps77a4kg6v.jpg


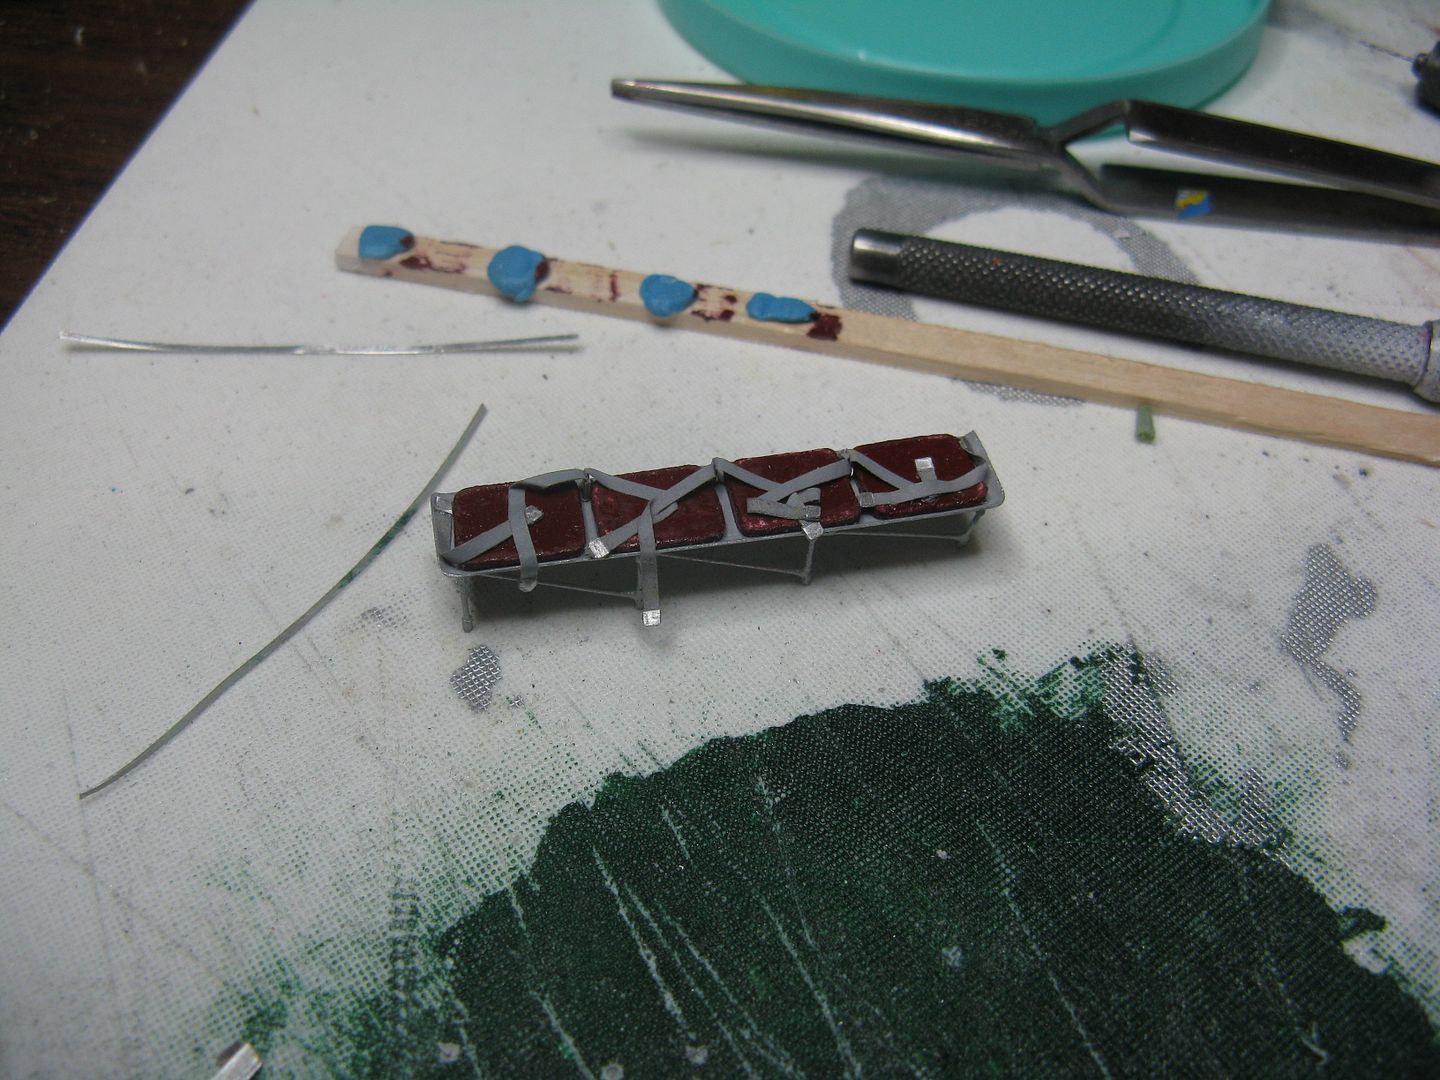
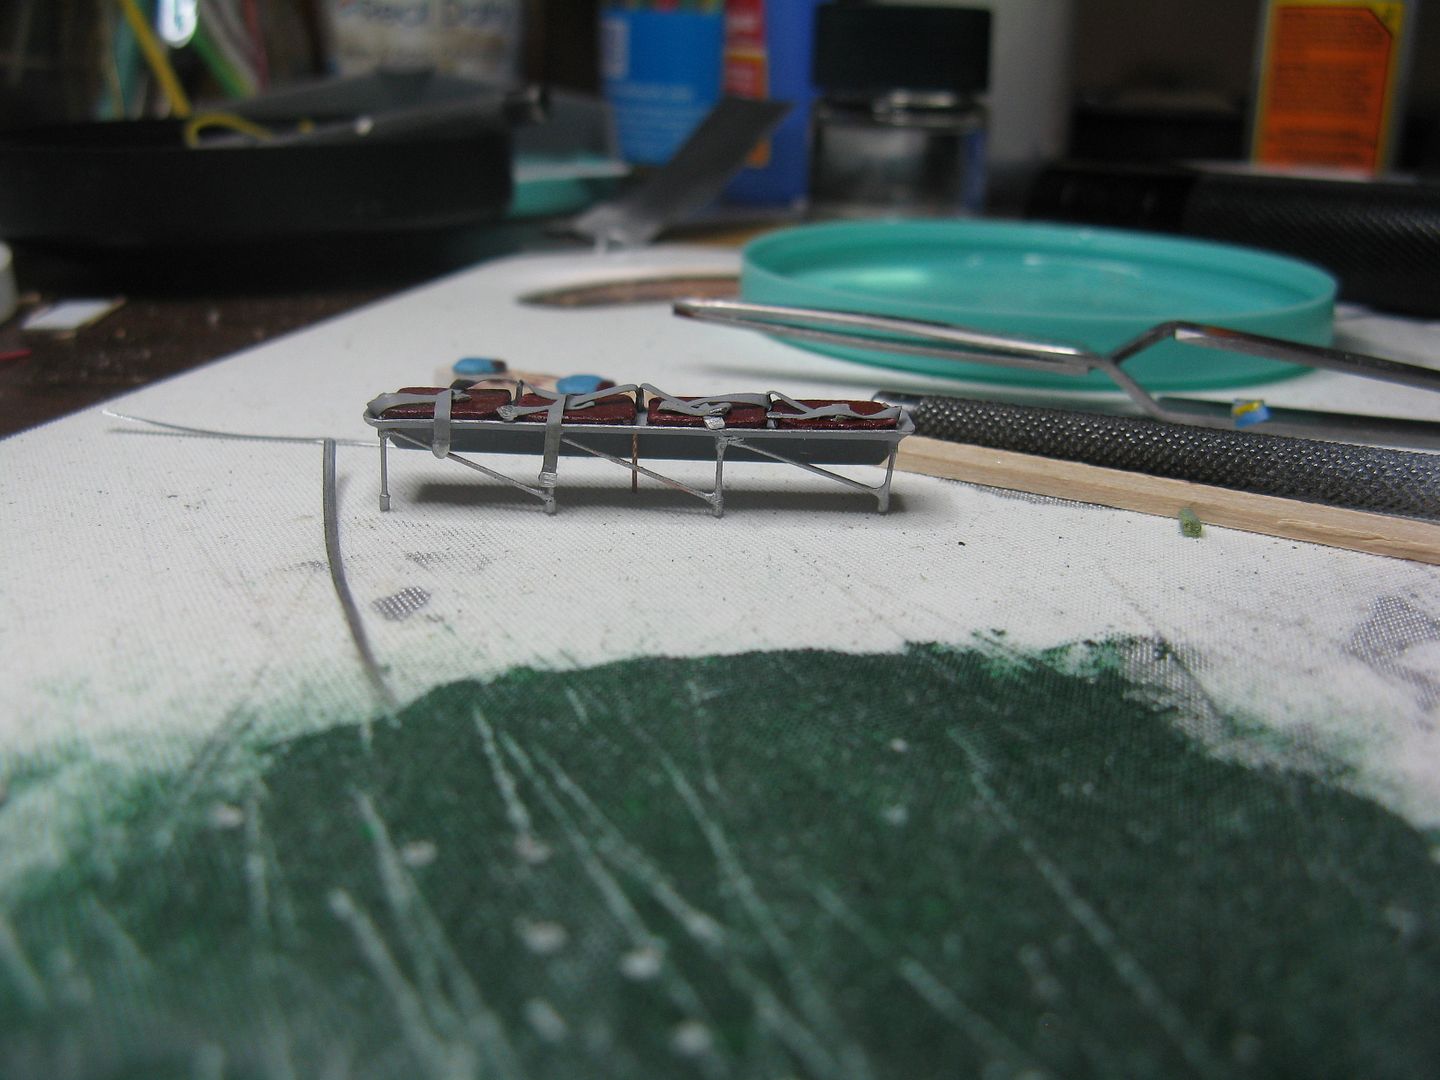
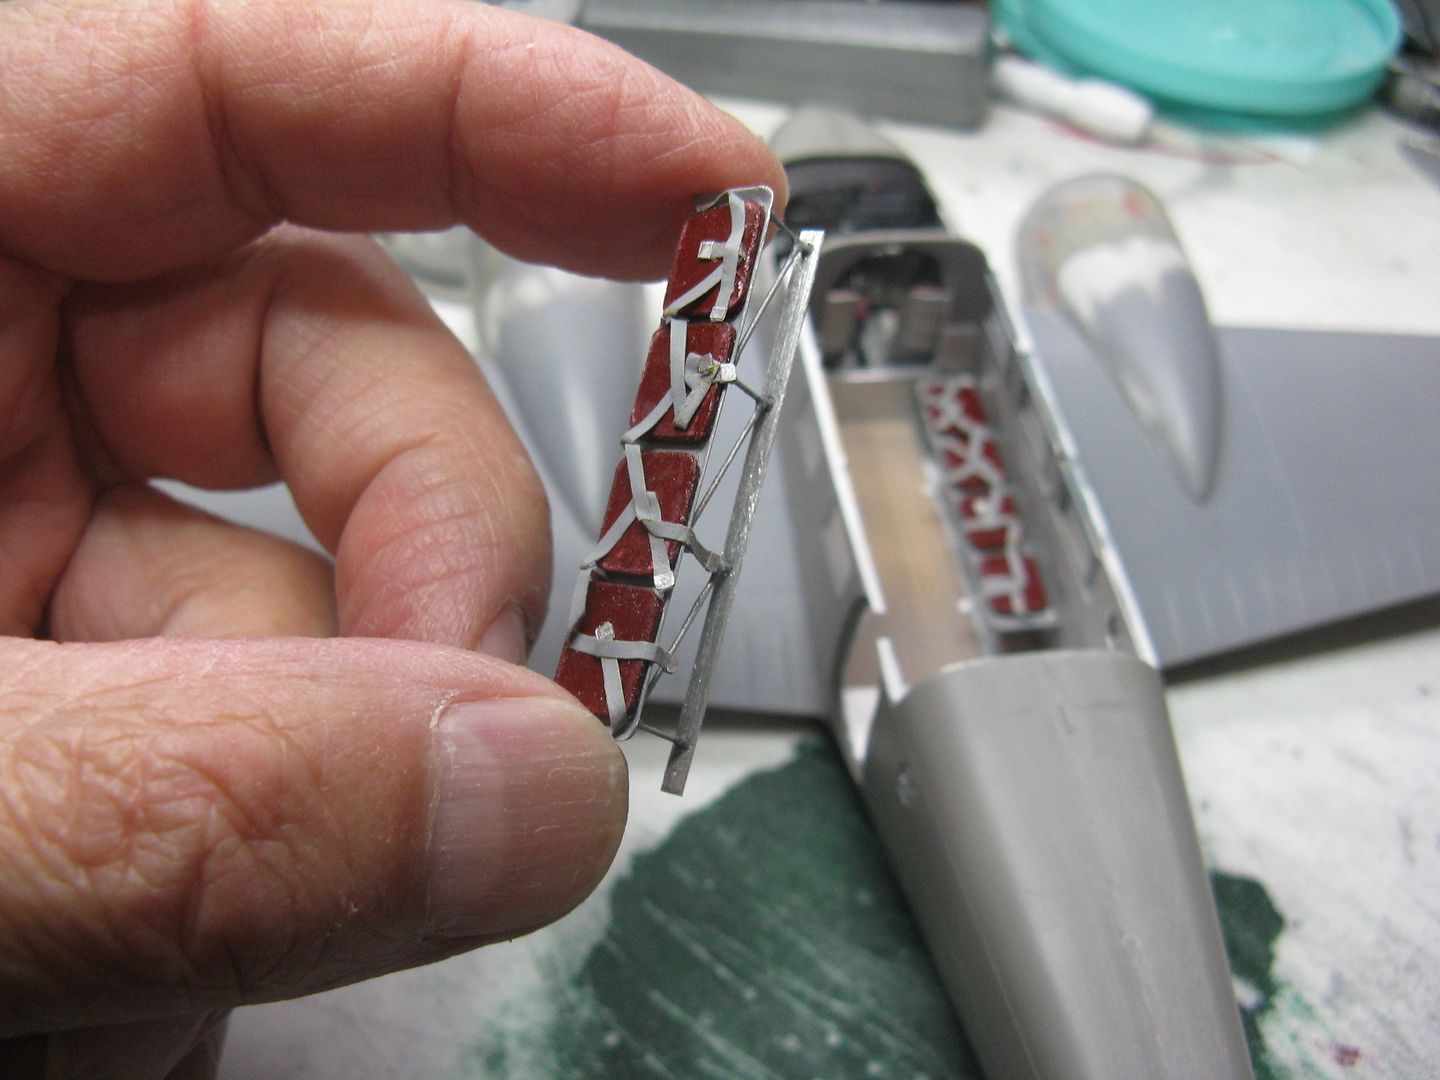
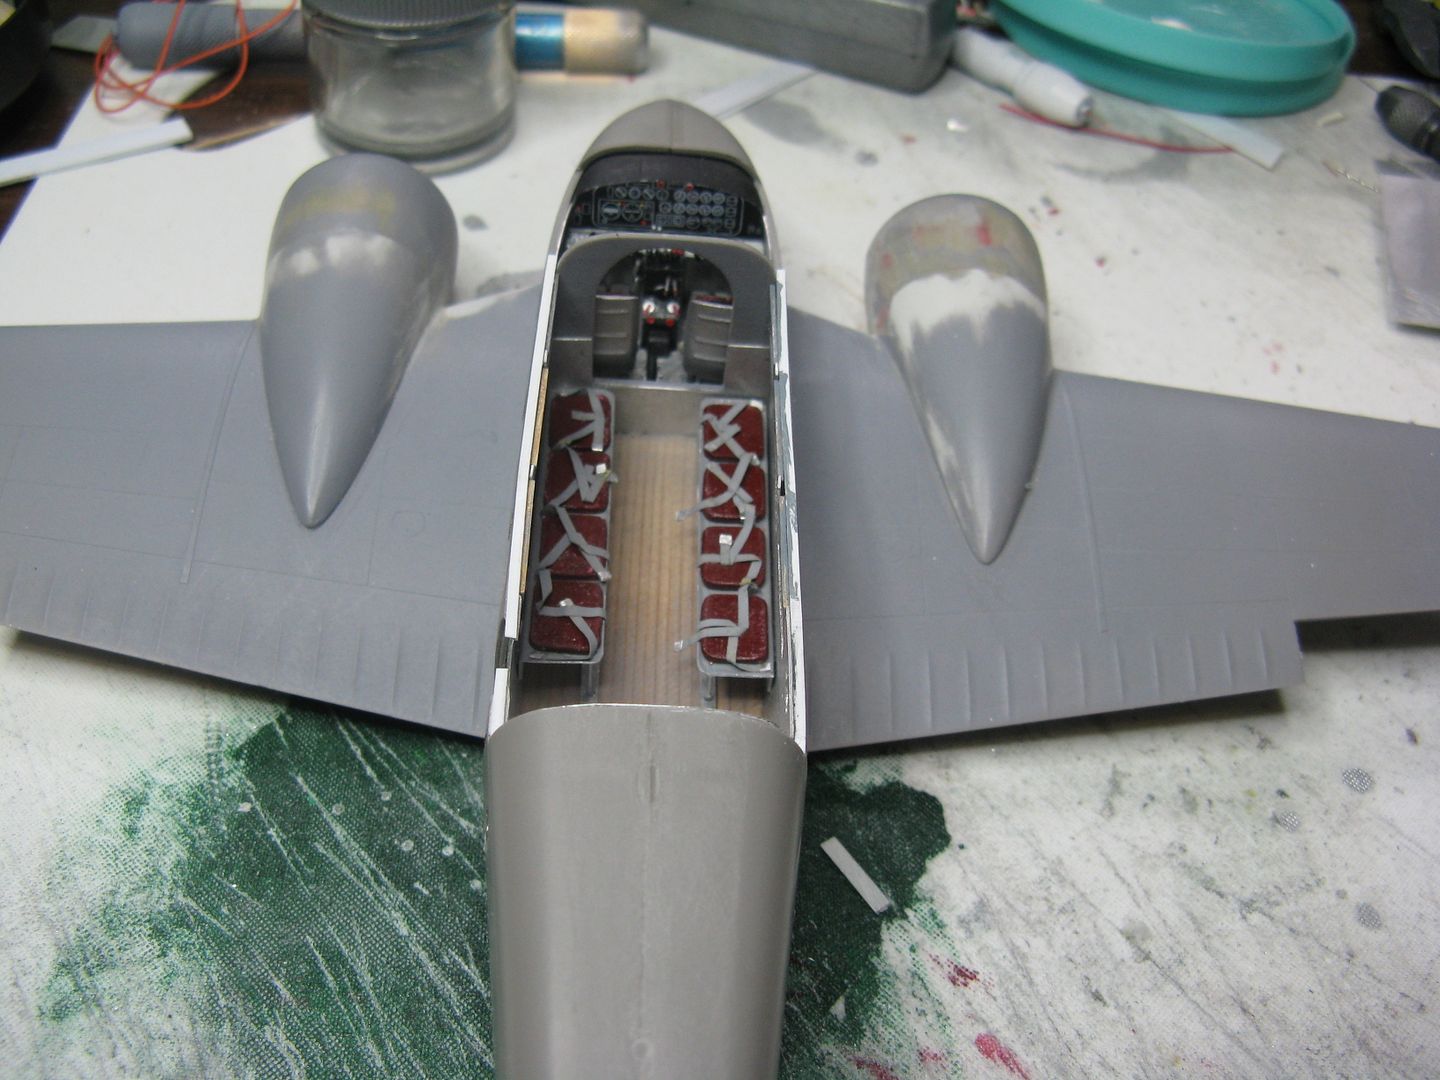
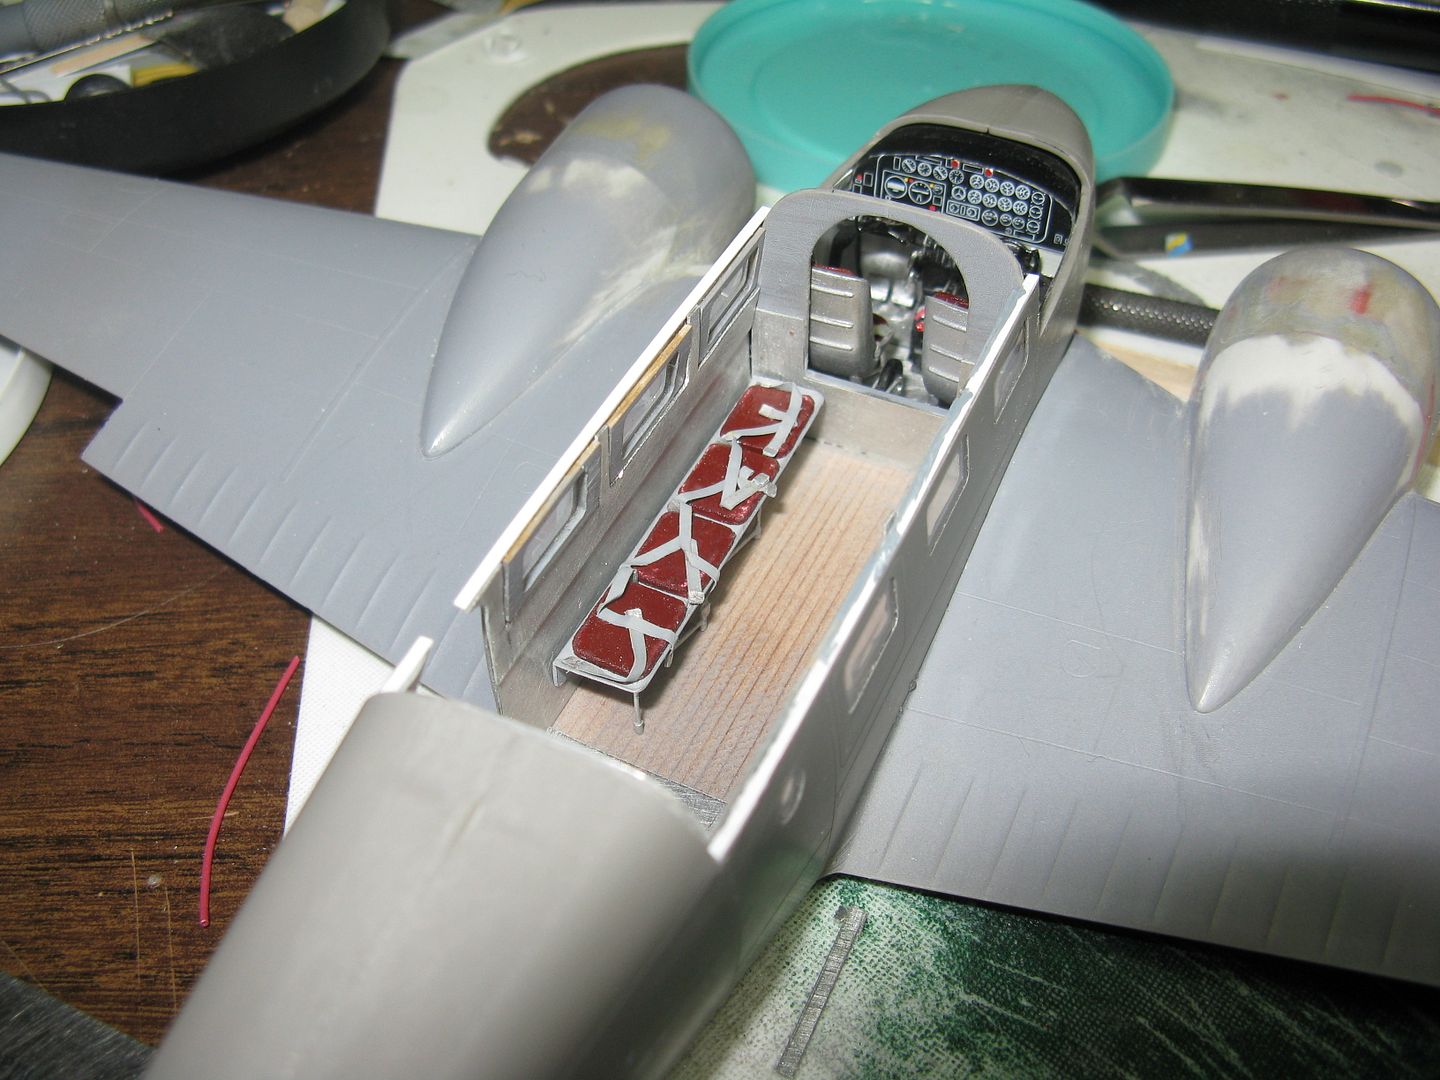
This airplane has bench seats along either side of the cabin. From the pics I have it looks like the seat legs detach from the floor seat rail and the seats can be folded up against the cabin sidewall. The legs are hinged at the top and when the seats are folded up, they hang down against the seat bottom, leaving the cabin floor free for dead moose, drunk fishermen, frozen porcupines, whatever. I cobbled some seats together from scrap aluminum and wire, with cushions made from construction paper folded over a few times, dipped in diluted white glue and painted. The belts are from masking tape and the hardware from beer can.
006_zpsxsqat1ic.jpg


007_zps7wotuy9a.jpg


Finally, one seat dry fitted in place. I do hope this airplane had eight passenger seats. :unsure:
008_zpsauo9aseu.jpg


That's it for now.
 
Stoney, the three view is of the E-18, The G and H had different windscreens and panoramic side windows. Some H-18's left the factory with tricycle gear.

I took a lot of pictures of a C-45J, mostly like the D-18S I would guess, including the way the rudders intersect the stabilizer. They are here:

http://www.yolo.net/~jeaton/Propplanes/c45/c45.htm
 
Thanks for the kind comments guys.

(You're both wrong, it's Beck's non-alcoholic.) :D

John, thanks for the link to those wonderful pics. That's how I figured the rudders worked, as seen in a video of a -18 taxiing away from a dock someplace in Northern Ontario. The elevators are similar, there's a fairing on the bottom of the elevator that slides down into the tail cone.
 
Stoney, the three view is of the E-18, The G and H had different windscreens and panoramic side windows. Some H-18's left the factory with tricycle gear.

I took a lot of pictures of a C-45J, mostly like the D-18S I would guess, including the way the rudders intersect the stabilizer. They are here:

http://www.yolo.net/~jeaton/Propplanes/c45/c45.htm

Thanks for the photos John. I just dig the Beech 18 in general.

:popcorn
 
Outstanding work as always Stoney.

Somewhere, someone definitely makes a 1:48 scale dead moose, drunk fisherman and/or frozen porcupine that would very authentic in the cargo area :laugh:

Engines look spot on. I'm going to try to remember the trick using the blue can material for the engine tag.

The engine cowlings and extended floats are a testament to your masterful knowledge of the subject. And the fuselage is a testament to your patience. Little bugger seems to be fighting you.

Impressive all the way around. Looking forward to seeing the final rendering!
 
MP, the 18 and the Twin Bonanza are the only two Beech production twins I don't have time in, up through the B-200 King Air. Well, I guess also the Queen Air, A-100, and the 56TC. I really would have liked to fly the 18, I had an uncle that wore out two of them flying for a construction company.
 
Thanks for the kind comments fellas. Cap, I'm sure someone out there makes 1:48 dead or drunk fauna. If not, Bob's wife is an accomplished sculptress. She built a diorama for that 180 on floats I built for their son. It has a little miniature of their son's dog sitting by the float of the airplane that's heeled in on the marge of Lake Labarge. I'm sure she could easily sculpt a moose. :D

Anyway, on to the seats and stuff. I cut a slice of scrap metal to act as a seat rail, drilled some holes in it to match the spacing of the seat legs and then glued everything in place.
001_zpsmbpewyez.jpg


002_zpsbwtf1lkt.jpg


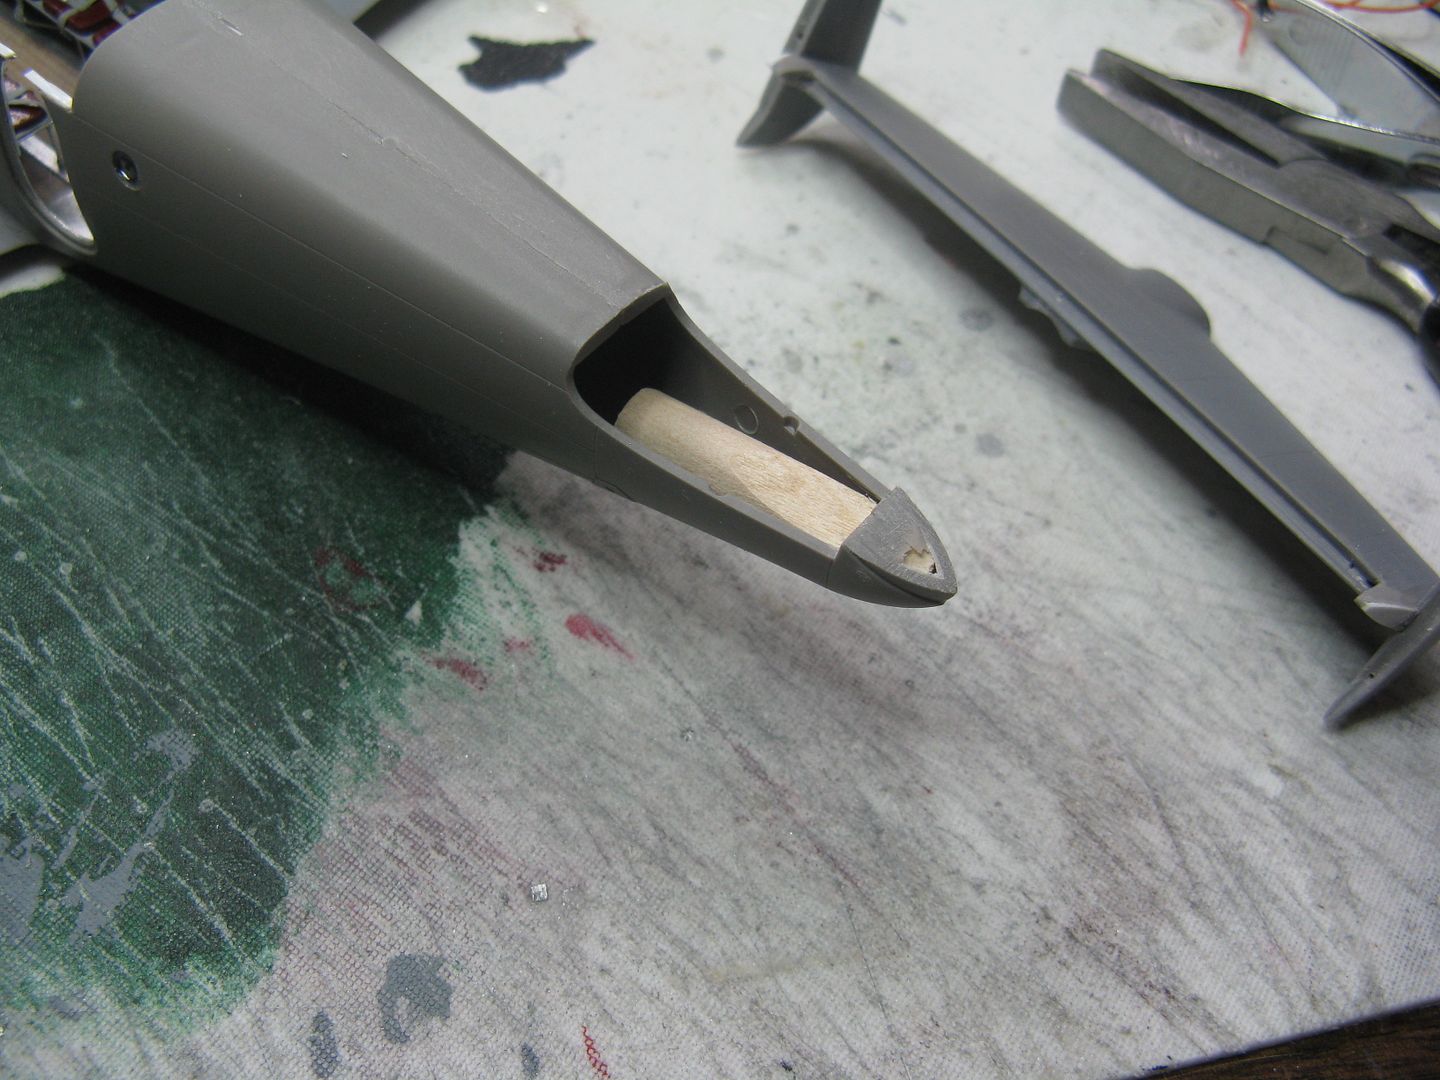
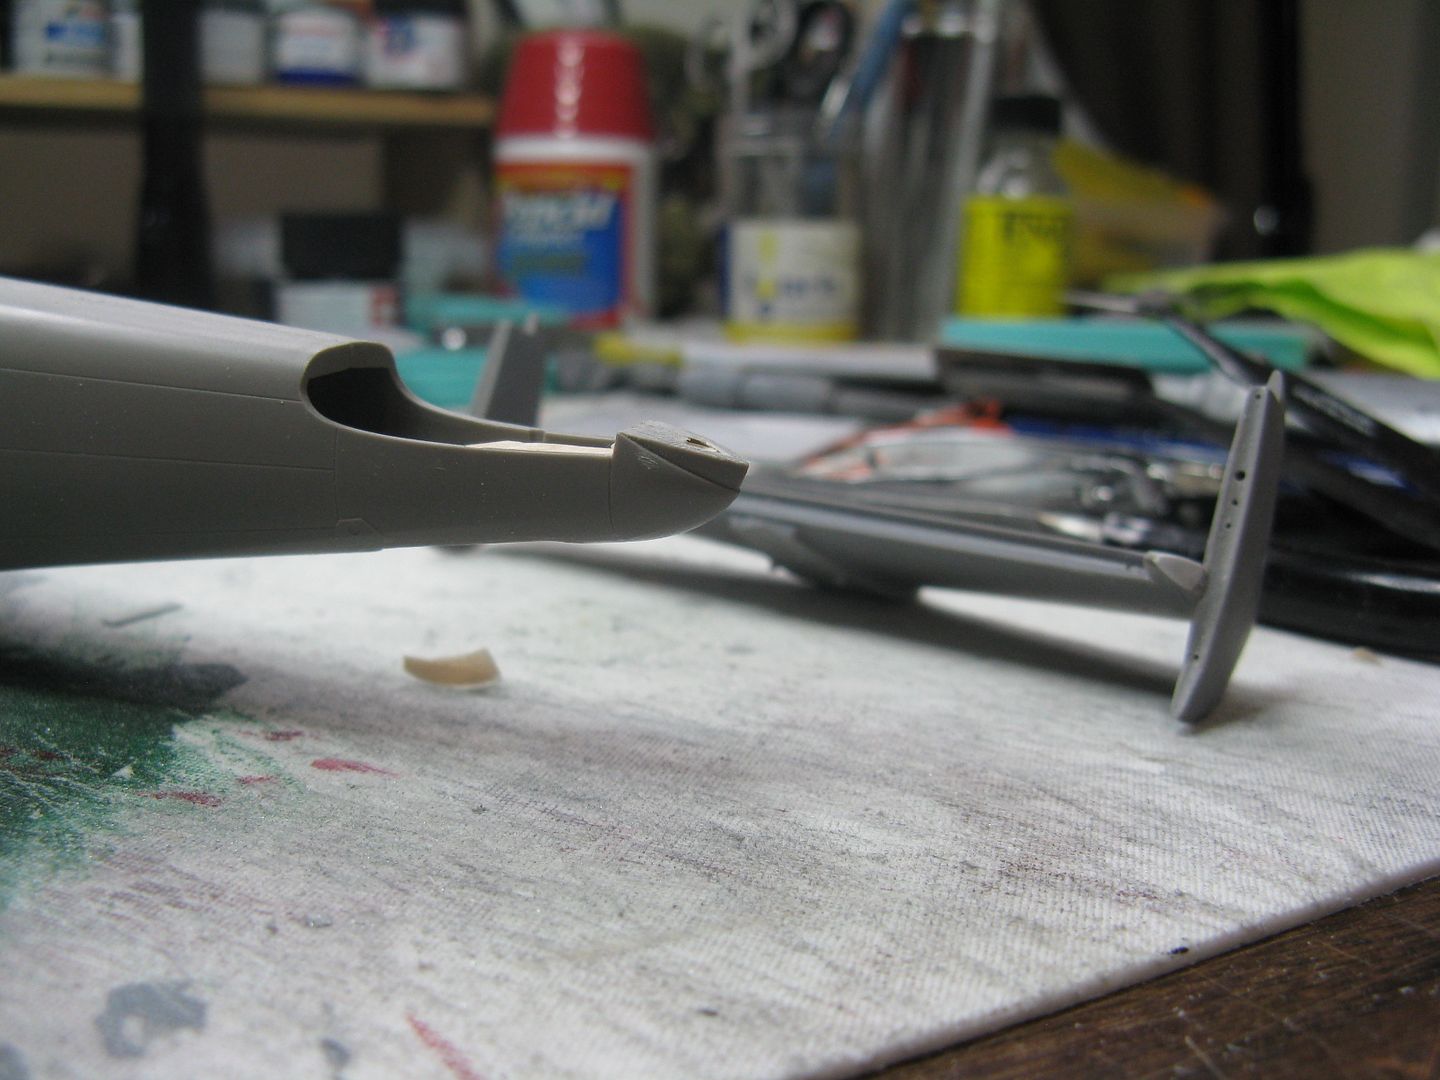
Since the Beech came with a ventral fin on floats, I added a block of wood inside the tail cone to strengthen the points of attachment. The tailwheel doors would have been too flimsy to hold the ventral fin securely by themselves. At the same time I shaved a bit off the tail cone to allow about 10 degrees of down elevator.
004_zpsomxg0kwy.jpg


005_zpsqnxjg87b.jpg


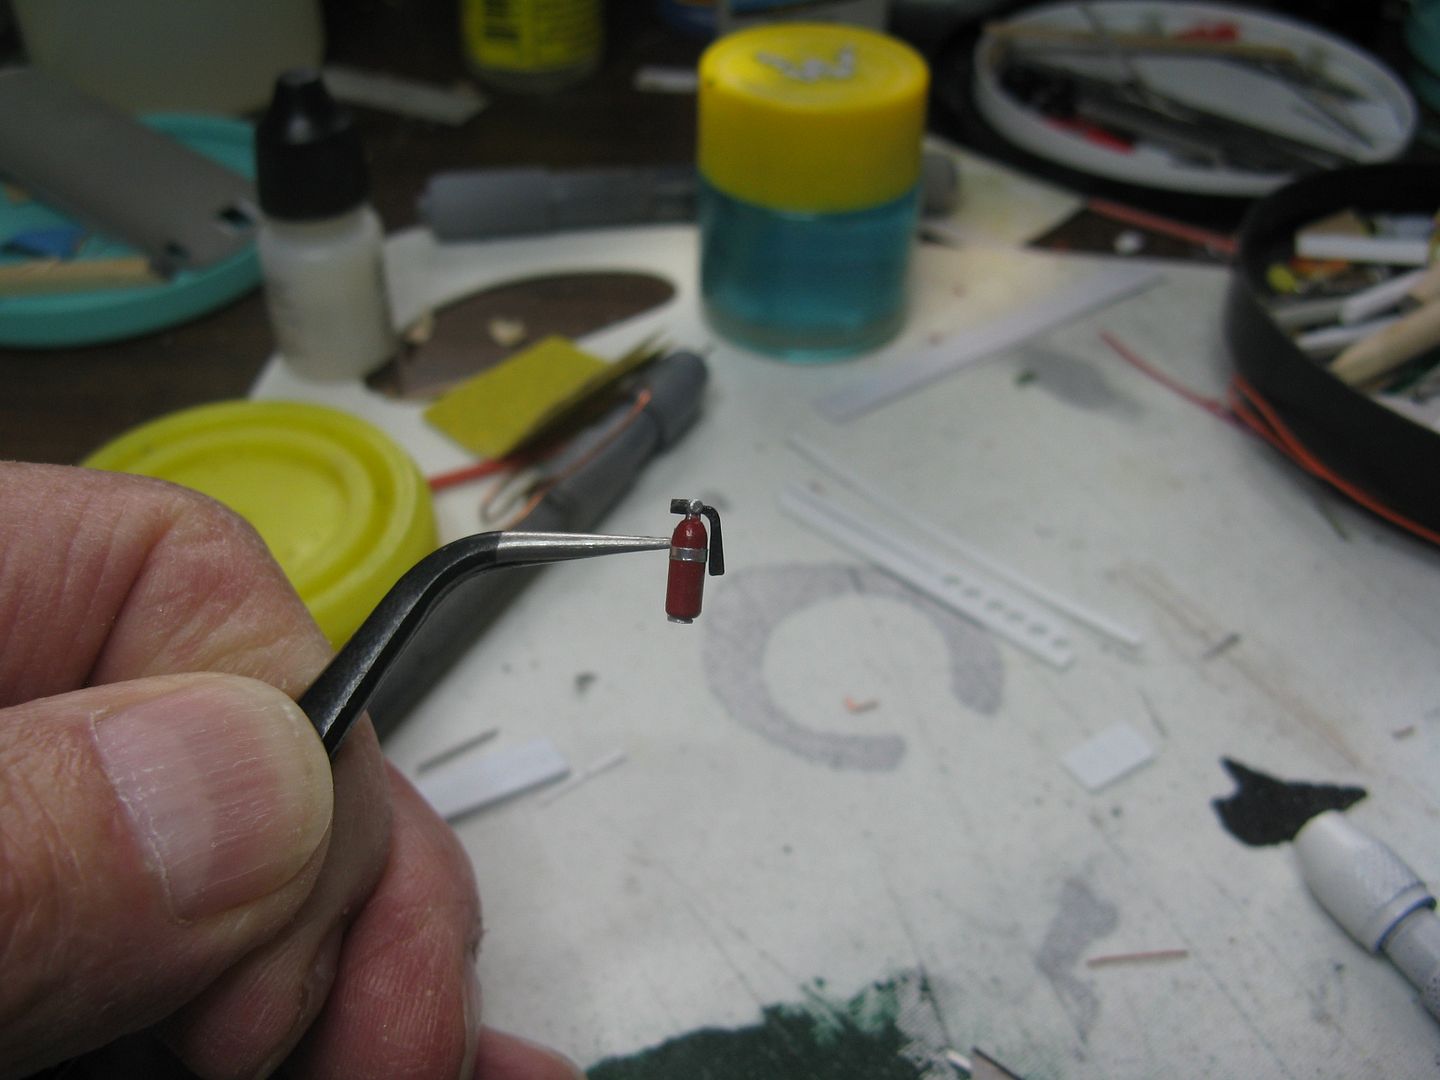
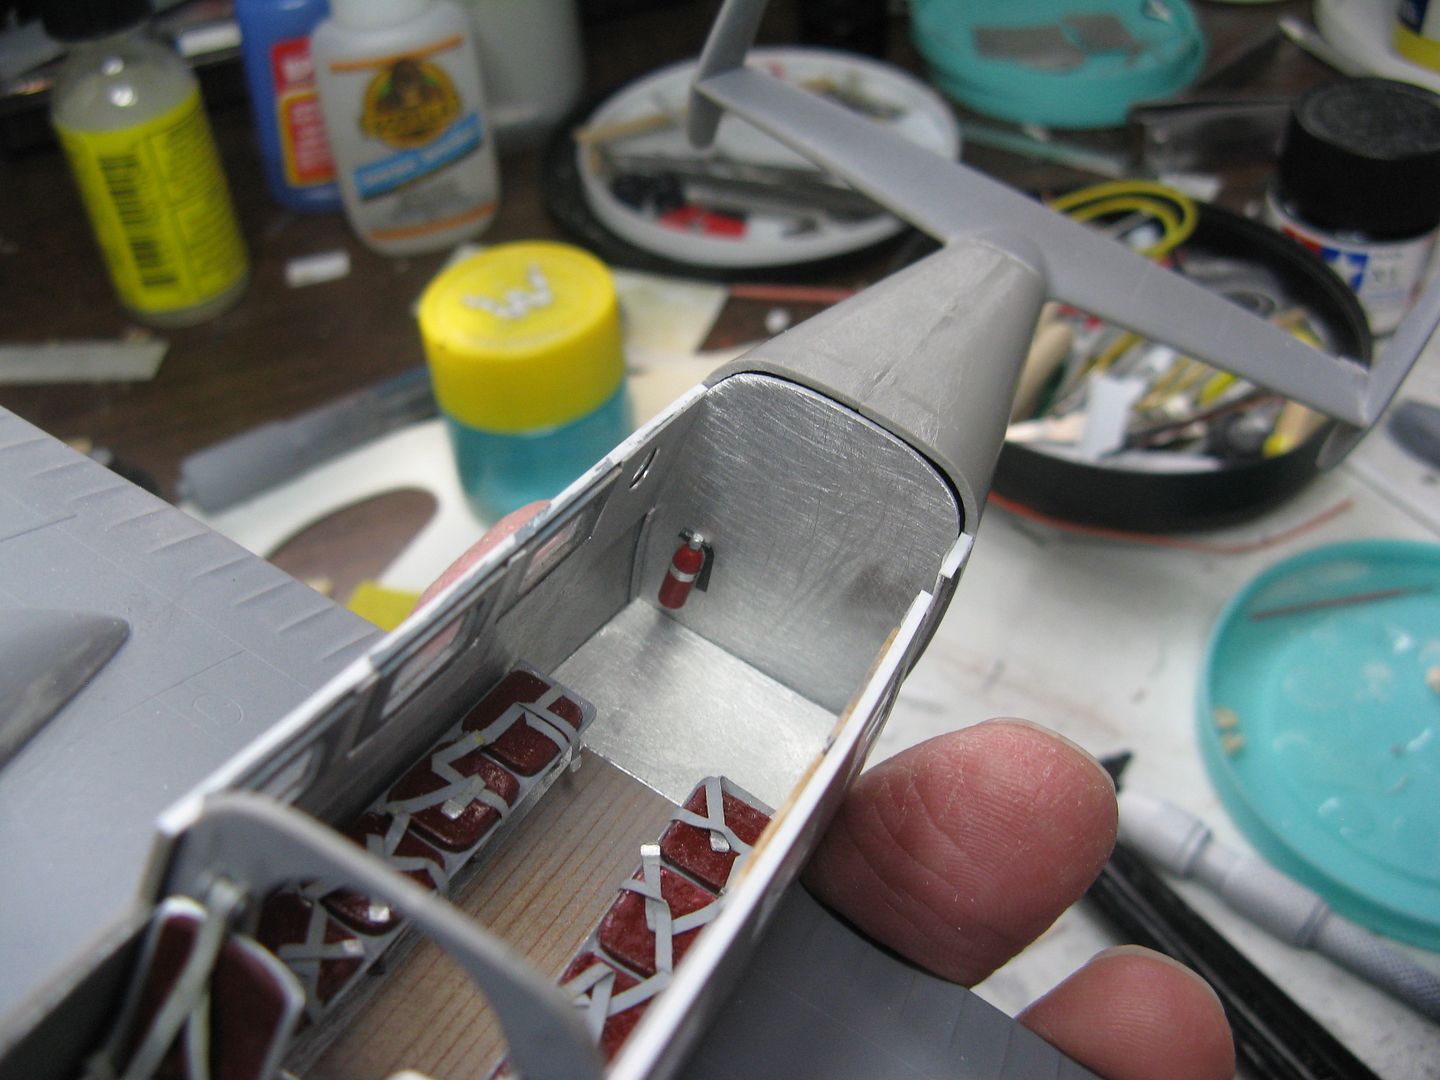
I made a cabin fire extinguisher using a bit of wire and a round toothpick...
008_zpsvcutkwno.jpg


...And attached it to the rear bulkhead.
009_zps0oszle3j.jpg


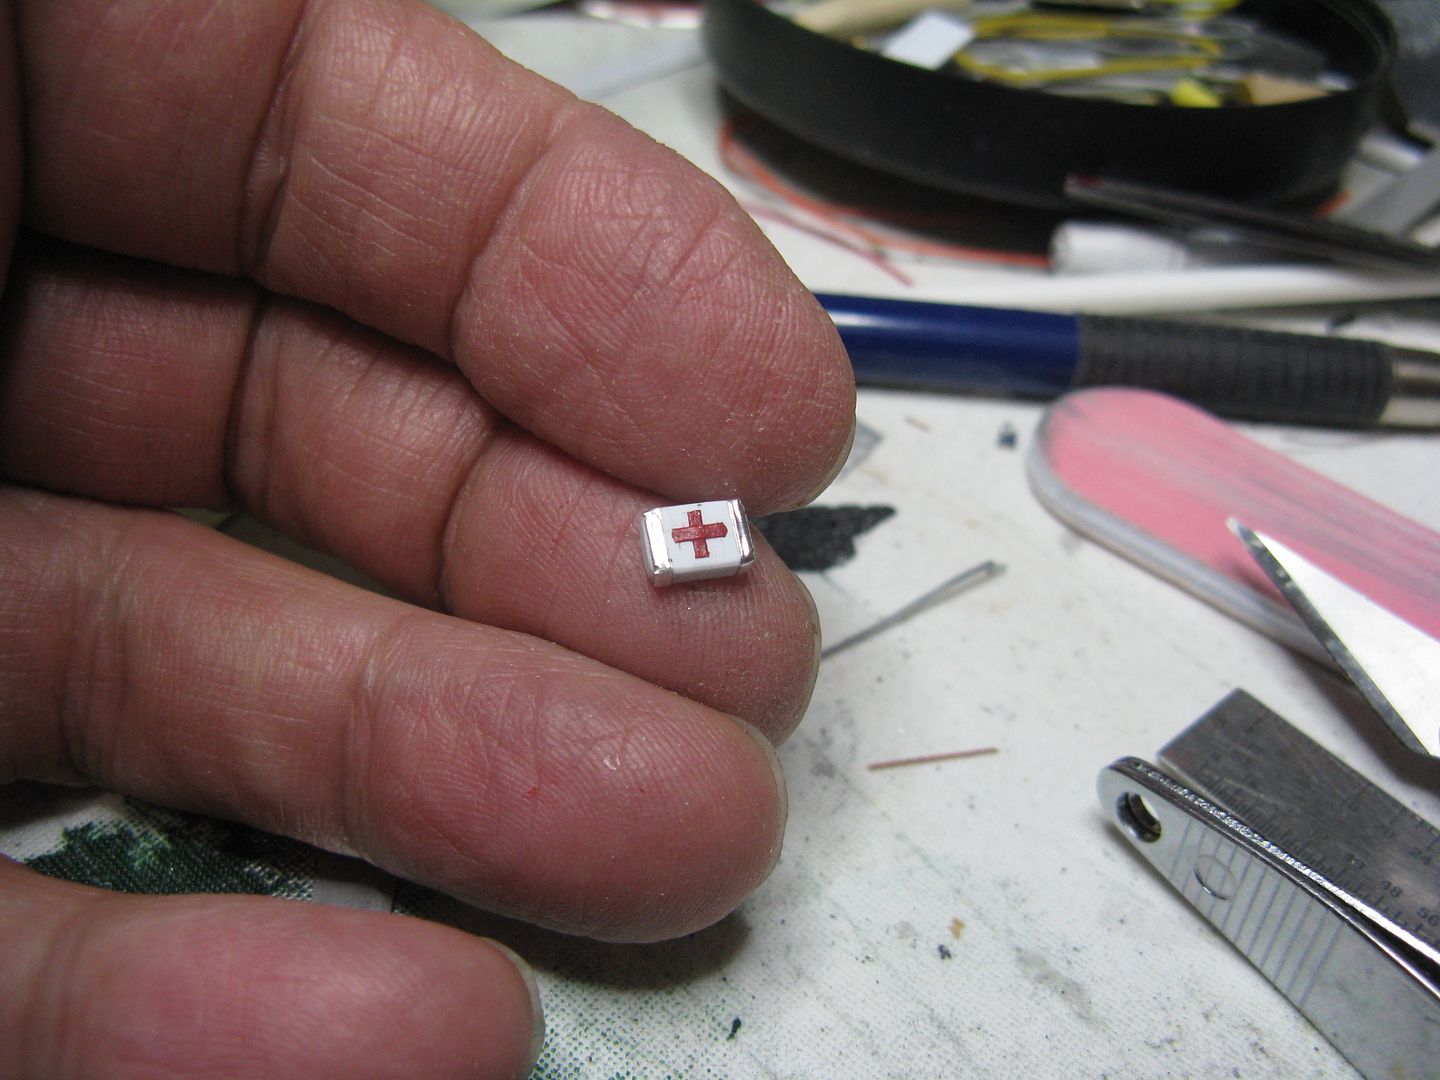
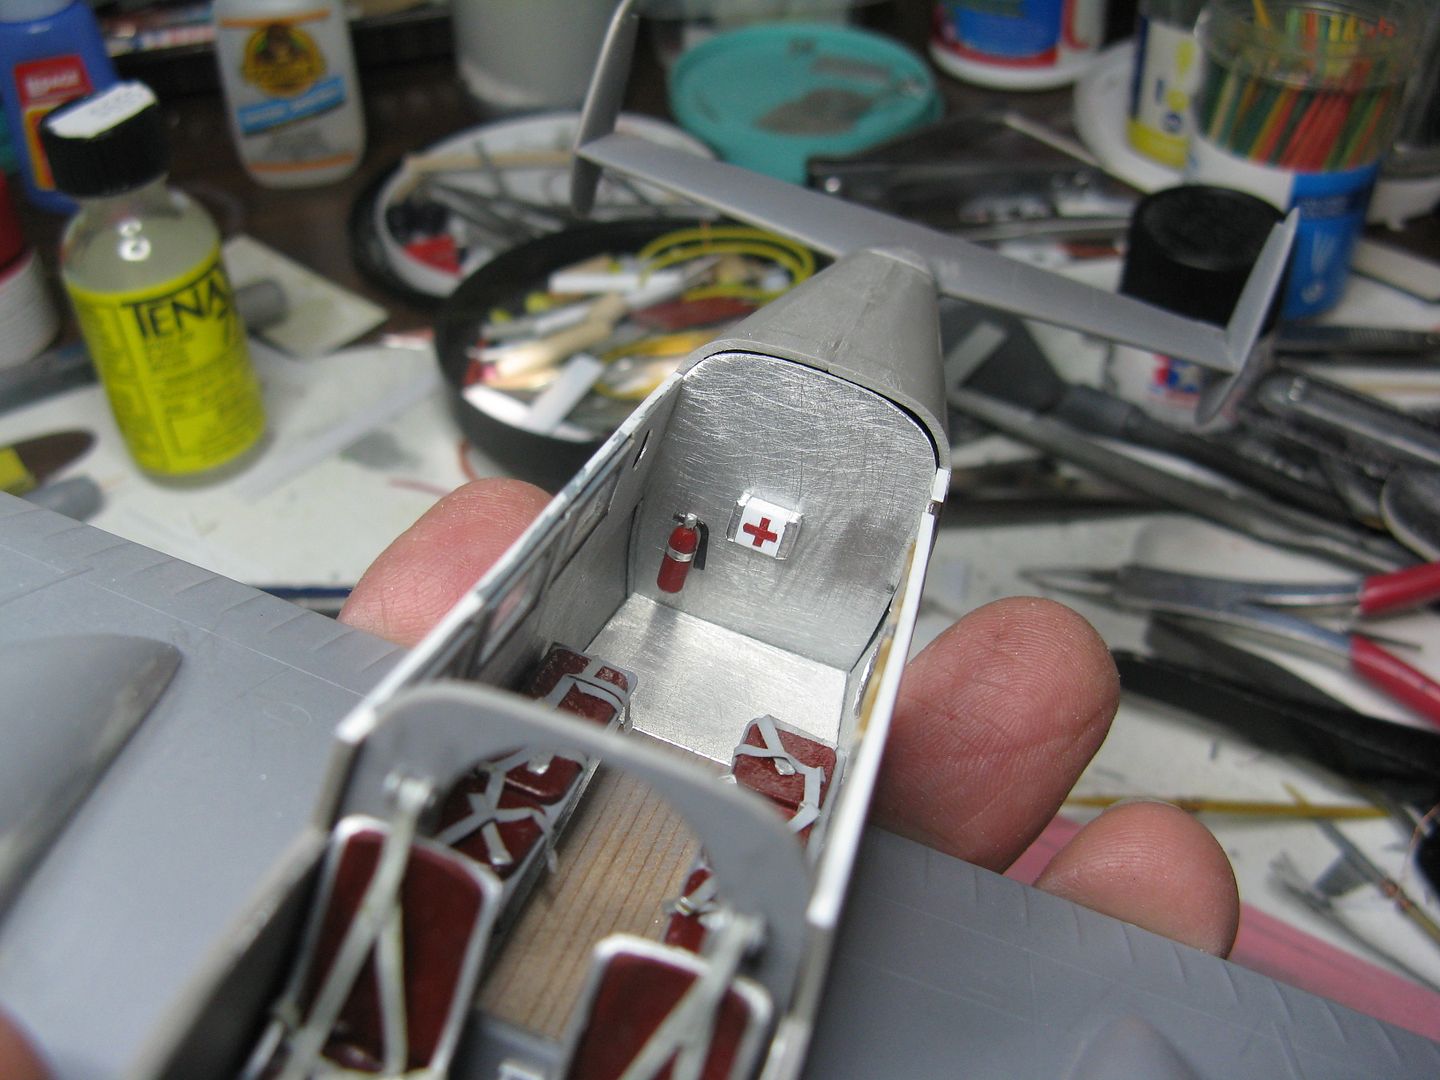
A first aid kit from some scrap plastic and chukw tape...
014_zpsgx95haib.jpg


...Joined the fire extinguisher on the rear bulkhead.
016_zpshba5g4z1.jpg


I was going to add a relief tube back there, but that meant I would have had to add a venturi on the belly, so it went by the board. Brief anecdote. When I was getting my twin rating, back when the buffalo roamed the plains, our local flying club had bought a brand new Aztec as a twin trainer. I was doing an hour of instruction with the Chief Flying Instructor and we had four other passengers with us, all members of the club. This airplane had a relief tube between the front and middle rows of seats. One of the passengers - who had never seen a relief tube in his life - asked the CFI what that thing was for. Jack stuttered a bit, so he said "'Th-that's the intercom, you can t-talk to the pilot." This guy put the thing up to his face and said "Hello" into it a couple of times, then stuck it against his ear waiting for a reply. The rest of us pretty near wet our collective skivvies.

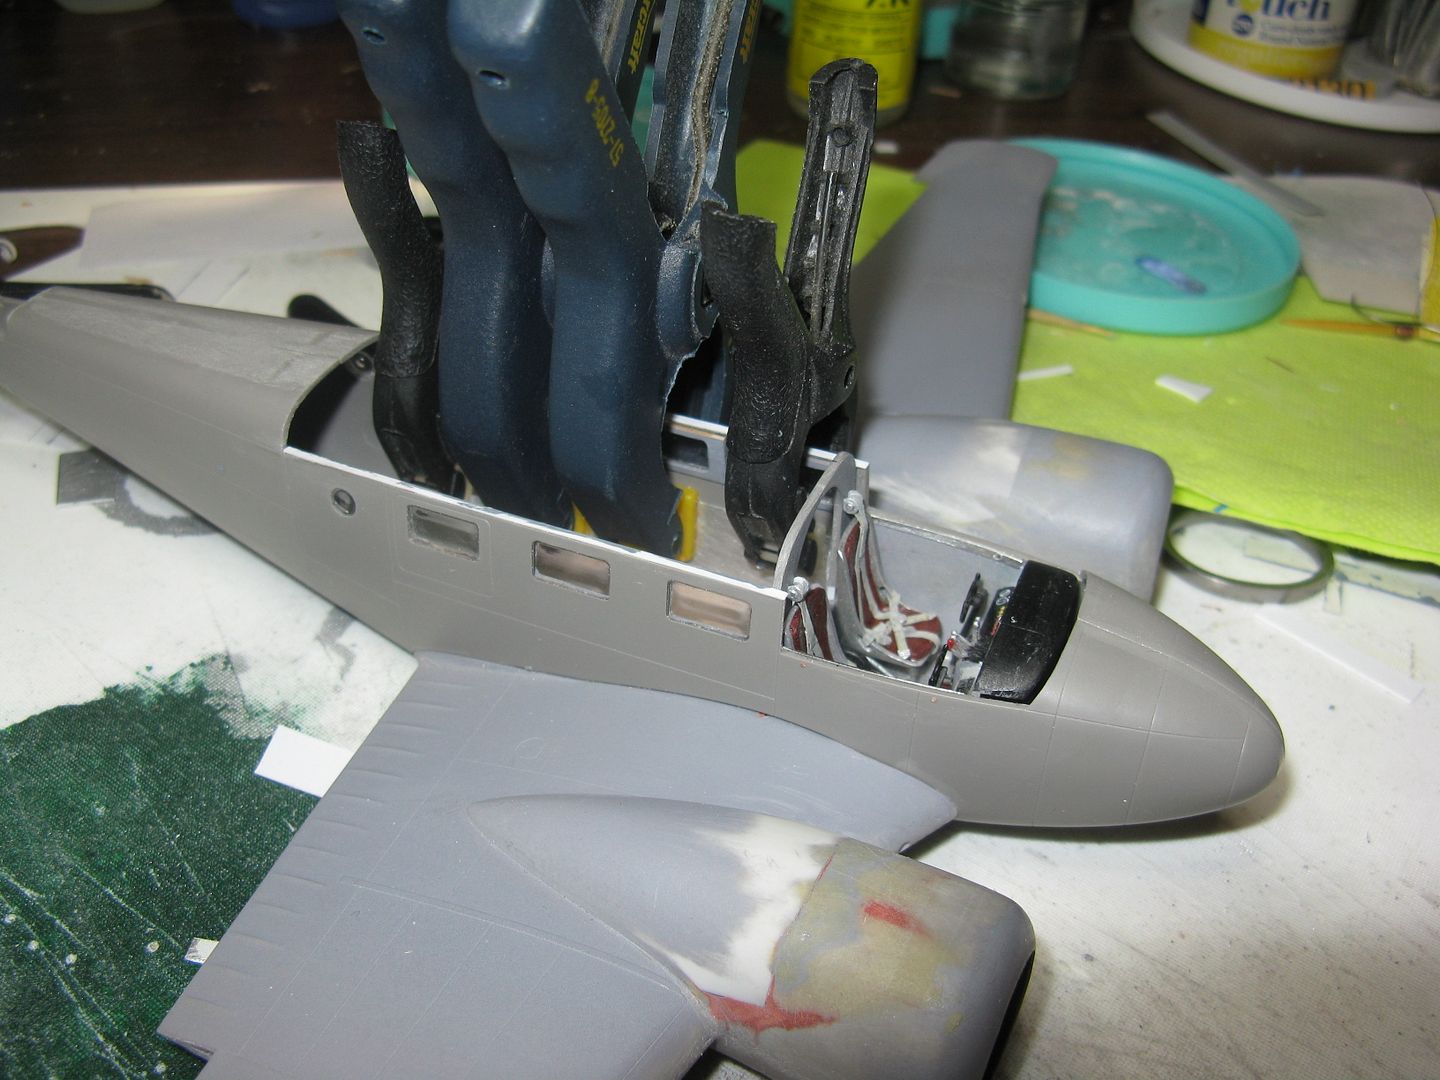
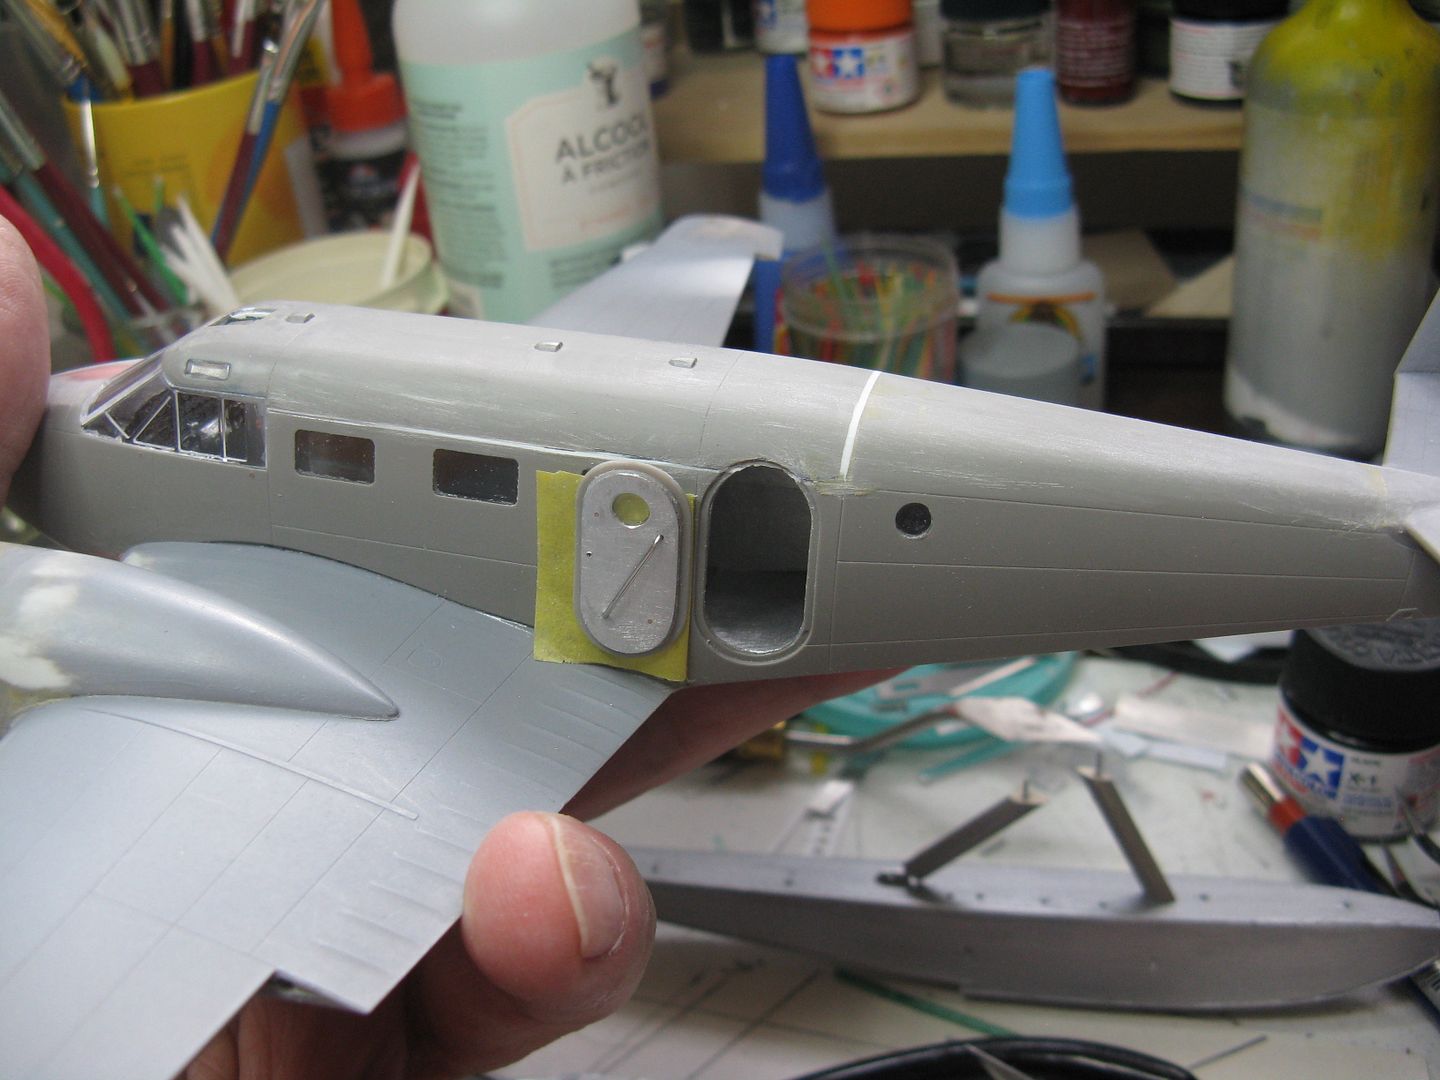
So after all that, I glued the windshield sections in place, then glued on the hardtop, so this is no longer a cabriolet. I added some scrap aluminum to the inside of the door, and added that diagonal whatzis using a piece of ss locking wire.
010_zpsalrkhxfz.jpg


More later on the floats.
 
I considered my self glib, but I confess, this kind of Model-making leaves me speechless!! (Those of you that have met me know that is uncommon!)
Sierra Hotel, Stoney!! :salute
 
Thanks for the kind comments fellas. Cap, I'm sure someone out there makes 1:48 dead or drunk fauna. If not, Bob's wife is an accomplished sculptress. She built a diorama for that 180 on floats I built for their son. It has a little miniature of their son's dog sitting by the float of the airplane that's heeled in on the marge of Lake Labarge. I'm sure she could easily sculpt a moose. :D

Anyway, on to the seats and stuff. I cut a slice of scrap metal to act as a seat rail, drilled some holes in it to match the spacing of the seat legs and then glued everything in place.
001_zpsmbpewyez.jpg


002_zpsbwtf1lkt.jpg


Since the Beech came with a ventral fin on floats, I added a block of wood inside the tail cone to strengthen the points of attachment. The tailwheel doors would have been too flimsy to hold the ventral fin securely by themselves. At the same time I shaved a bit off the tail cone to allow about 10 degrees of down elevator.
004_zpsomxg0kwy.jpg


005_zpsqnxjg87b.jpg


I made a cabin fire extinguisher using a bit of wire and a round toothpick...
008_zpsvcutkwno.jpg


...And attached it to the rear bulkhead.
009_zps0oszle3j.jpg


A first aid kit from some scrap plastic and chukw tape...
014_zpsgx95haib.jpg


...Joined the fire extinguisher on the rear bulkhead.
016_zpshba5g4z1.jpg


I was going to add a relief tube back there, but that meant I would have had to add a venturi on the belly, so it went by the board. Brief anecdote. When I was getting my twin rating, back when the buffalo roamed the plains, our local flying club had bought a brand new Aztec as a twin trainer. I was doing an hour of instruction with the Chief Flying Instructor and we had four other passengers with us, all members of the club. This airplane had a relief tube between the front and middle rows of seats. One of the passengers - who had never seen a relief tube in his life - asked the CFI what that thing was for. Jack stuttered a bit, so he said "'Th-that's the intercom, you can t-talk to the pilot." This guy put the thing up to his face and said "Hello" into it a couple of times, then stuck it against his ear waiting for a reply. The rest of us pretty near wet our collective skivvies.

So after all that, I glued the windshield sections in place, then glued on the hardtop, so this is no longer a cabriolet. I added some scrap aluminum to the inside of the door, and added that diagonal whatzis using a piece of ss locking wire.
010_zpsalrkhxfz.jpg


More later on the floats.


All I can say is.. :notworthy :notworthy
 
Back
Top