
HK Models 1/32 Meteor F4
History
The Gloster Meteor was the first and only operational jet fighter to actually enter combat in WWII for the Allies. Its first flight occurred in March of 1943 and by July of 1944 the first production Meteor, the F1, went into service. They were relatively successful in downing V1 rockets. The F1 was replaced by the F3 which had Rolls Royce engines, a revised canopy style and increased fuel capacity. 210 F3's were produced The F3's were introduced on the Belgium front in January of 1945 to intercept the Me 262, however by that time the Luftwaffe was sufficiently weakened that the F3's never engaged the 262 in combat. They were mostly used in reconnaissance and air to ground support activities. With its ejection seat and other modern features it served as a basis for development of post war British jets. The F4 variant featured clipped wings, longer cord intakes, improved engines, a stronger airframe, fully pressurized cockpit, lighter ailerons (to improve manoeuvrability), and rudder trim adjustments to reduce snaking. It was also the first version to be exported. The F4 did not go into production until 1946.
The Kit
------------------------------------
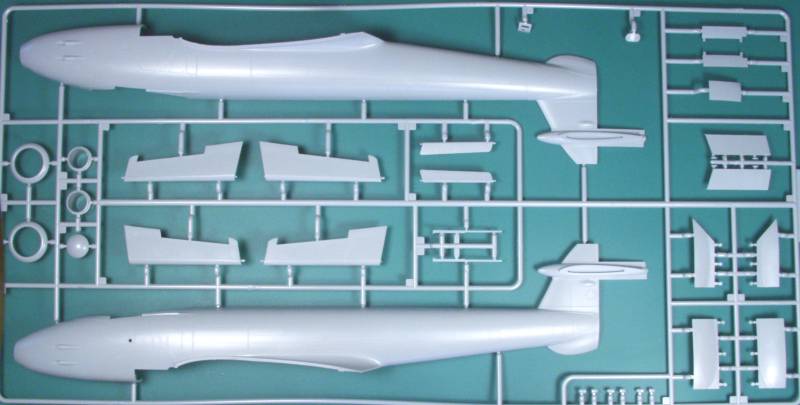
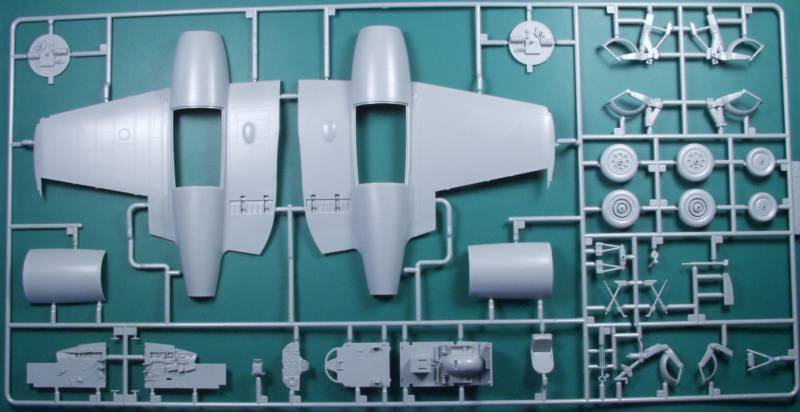
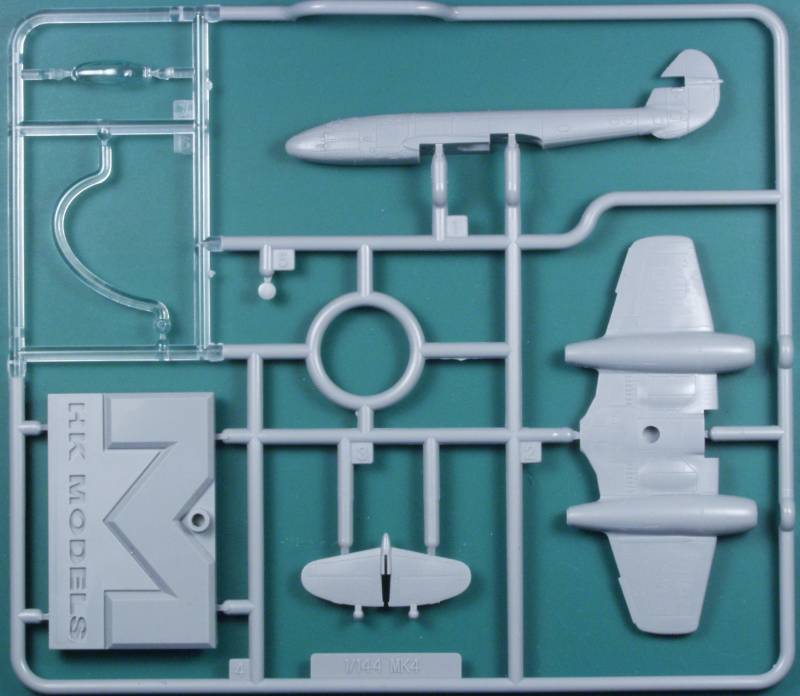
The HK Models Meteor F4 comes in a rather large tray type top open box. The bottom of the box is corrugated and there is a folded corrugated stiffener across the center of the box to provide extra protection for the parts inside. Inside the box are three large sprues molded in light gray and individually bagged. There is also small sprue of clear parts and one small sprue that appears to be some parts that got left off the other sprues as it only contains the intake splitters and two antenna. At least in the first release of the kit there is another bag containing a 1/144 scale kit of the Meteor. The bags are all resealable which I find nice as I can open them for review purposes and seal them back up to prevent parts loss. The kit features recessed panel lines, fastener and rivet detail. The screw type fasteners have screwdriver slots in them. These are quite fine, more so than many 1/48 scale kits. The surface is semi gloss in appearance. I found no sink marks or other deformities on any of the airframe parts. The flight control surfaces are all separate as are the speed brakes which fit into a recesses on the upper and lower wings. The upper wings feature separate engine covers but the kit supplies no engines underneath. Perhaps for a later version or an invitation to the after market folks. Ejector pin marks are only found on the inside of the flaps. I found only the slightest amount of flash on a few parts. Parting line seams were minimal. The main gear bays have structural detail but little else so they will be fertile ground for those who like adding more detail. The cockpit is also rather simplified for the scale consisting of a multi piece tub with nearly all the parts molded on the side walls. The instrument panel looks pretty good to me with raised bezels and internal instrument detail. The landing gear looks nicely done, the wheels are molded in halves and the main gear wheels are weighted. The engine situation is a bit bleak, there is a splitter and backing plate for the intake side (Note: this is a centrifugal turbine engine so you are not looking into the front of a turbine like on an axial flow engine) and a tailpipe for the exhaust end. A weight is supplied to keep the nose on the ground. Like many newer kits most of the airframe parts have their sprue attachment points on the mating surface so that a slip while removing them will not mar the outer surface. OK, so lets look at the sprues...
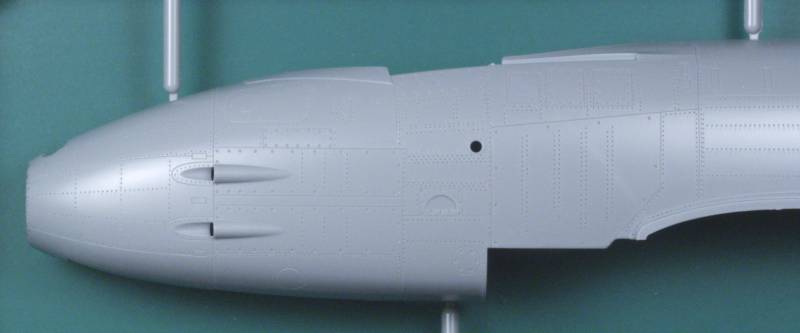
This photo illustrates the nice fine surface detail.
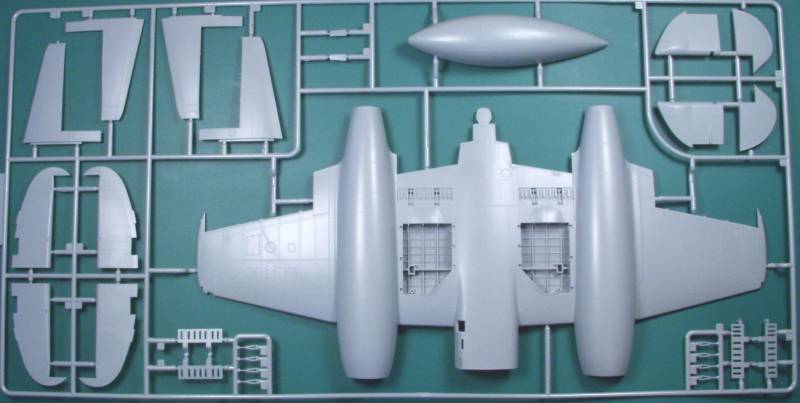
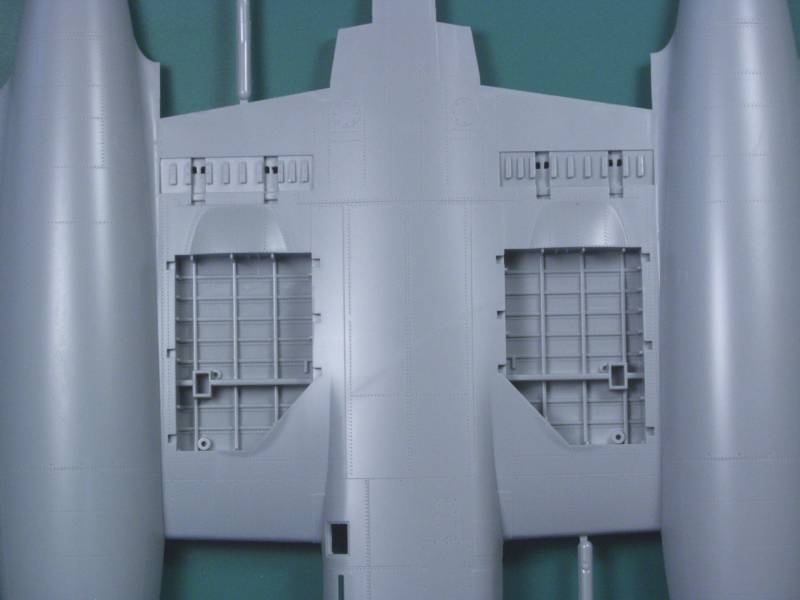
A closer look at the gear bays and bottom detail of the wing. Although not shown both the top and bottom wings have strengthening ribs molded inside to keep them from bowing or warping.
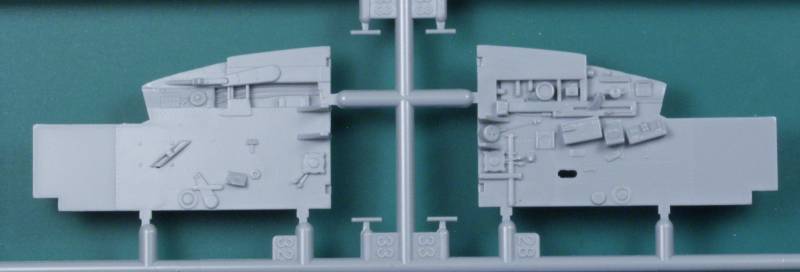
A close up of the cockpit side walls.
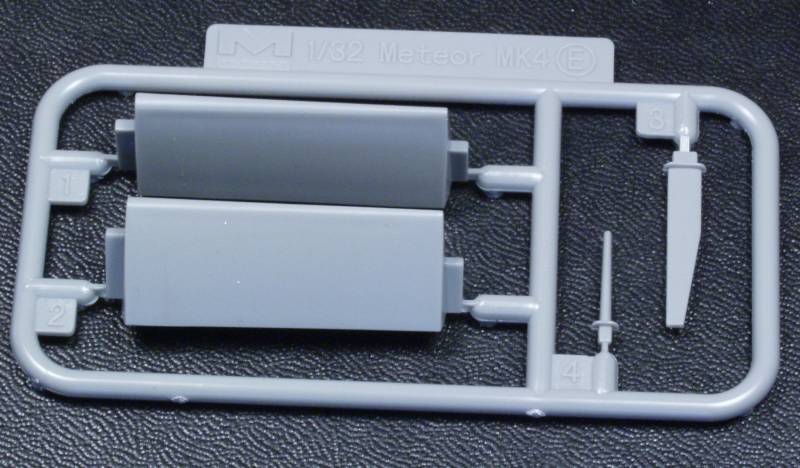
The intake splitters and antennas.
The supplied nose weight.

The mini me 144 scale Meteor. Though it doesn't show that well in the photo the mini kit has an amazing amount of surface detail and includes a stand.
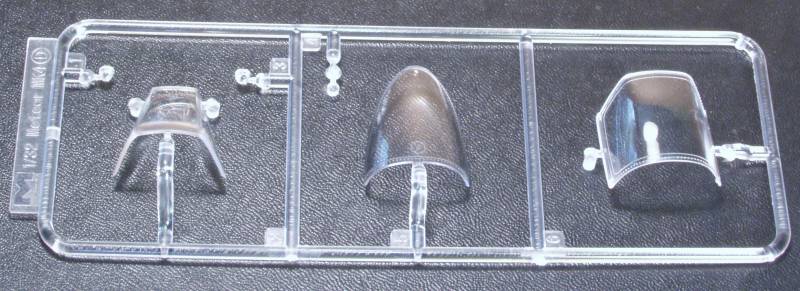
The clear parts are thin and clear with nicely defined frame lines, the only other clear parts are a tail light and wingtip light lenses.
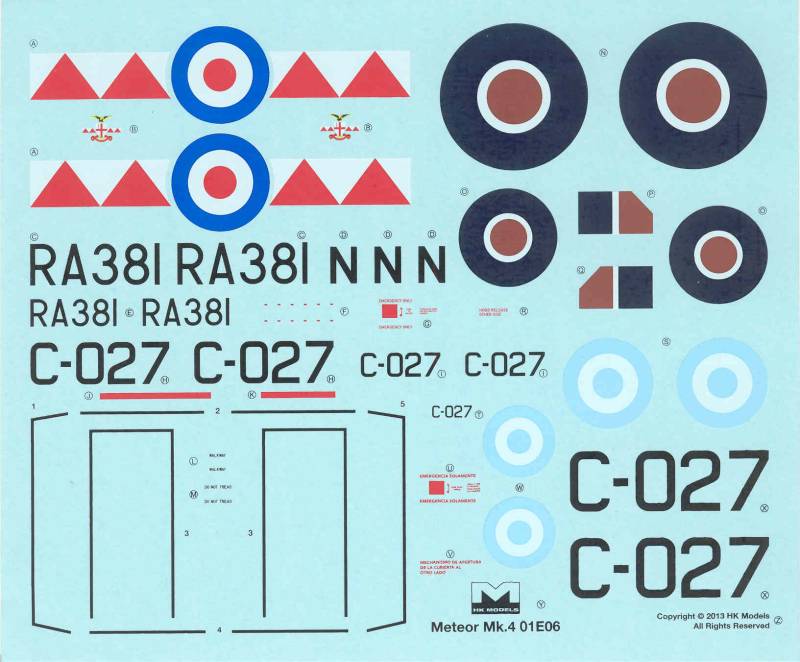
The decals are thin and appear to be opaque with minimal extra clear film and feature markings for two aircraft, one British and one Argentine.
The instructions are printed on slick stock and are in a large booklet form almost 10"x 14" in size and is 12 pages long. Included is a very brief history, some assembly tips, an icon chart, parts map and color chart with generic color names, FS numbers where applicable, Hobby Color and Tamiya paint numbers. The assembly is broken down into 16 steps and there is a page with front, rear, both sides and top and bottom line drawings. One page each is devoted to paint and markings of the two supplied schemes.
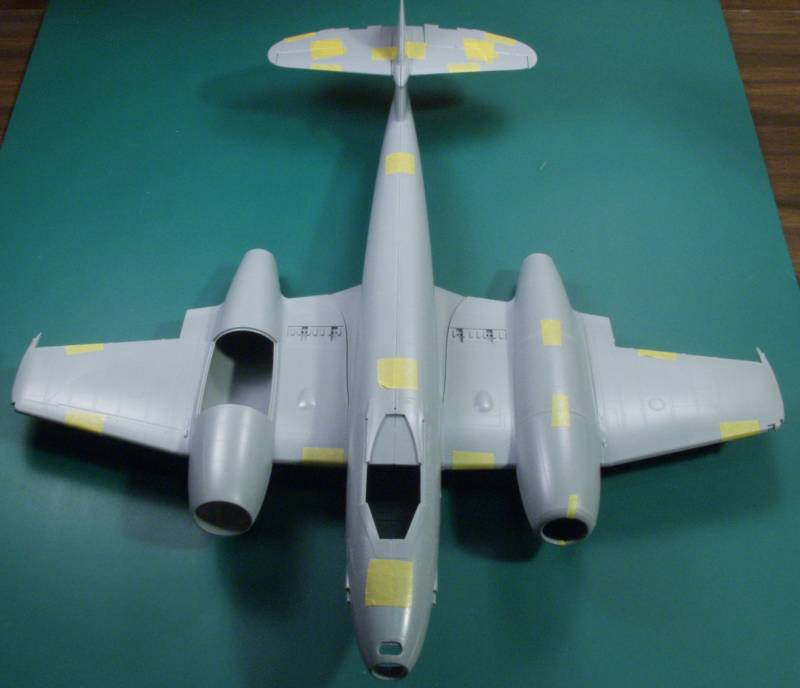
So how do things fit together ? Overall it looks pretty good. Here is an over view...
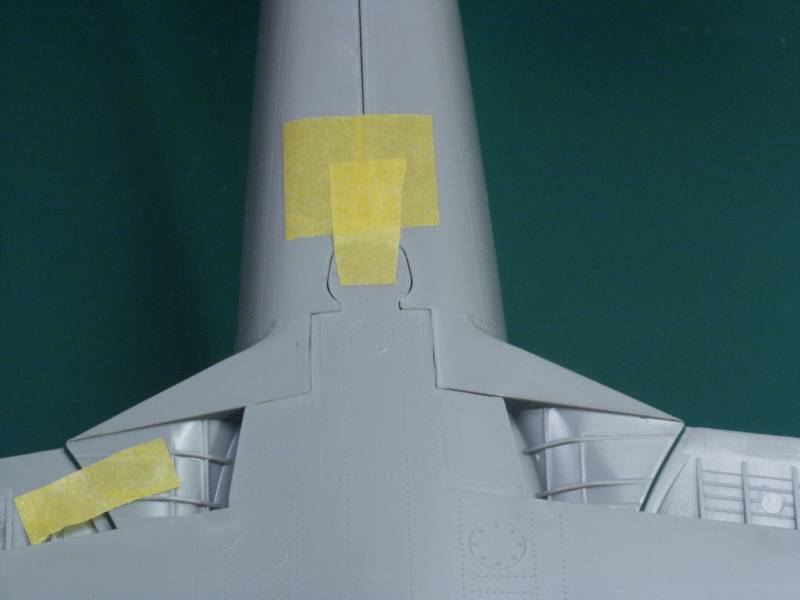
The tail planes were fiddly to keep in position for a test fit as the tongue on the part was not a tight fit in the slot on the fin. The fit to the fin was good so this shouldn't be a problem during assembly, shown below are the fit shots from above. I didn't take a shot from below but the fit there was equally good.
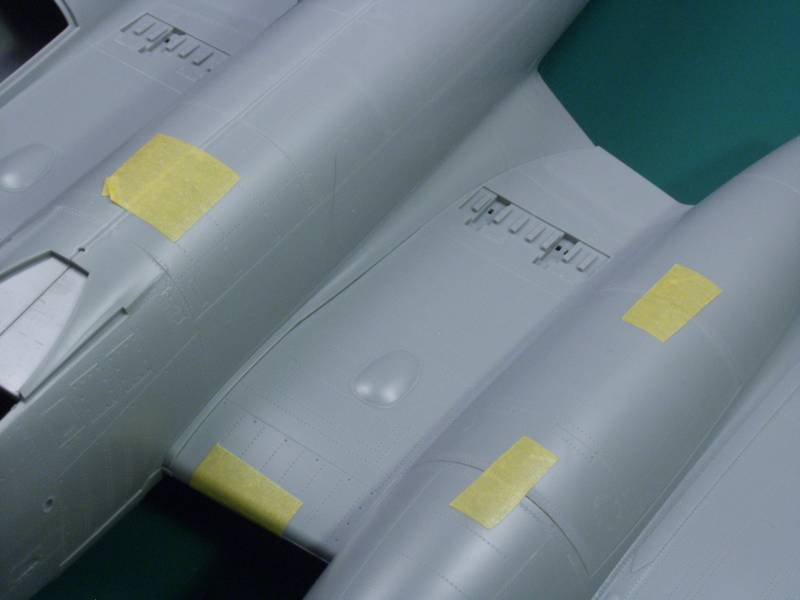
One area I was concerned about was the fit of the engine cover on the wing however my worry was not justified as they fit quite nicely...

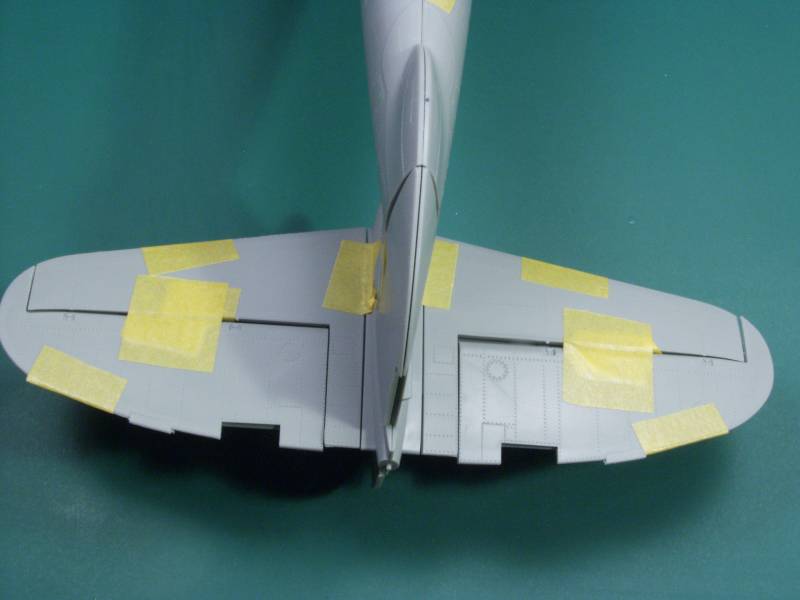
The wing to fuselage joins were another area that was difficult to do as a test fit, had I had four hands, three to hold the parts and one to operate the camera it would have been easy. In any event here a photo, the fit should be good if held in position while gluing.
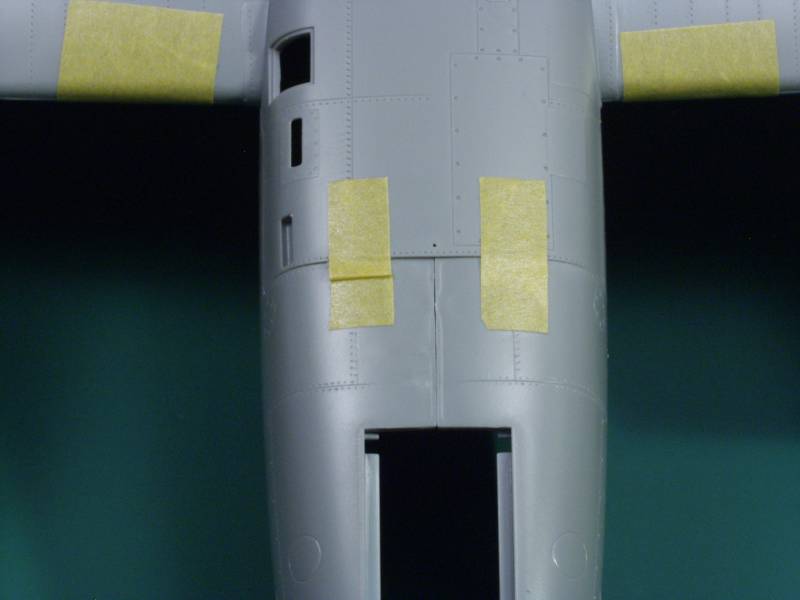
The forward bottom wing to fuselage join, not perfect but again I think it will be better when glued...
The rear bottom wing to fuselage fit...
One of the few complaints from the accuracy zealots has been the shape of forward part of the engine cowlings. It probably wouldn't have been an issue for me but Fisher Models came out with a replacement set and since I had never sampled any of their products I ordered a set. While I can see the difference I'm still not sure it would bother me enough to replace them. Shown below are a couple of comparison photos...
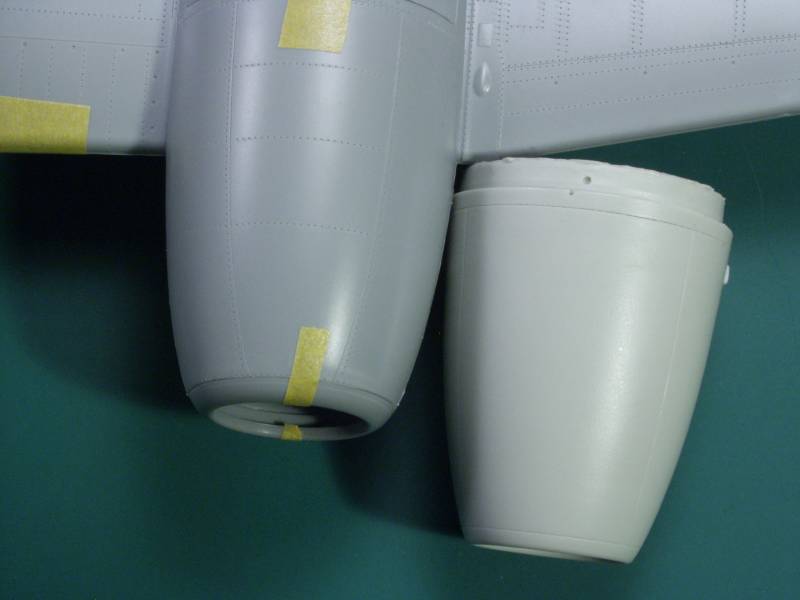
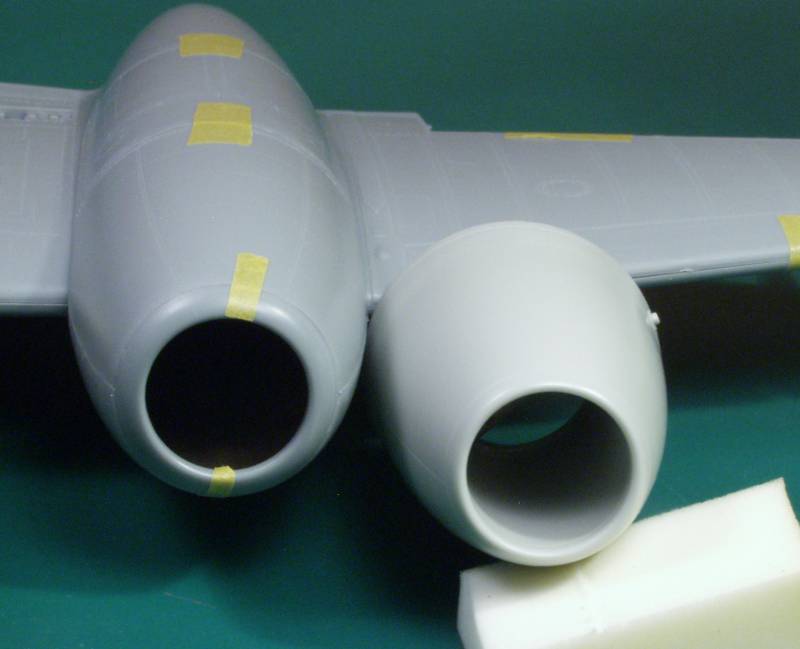
The replacement cowlings have the forward cowl ring as an integral part whereas the kit has a separate part. The replacement part also has the internal splitter molded as part of the cowling and intake trunking, something the kit does not have. It also features a couple of details the kit lacks. The down sides are the cutting required to fit them, not all that hard but care must be used to ensure a good fit and the replacement parts lack the rivet detail to match the rest of the kit. It will be up to the individual as to whether these need to be used.
Conclusion
My 2¢ worth...This is my first sampling of a HK Models kit and my impressions of it are favorable. I will not likely acquire any of their other current kits as for me they would be too large to display. The kits surface detail and fit are quite nice and I don't see any reason why it won't build up into a nice representation of the Meteor right from the box. Other than the cowling issue, the biggest complaint from the modeling public seems to be price. Many seem to think that for the price the detail level should have been higher. I paid $85 for mine from Sprue Brothers and didn't think that was all that out of line for a kit this size. I have certainly spent more and got less with other kits. I do think the cockpit could use more detail and while I'm not a big fan of engines that will disappear when installed I think a bit more detail on the intake and exhaust ends of the engine would have been nice but I suspect in time there will be loads of after market goodies for us to spend our hard earned dollars on.
History
The Gloster Meteor was the first and only operational jet fighter to actually enter combat in WWII for the Allies. Its first flight occurred in March of 1943 and by July of 1944 the first production Meteor, the F1, went into service. They were relatively successful in downing V1 rockets. The F1 was replaced by the F3 which had Rolls Royce engines, a revised canopy style and increased fuel capacity. 210 F3's were produced The F3's were introduced on the Belgium front in January of 1945 to intercept the Me 262, however by that time the Luftwaffe was sufficiently weakened that the F3's never engaged the 262 in combat. They were mostly used in reconnaissance and air to ground support activities. With its ejection seat and other modern features it served as a basis for development of post war British jets. The F4 variant featured clipped wings, longer cord intakes, improved engines, a stronger airframe, fully pressurized cockpit, lighter ailerons (to improve manoeuvrability), and rudder trim adjustments to reduce snaking. It was also the first version to be exported. The F4 did not go into production until 1946.
The Kit
------------------------------------
The HK Models Meteor F4 comes in a rather large tray type top open box. The bottom of the box is corrugated and there is a folded corrugated stiffener across the center of the box to provide extra protection for the parts inside. Inside the box are three large sprues molded in light gray and individually bagged. There is also small sprue of clear parts and one small sprue that appears to be some parts that got left off the other sprues as it only contains the intake splitters and two antenna. At least in the first release of the kit there is another bag containing a 1/144 scale kit of the Meteor. The bags are all resealable which I find nice as I can open them for review purposes and seal them back up to prevent parts loss. The kit features recessed panel lines, fastener and rivet detail. The screw type fasteners have screwdriver slots in them. These are quite fine, more so than many 1/48 scale kits. The surface is semi gloss in appearance. I found no sink marks or other deformities on any of the airframe parts. The flight control surfaces are all separate as are the speed brakes which fit into a recesses on the upper and lower wings. The upper wings feature separate engine covers but the kit supplies no engines underneath. Perhaps for a later version or an invitation to the after market folks. Ejector pin marks are only found on the inside of the flaps. I found only the slightest amount of flash on a few parts. Parting line seams were minimal. The main gear bays have structural detail but little else so they will be fertile ground for those who like adding more detail. The cockpit is also rather simplified for the scale consisting of a multi piece tub with nearly all the parts molded on the side walls. The instrument panel looks pretty good to me with raised bezels and internal instrument detail. The landing gear looks nicely done, the wheels are molded in halves and the main gear wheels are weighted. The engine situation is a bit bleak, there is a splitter and backing plate for the intake side (Note: this is a centrifugal turbine engine so you are not looking into the front of a turbine like on an axial flow engine) and a tailpipe for the exhaust end. A weight is supplied to keep the nose on the ground. Like many newer kits most of the airframe parts have their sprue attachment points on the mating surface so that a slip while removing them will not mar the outer surface. OK, so lets look at the sprues...
This photo illustrates the nice fine surface detail.
A closer look at the gear bays and bottom detail of the wing. Although not shown both the top and bottom wings have strengthening ribs molded inside to keep them from bowing or warping.
A close up of the cockpit side walls.
The intake splitters and antennas.
The supplied nose weight.
The mini me 144 scale Meteor. Though it doesn't show that well in the photo the mini kit has an amazing amount of surface detail and includes a stand.
The clear parts are thin and clear with nicely defined frame lines, the only other clear parts are a tail light and wingtip light lenses.
The decals are thin and appear to be opaque with minimal extra clear film and feature markings for two aircraft, one British and one Argentine.
The instructions are printed on slick stock and are in a large booklet form almost 10"x 14" in size and is 12 pages long. Included is a very brief history, some assembly tips, an icon chart, parts map and color chart with generic color names, FS numbers where applicable, Hobby Color and Tamiya paint numbers. The assembly is broken down into 16 steps and there is a page with front, rear, both sides and top and bottom line drawings. One page each is devoted to paint and markings of the two supplied schemes.
So how do things fit together ? Overall it looks pretty good. Here is an over view...
The tail planes were fiddly to keep in position for a test fit as the tongue on the part was not a tight fit in the slot on the fin. The fit to the fin was good so this shouldn't be a problem during assembly, shown below are the fit shots from above. I didn't take a shot from below but the fit there was equally good.
One area I was concerned about was the fit of the engine cover on the wing however my worry was not justified as they fit quite nicely...
The wing to fuselage joins were another area that was difficult to do as a test fit, had I had four hands, three to hold the parts and one to operate the camera it would have been easy. In any event here a photo, the fit should be good if held in position while gluing.
The forward bottom wing to fuselage join, not perfect but again I think it will be better when glued...
The rear bottom wing to fuselage fit...
One of the few complaints from the accuracy zealots has been the shape of forward part of the engine cowlings. It probably wouldn't have been an issue for me but Fisher Models came out with a replacement set and since I had never sampled any of their products I ordered a set. While I can see the difference I'm still not sure it would bother me enough to replace them. Shown below are a couple of comparison photos...
The replacement cowlings have the forward cowl ring as an integral part whereas the kit has a separate part. The replacement part also has the internal splitter molded as part of the cowling and intake trunking, something the kit does not have. It also features a couple of details the kit lacks. The down sides are the cutting required to fit them, not all that hard but care must be used to ensure a good fit and the replacement parts lack the rivet detail to match the rest of the kit. It will be up to the individual as to whether these need to be used.
Conclusion
My 2¢ worth...This is my first sampling of a HK Models kit and my impressions of it are favorable. I will not likely acquire any of their other current kits as for me they would be too large to display. The kits surface detail and fit are quite nice and I don't see any reason why it won't build up into a nice representation of the Meteor right from the box. Other than the cowling issue, the biggest complaint from the modeling public seems to be price. Many seem to think that for the price the detail level should have been higher. I paid $85 for mine from Sprue Brothers and didn't think that was all that out of line for a kit this size. I have certainly spent more and got less with other kits. I do think the cockpit could use more detail and while I'm not a big fan of engines that will disappear when installed I think a bit more detail on the intake and exhaust ends of the engine would have been nice but I suspect in time there will be loads of after market goodies for us to spend our hard earned dollars on.