
(Shortly variant) We will be utilizing a special paintig kit conceived for painting winter camouflage on german tanks.
Why?Because the colors are already prepared and avoid to make savant mixtures,and finally you had no idea why your model refused stubbornly to look like the ones you were admiring in the catalogues or magazines....
And is more easy...with some special effect and tricks.
1.
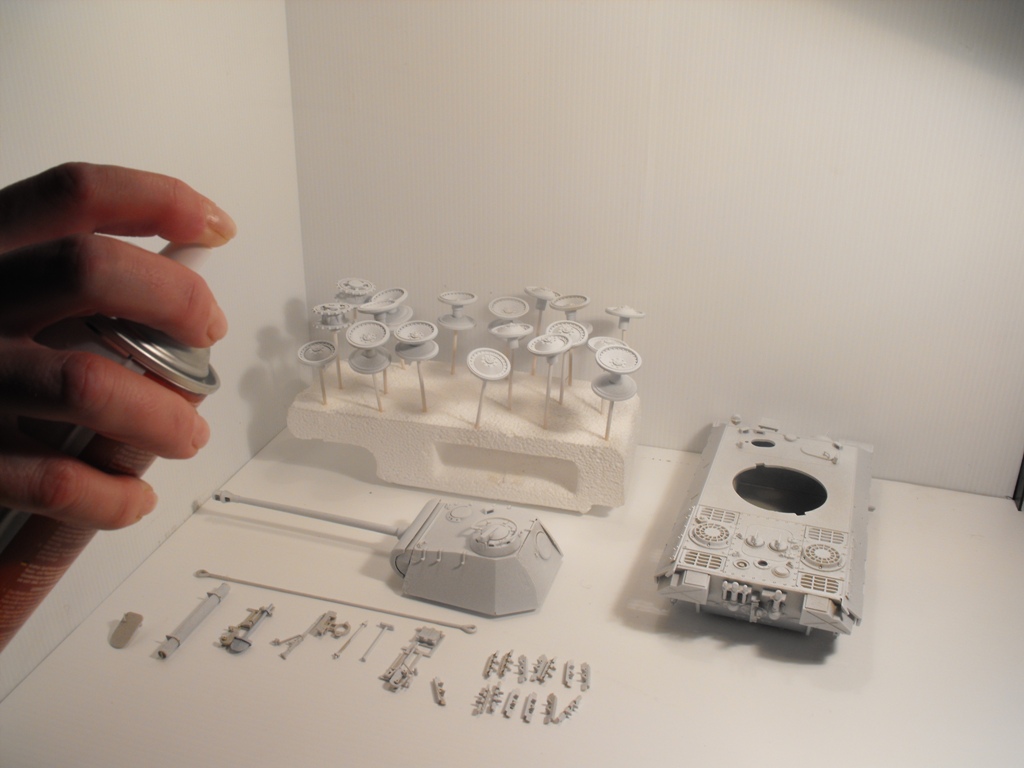
Normally,the first step consists in applying a coat of paint using a spray.
2/3
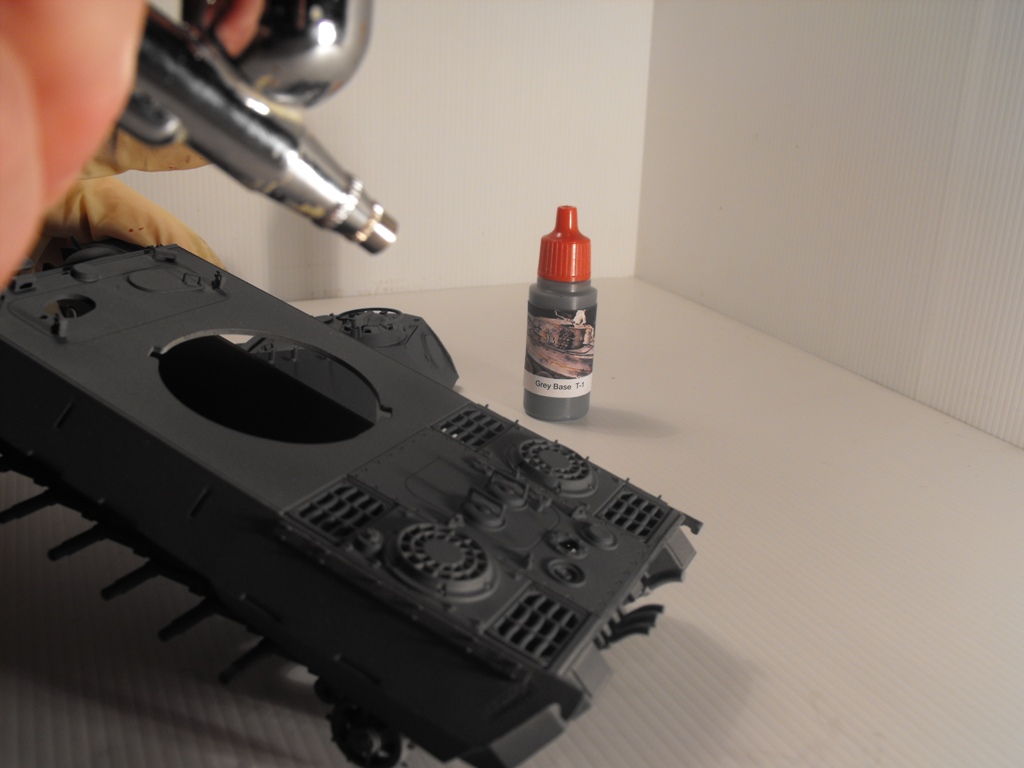
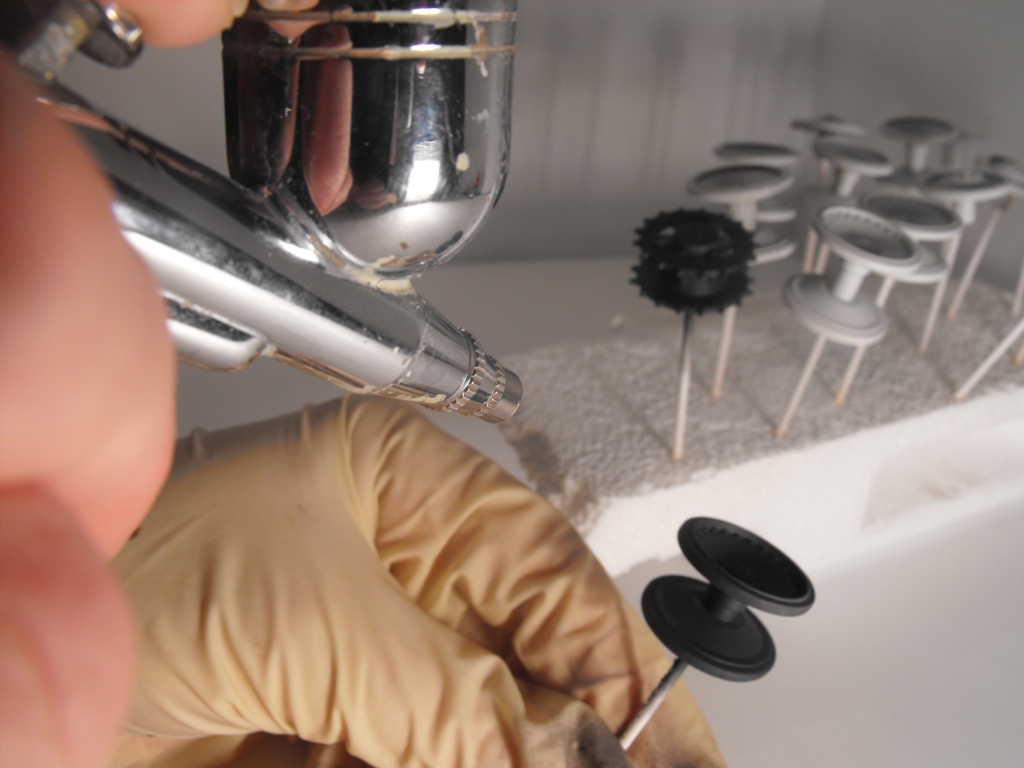
We paint all parts with the base color.
4.Apply the white camouflage color.(First "white")We will thoroughly cover the flat surfaces and less on ,if not at all ,the jointing,edges and arround the parts on the armor.
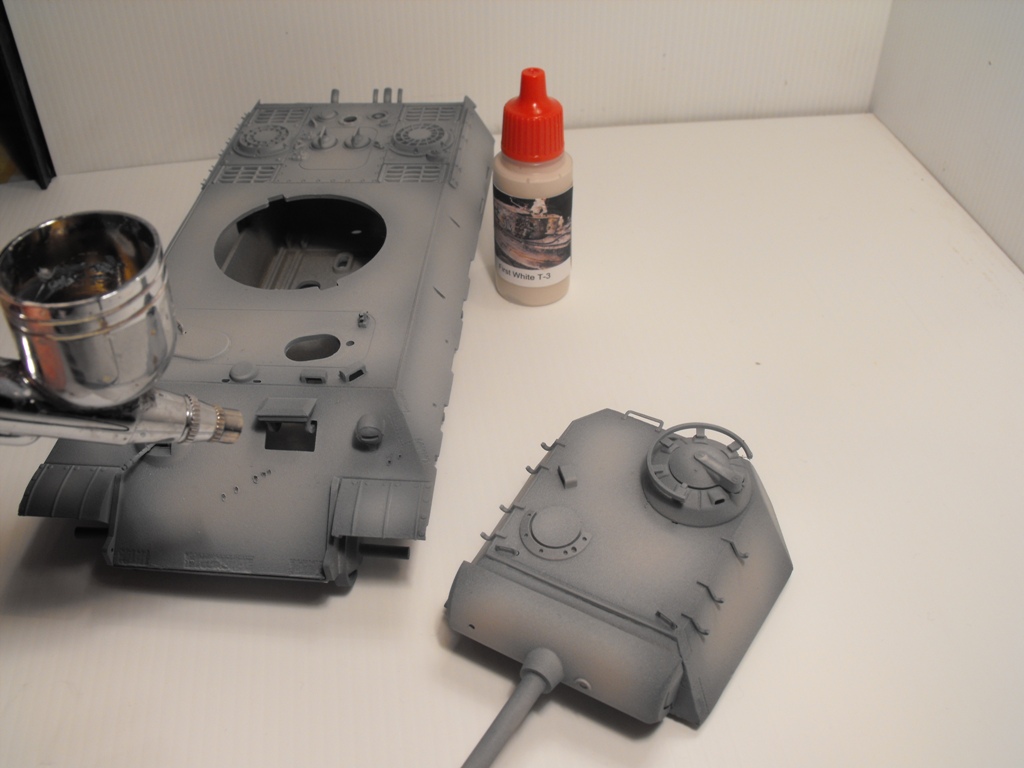
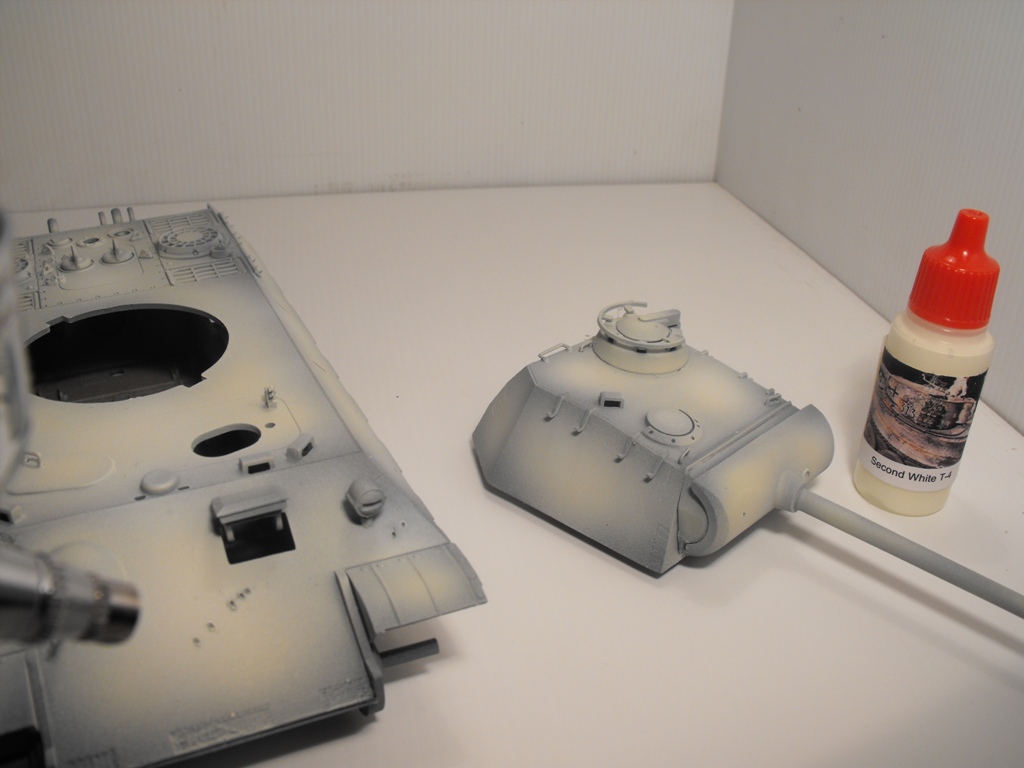
5.Using the "second white" camouflage color,we apply it on the previous one,but in a thinner layer.Do not insist!
6.Utilizing base color,we unload the surplus paint on a piece of paper until the brush leaves a fine line
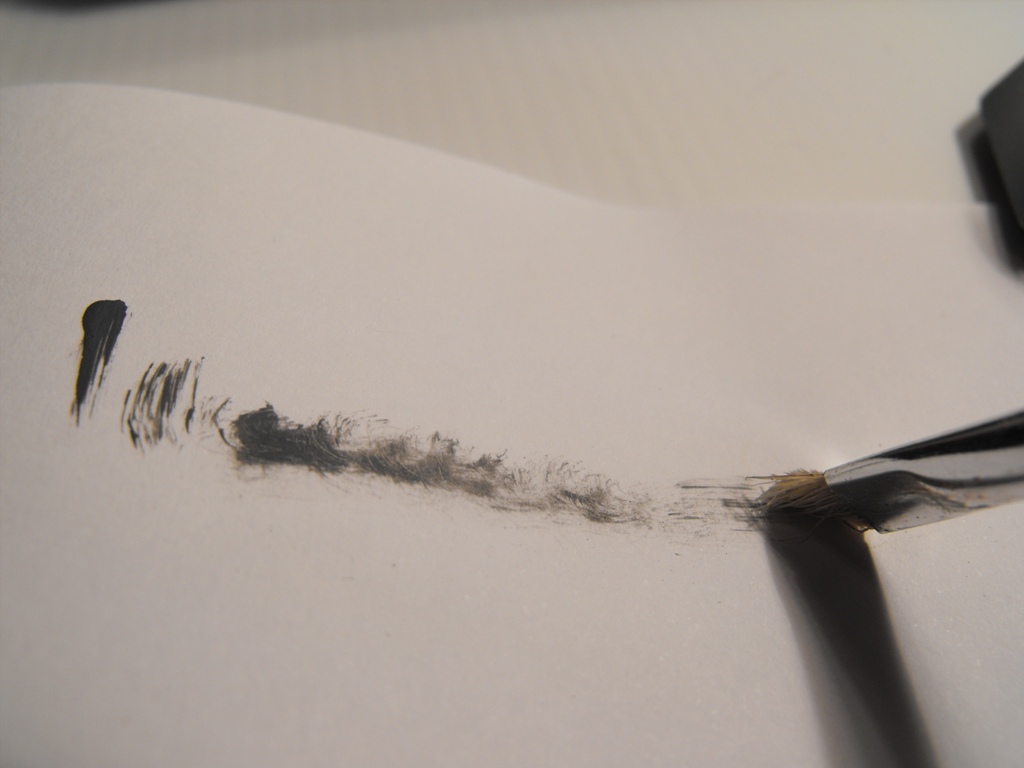
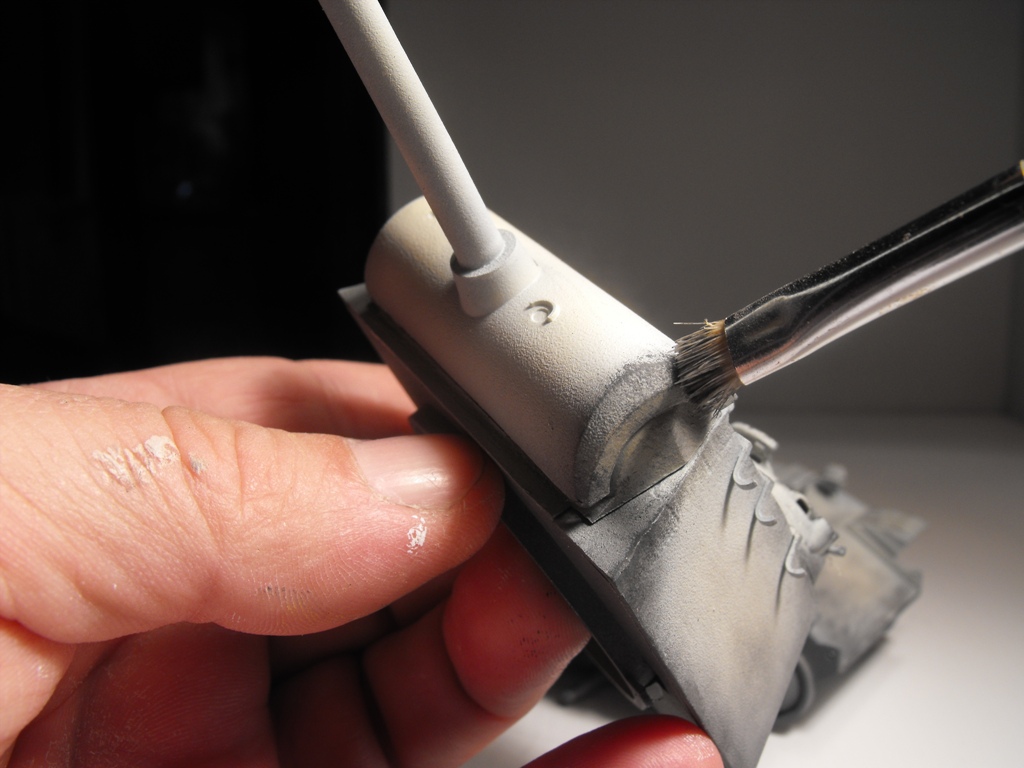
7.Rub the brush in the areas where natural factors act,insisting on the edges.As the paint unloads even more u may raise the pressure on the plating.Rub hard in circles and the outcome will have a natural look.
8.With a fine brush and the base color,draw irregular spots on the tank's surface,suggesting that the camouflage there has been erased completely.
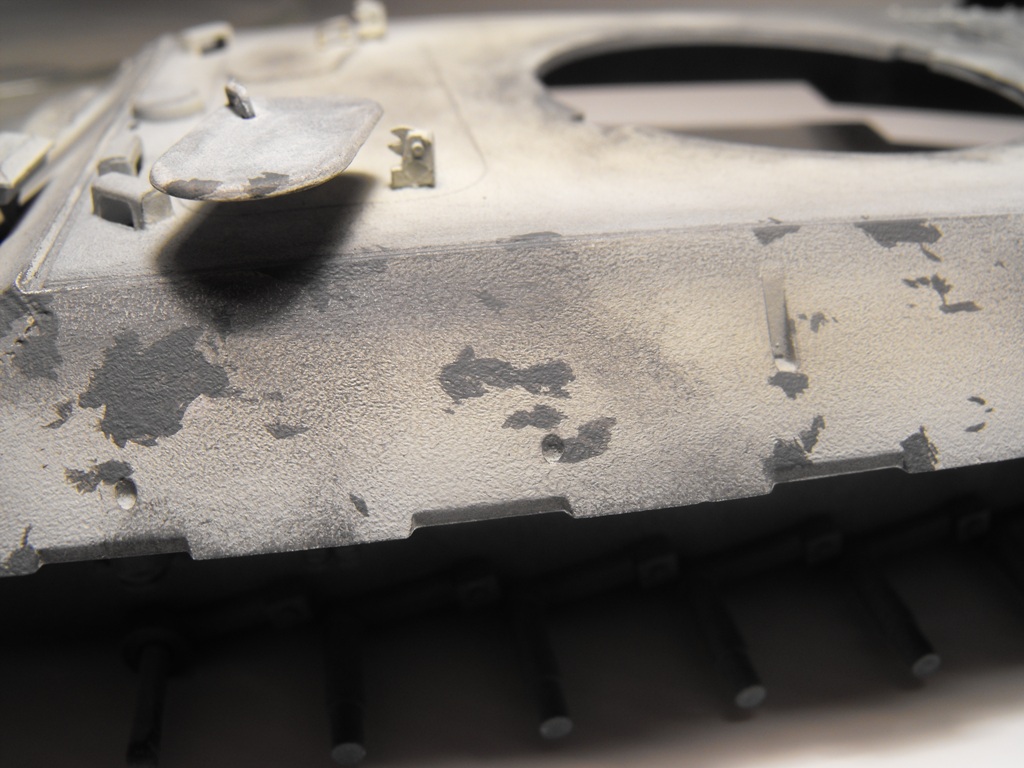
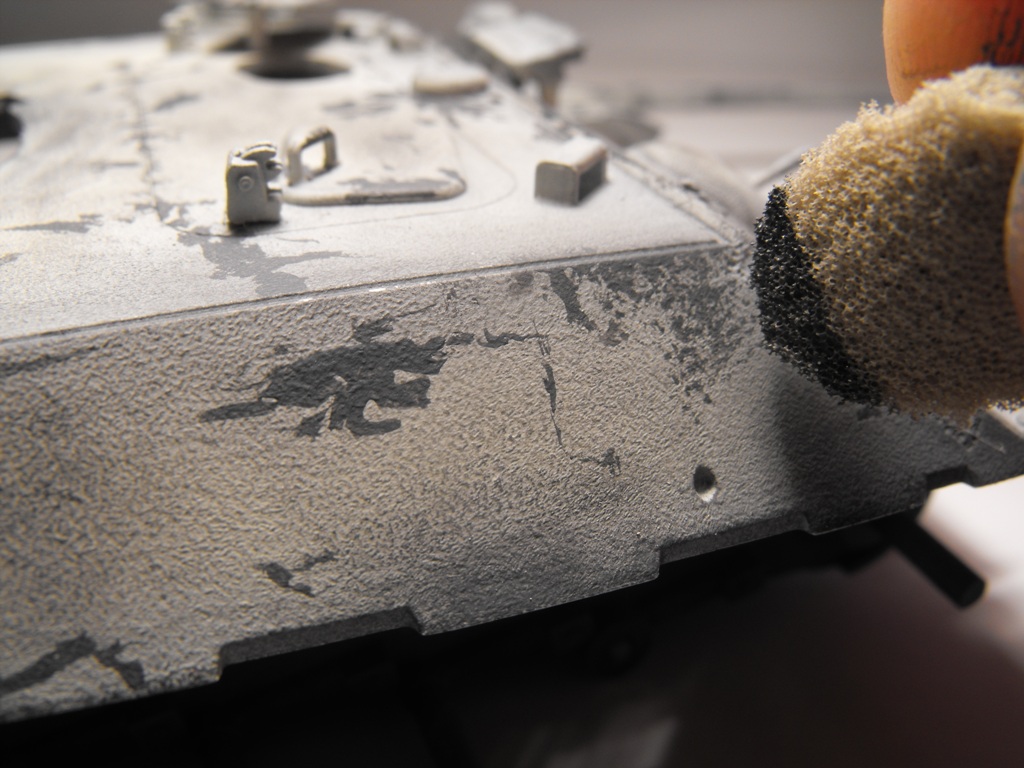
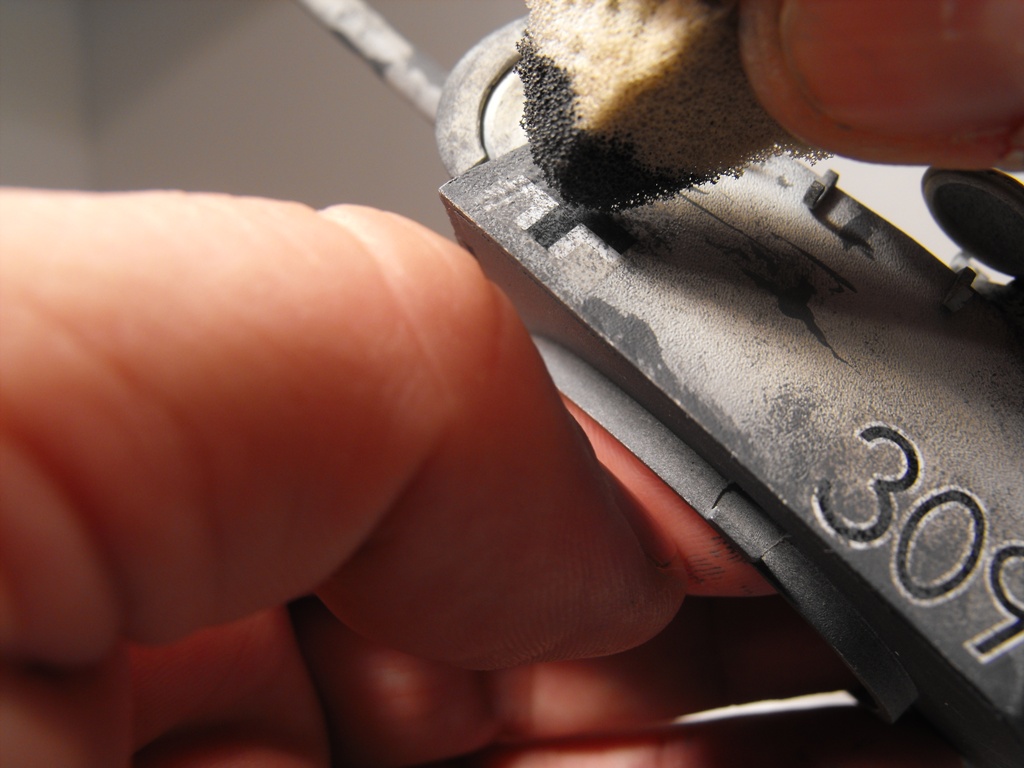
9.Using a small piece of a rougher sponge with the same base color,we unload the paint on a piece of paper and we continue by repeatedly pressing it on the armor.Use this technique especially for going from the pase color spots,drawn previously with the brush ,to the remaining camouflage that is less affected.
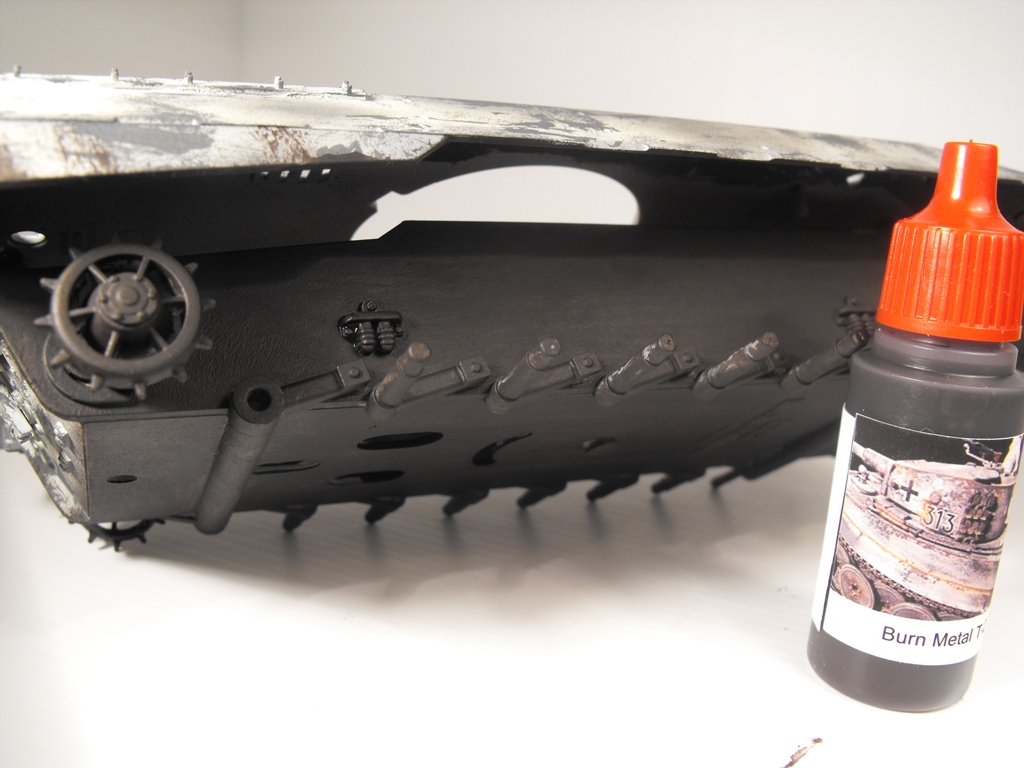
10.Paint the lower part of the chassis with a thicker brush and utilizing "burn metal"color
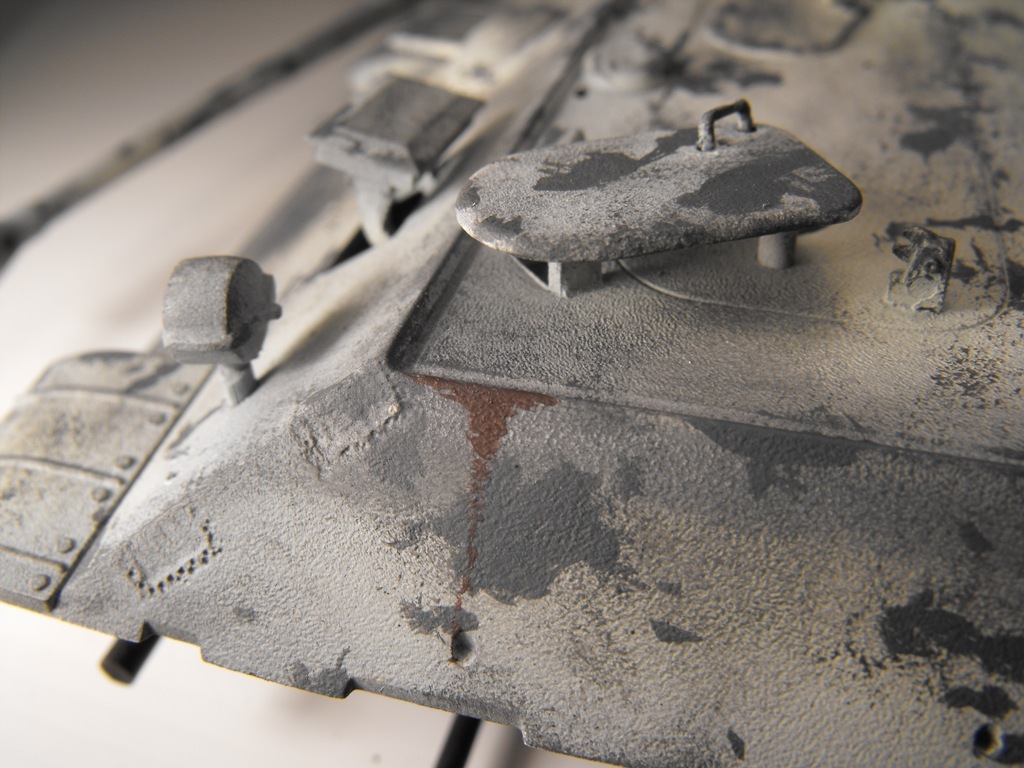
11/12.As seen in the photo,draw rust marks,applying the rust color with a fine brush.
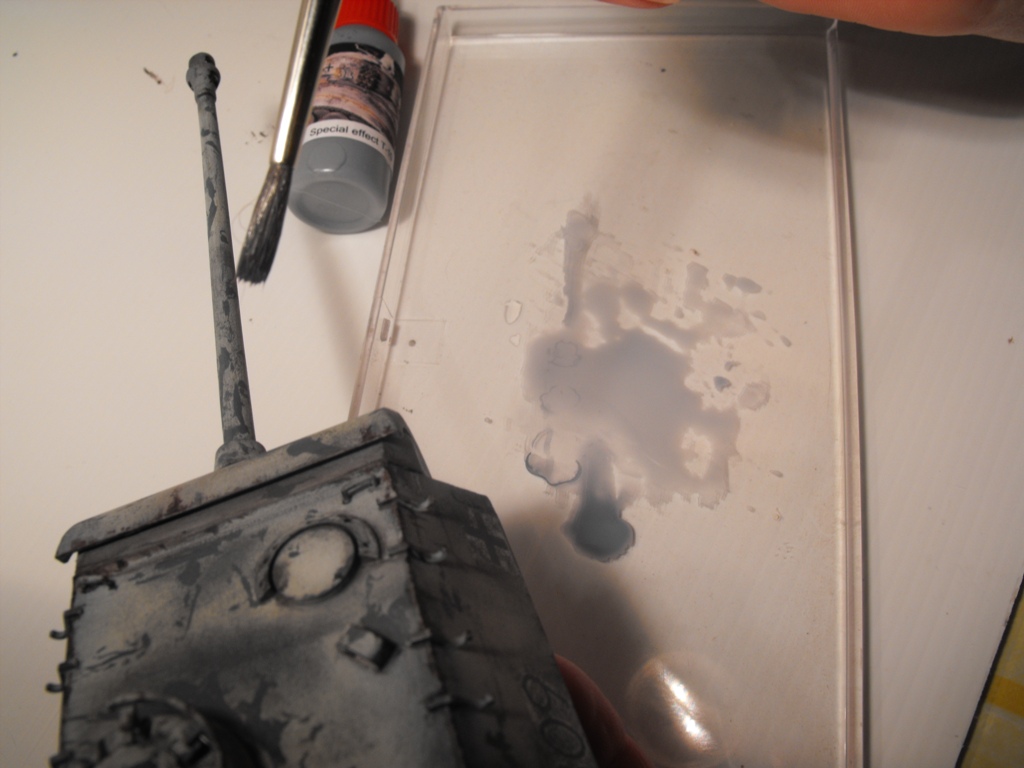
Special effect
13.The color is already thinned in the right proportion.Applying this special effect color highlights the details through the created contrast.last but not least we notice that the surface of the plating will take on a "veteran" look ,resulting from the participation in the war campaigns.
14.All that is left is to apply it arround the screws,protection parts,lides and in all the spaces left between the joints.
15.We then use a rougher brush,with longer hairs ,that will be moistened in water.
With the brush ready,we wip the created spots edges,thus integrating the special effect created in thegeneral context
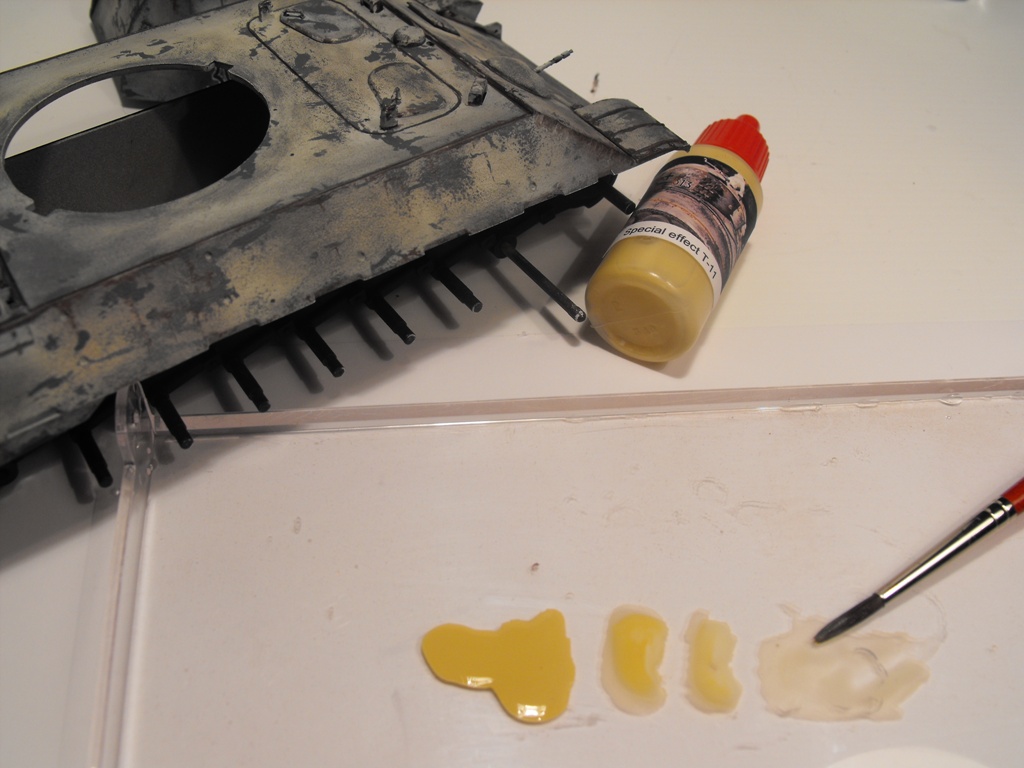
16.Special effect(Filter)The filter is already diluted and prepared for application ,but we will dilute with water untill it becomes coloress to avoid any mistake we apply this filter only to the turret and on the plane of the armor.We use a thick and round brush.Let it dry!
17.It is second filter created forapplication in low areas and the inclined planes of armor.We will diluted as well as the anterior filter.the difference is that is applied ffrom bottom to top,covering the inclined planes of the tank.
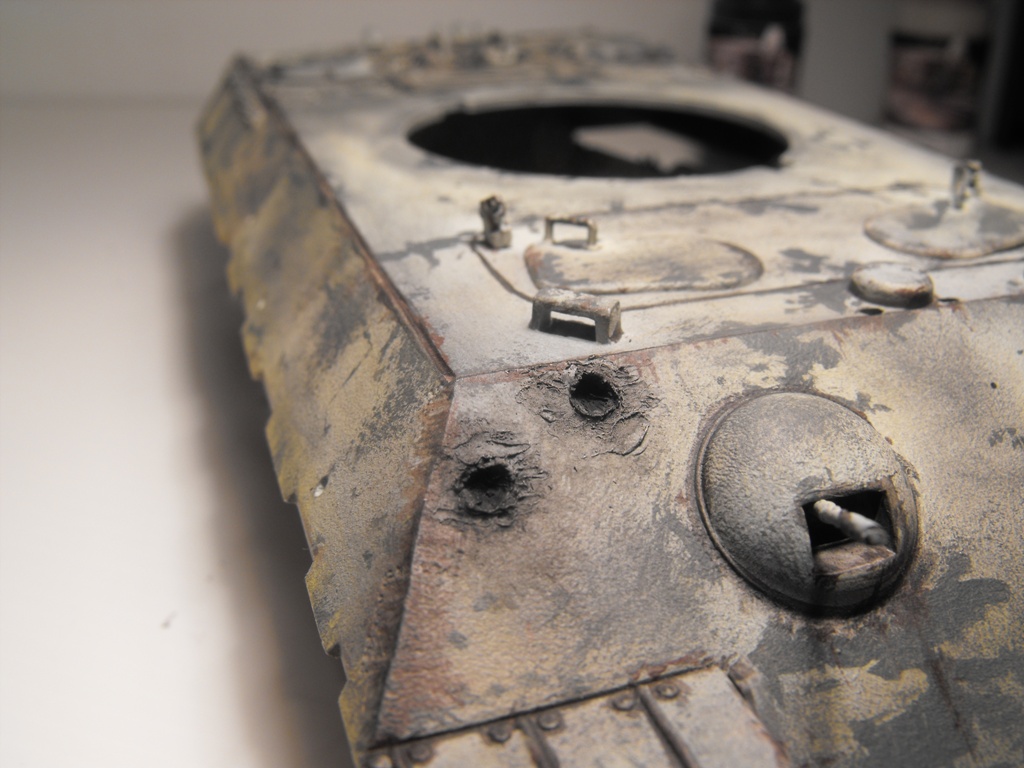
18.Painted the traces of impact.We paint with black in the center of the stroke and more diluted arround it.With a fine brush,we start from the center to outwards,gradually decreasing the color quantity, until it disappears.
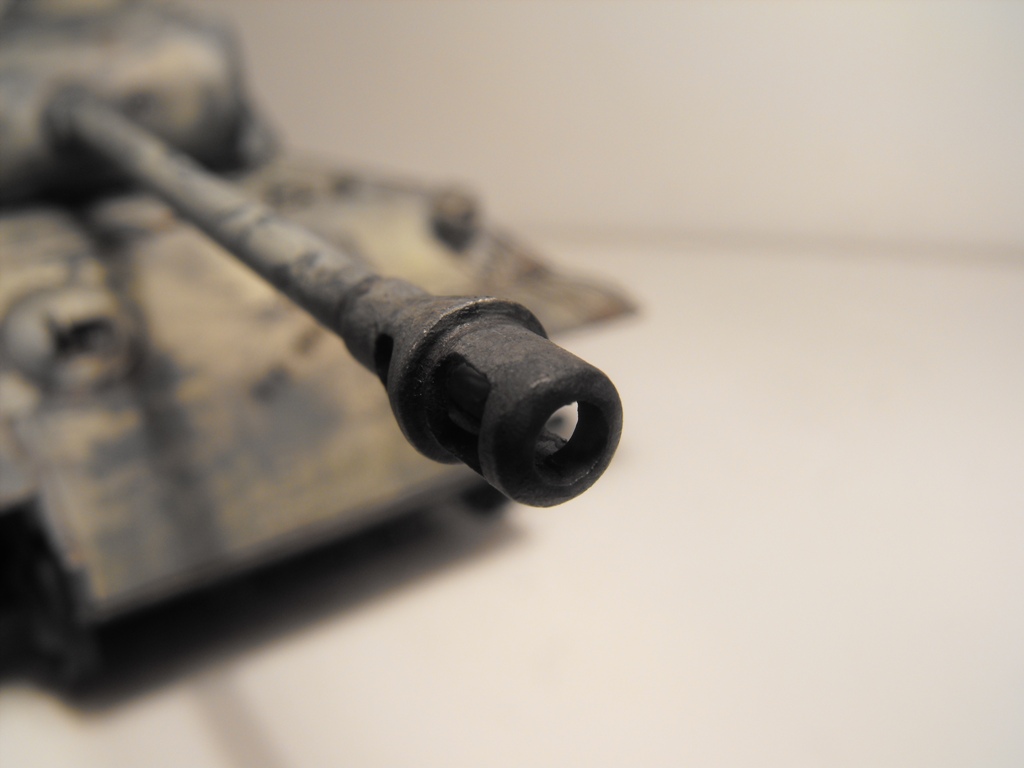
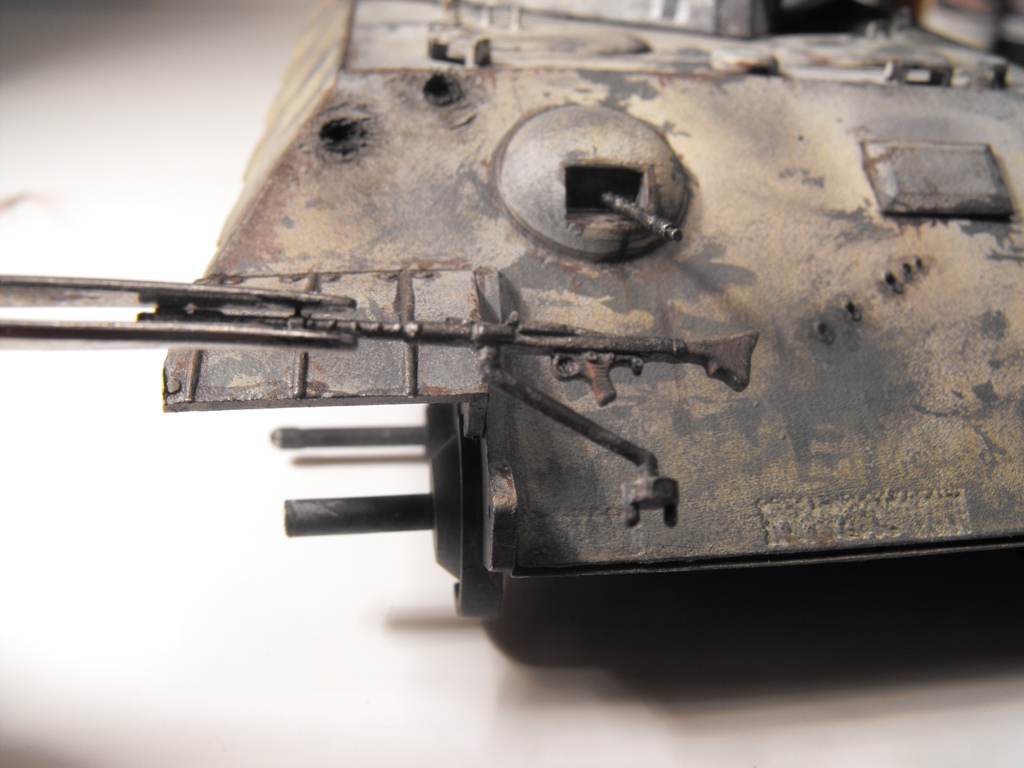
19.The "mouth" of the cannon
We dilute very well the same color Black and we paint the "mouth" of the cannon. We will repeat the procedure until the part will again one aspect of " smoked", avoiding to apply a mostly black and opaque color. Let it dry between the applications.
20. Machine guns. To paint it, we already have the color T8, Gun matal. As the top machine gun is completely exposed and the wood parts are visible, in case that we don't have a color for the wood, we will use a mixture of T3 and T8, in proportion of 50% each one.
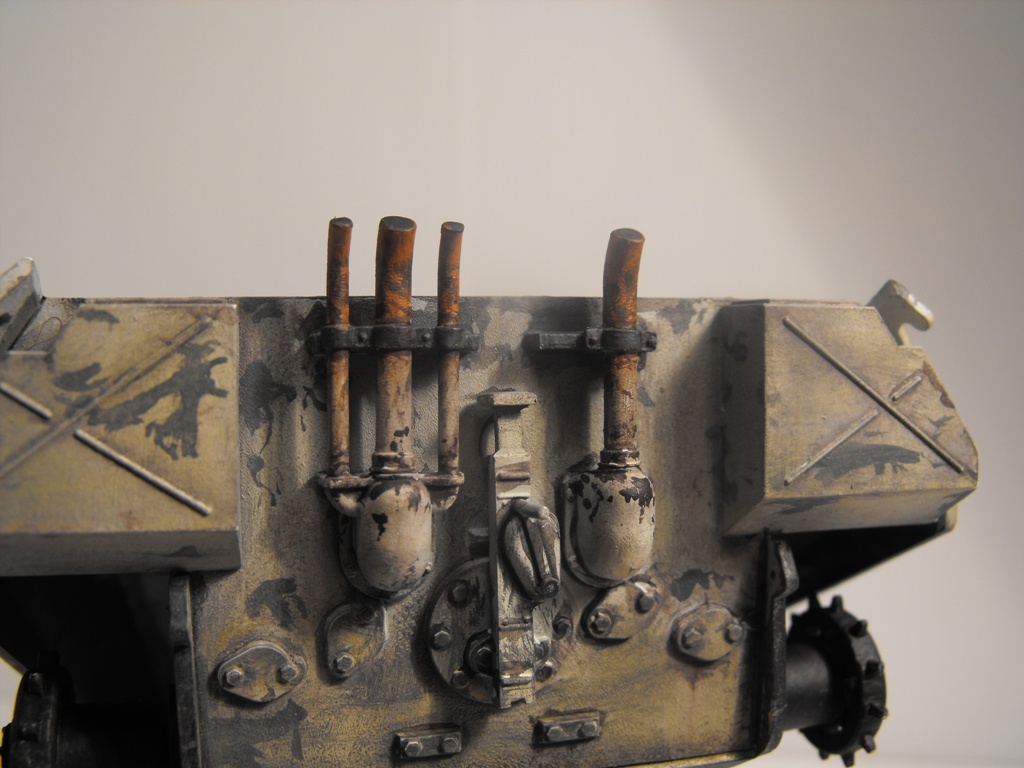
21. Exhaust Pipes. We cover the last part with "rusty exhaust pipe". The color "rusty exhaust pipe" will be considered a basic color for this part and above it we draw rust spotswith T8.
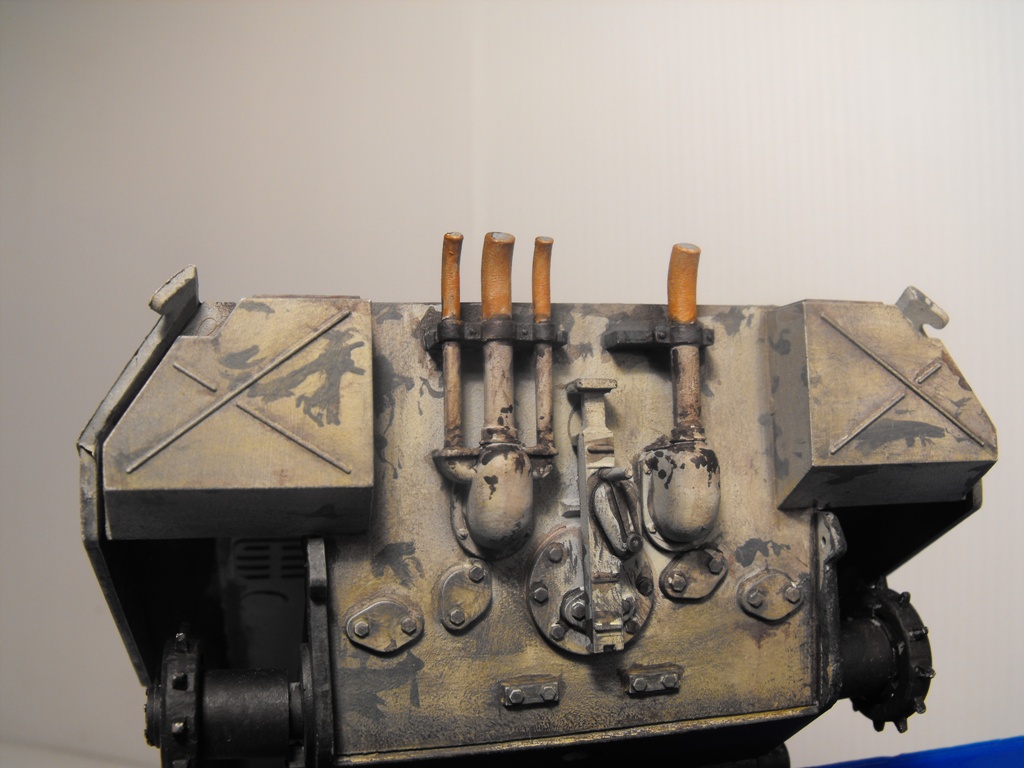
22. We alternate with spots of T2 and the last part of the color "rusty exhaust pipe" will have a greater intensity. We finish it by painting with black pipe's inside and very little more diluted near.
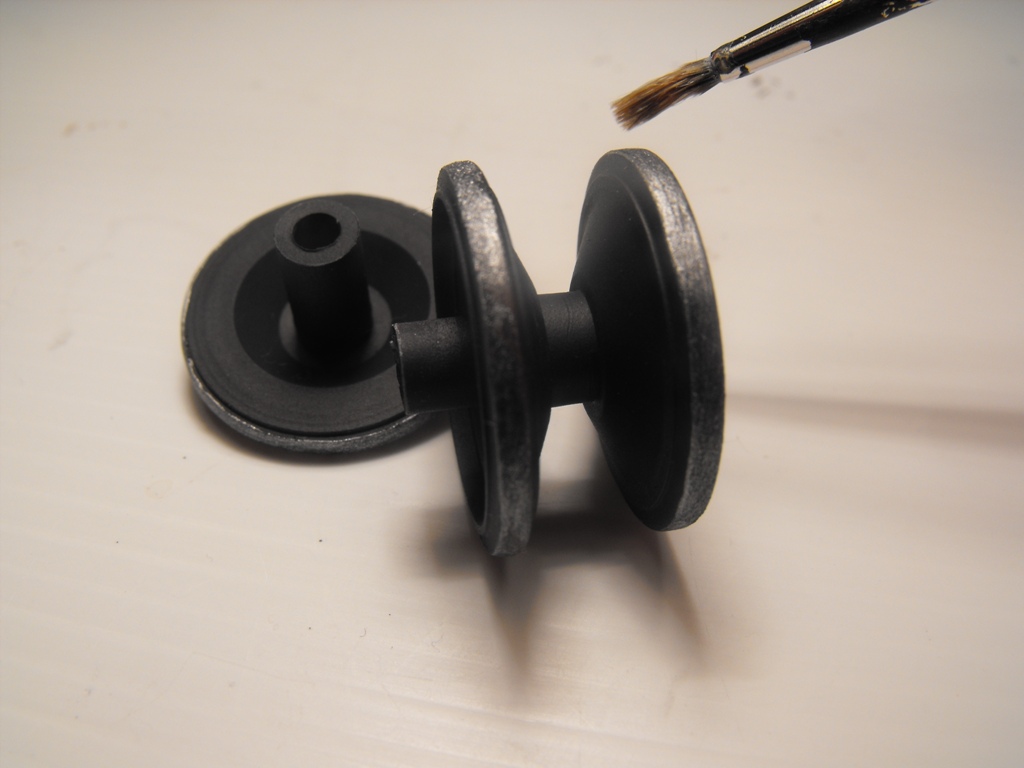
23. Rolls and Tracks. Rolls. We use the basic color T2. After drying, on the outside of the rolls we draw irregular portions with T3. We continue with the same procedure but this time we use the camouflage color T4.
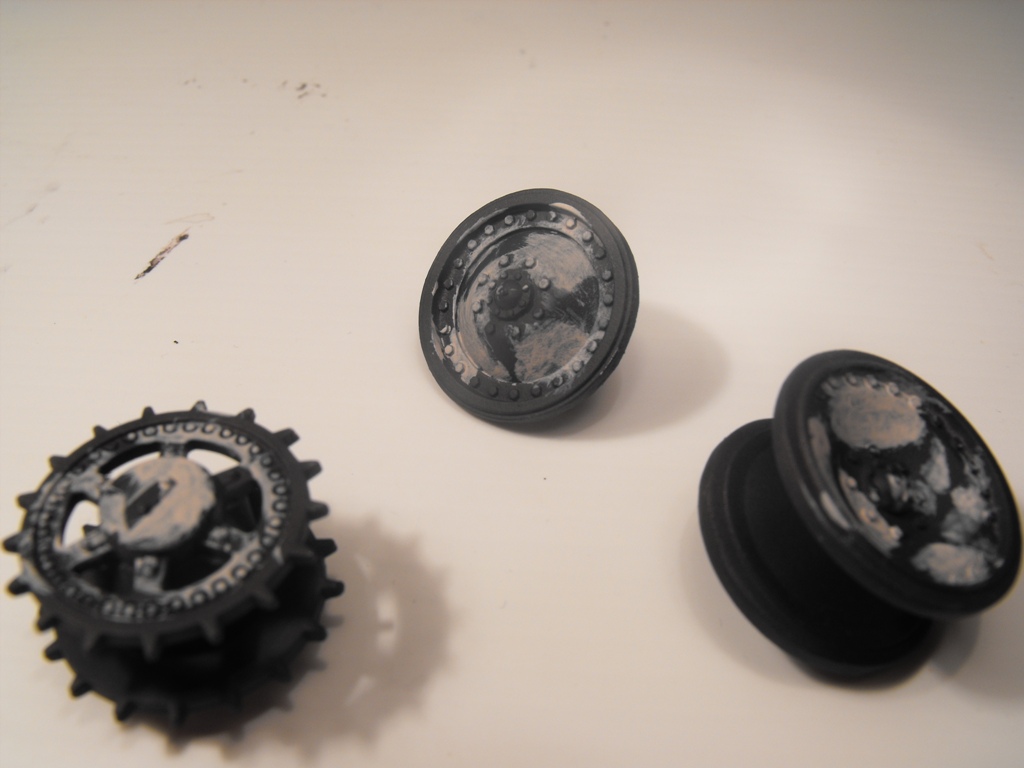
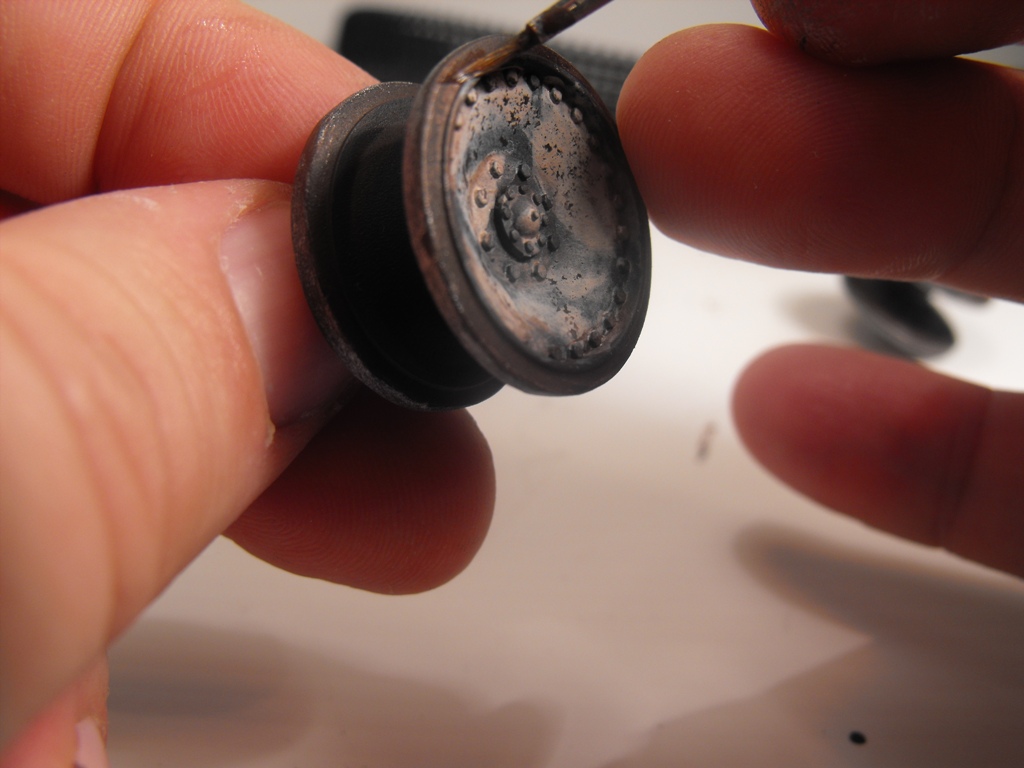
24. With the same piece of rough clouth used earlier and a few drops of almost dry T2 color , we press the rolls (not before removing the painting excess, pressing repeatedly on a piece of paper).
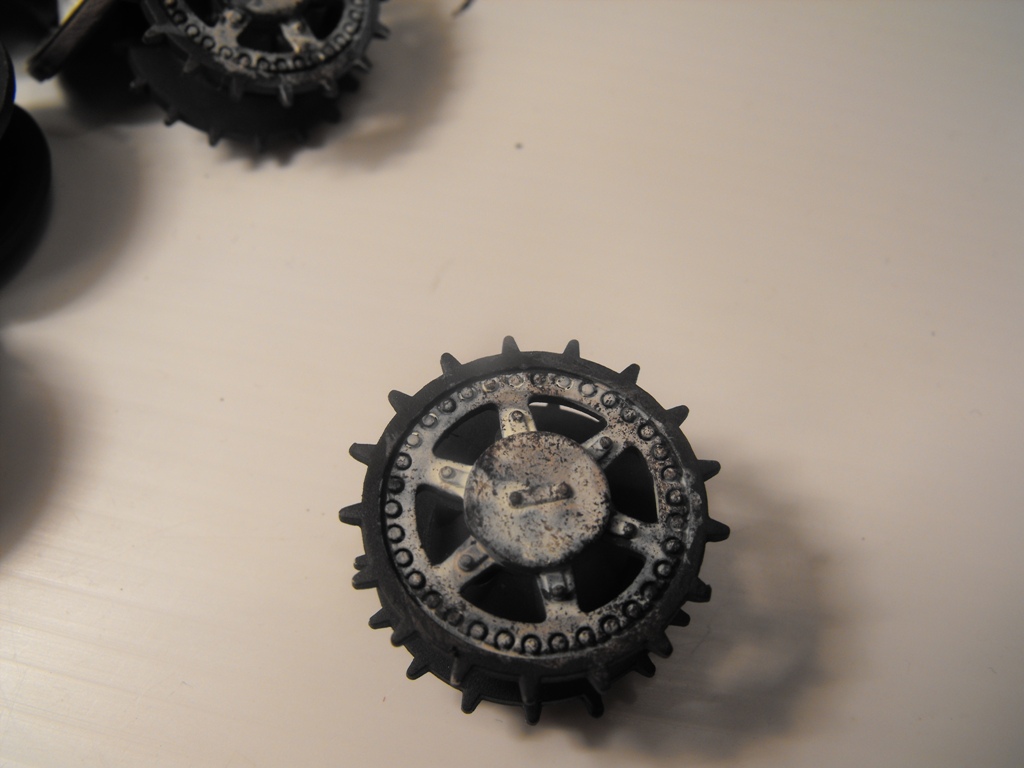
25.We paint the parts exposed to friction with T7, using a medium brush with shorter and rougher hair. For the interior parts of the roll, we will use " the rust" T8, diluted in proportin of 50%, as in the pictures.
26.We will continue to apply the T9 color around the screws and around the roll's prominent parts. We finsh by appling successive filters with T1. Do not forget to let it dry between one application and another!
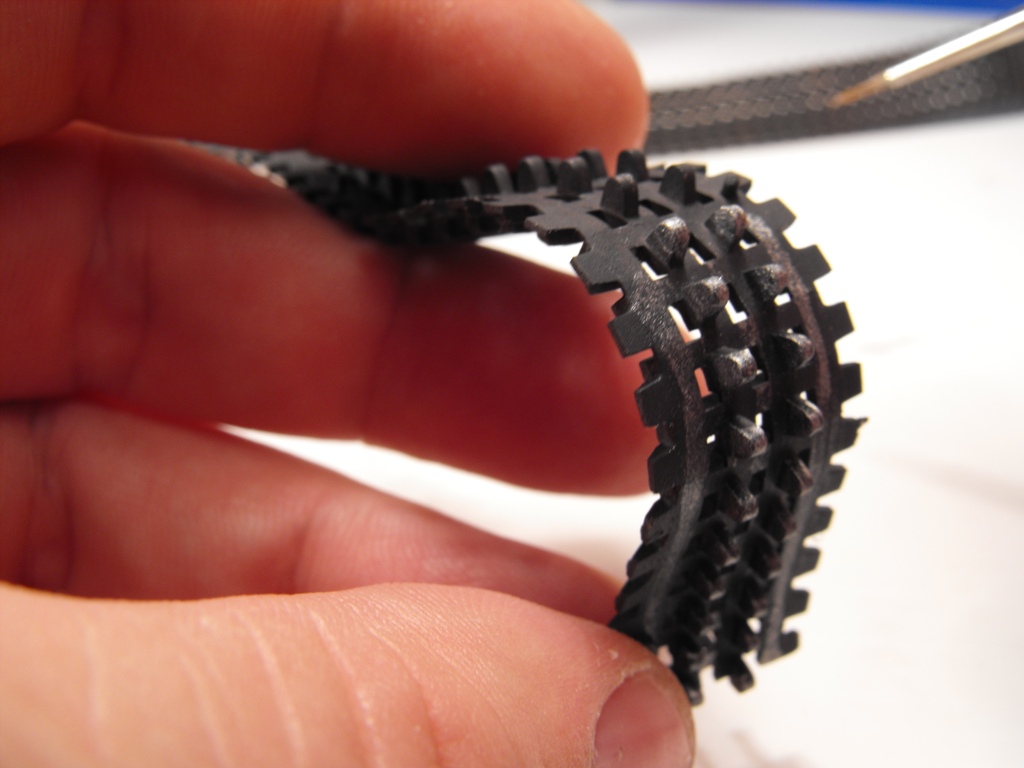
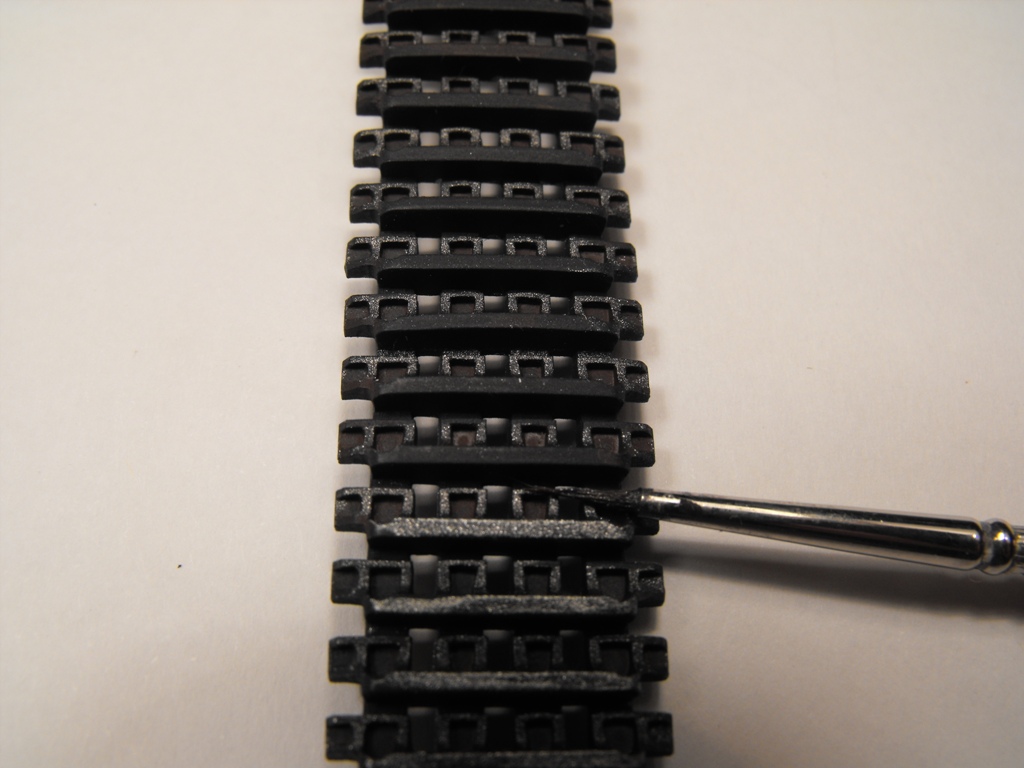
27/28. Tracks We have the basic color T2. We start by applying rust traces (T8) in the interior and exterior track's areas We will paint with T7 the zone with the rolls. For parts with the highest friction we use T7 ( parts that stick in the ground). In conclusion, for integration effects, we apply successive filters with T11

More photos,demonstrations and tricks in the magazine-manual Panzer(winter camouflage)
Panzer Paint -set (winter camouflage)
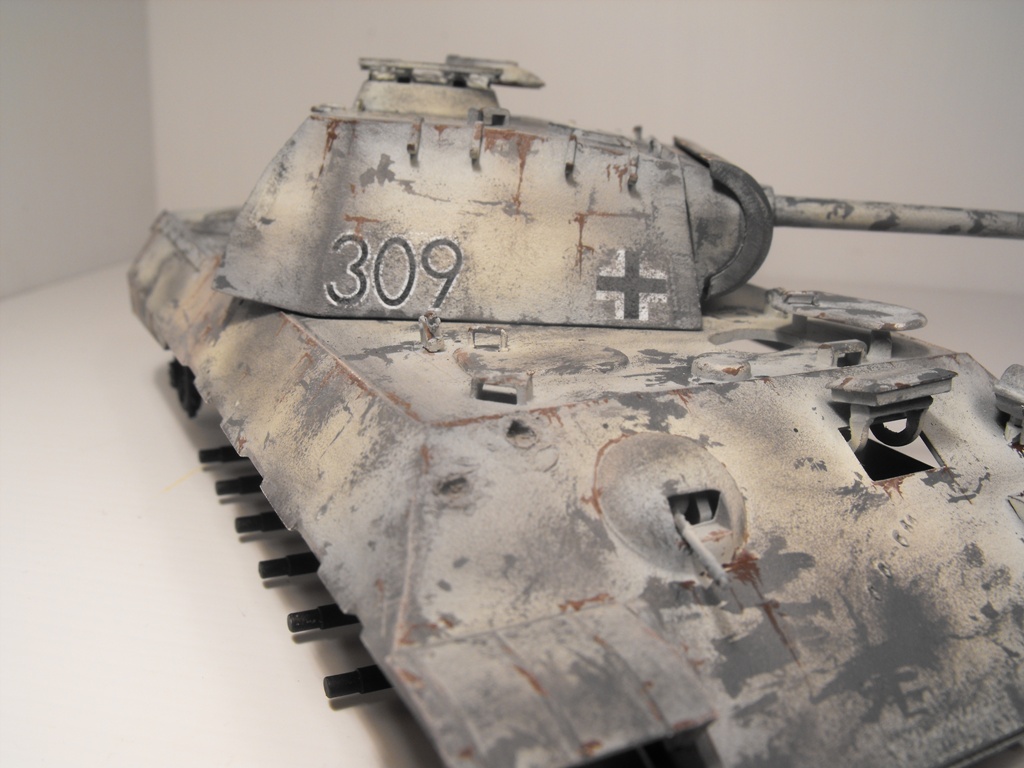
Final result


Why?Because the colors are already prepared and avoid to make savant mixtures,and finally you had no idea why your model refused stubbornly to look like the ones you were admiring in the catalogues or magazines....
And is more easy...with some special effect and tricks.
1.
Normally,the first step consists in applying a coat of paint using a spray.
2/3
We paint all parts with the base color.
4.Apply the white camouflage color.(First "white")We will thoroughly cover the flat surfaces and less on ,if not at all ,the jointing,edges and arround the parts on the armor.
5.Using the "second white" camouflage color,we apply it on the previous one,but in a thinner layer.Do not insist!
6.Utilizing base color,we unload the surplus paint on a piece of paper until the brush leaves a fine line
7.Rub the brush in the areas where natural factors act,insisting on the edges.As the paint unloads even more u may raise the pressure on the plating.Rub hard in circles and the outcome will have a natural look.
8.With a fine brush and the base color,draw irregular spots on the tank's surface,suggesting that the camouflage there has been erased completely.
9.Using a small piece of a rougher sponge with the same base color,we unload the paint on a piece of paper and we continue by repeatedly pressing it on the armor.Use this technique especially for going from the pase color spots,drawn previously with the brush ,to the remaining camouflage that is less affected.
10.Paint the lower part of the chassis with a thicker brush and utilizing "burn metal"color
11/12.As seen in the photo,draw rust marks,applying the rust color with a fine brush.
Special effect
13.The color is already thinned in the right proportion.Applying this special effect color highlights the details through the created contrast.last but not least we notice that the surface of the plating will take on a "veteran" look ,resulting from the participation in the war campaigns.
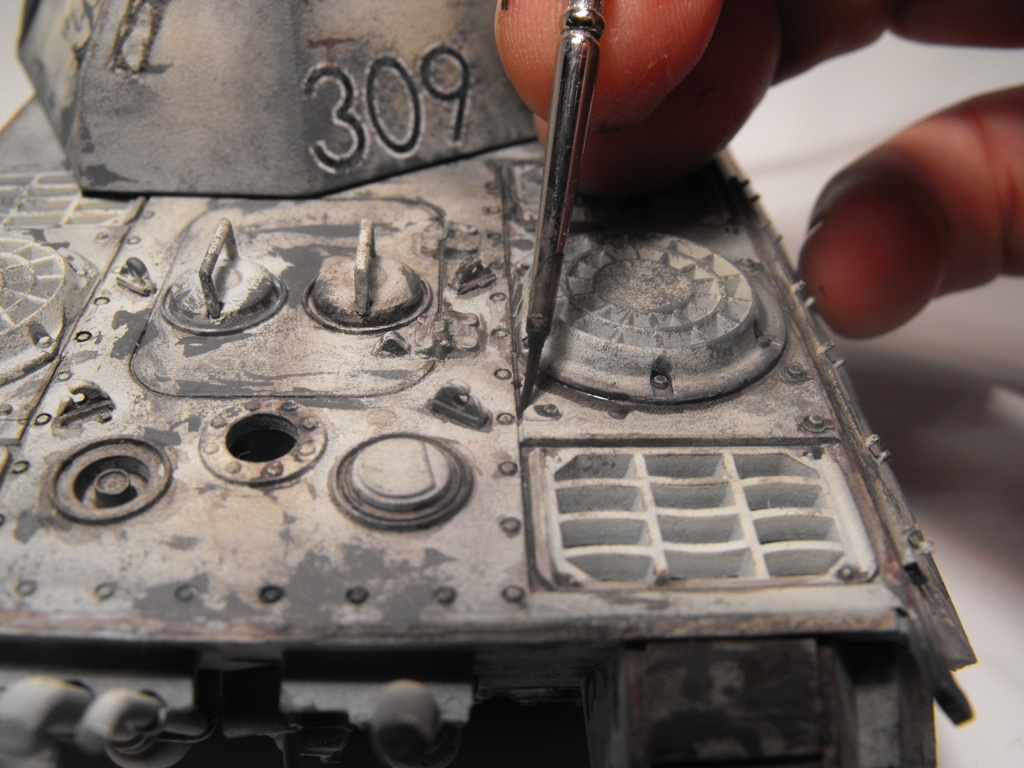
14.All that is left is to apply it arround the screws,protection parts,lides and in all the spaces left between the joints.
15.We then use a rougher brush,with longer hairs ,that will be moistened in water.
With the brush ready,we wip the created spots edges,thus integrating the special effect created in thegeneral context
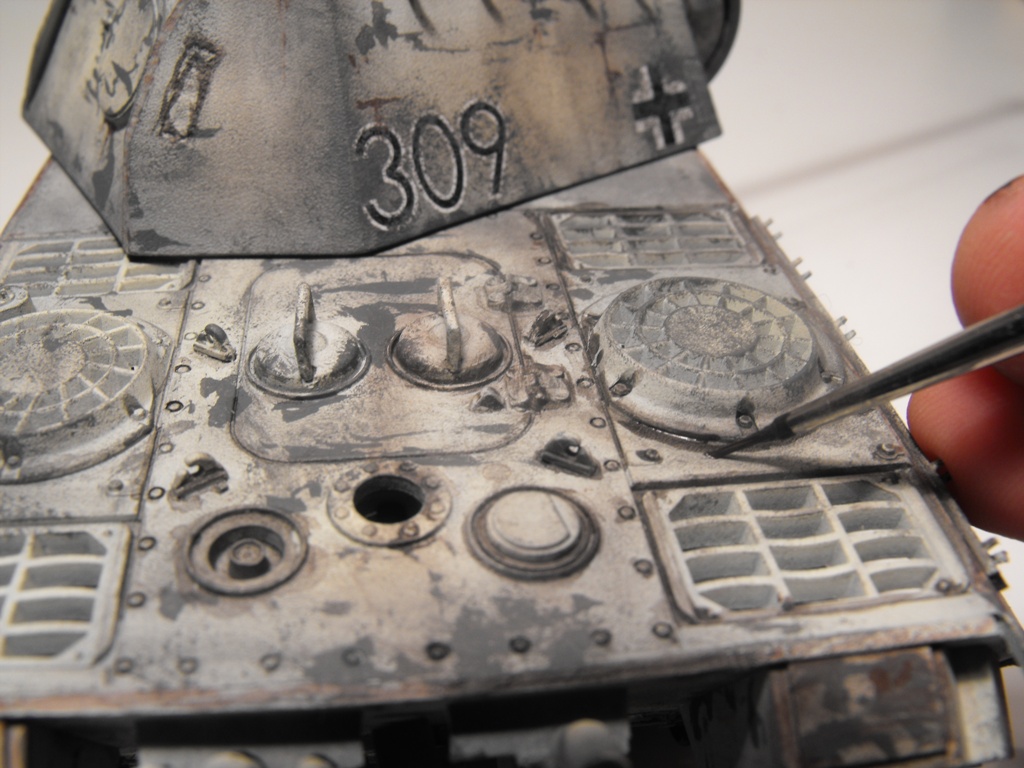
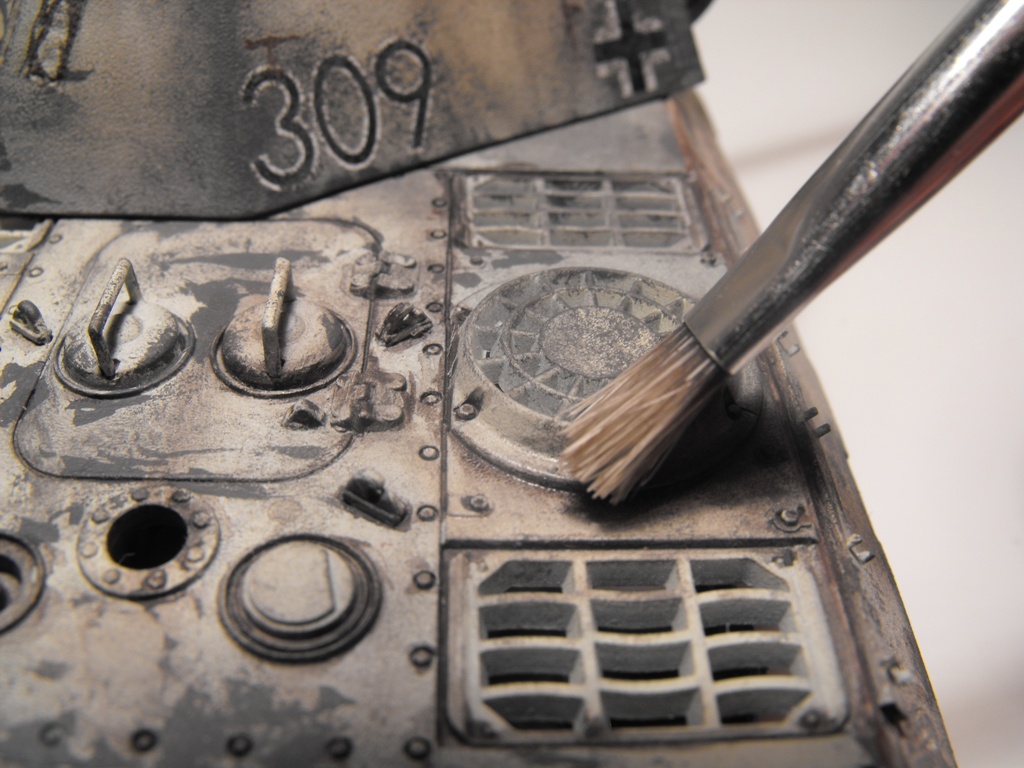
16.Special effect(Filter)The filter is already diluted and prepared for application ,but we will dilute with water untill it becomes coloress to avoid any mistake we apply this filter only to the turret and on the plane of the armor.We use a thick and round brush.Let it dry!
17.It is second filter created forapplication in low areas and the inclined planes of armor.We will diluted as well as the anterior filter.the difference is that is applied ffrom bottom to top,covering the inclined planes of the tank.
18.Painted the traces of impact.We paint with black in the center of the stroke and more diluted arround it.With a fine brush,we start from the center to outwards,gradually decreasing the color quantity, until it disappears.
19.The "mouth" of the cannon
We dilute very well the same color Black and we paint the "mouth" of the cannon. We will repeat the procedure until the part will again one aspect of " smoked", avoiding to apply a mostly black and opaque color. Let it dry between the applications.
20. Machine guns. To paint it, we already have the color T8, Gun matal. As the top machine gun is completely exposed and the wood parts are visible, in case that we don't have a color for the wood, we will use a mixture of T3 and T8, in proportion of 50% each one.
21. Exhaust Pipes. We cover the last part with "rusty exhaust pipe". The color "rusty exhaust pipe" will be considered a basic color for this part and above it we draw rust spotswith T8.
22. We alternate with spots of T2 and the last part of the color "rusty exhaust pipe" will have a greater intensity. We finish it by painting with black pipe's inside and very little more diluted near.
23. Rolls and Tracks. Rolls. We use the basic color T2. After drying, on the outside of the rolls we draw irregular portions with T3. We continue with the same procedure but this time we use the camouflage color T4.
24. With the same piece of rough clouth used earlier and a few drops of almost dry T2 color , we press the rolls (not before removing the painting excess, pressing repeatedly on a piece of paper).
25.We paint the parts exposed to friction with T7, using a medium brush with shorter and rougher hair. For the interior parts of the roll, we will use " the rust" T8, diluted in proportin of 50%, as in the pictures.
26.We will continue to apply the T9 color around the screws and around the roll's prominent parts. We finsh by appling successive filters with T1. Do not forget to let it dry between one application and another!
27/28. Tracks We have the basic color T2. We start by applying rust traces (T8) in the interior and exterior track's areas We will paint with T7 the zone with the rolls. For parts with the highest friction we use T7 ( parts that stick in the ground). In conclusion, for integration effects, we apply successive filters with T11
More photos,demonstrations and tricks in the magazine-manual Panzer(winter camouflage)
Panzer Paint -set (winter camouflage)
Final result
") looks like a nice set of weathering products you have there
looks like a nice set of weathering products you have there