The beaver - Castor Canadensis - is a large, semiaquatic mammal, the largest rodent in North America. Primarily nocturnal.. Oops! Wrong reference book. :facepalm
The DHC-2 Beaver was the second design offered by deHavilland Canada after WW2, the first being the primary trainer, the DHC-1 Chipmunk. I had toyed with the idea of building a model of a DC-3 on skis after completing the Turbo Otter, but my friend Rich express an interest in acquiring a model of the Beaver, so Beaver it is. The model is the 1:48 Hobbycraft offering, a pretty good rendition of the real thing. Ok, the only one in 1:48 actually. I had a couple in the stash, so onward. Actually the Hobbycraft model came in two variations, one on floats in Harbour Air titles, and the other they called the Viet Nam Beaver which came only on wheels. I never bothered to check the stash, and when I did I found one Harbour Air machine minus the floats. Oh oh, sez I, but then I opened one of the VN boxes and found a set of floats. Go figure.
The original Beaver was supposed to have been powered by a 350-horse Gypsy Major inline six. Thankfully this insanity was put to rest when Pratt & Whitney advised deHav they had scads of the 450-horse small Pratt R-985's left over from WW2, and a match made in aeronautical heaven ensued. The airplane is so practical it remained unchanged for 50 years. It had seats for seven, including the pilot (I've carried ten, and will only admit it now that the statute of limitations has run out.) The doors are 40-some inches wide, which means that you can roll a 39-inch, 55-gallon, barrel of gas onboard without skinning both sets of knuckles on the door frames. All in all, a fantastic airplane and I loved to fly it.
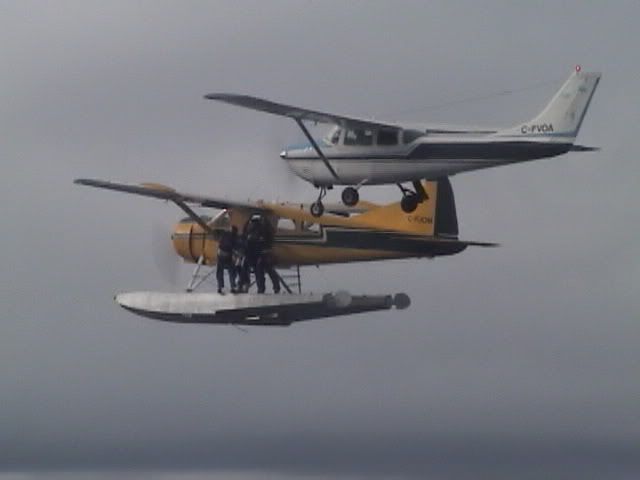
This is the one I shall attempt to replicate, sn 1272, C-GZBR.
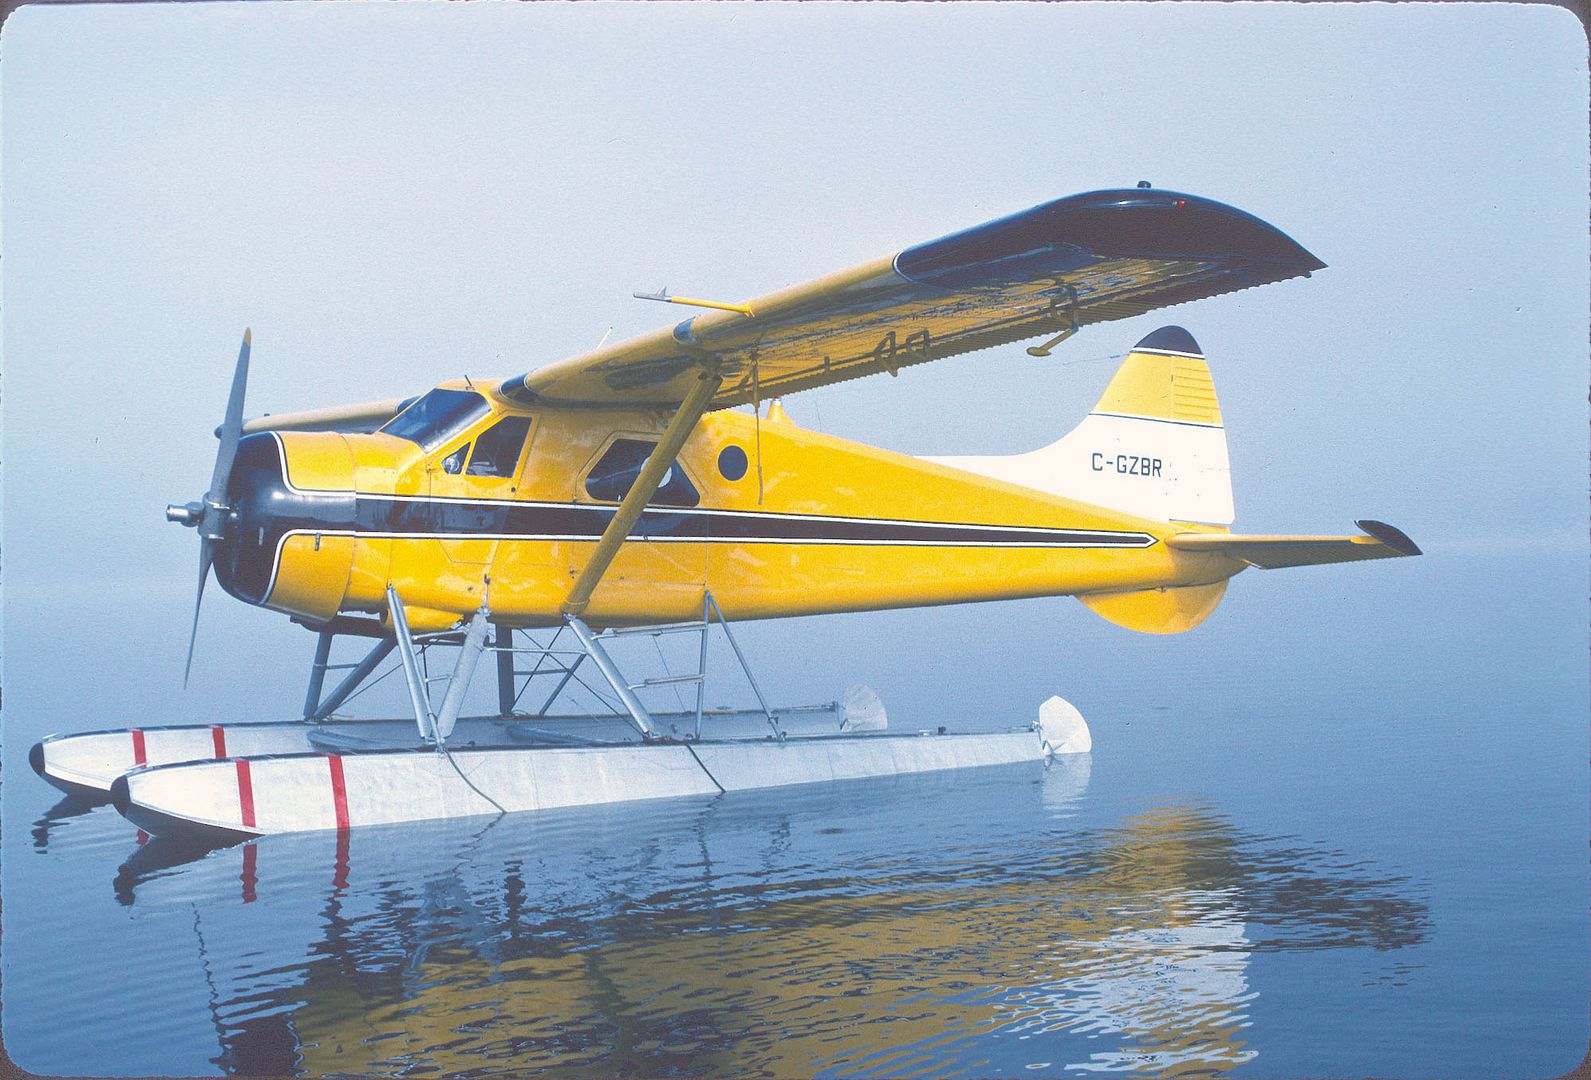
More on the history of this aircraft here.
C-GZBR sn 1272
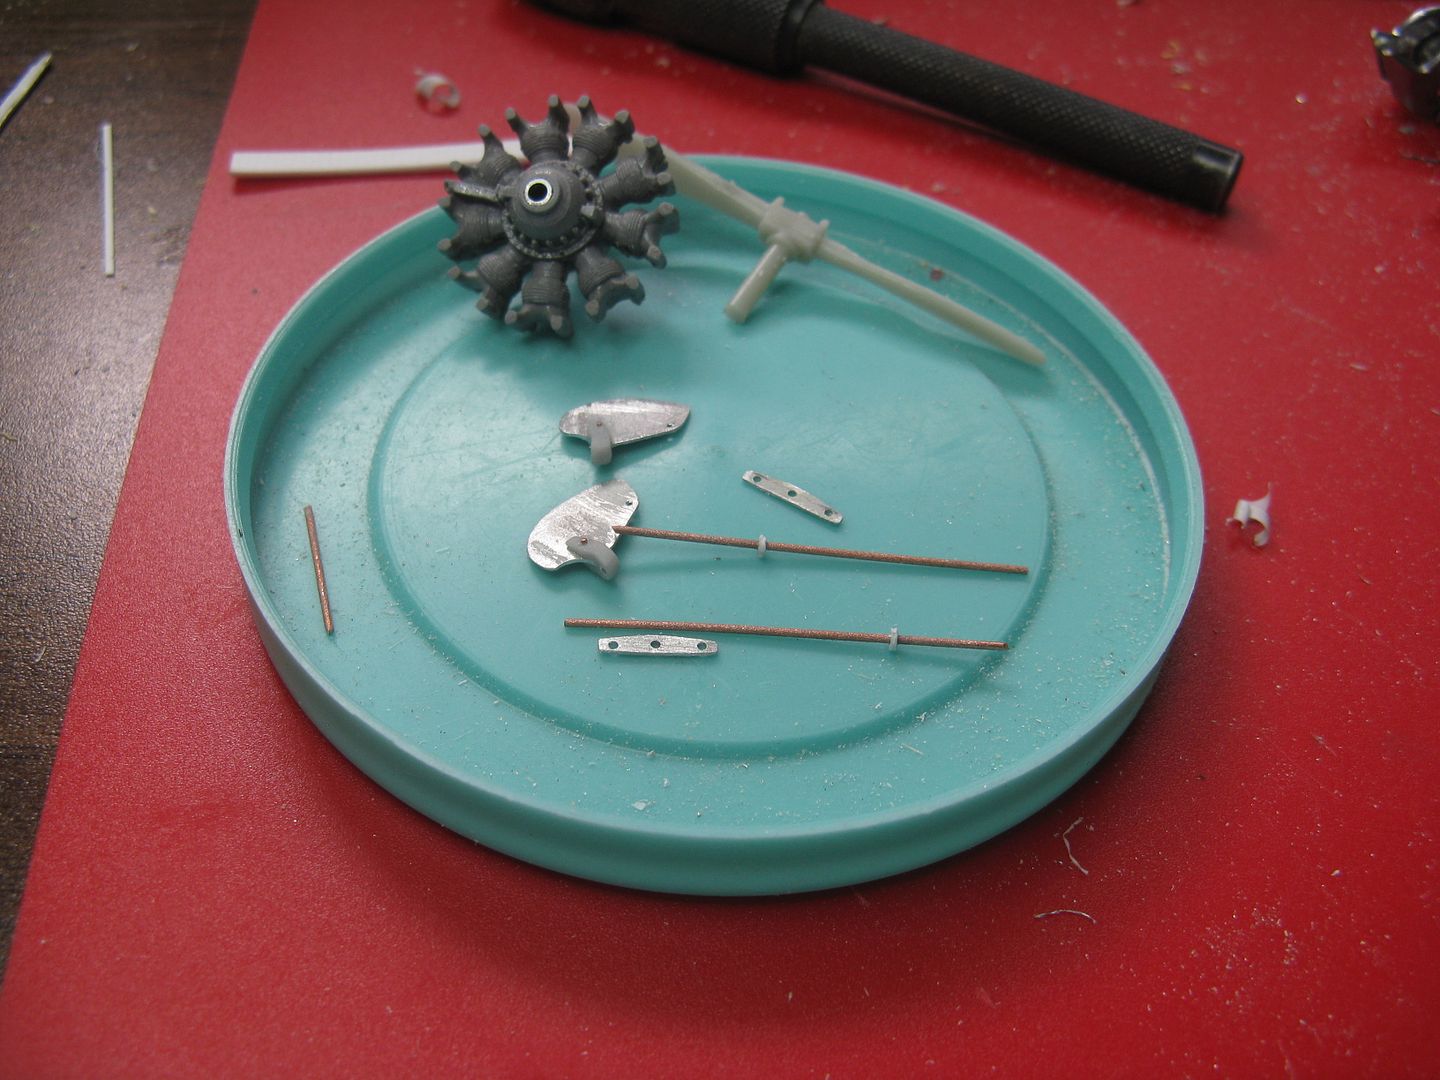
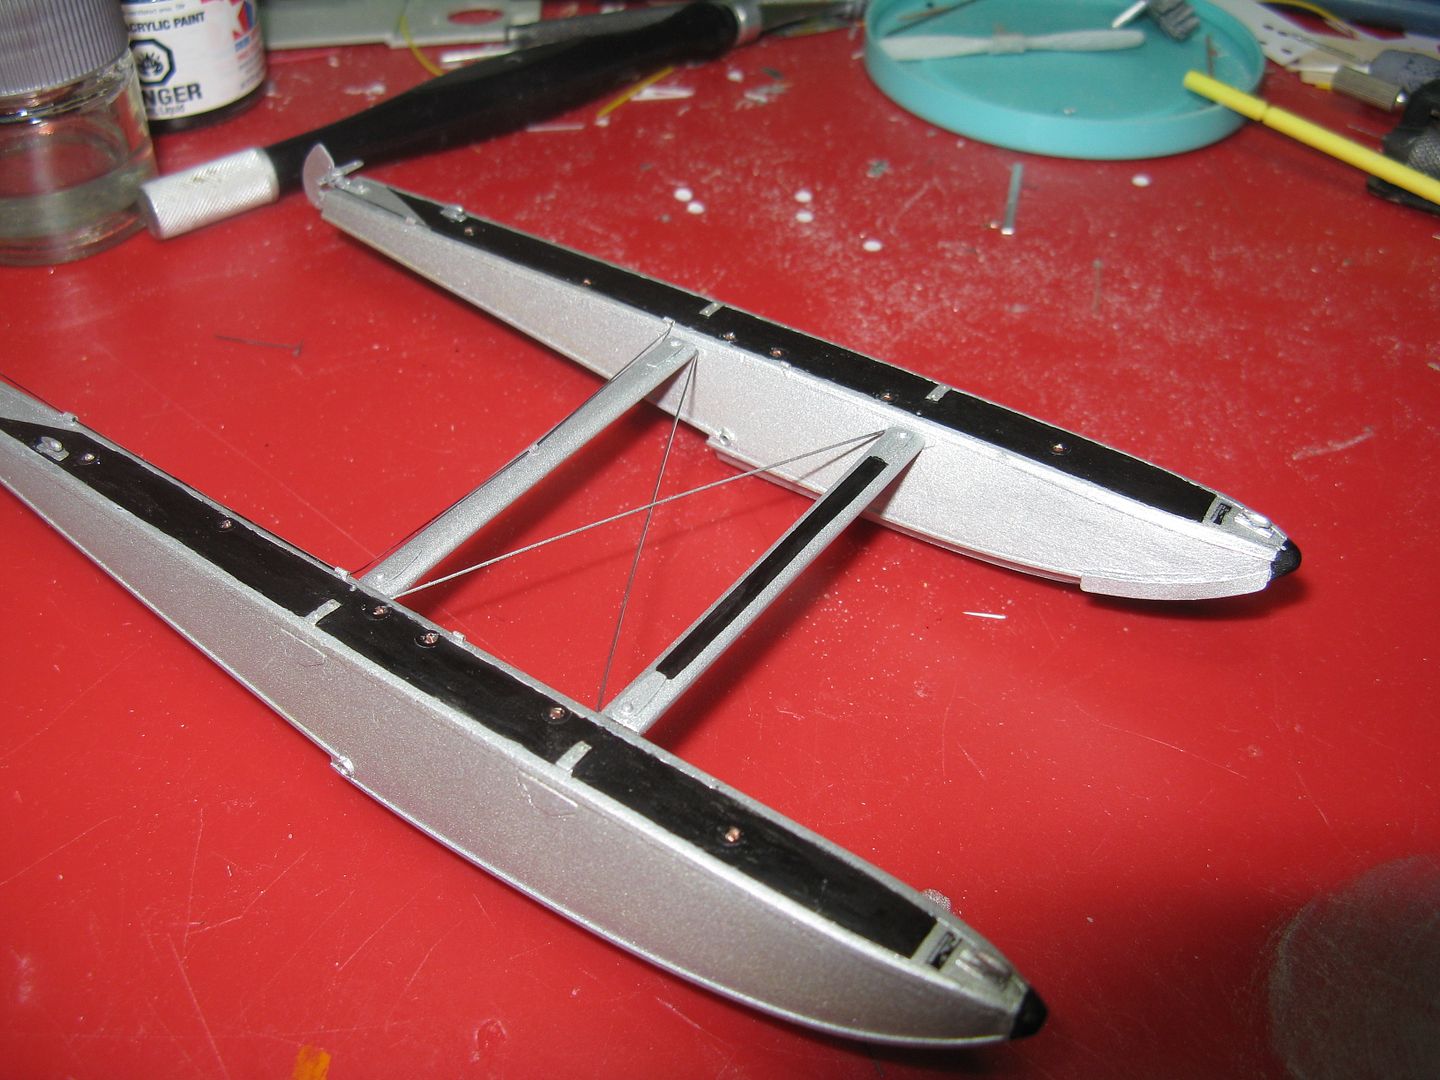
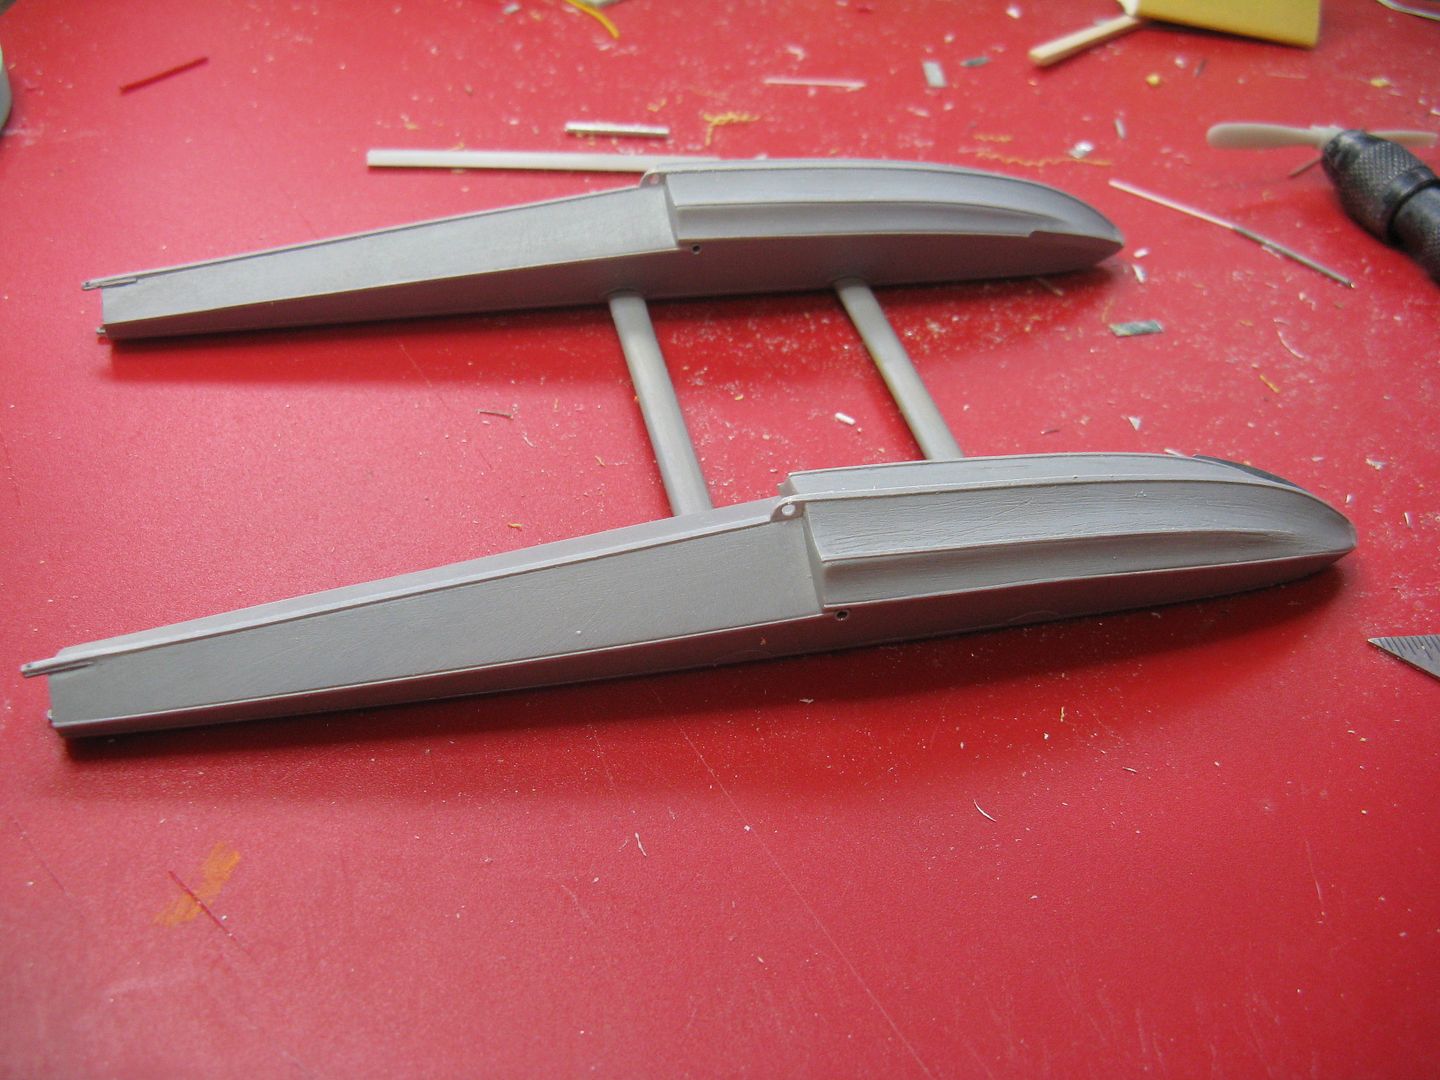
As with any project, one must start somewhere, so what better place than with the floats which I glued together conventionally. The kit floats lack any kind of detail, except for a set of water rudders that I promptly sawed off and threw away. I shall make a new set, along with the hardware, and mount them using these nifty upper and lower mounting brackets I made from scrap metal.
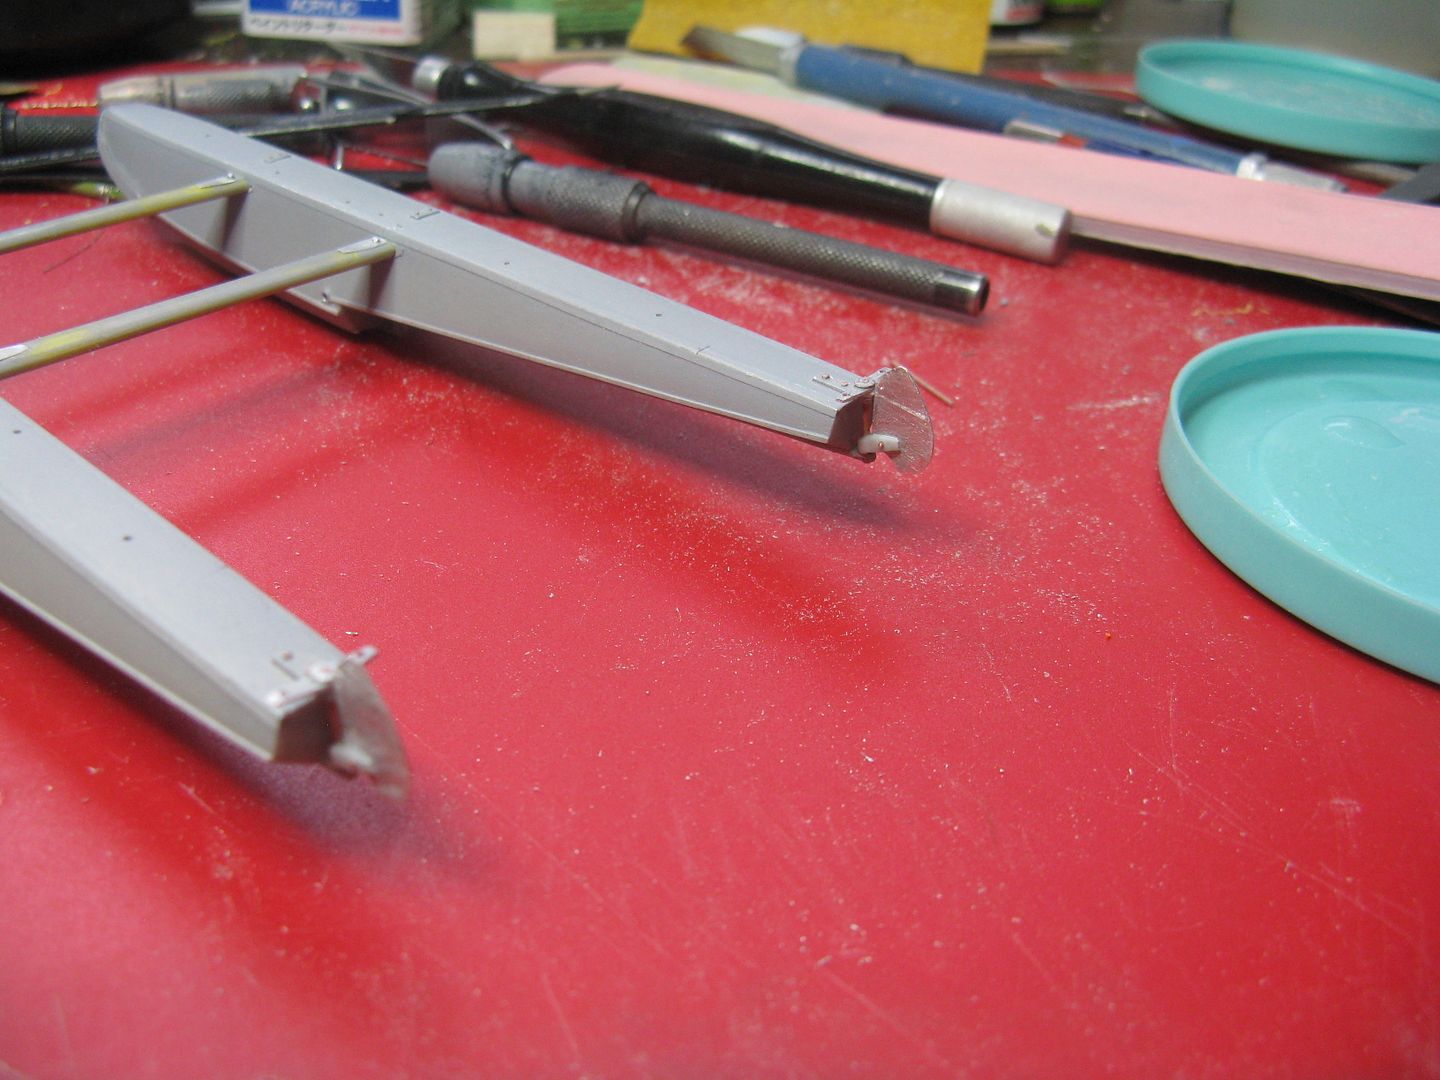
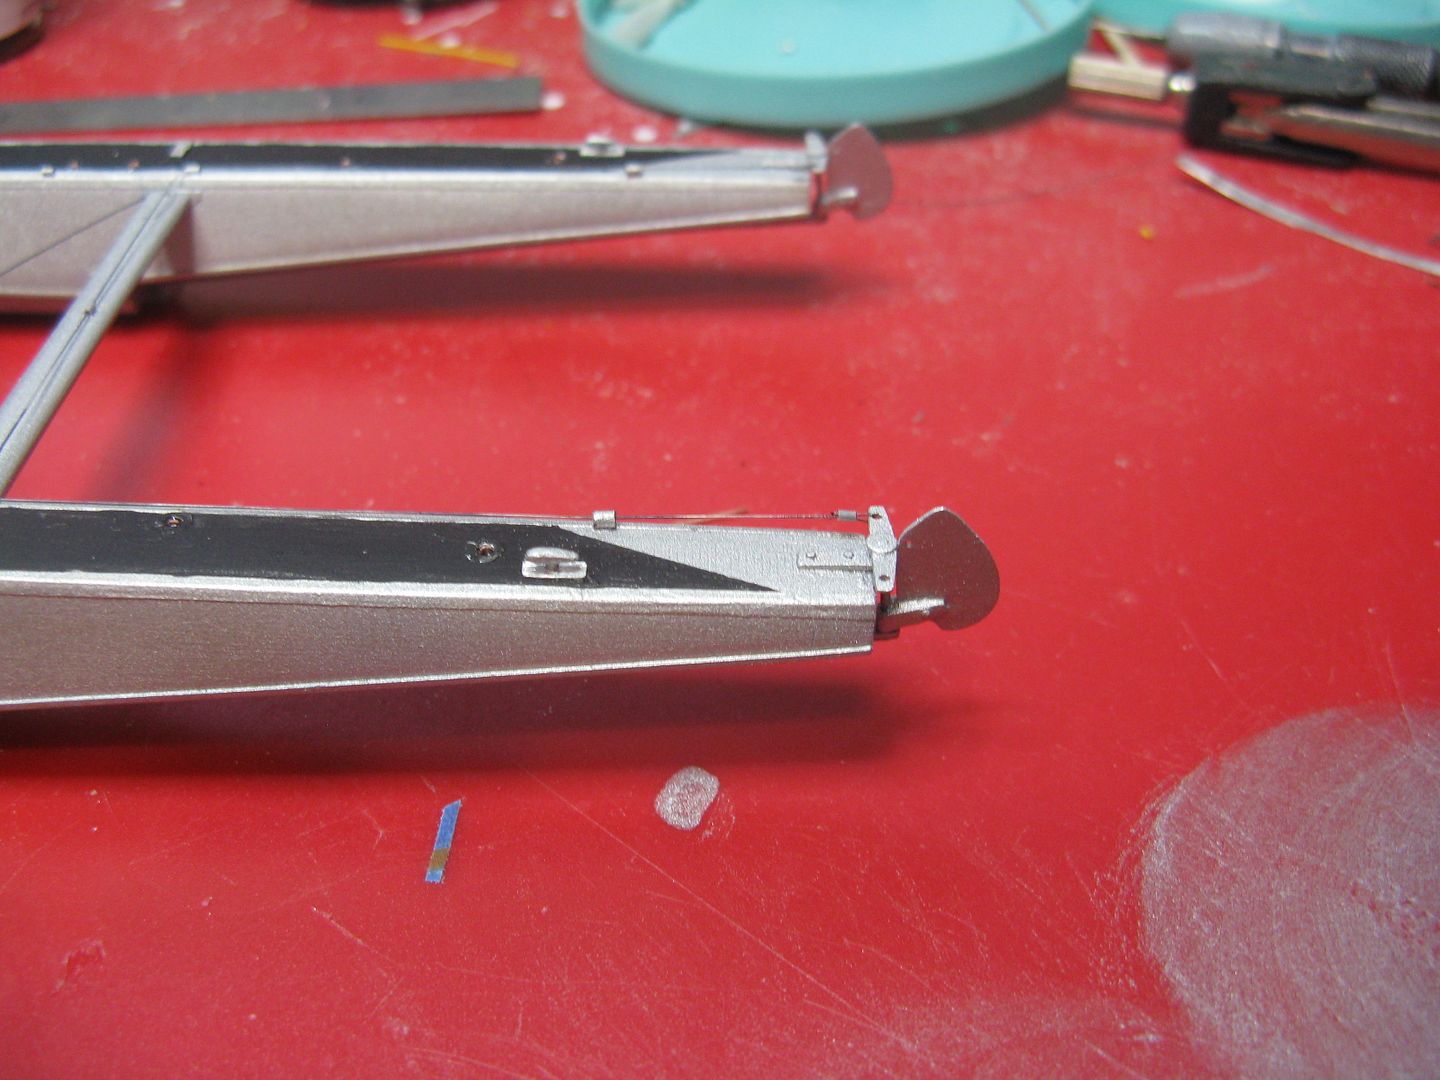
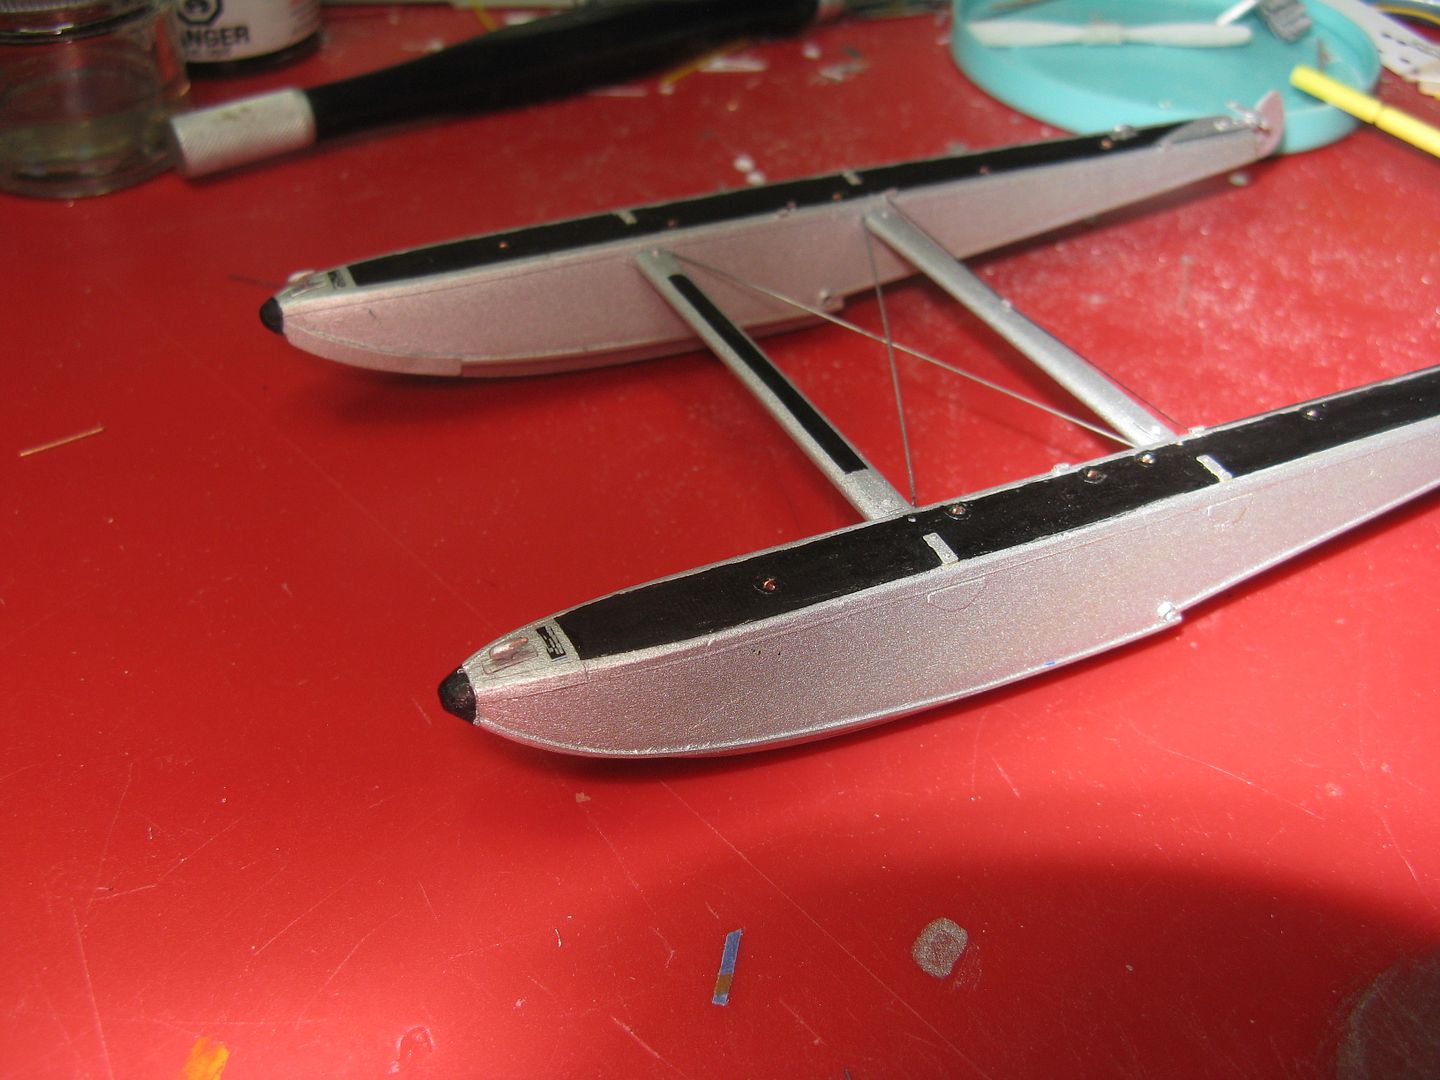
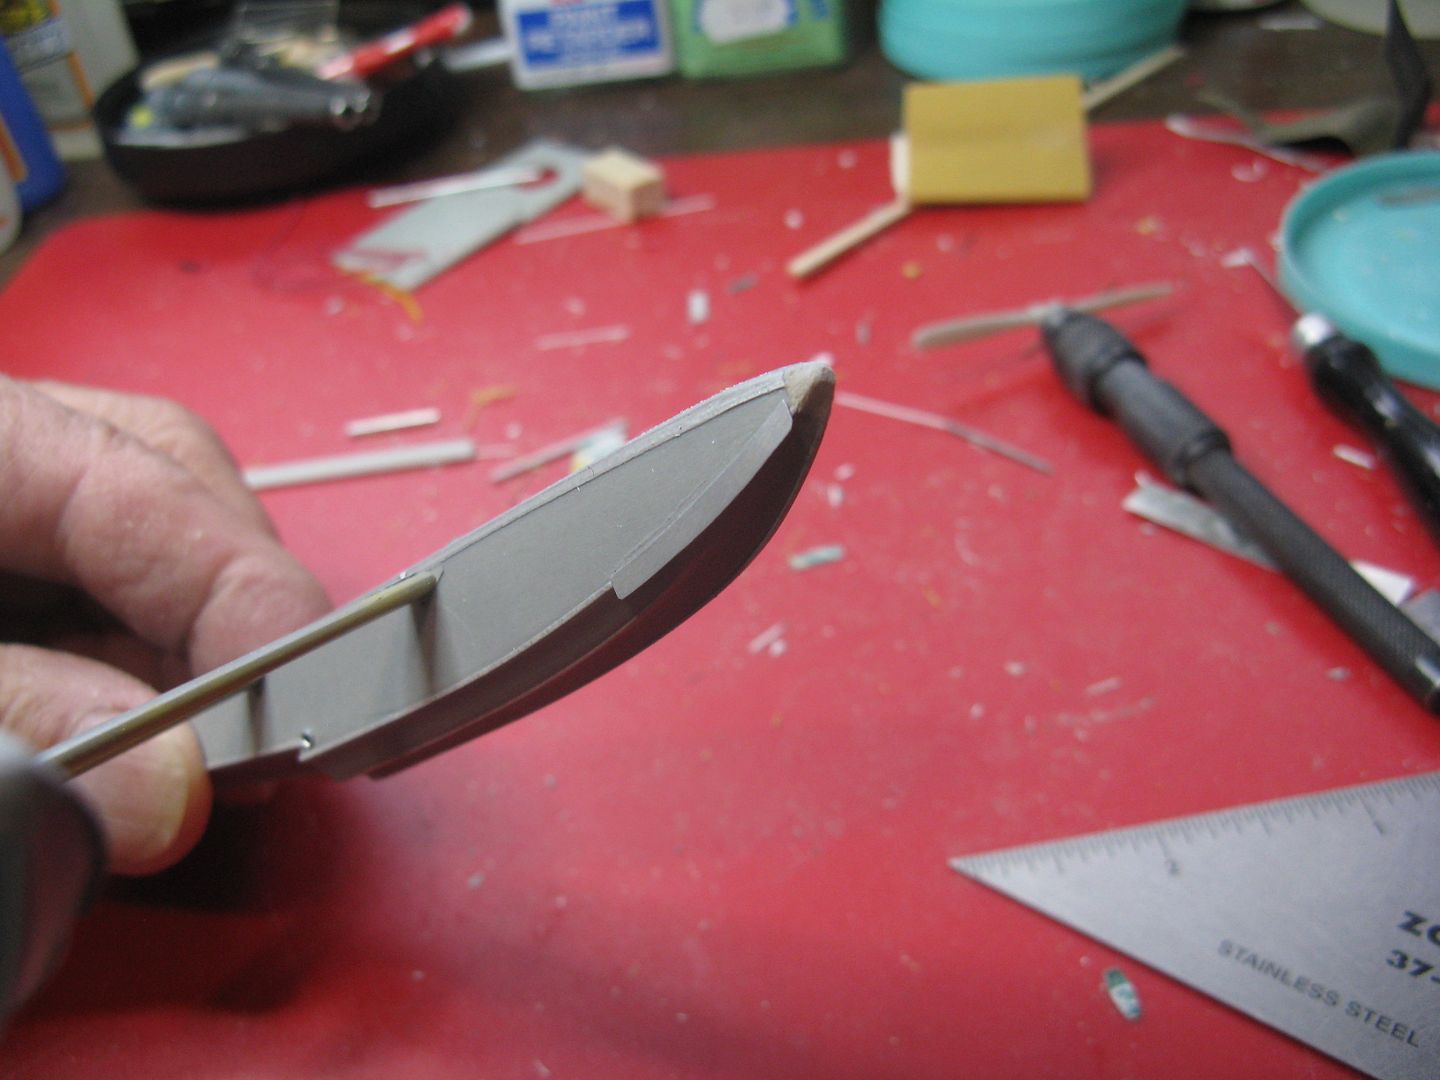
Other detail added to the floats were chine keels on the front steps, shoes on the float keels and a skeg - that little thingy with the hole in it between the steps...
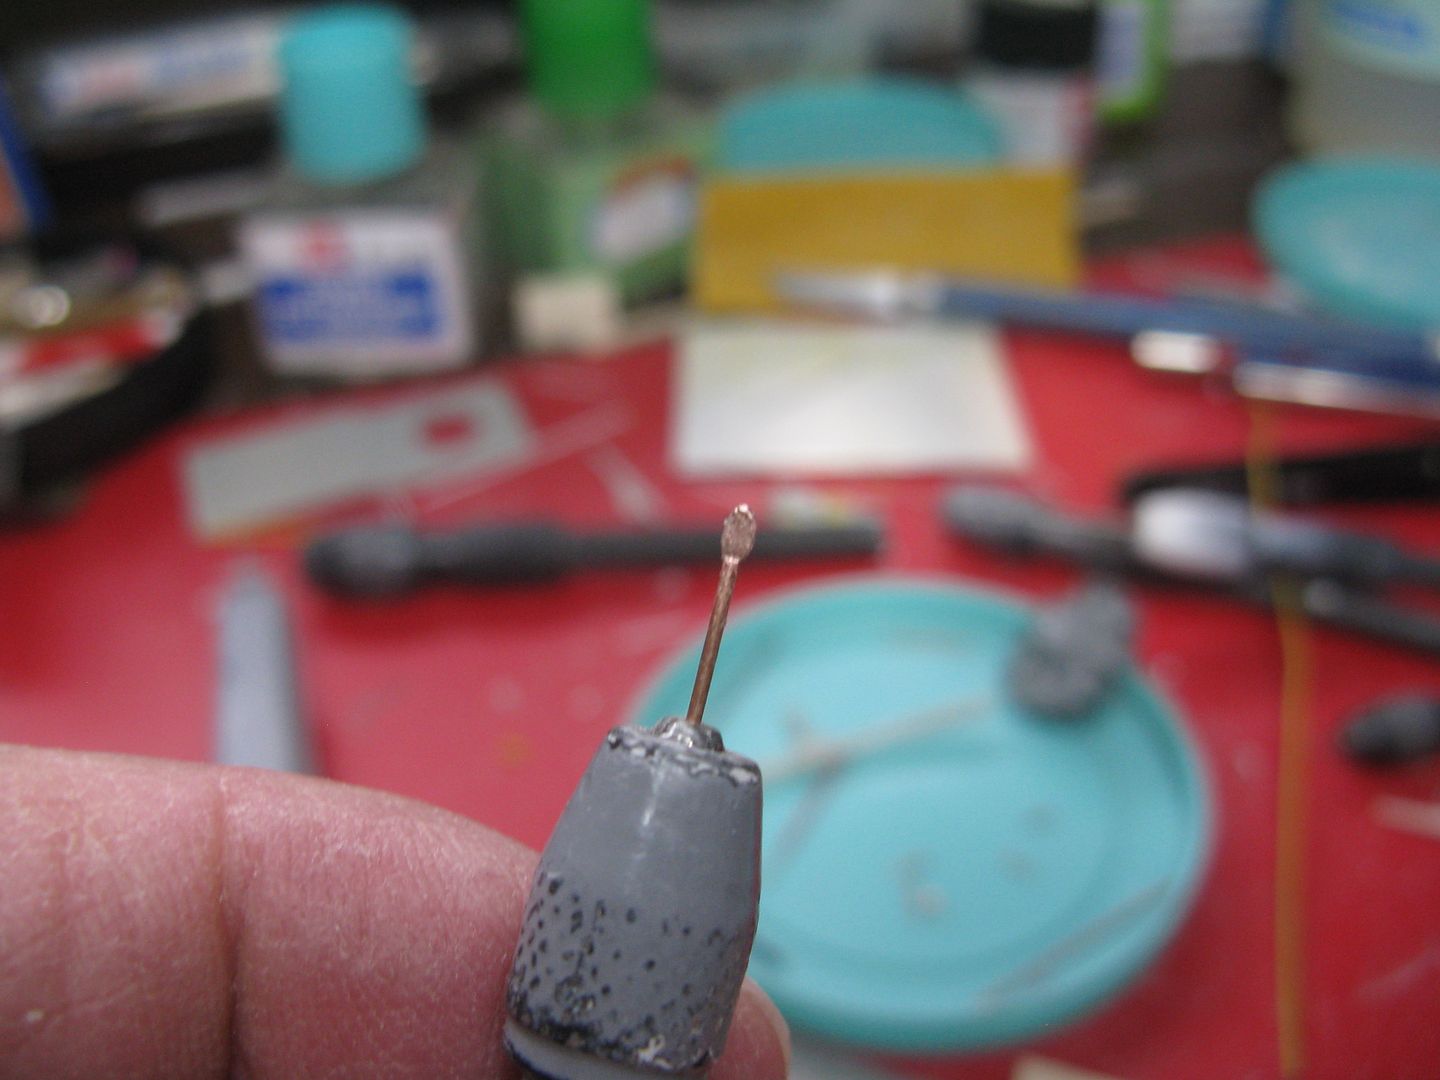
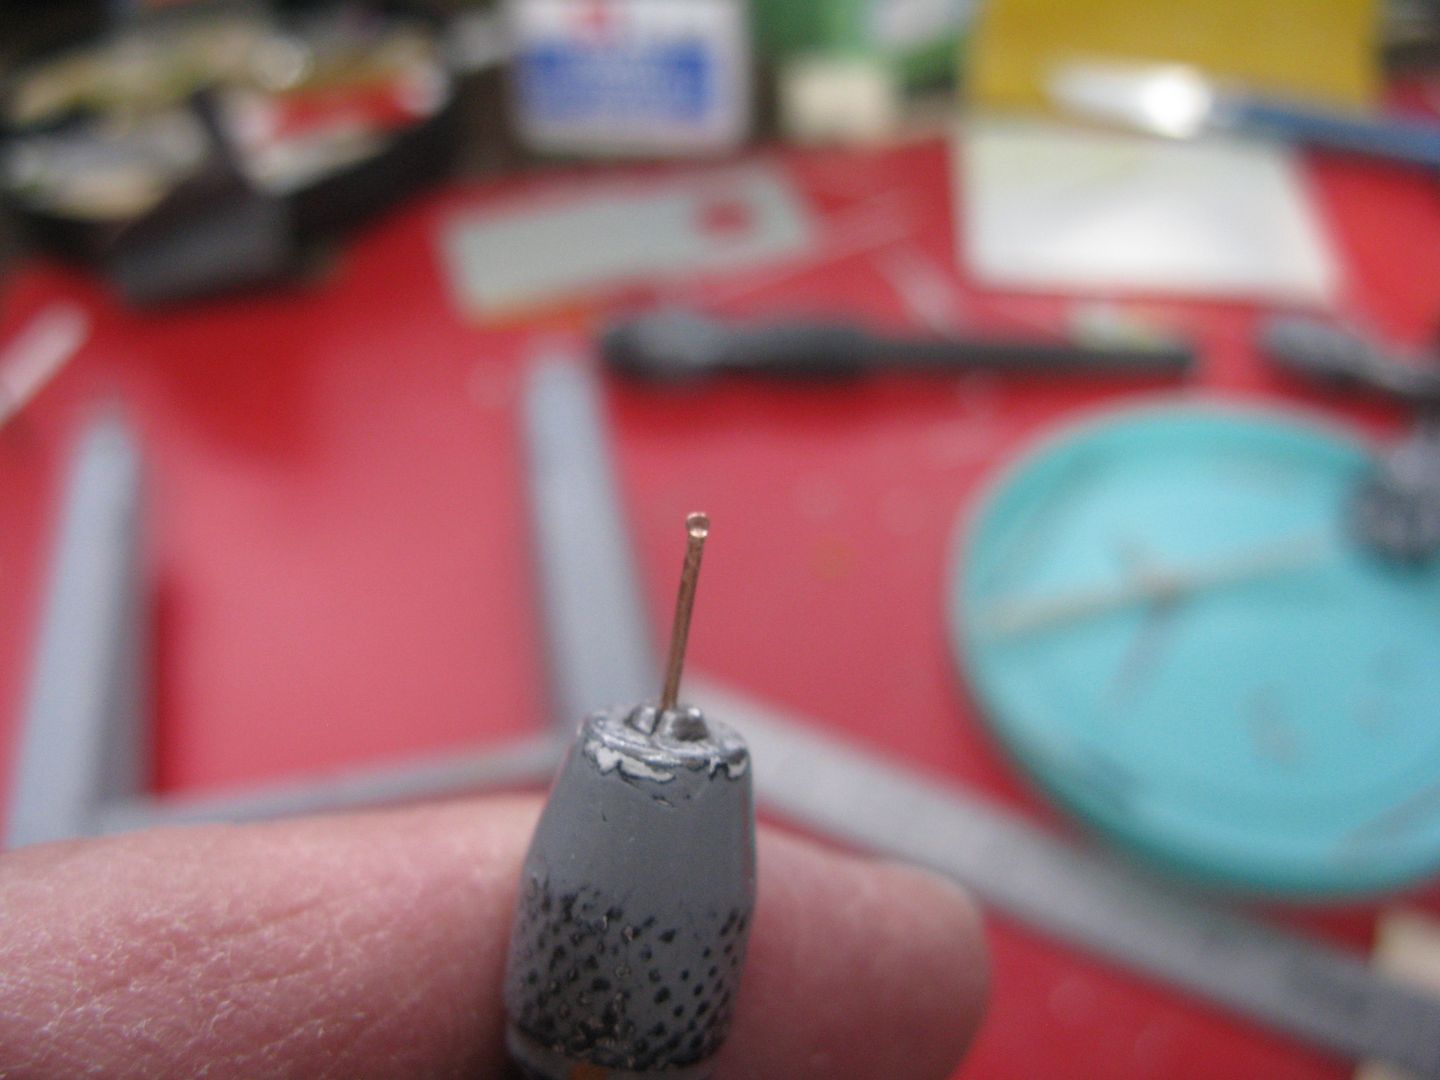
...Splash guards - made from beverage can - for the inboard front of each float to protect the prop from overspray, as well as new float bumpers made from a bit of balsa wood, glued to where the kit bumper used to be before I sawed it off, and sanded to shape...
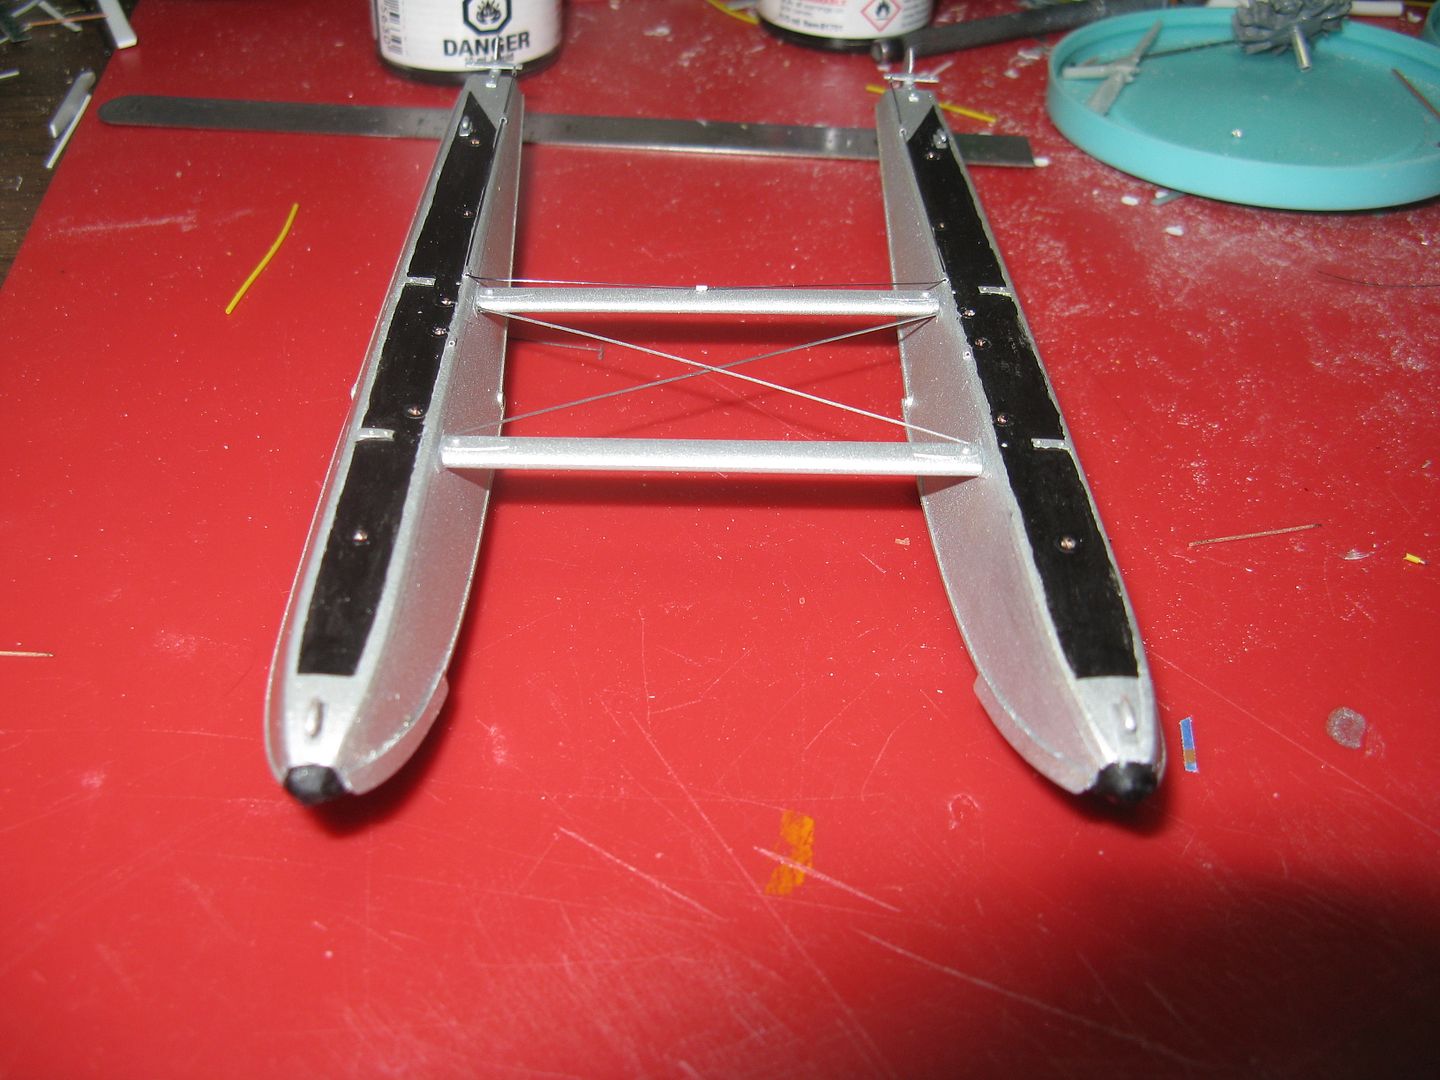
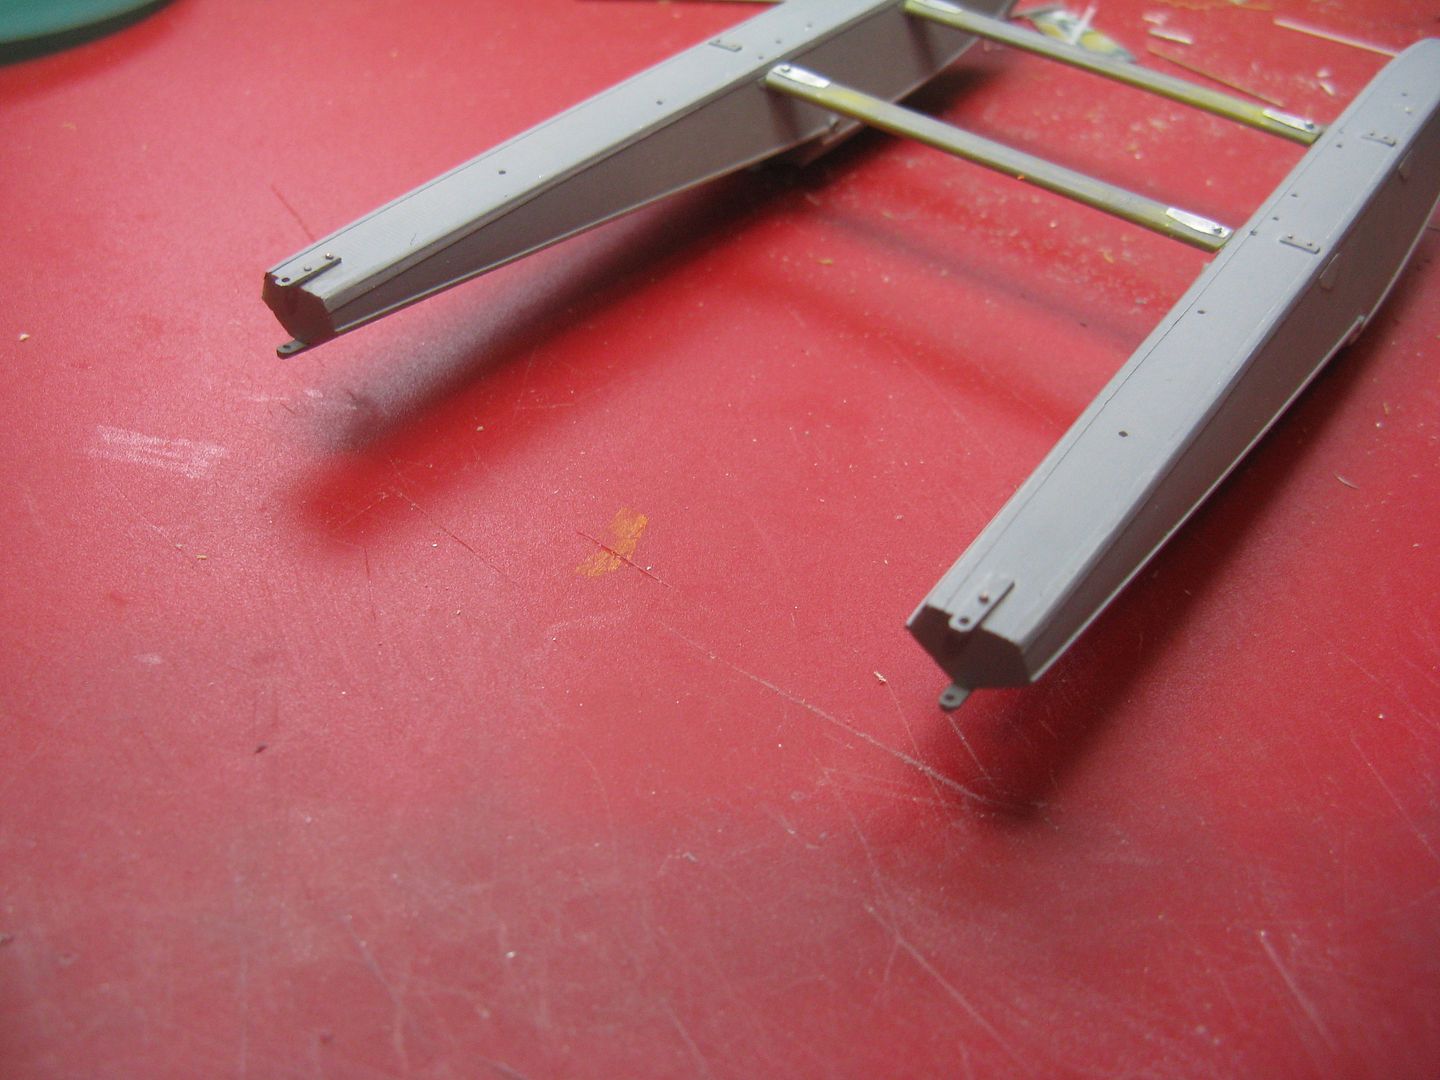
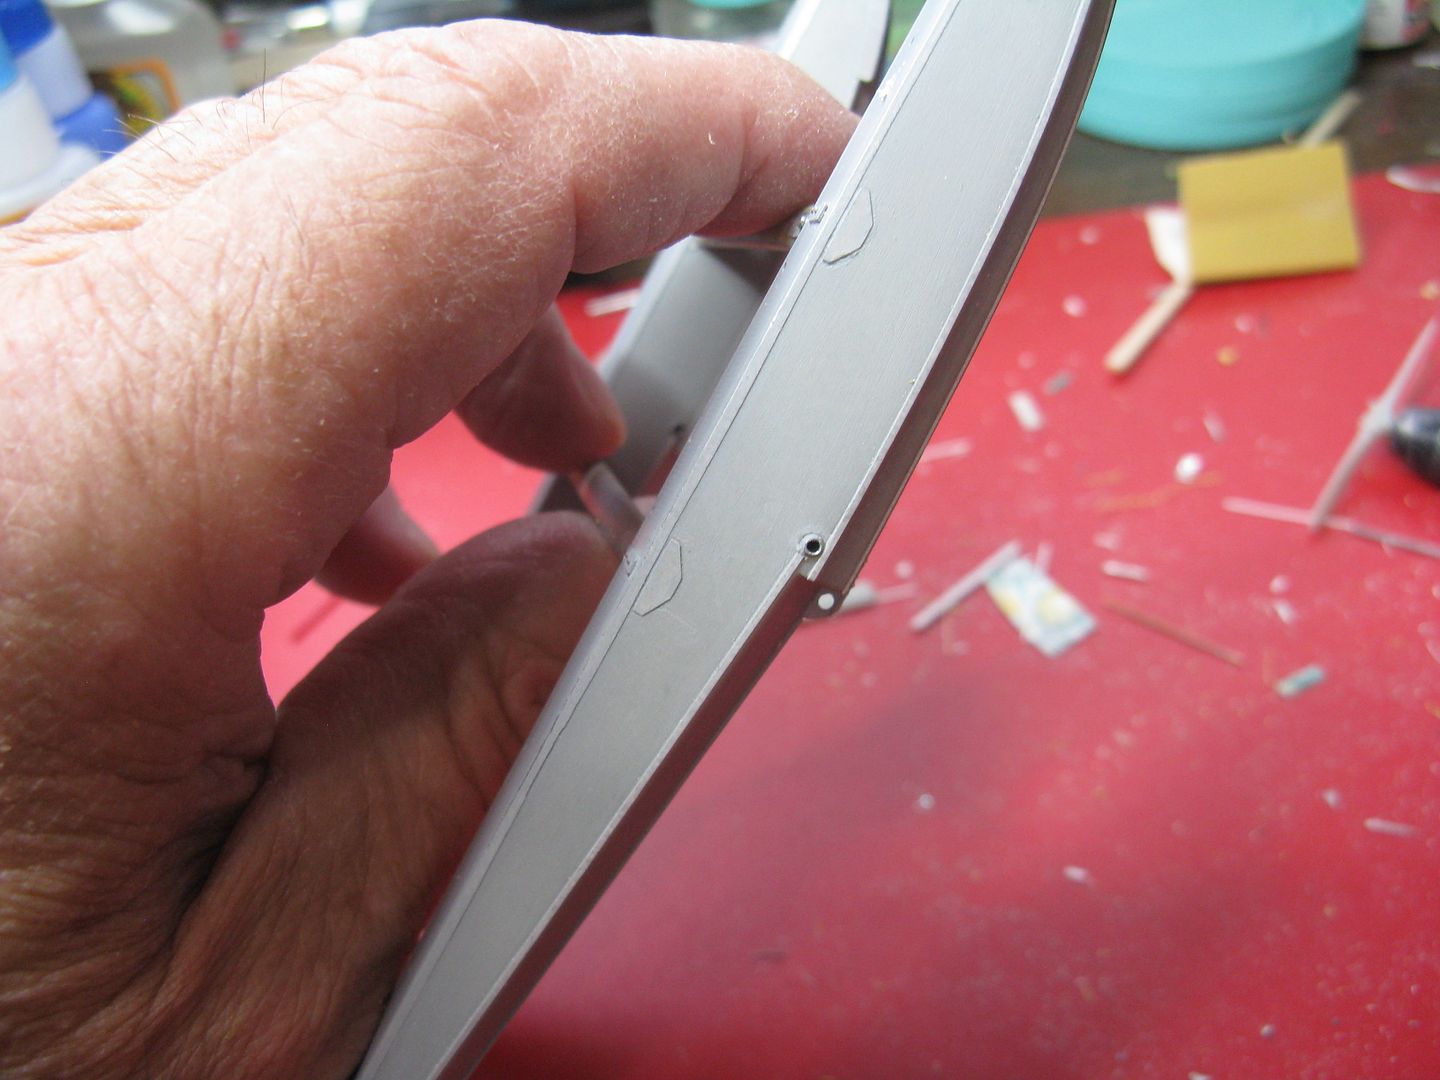
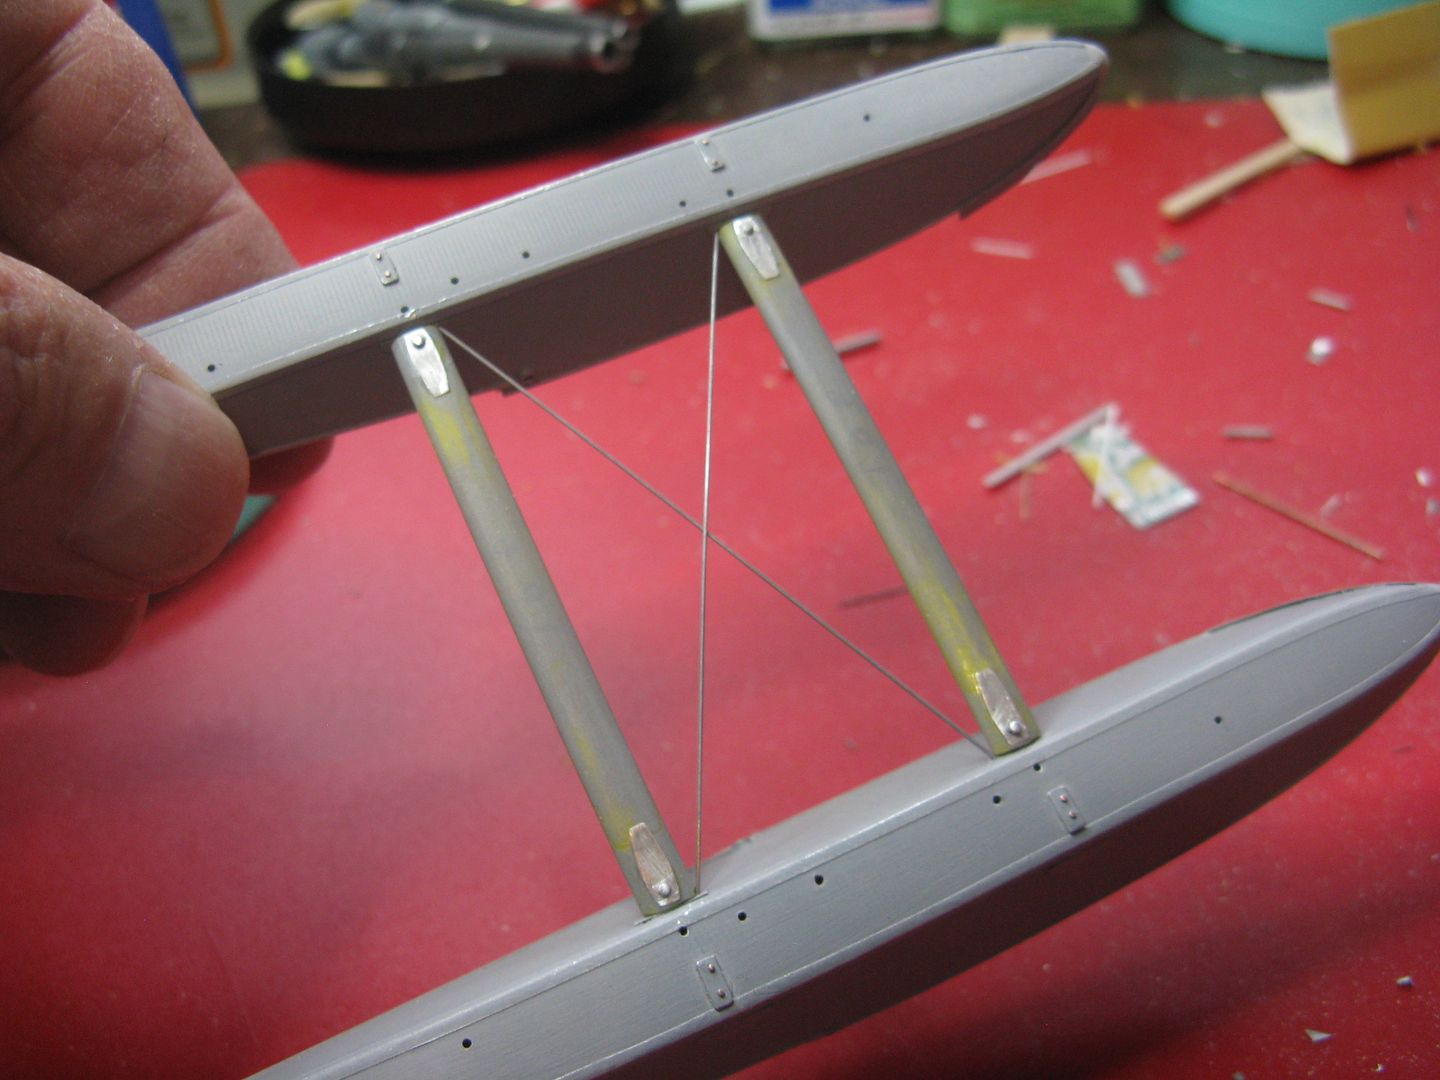
...New spreader bars that include the doubler found on top of the real spreader bar, complete with the pins that attach the bar to the float...
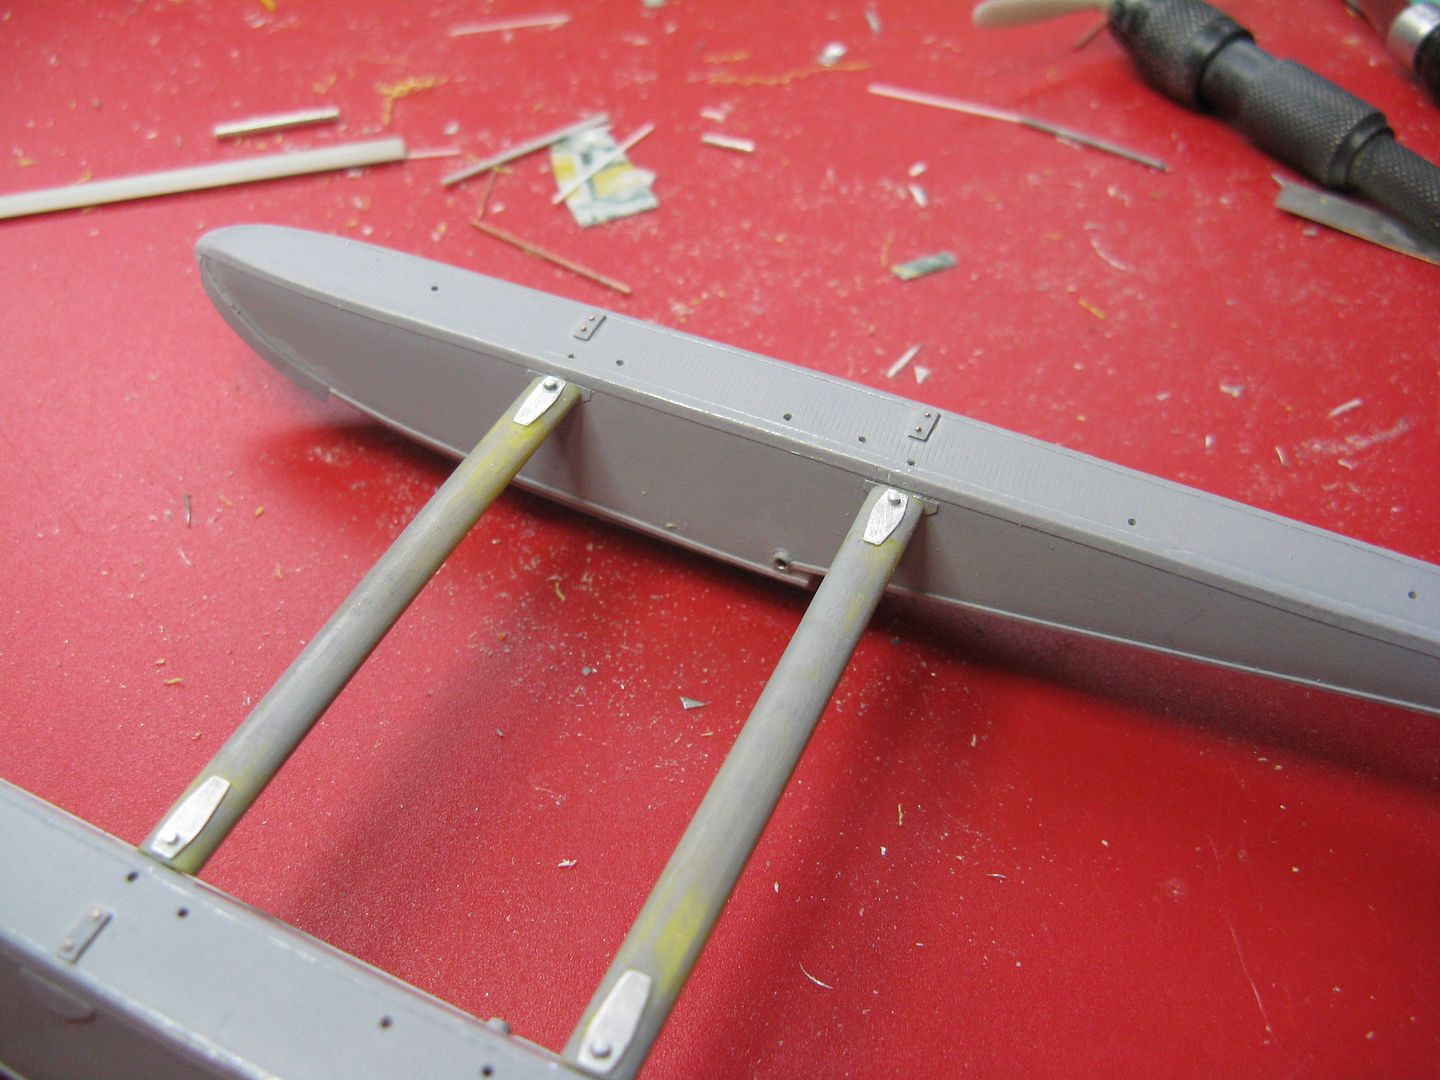
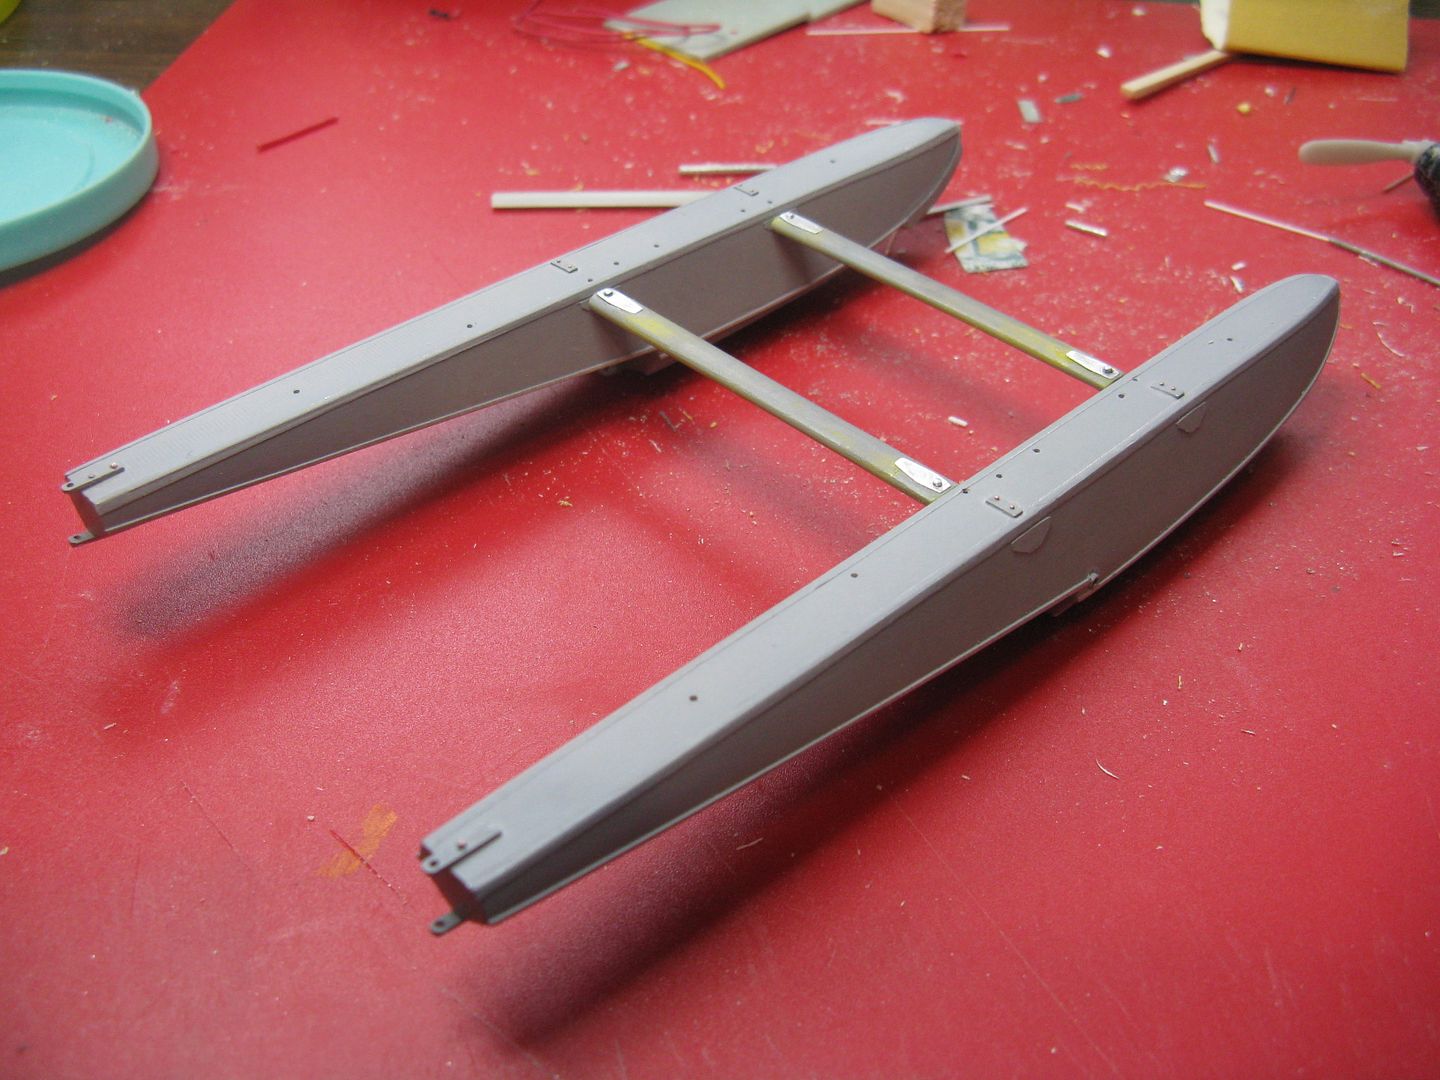
...I drilled a hole through and through each float just above the step to accept a length of 1/16 od aluminum tube to represent the axle tube for the beaching gear, and added some .010 x .010 styrene strip to represent the attach angles between the float side and bottom skins.
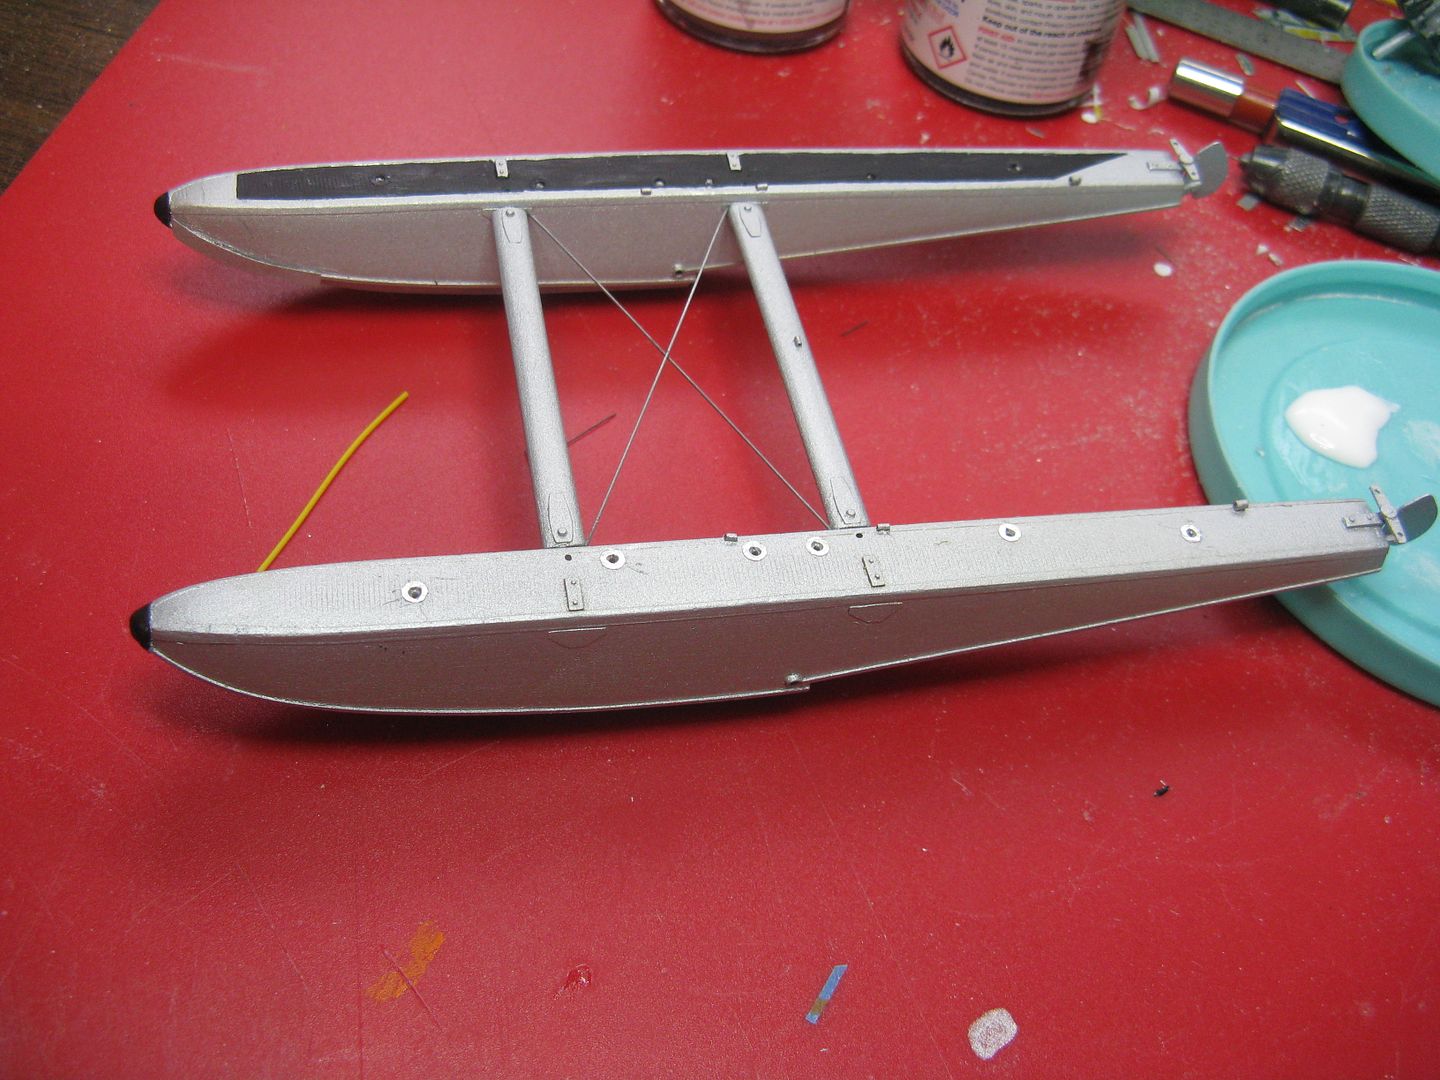
Finally, two boxing wires that cross diagonally between the spreader bars. On the real thing, these wires are aerodynamically shaped stainless steel flying wires that can be adjusted to ensure the floats are boxed squarely. They have to be finely adjusted - I seem to remember to 1/32" - and hearing an aircraft mechanic call the tolerances while measuring between those metal pins is an education. Who knew that different colour body hairs were so precise?
I still have to make and install the water rudders and the mounting hardware, along with the cable runs and cables, then two mooring cleats per float as well as finish the pump-out wells and plugs.
The DHC-2 Beaver was the second design offered by deHavilland Canada after WW2, the first being the primary trainer, the DHC-1 Chipmunk. I had toyed with the idea of building a model of a DC-3 on skis after completing the Turbo Otter, but my friend Rich express an interest in acquiring a model of the Beaver, so Beaver it is. The model is the 1:48 Hobbycraft offering, a pretty good rendition of the real thing. Ok, the only one in 1:48 actually. I had a couple in the stash, so onward. Actually the Hobbycraft model came in two variations, one on floats in Harbour Air titles, and the other they called the Viet Nam Beaver which came only on wheels. I never bothered to check the stash, and when I did I found one Harbour Air machine minus the floats. Oh oh, sez I, but then I opened one of the VN boxes and found a set of floats. Go figure.
The original Beaver was supposed to have been powered by a 350-horse Gypsy Major inline six. Thankfully this insanity was put to rest when Pratt & Whitney advised deHav they had scads of the 450-horse small Pratt R-985's left over from WW2, and a match made in aeronautical heaven ensued. The airplane is so practical it remained unchanged for 50 years. It had seats for seven, including the pilot (I've carried ten, and will only admit it now that the statute of limitations has run out.) The doors are 40-some inches wide, which means that you can roll a 39-inch, 55-gallon, barrel of gas onboard without skinning both sets of knuckles on the door frames. All in all, a fantastic airplane and I loved to fly it.
This is the one I shall attempt to replicate, sn 1272, C-GZBR.
More on the history of this aircraft here.
C-GZBR sn 1272
As with any project, one must start somewhere, so what better place than with the floats which I glued together conventionally. The kit floats lack any kind of detail, except for a set of water rudders that I promptly sawed off and threw away. I shall make a new set, along with the hardware, and mount them using these nifty upper and lower mounting brackets I made from scrap metal.
Other detail added to the floats were chine keels on the front steps, shoes on the float keels and a skeg - that little thingy with the hole in it between the steps...
...Splash guards - made from beverage can - for the inboard front of each float to protect the prop from overspray, as well as new float bumpers made from a bit of balsa wood, glued to where the kit bumper used to be before I sawed it off, and sanded to shape...
...New spreader bars that include the doubler found on top of the real spreader bar, complete with the pins that attach the bar to the float...
...I drilled a hole through and through each float just above the step to accept a length of 1/16 od aluminum tube to represent the axle tube for the beaching gear, and added some .010 x .010 styrene strip to represent the attach angles between the float side and bottom skins.
Finally, two boxing wires that cross diagonally between the spreader bars. On the real thing, these wires are aerodynamically shaped stainless steel flying wires that can be adjusted to ensure the floats are boxed squarely. They have to be finely adjusted - I seem to remember to 1/32" - and hearing an aircraft mechanic call the tolerances while measuring between those metal pins is an education. Who knew that different colour body hairs were so precise?
I still have to make and install the water rudders and the mounting hardware, along with the cable runs and cables, then two mooring cleats per float as well as finish the pump-out wells and plugs.


")