Brokeneagle
Master at Arms
Hello TNTers,
I have been working on this vehicle for the last few months just as a build project, as I am not sure when I will be painting this. It has been fun researching the photo's which I always enjoy (as those of you who are used to my posts will be aware). This particular vehicle has been a subject which caught my eye about 12 years ago when I purchased the book (Sturm and Drang no4 )that had a series of shots in it (see below)
Russia- 4th Panzer Division, 2nd company
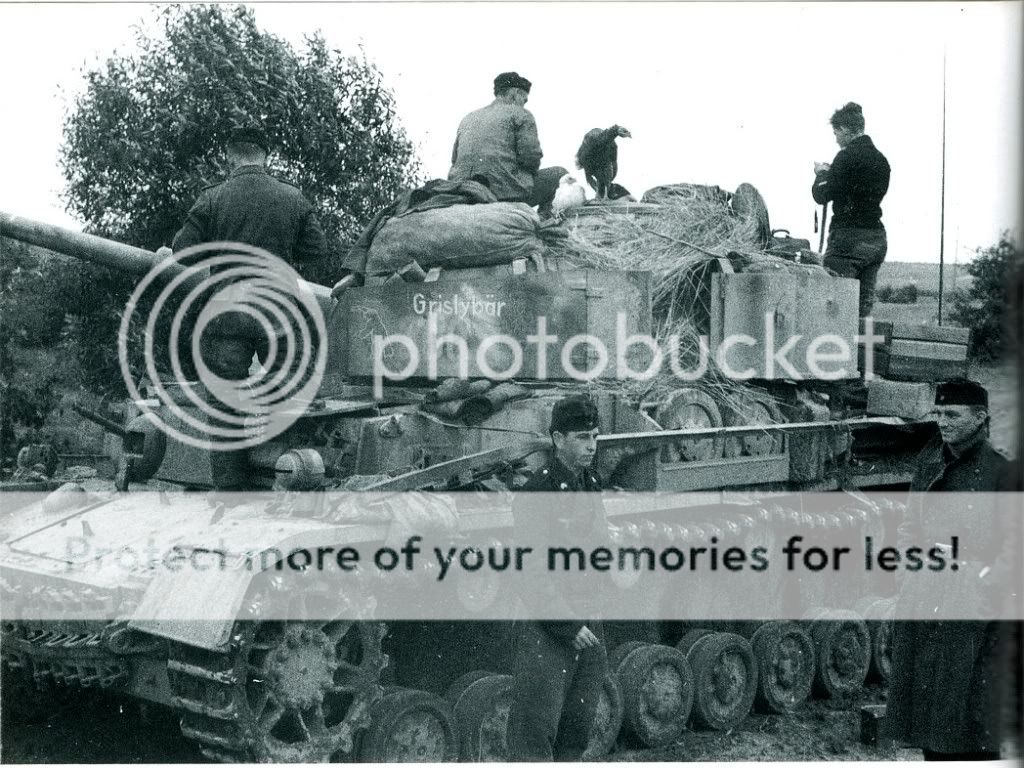
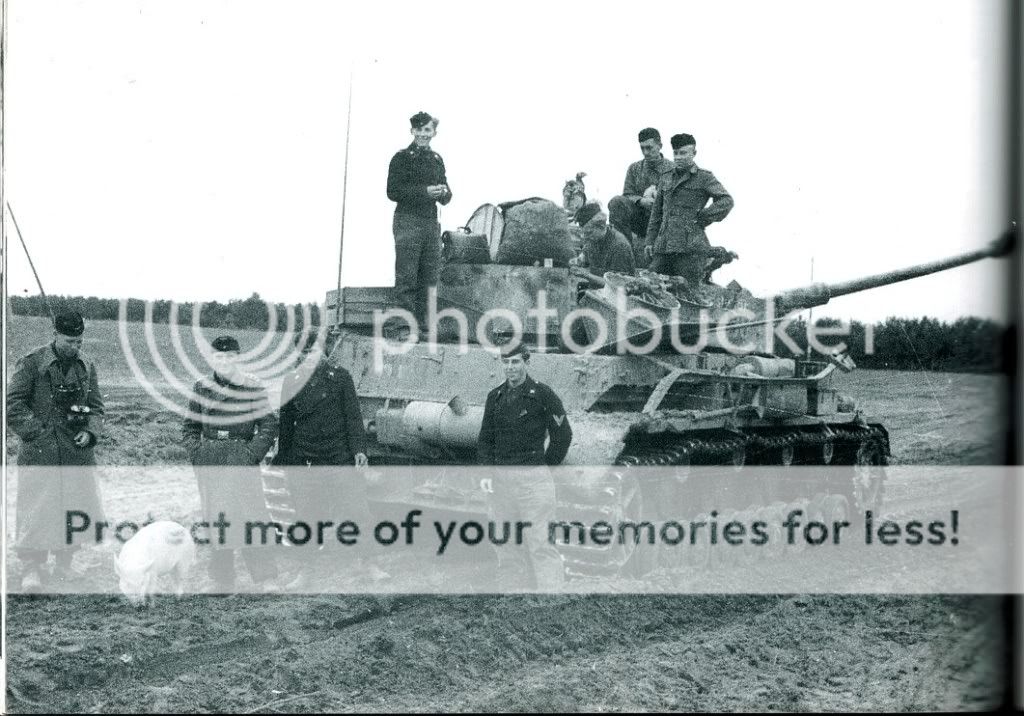
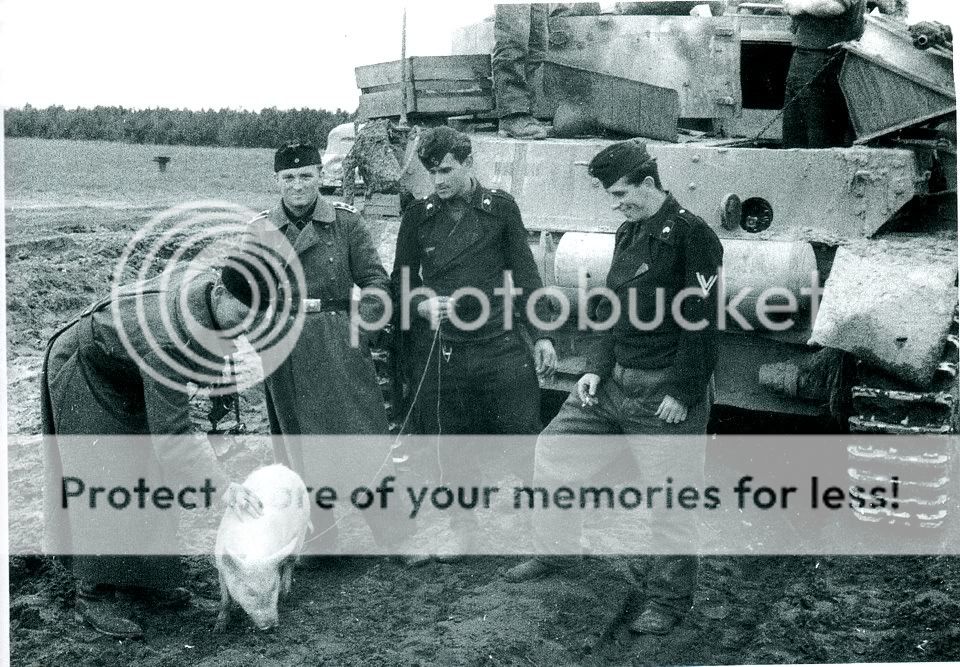
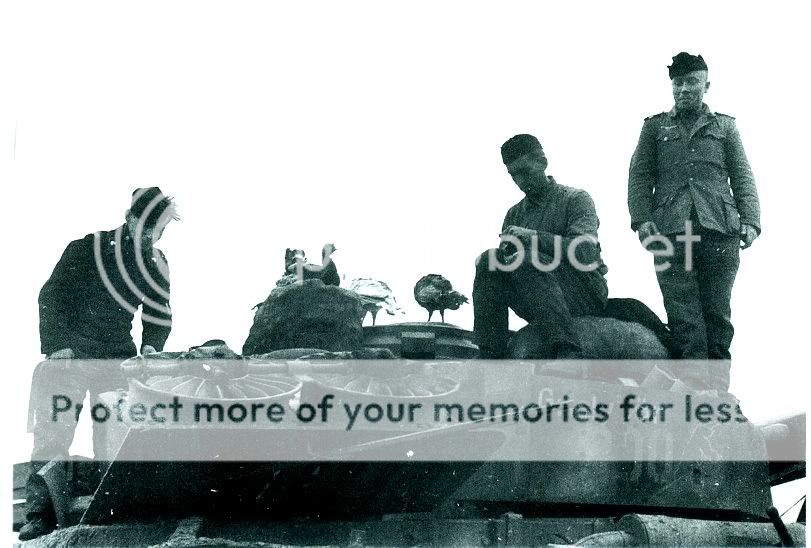
I was attracted to this vehicle for several reasons, not the least being the collection of gear and stores, as well as the farmyard hitchhikers, which will all add to the scene and enhance the model display. This is also interesting because it is a cross over vehicle from G to H variants.
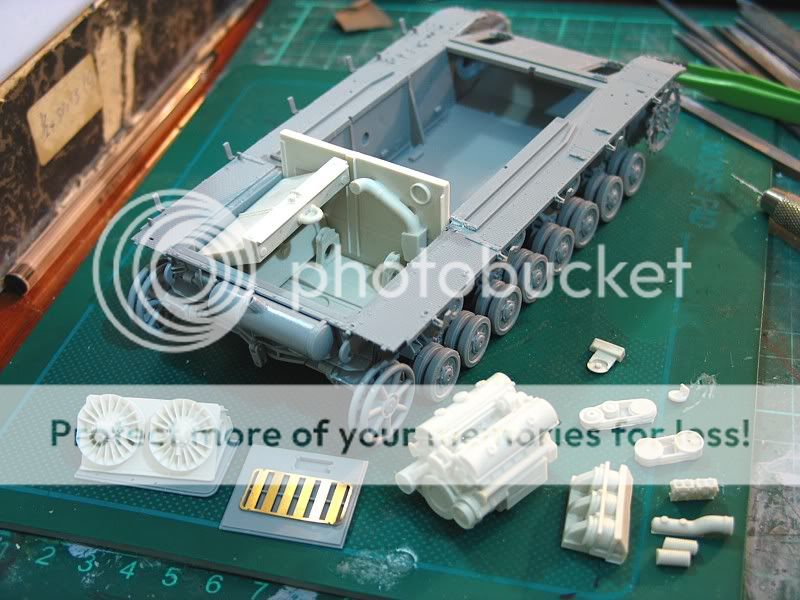
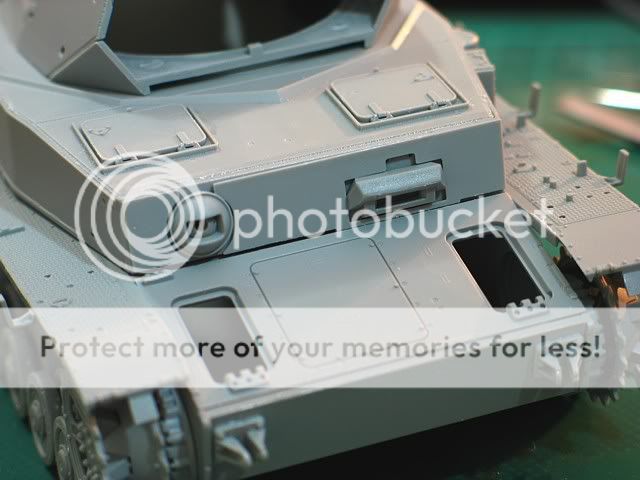
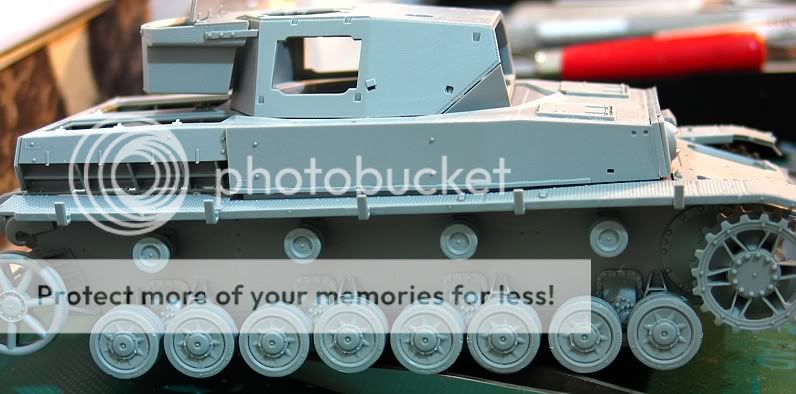
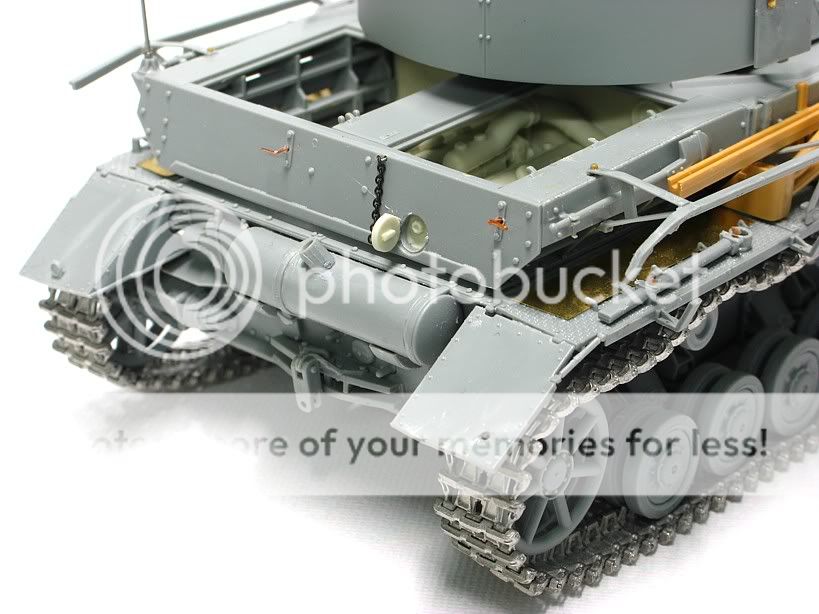
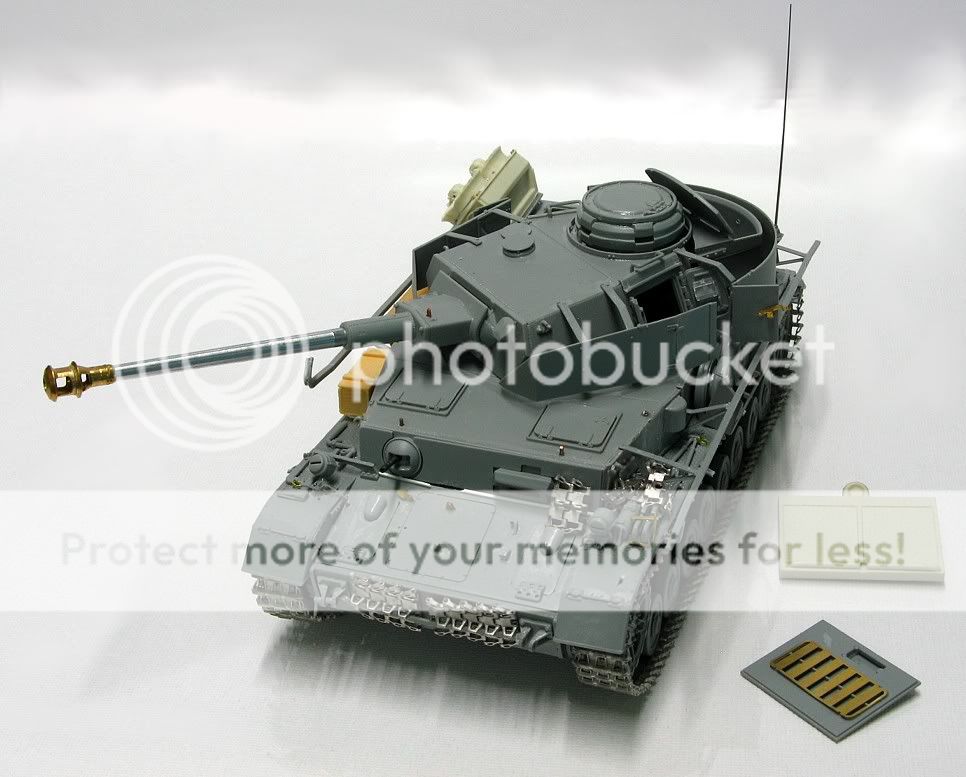
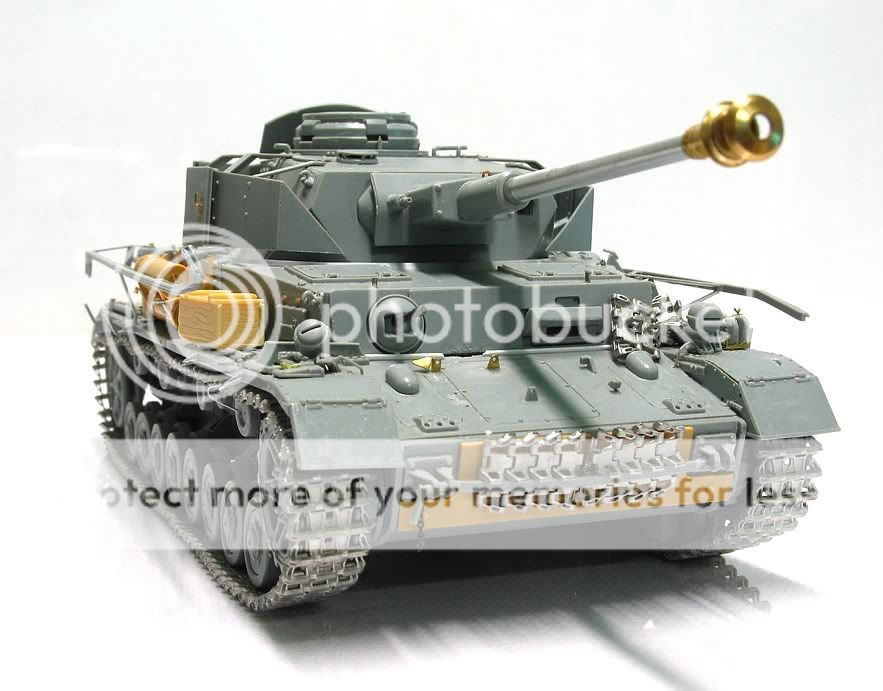
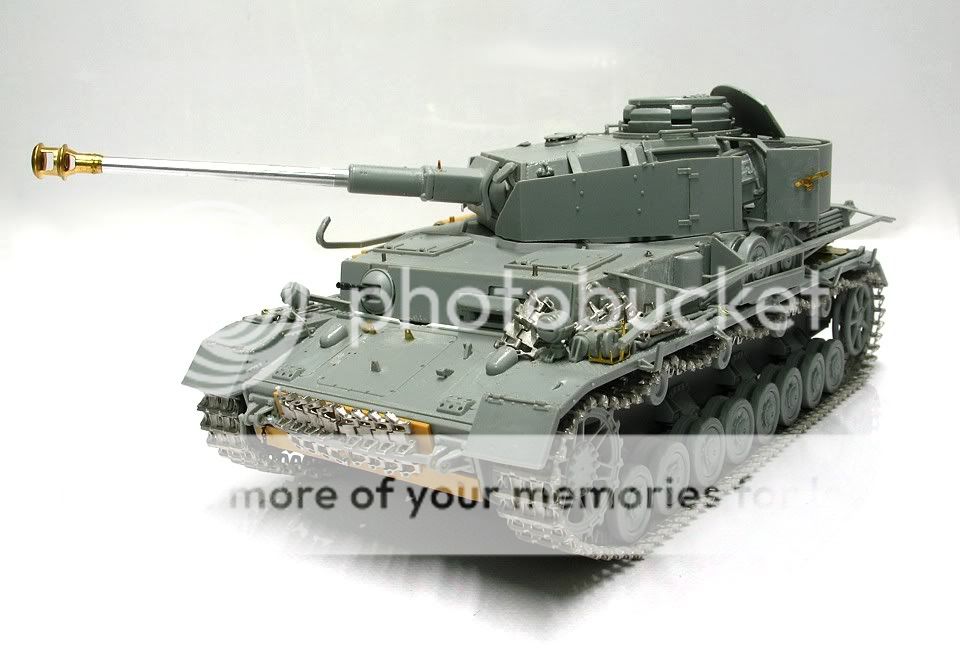
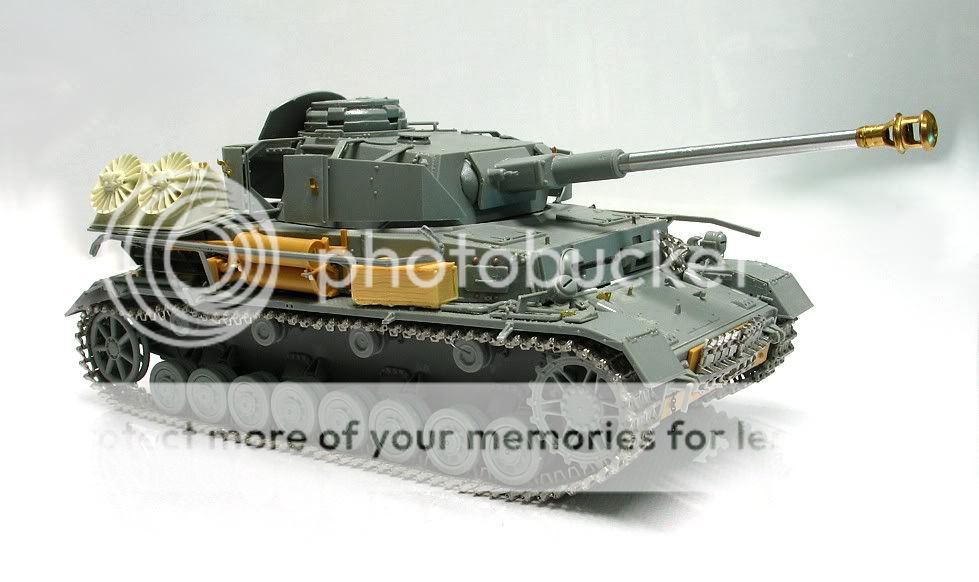
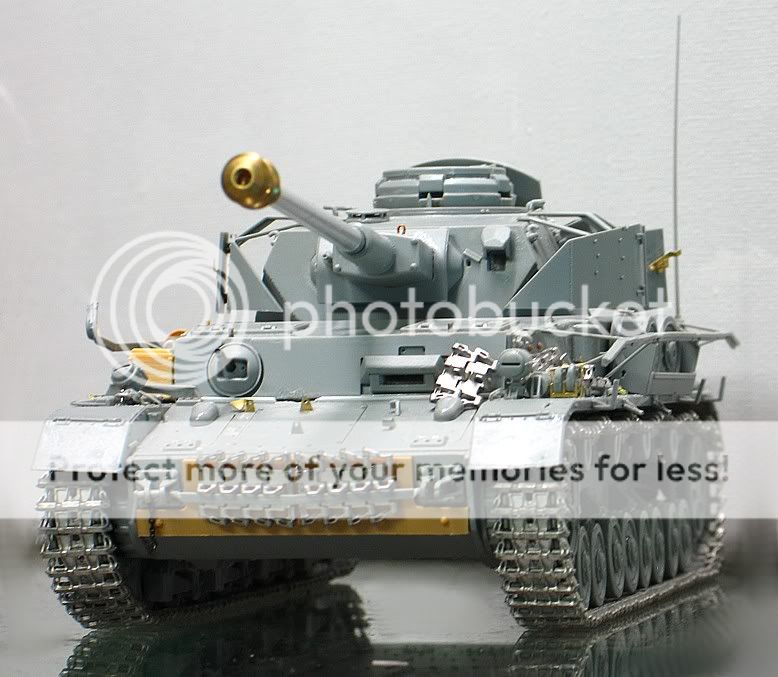
This vehicle displays some unusual mixes of early H and late G variations as well as battle damage ( a magnet for me). It shows some significant attributes associated with late G models such as the additional welded armour (split version)to the front superstructure and single bolted lower plate, hollow toothed track, early rear Idler wheel, early schurzen mounts and rubber tyred return rollers. It also still retains the side superstructure vision ports as well as the double headlights, however it does have the later model drive sprockets, late rear plate mounts for the cable and the newly designed air cleaner on the right hand side of the vehicle (and this is actually about the only way to really confirm that it is a H model).
So it is about the earliest H version I have seen and must have been in the first batch I think in early 1943 which also explains the total lack of Zimmerit coating.
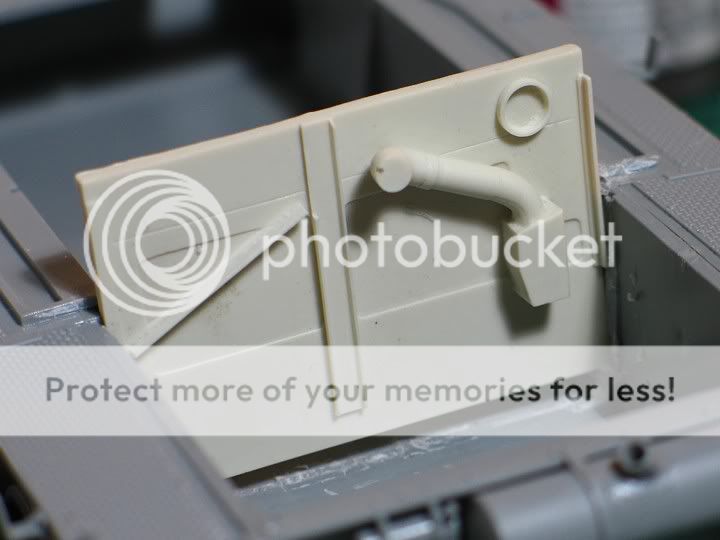
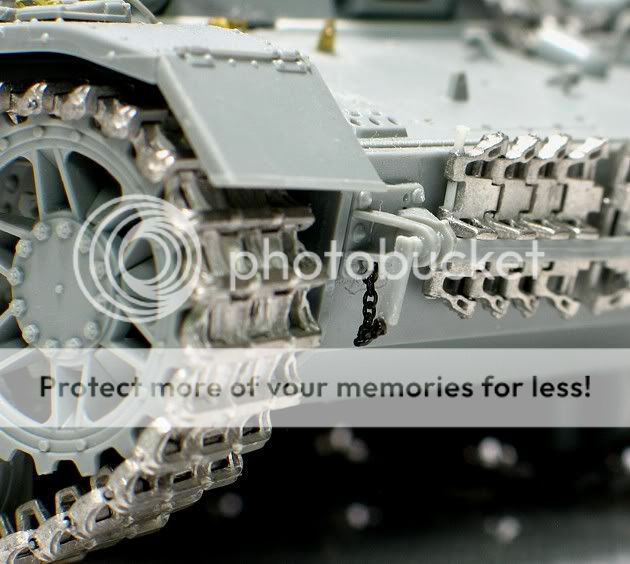
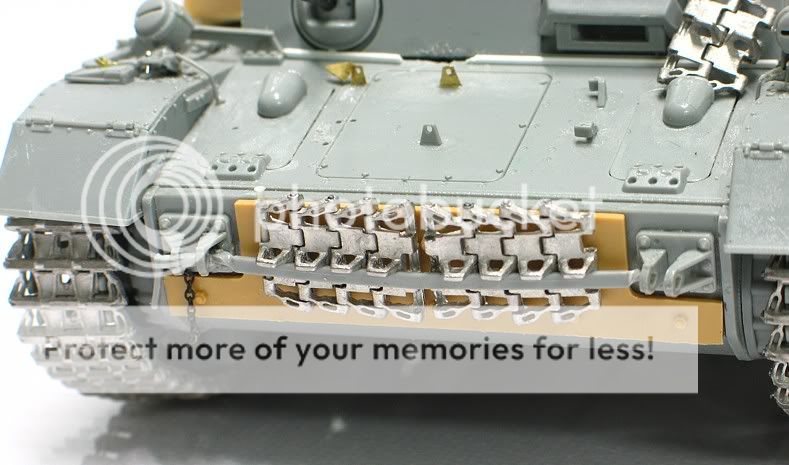
There has been some exstensive damage as well with the bent hanging rail on the left going 'hand in hand' with the badly damaged front top plate and shot hit into the bottom middle of the welded armour plate. There is also a twisted track bracket and one missing as well as an ill-fitting transmission access hatch. The right headlight is still attached but has broken the mount and is bent over. It is also missing the jack rest block and chain and has nearly every mudguard schurzen mount bent or broken.
Color wise, the decals from Echelon that I have for this tank (Thanks Peter B)suggest a green dominated color but i disagree in looking at my black an white charts etc I think it is more a red brown due to the darker tonal quality so I will be going with yellow and red brown. Echelon also did not have references for the other side but clearly from these photos we see the grizzly bear repeated (lucky they give you an additional set just in case).
The model, I will have to post In the next day or so , as I noticed a couple of other missing details while doing this post. I modified the new late model H just because I wanted to use this new kit but in doing so I had to steal some parts from my late G (Dragon also)- i may as well have used the G kit I think or the Tamiya version I have (early H
  ). I did however miss the fact that it still retaind the late G rear lower superstructure plate but it is too late to replace it now.....i will have to live with the H version.
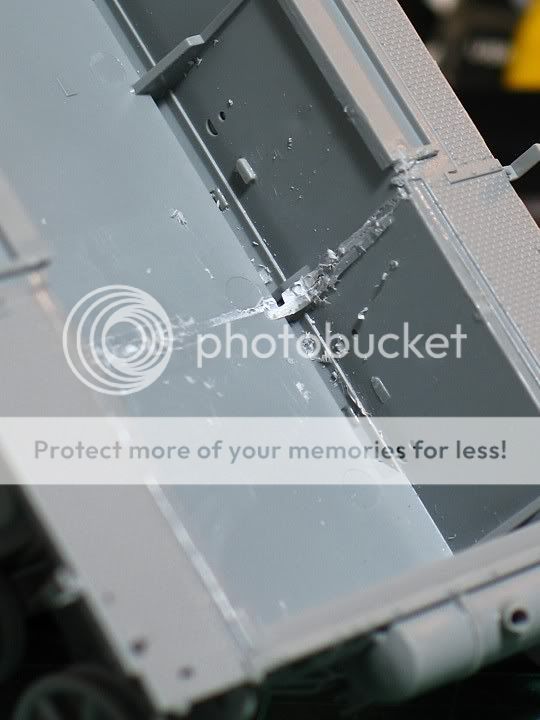
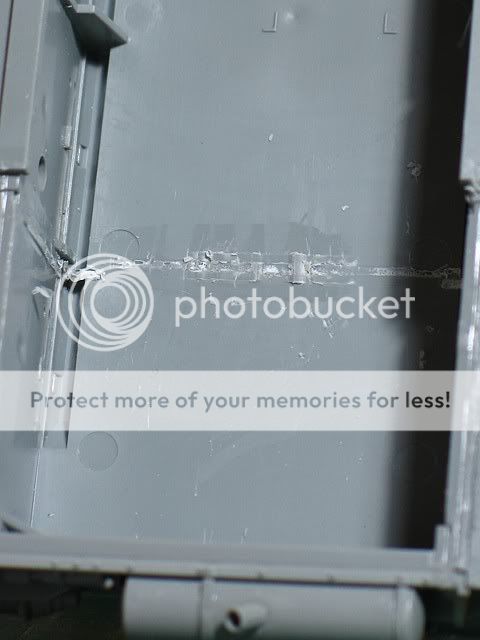
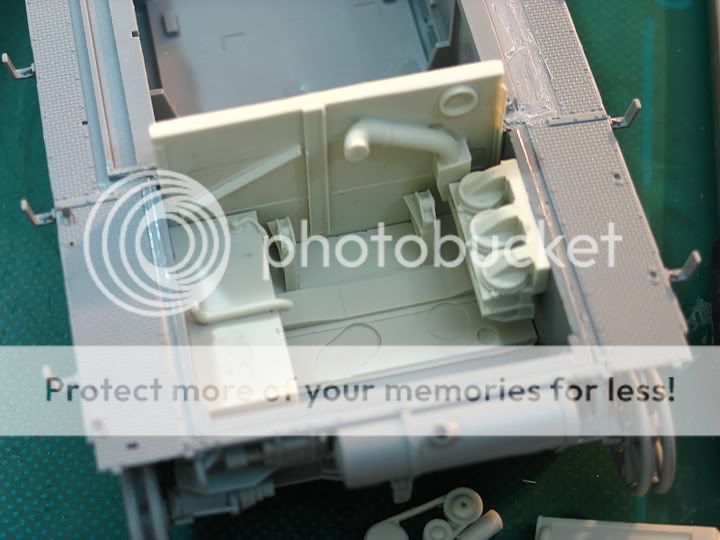
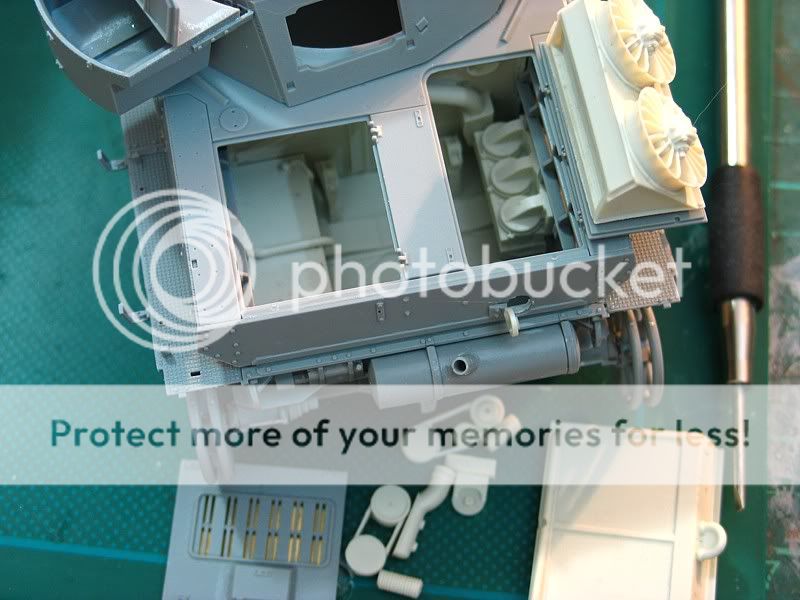
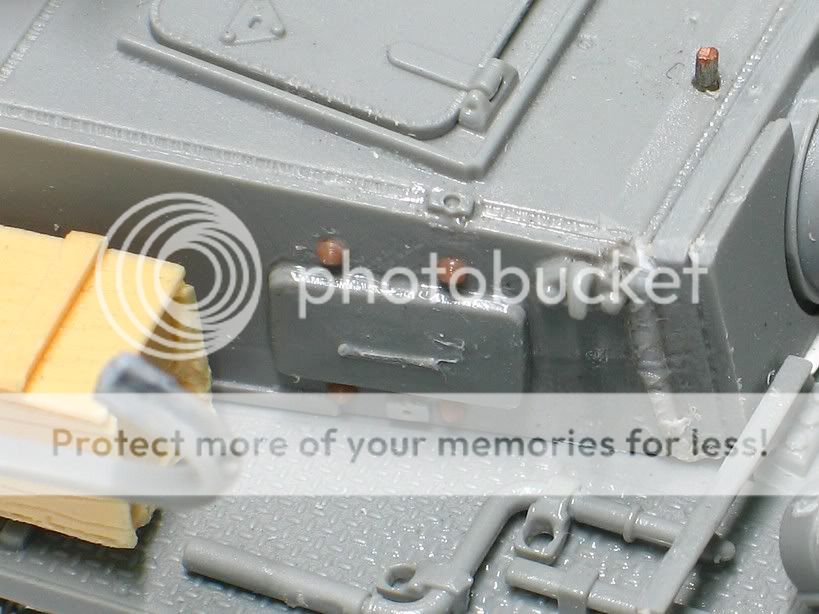
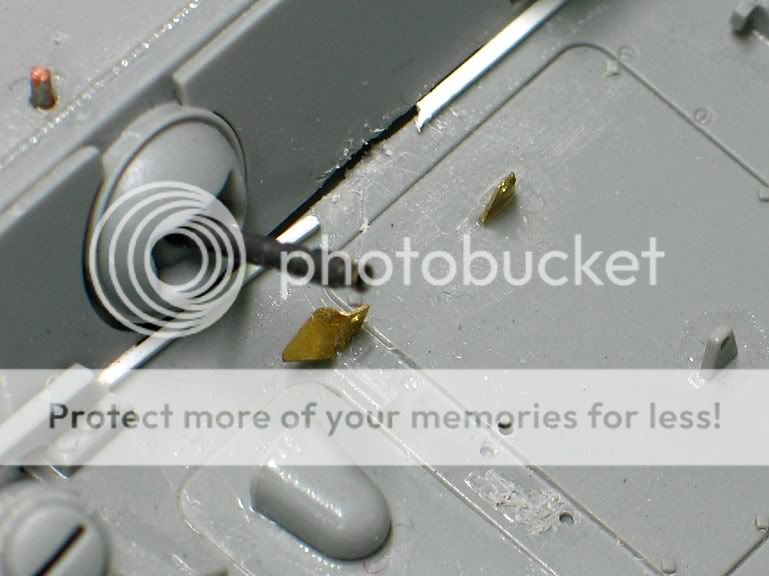
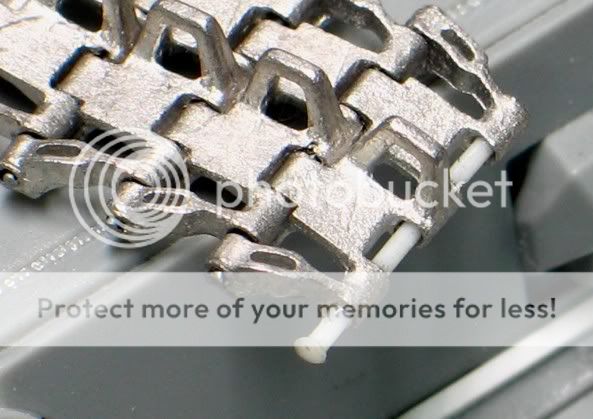
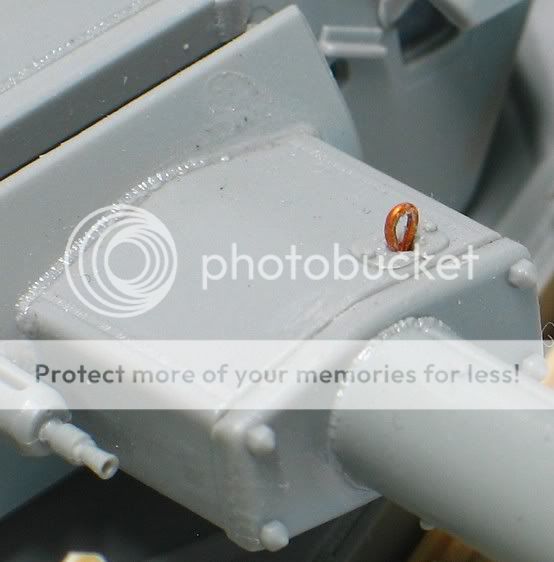
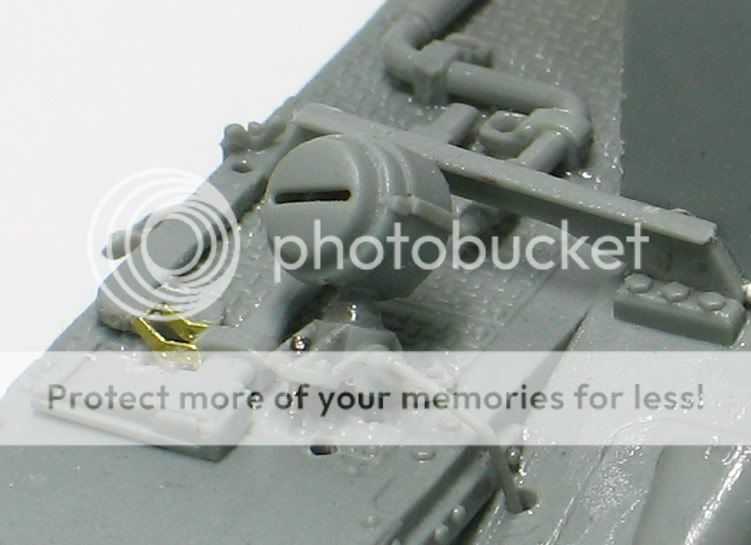
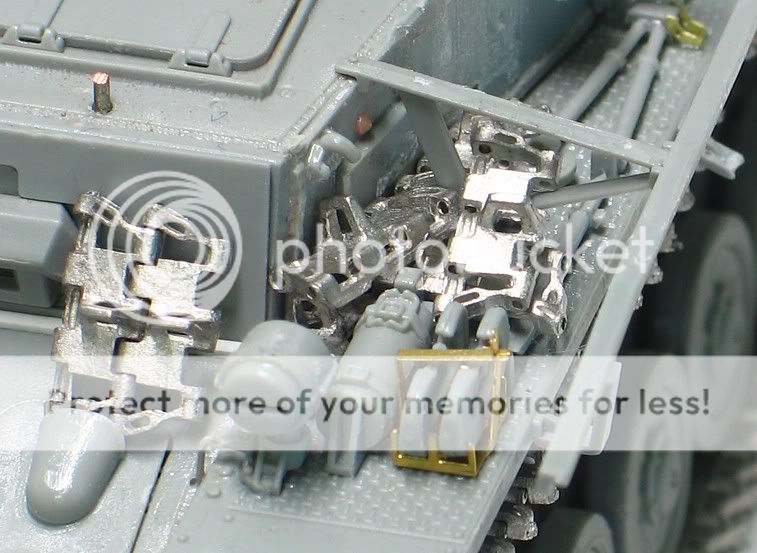
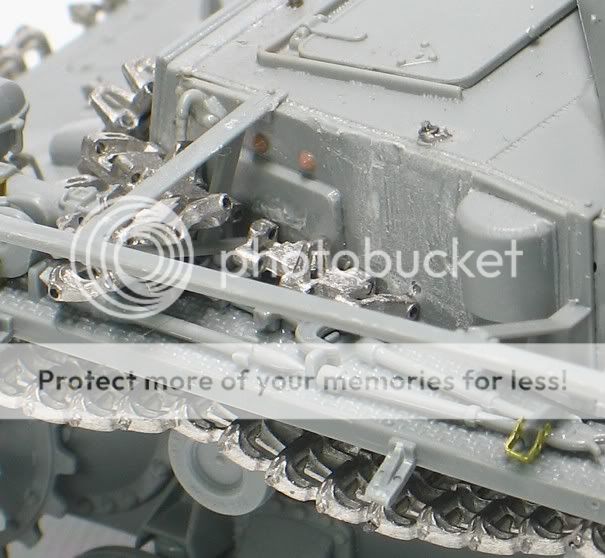
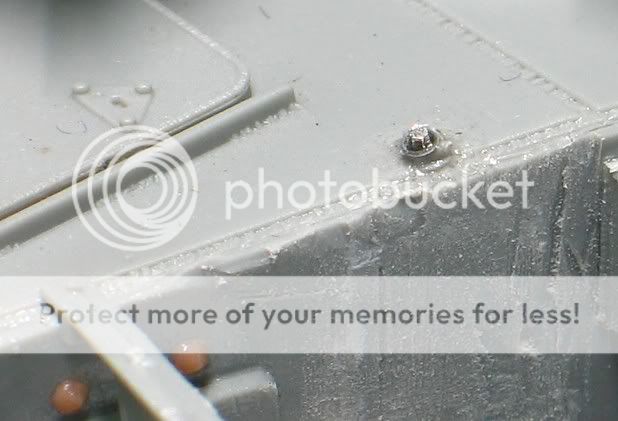
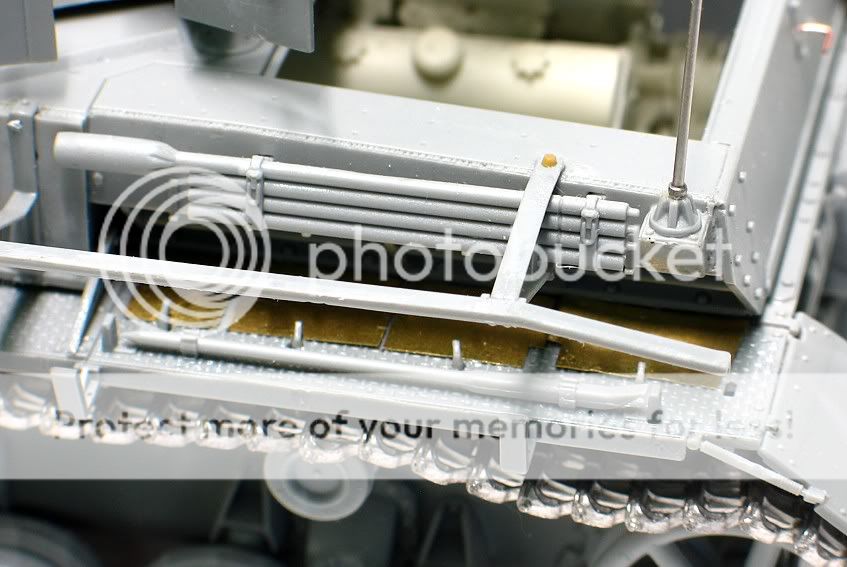
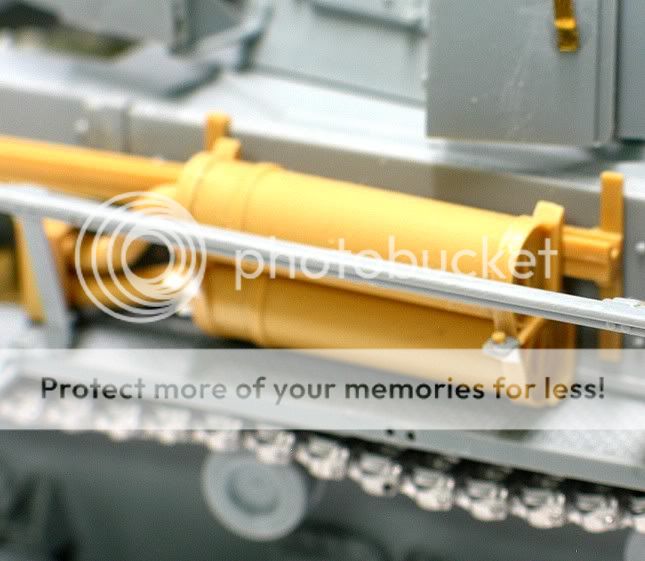
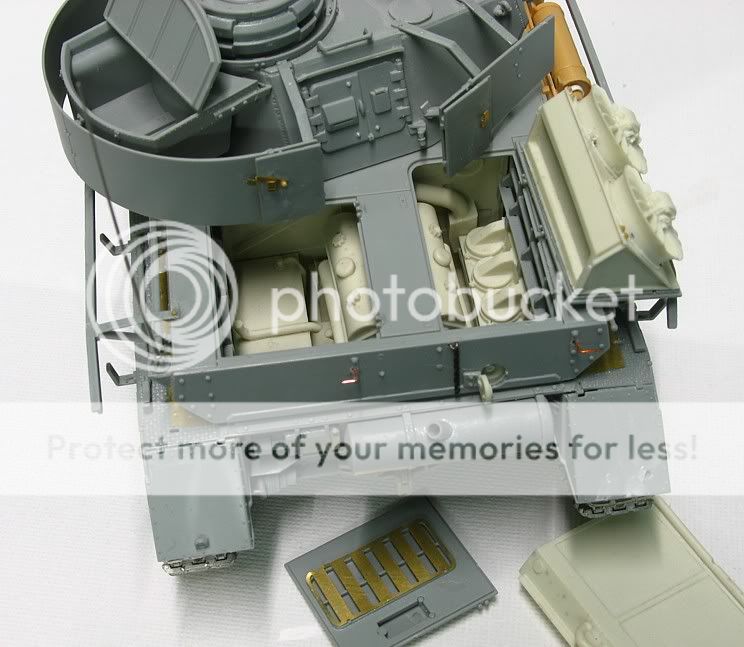
I added a VP engine compartment, Alders Nest steel Mg barrel for the front plate and steel Aerial, Fruil track(1941-44) ATL-04, TAMIYA front bolted armour plate and side air cleaner, JB MODEL barrel (35B40). I also used some scale hardware bolts and washes, Model kasten nuts and rounded bolt heads, parts from the Dragon G kit, chain, Aber tool clamps and some scratch wire and plastic pieces.
I will return shortly with an actual build to show.
Brokeneagle.
I have been working on this vehicle for the last few months just as a build project, as I am not sure when I will be painting this. It has been fun researching the photo's which I always enjoy (as those of you who are used to my posts will be aware). This particular vehicle has been a subject which caught my eye about 12 years ago when I purchased the book (Sturm and Drang no4 )that had a series of shots in it (see below)
Russia- 4th Panzer Division, 2nd company
I was attracted to this vehicle for several reasons, not the least being the collection of gear and stores, as well as the farmyard hitchhikers, which will all add to the scene and enhance the model display. This is also interesting because it is a cross over vehicle from G to H variants.
This vehicle displays some unusual mixes of early H and late G variations as well as battle damage ( a magnet for me). It shows some significant attributes associated with late G models such as the additional welded armour (split version)to the front superstructure and single bolted lower plate, hollow toothed track, early rear Idler wheel, early schurzen mounts and rubber tyred return rollers. It also still retains the side superstructure vision ports as well as the double headlights, however it does have the later model drive sprockets, late rear plate mounts for the cable and the newly designed air cleaner on the right hand side of the vehicle (and this is actually about the only way to really confirm that it is a H model).
So it is about the earliest H version I have seen and must have been in the first batch I think in early 1943 which also explains the total lack of Zimmerit coating.
There has been some exstensive damage as well with the bent hanging rail on the left going 'hand in hand' with the badly damaged front top plate and shot hit into the bottom middle of the welded armour plate. There is also a twisted track bracket and one missing as well as an ill-fitting transmission access hatch. The right headlight is still attached but has broken the mount and is bent over. It is also missing the jack rest block and chain and has nearly every mudguard schurzen mount bent or broken.
Color wise, the decals from Echelon that I have for this tank (Thanks Peter B)suggest a green dominated color but i disagree in looking at my black an white charts etc I think it is more a red brown due to the darker tonal quality so I will be going with yellow and red brown. Echelon also did not have references for the other side but clearly from these photos we see the grizzly bear repeated (lucky they give you an additional set just in case).
The model, I will have to post In the next day or so
, as I noticed a couple of other missing details while doing this post. I modified the new late model H just because I wanted to use this new kit but in doing so I had to steal some parts from my late G (Dragon also)- i may as well have used the G kit I think or the Tamiya version I have (early H ). I did however miss the fact that it still retaind the late G rear lower superstructure plate but it is too late to replace it now.....i will have to live with the H version.I added a VP engine compartment, Alders Nest steel Mg barrel for the front plate and steel Aerial, Fruil track(1941-44) ATL-04, TAMIYA front bolted armour plate and side air cleaner, JB MODEL barrel (35B40). I also used some scale hardware bolts and washes, Model kasten nuts and rounded bolt heads, parts from the Dragon G kit, chain, Aber tool clamps and some scratch wire and plastic pieces.
I will return shortly with an actual build to show.
Brokeneagle.