
-
Modelers Alliance has updated the forum software on our website. We have migrated all post, content and user accounts but we could not migrate the passwords.
This requires that you manually reset your password.
Please click here, http://modelersalliance.org/forums/login to go to logon page and use the "Forgot your Password" option.
You are using an out of date browser. It may not display this or other websites correctly.
You should upgrade or use an alternative browser.
You should upgrade or use an alternative browser.
How to fix this?
- Thread starter The Zod
- Start date
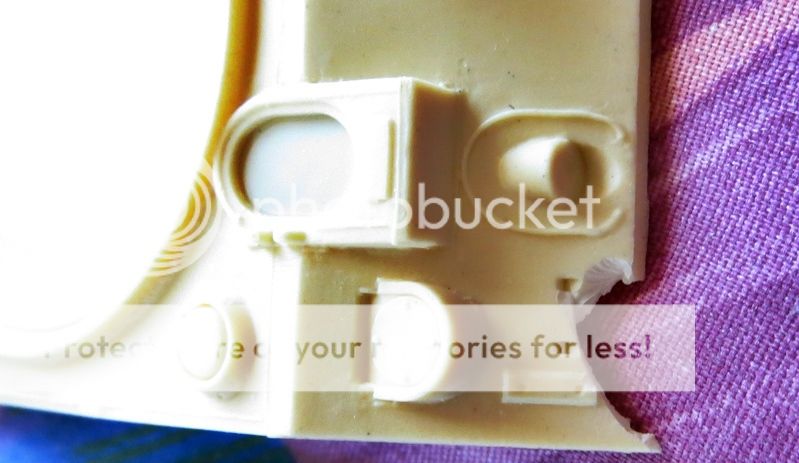
 I think I'd slap some styrene under it & putty & sand, sand & putty... :zen :zen
jknaus
Administrator
Ouch. I think I would try and slice that bracket off or make a new one and check it against the original. Then remove and sand.Then get a triangle of at least 40 thou plastic. Lay some tape on the top of the hull tp cover the hole. Flip and put in the plastic so its held by the tape. Fill the gaps with baby powder or talc or micro balloons and then pour in the thin cyano. Once dry flip again and add a plastic brace across the fix. Flip again and remove tape. Some may stick, it doesn't matter. Litely sand until smooth and blended and then do the Mr Surfacer treatment to make the surface look cast. If I remember correctly Saul uses scotch tape rather than masking tape.
James
James
Lots of putty. :zen
Heavens Eagle
Well-known member
Looks like a resin part, so I would go with Chukw's suggestion. Square up the chipped area and cut a piece of similar thickness styrene to fit and use CA to attach. Get the part that can be seen as well aligned as possible. When set, smooth the surface and add details.
Since the 'bracket' (lift ring base) is simply a strip, you can replace it easily. So, as others stated, make the damaged area into a shape you can easily fill in (rectangle is best). Use a sheet (or laminate sheets) of polystyrene which will be a touch thicker than needed. Brace that part with a strip from behind (use epoxy cement). Around the raised area of the filler, use thin cyanoacrylate (superglue). Let dry about an hour and use a good sanding block to knock down the filler plastic to the correct height (flush) and you will note that the thin CA ensures no filling is necessary. Last, sand the lower edge to the correct angle so you can use it on the donor kit.
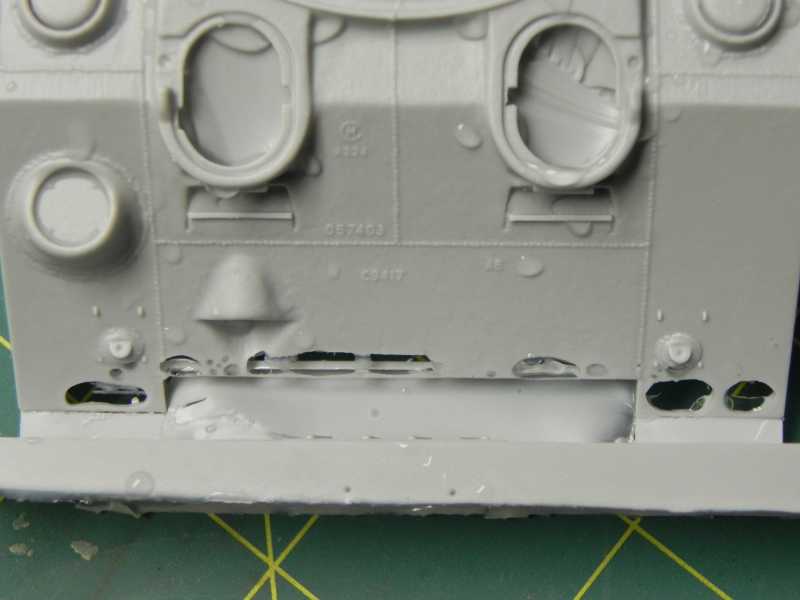
It is what I did with this:
Regards,
It is what I did with this:
Regards,

Thanks for the tips everyone.I could buy a new one from Tank Workshop to replace this,but I am being cheap,and stubborn. I will try to fix this first,
If nothin' else Chad, you can work it into a battle damage scene... :drinks
Skinny_Mike
Well-known member
good post! I just got some ideas on how to fix stuff! LOL