
-
Modelers Alliance has updated the forum software on our website. We have migrated all post, content and user accounts but we could not migrate the passwords.
This requires that you manually reset your password.
Please click here, http://modelersalliance.org/forums/login to go to logon page and use the "Forgot your Password" option.
You are using an out of date browser. It may not display this or other websites correctly.
You should upgrade or use an alternative browser.
You should upgrade or use an alternative browser.
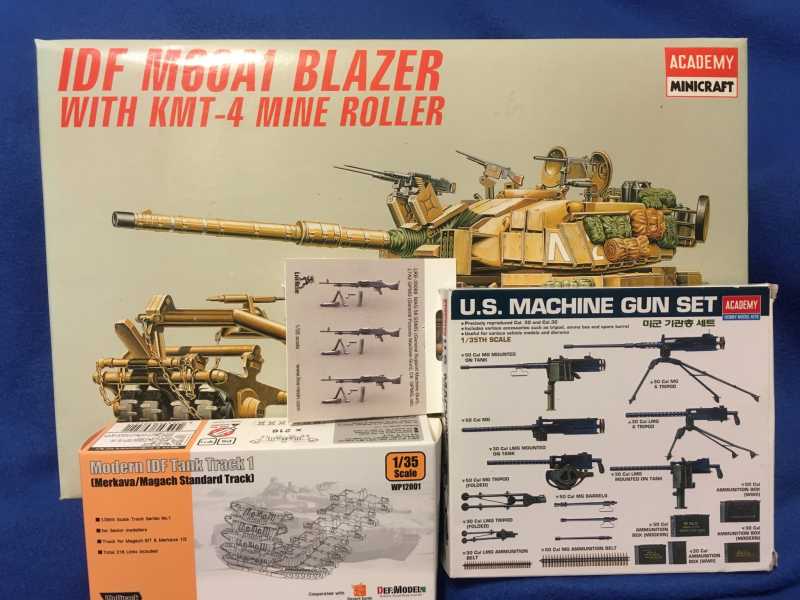
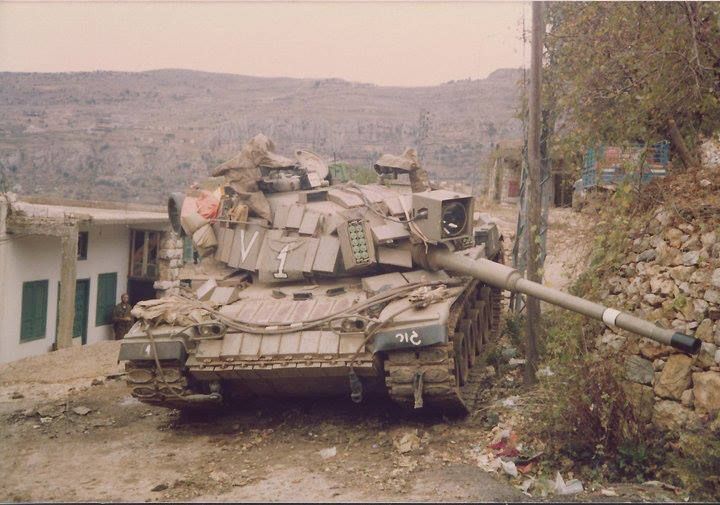
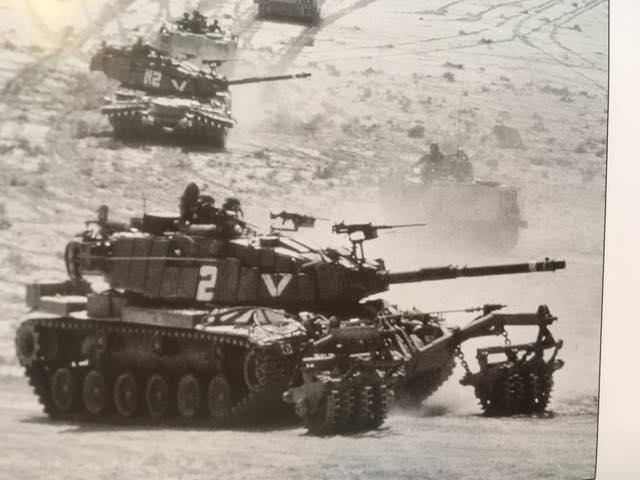
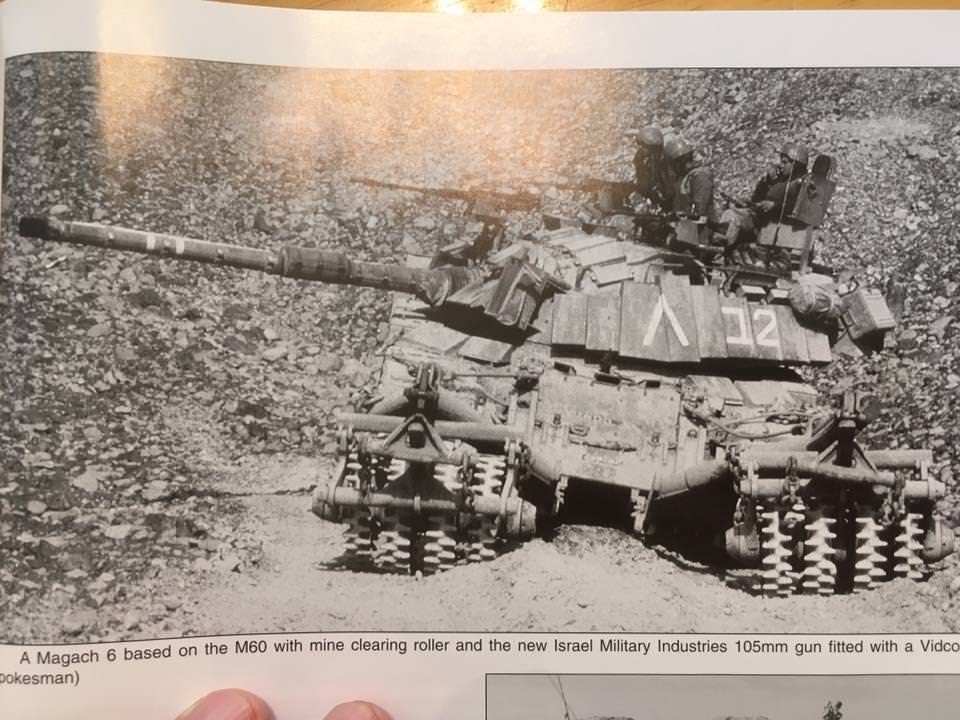
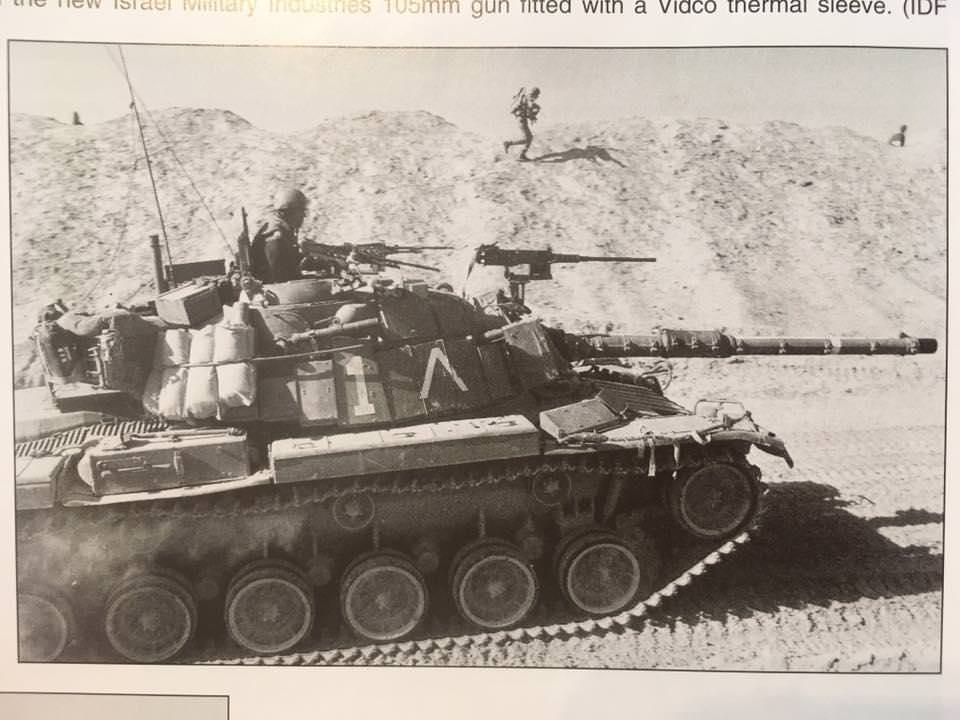
IDF M60A1 w/mine roller
- Thread starter iambrb
- Start date


Skinny_Mike
Well-known member
Cool! Will be watching for sure!

Sherman 18
Master at Arms
I never liked the lower hull of that kit. By the way the turret does not just drop on to the old AMT kit. I've been told the mine roller wheels are a bit too small.
Can't wait to see you build it.

iambrb
Well-known member
Ok here we go, my bonofides that I have not started this yet:


Wow the instruction on this thing are terrible! I spent a bunch of time working on the hull, only to realize that in order to install the mine-roller, I had to go back with a saw and cut most of it back off!
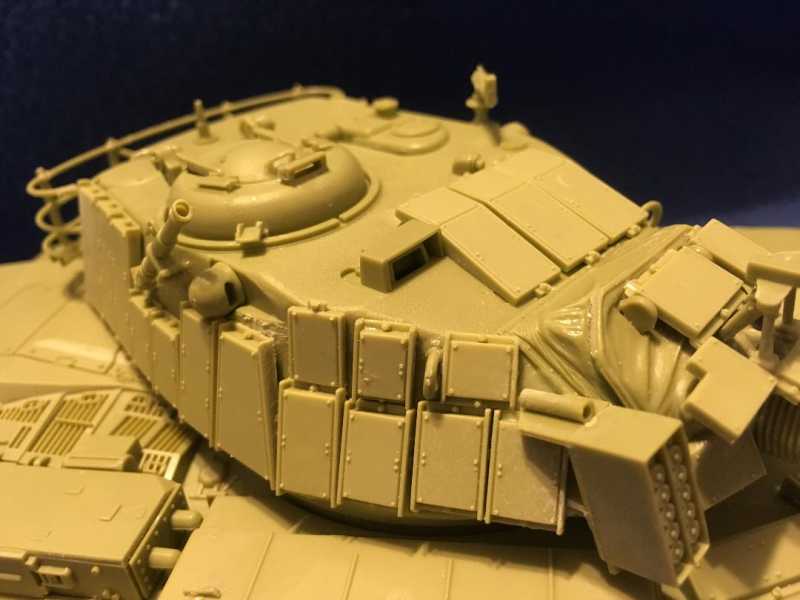
The instructions only give REALLY vague pictures regard placement of the Blazer armor on the turret, so I had to just 'tack' it on there using Tamiya Extra thin, then once positioned and slid around until it all looks as right as it can be, go back and apply more to hold in place. Also the brackets for the smoke grenades required extreme modification to get them to position.
However, it is coming along nicely as you can see.


Still more to on the turret, but looking OK for now.
Lastly is the suspension, see how parts of it are just hanging in the air! Undoubtedly the wheels are there to hid this, but I have Juuuuuuust enough AMS that this is bugging me really bad. I think I am going to have to do something to effect some kind of basic correction here.
Taking a break from this for the rest of the day, will try to do/post more this weekend!
Wow the instruction on this thing are terrible! I spent a bunch of time working on the hull, only to realize that in order to install the mine-roller, I had to go back with a saw and cut most of it back off!
The instructions only give REALLY vague pictures regard placement of the Blazer armor on the turret, so I had to just 'tack' it on there using Tamiya Extra thin, then once positioned and slid around until it all looks as right as it can be, go back and apply more to hold in place. Also the brackets for the smoke grenades required extreme modification to get them to position.
However, it is coming along nicely as you can see.
Still more to on the turret, but looking OK for now.
Lastly is the suspension, see how parts of it are just hanging in the air! Undoubtedly the wheels are there to hid this, but I have Juuuuuuust enough AMS that this is bugging me really bad. I think I am going to have to do something to effect some kind of basic correction here.
Taking a break from this for the rest of the day, will try to do/post more this weekend!
Sherman 18
Master at Arms
Dang!
Have you been studying Mr.T and how he gets them done?
")
Have you been studying Mr.T and how he gets them done?
Shouldn't the shocks make contact with the swing arms? Or is there another part linking this?
Quick progress, looking good Bruce.
Quick progress, looking good Bruce.
iambrb
Well-known member
MP, yes, they ARE supposed to connect to the swingarms...and there are not other parts! Apparently on earlier Tamiya (and the Academy copies of Tamiya, which this is), those are hidden behind the road wheels.
No Sherman, I did not know anything about Mr.T and his work, I will have to try and find it. I have better camo'd it with some admittedly silly looking connecting brackets, but it is certainly better than it was, will try & post pics tomorrow, though that may change yet again, if i can find a link to Mr. T's work (hint-hint).
Anyhow, thanks for the tips y'all, and hope to have some progress pics pretty soon
No Sherman, I did not know anything about Mr.T and his work, I will have to try and find it.
https://www.modelersalliance.org/forum/terry-barrow
There's a lot on this forum that goes unnoticed.
iambrb
Well-known member
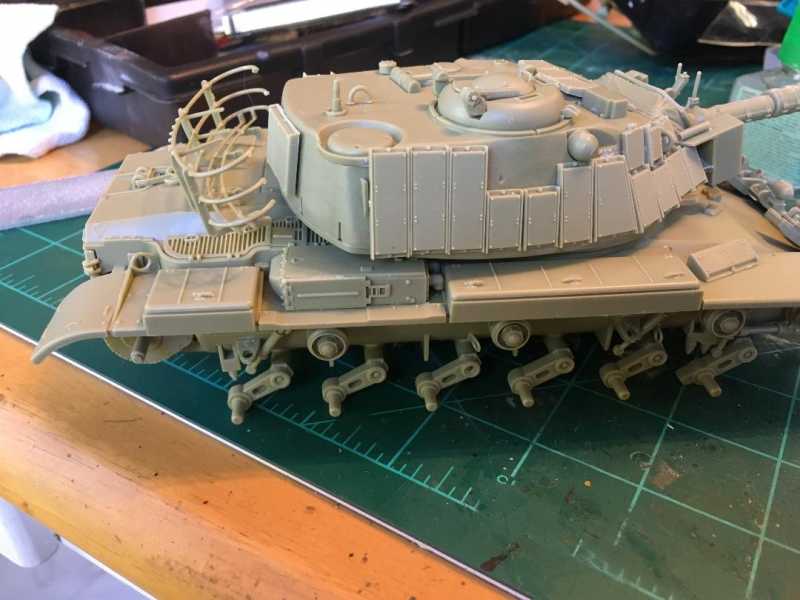
Thanks MP! I did find it, particularly his M48 build, and there some good views on there. In looking at those and others on the web, and doing some research on this older kit, I found that it was intended to be close but not connected, and hide behind the wheels. I looked at some suspension pics and roughed out some lugs, as you can see here (the cuts are actually quite crisp, the dark edges are pencil marks). I think they need to be only slightly trimmed, and a touch of detail added, and they should be fine.
I also got the rest of the upper hull/turret done. There are actually no location marks for all the Blazer armor, just some pics and one tree with them on it. Made for a real challenge! But I got them on there, and even was able to hollow out the mortar tube (almost too much, but backed off in time!)

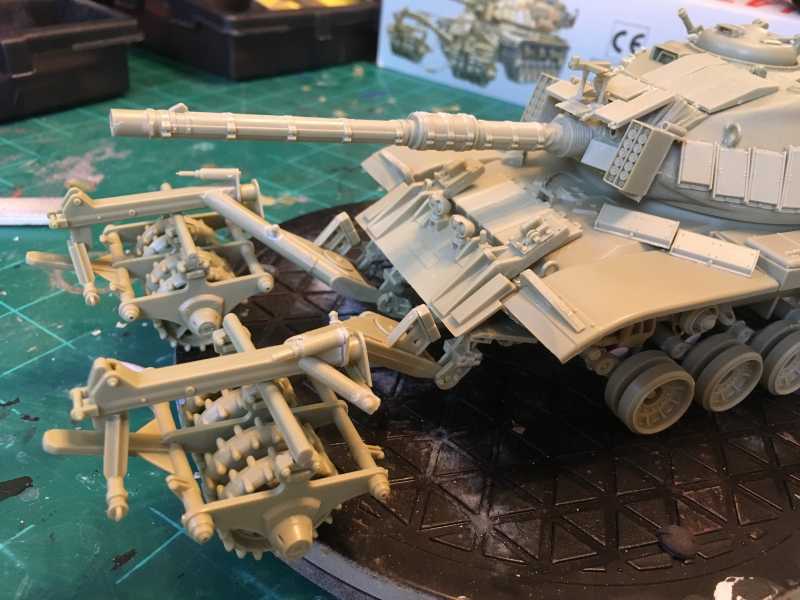
I have started on the mine roller, but again the instructions are Really corn-fusing, so just trying to figure it out. I still maintain that whoever authored this set of instructions went on to work for DML! When I get that and the wheels done, she'll be ready for paint!
'Till then! :salute
I looked at some suspension pics and roughed out some lugs, as you can see here (the cuts are actually quite crisp, the dark edges are pencil marks). I think they need to be only slightly trimmed, and a touch of detail added, and they should be fine.
I also got the rest of the upper hull/turret done. There are actually no location marks for all the Blazer armor, just some pics and one tree with them on it. Made for a real challenge! But I got them on there, and even was able to hollow out the mortar tube (almost too much, but backed off in time!)
I have started on the mine roller, but again the instructions are Really corn-fusing, so just trying to figure it out. I still maintain that whoever authored this set of instructions went on to work for DML!
When I get that and the wheels done, she'll be ready for paint!'Till then! :salute
That'll work...
http://www.missing-lynx.com/articles/modern/jcm60/jcm60.htm
don't know if you stumbled on this?
https://www.modelersalliance.org/forum/terry-barrow/151790-m-60a1
http://www.missing-lynx.com/articles/modern/jcm60/jcm60.htm
don't know if you stumbled on this?
https://www.modelersalliance.org/forum/terry-barrow/151790-m-60a1
iambrb
Well-known member
I did actually, and thanks for posting the link! It has been challenging but really, it's not too bad. I have gotten some of the mine roller sub assemblies together, but it still doesn't make sense to me, so I am going to have to do some pic-research, but hey, that's part of the fun!
iambrb
Well-known member
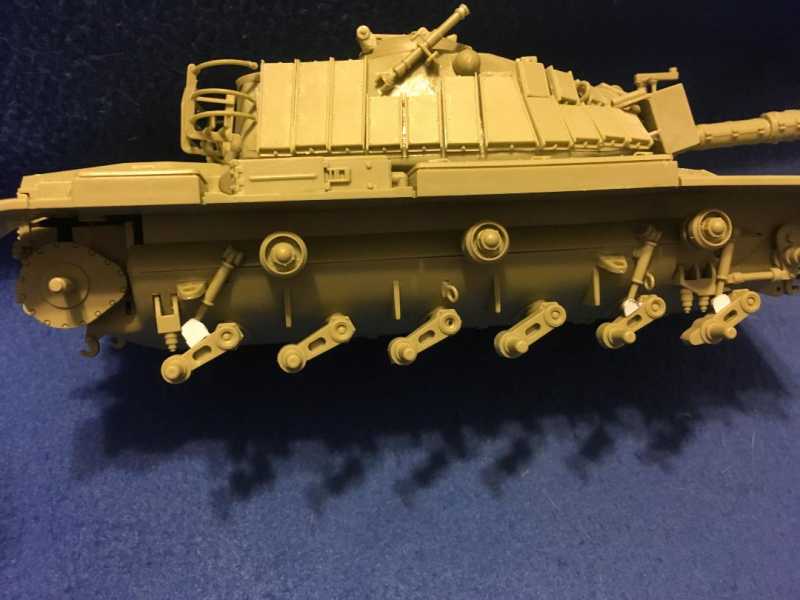
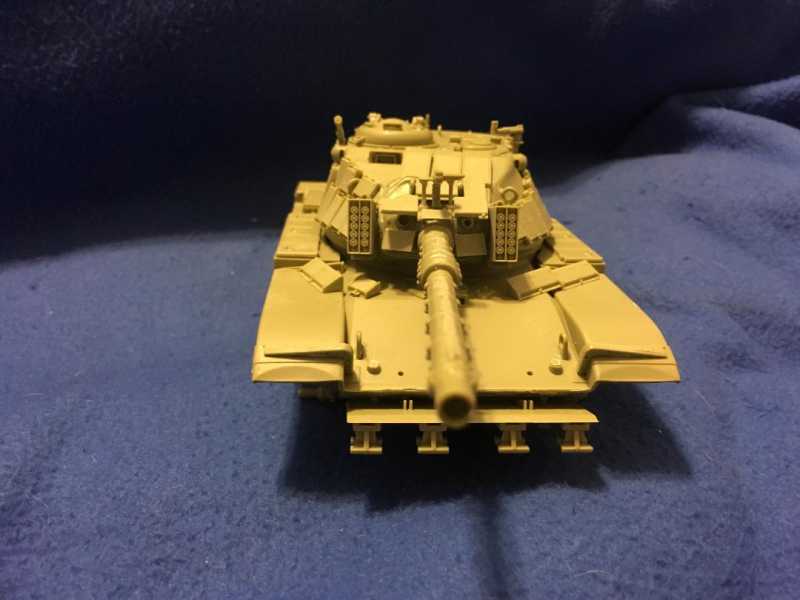
OK here is where we currently sit....not too shabby! The upper & lower hull, turret, wheels,, and parts of the mine roller are just “sitting” togetherness, there is still lot more to go. Paint For this is not gonna be easy!!! But i am really close to that stage!
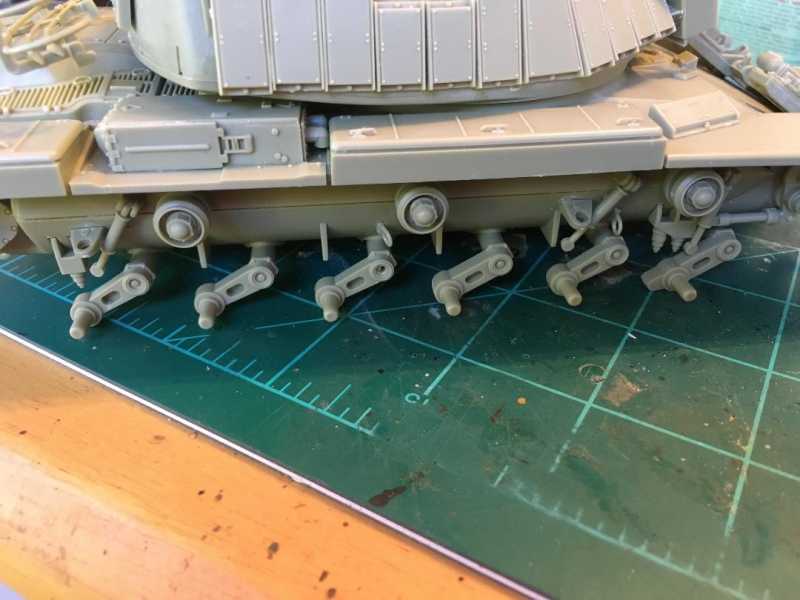
Note that the shocks are hidden but man they look better than dangling out there


Note that the shocks are hidden but man they look better than dangling out there
Watch that seam on the hull!
Looks good, don't know how much would be hidden behind the wheel, you know some people look with pin lights behind wheels and stuff.
Looks good, don't know how much would be hidden behind the wheel, you know some people look with pin lights behind wheels and stuff.
Skinny_Mike
Well-known member
moving along nicely - despite the challenging directions! Keep it up!
What paint are you planning to use?
What paint are you planning to use?
Duke Maddog
Well-known member
Bruce, I finally caught up with this and I am most impressed! Way to go man!