
Skinny_Mike
Well-known member
Hi guys. Well –my A-4 build suffered from a short shot off the cat right into the circular filing cabinet, and thus has been withdrawn from this campaign. I'll have to try that kit again some other time. I’ve decided to enter the other kit I was originally considering, the Wolfpack T-38A Talon kit.
Here is the standard start up pic. Sorry its blurry, I didn’t realize before I jumped into assembly, but it does say December 18, 2016.
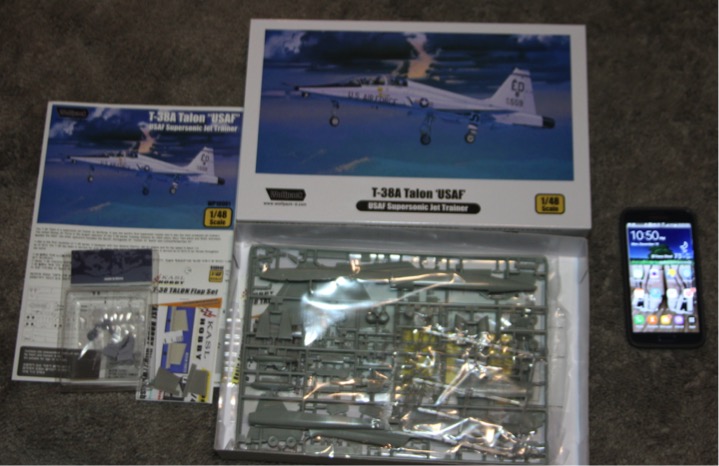
Aftermarket for this kit is pretty limited. I have the Wolfpack update, which includes resin seats and main landing gear wheels, and the KASL flaps set, which I’ve decided not to use on this build. The instructions for the flaps are not very clear, and I really wanted to get in a quick low stress build.
I’ve been home from work for the last week, so I’ve been making some good progress on this build in between all the other chores I’ve been trying to get done. Lets get into it!
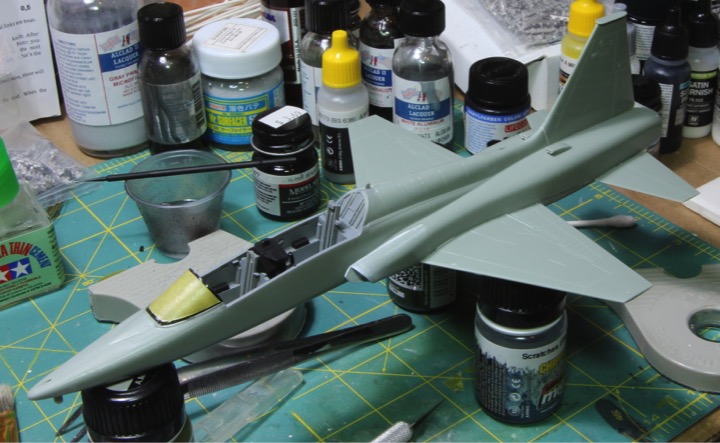
As is typical, work starts in the cockpit. The pit is made up of a two-place tub that you add the seat rails and the instrument panels with rubber pedal to. Assembly was pretty straightforward.
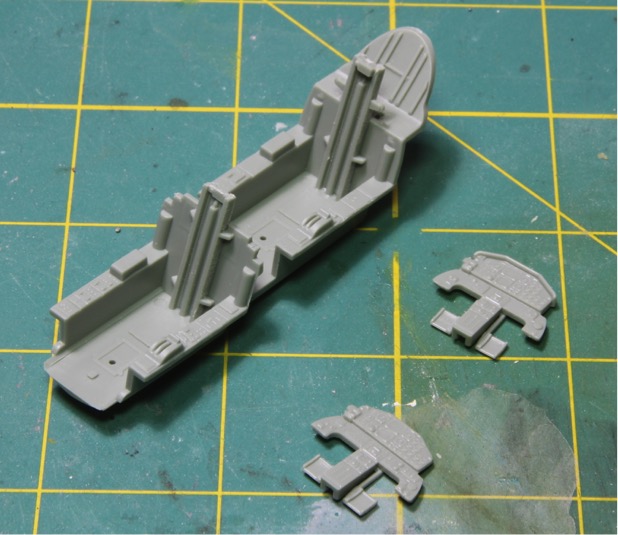
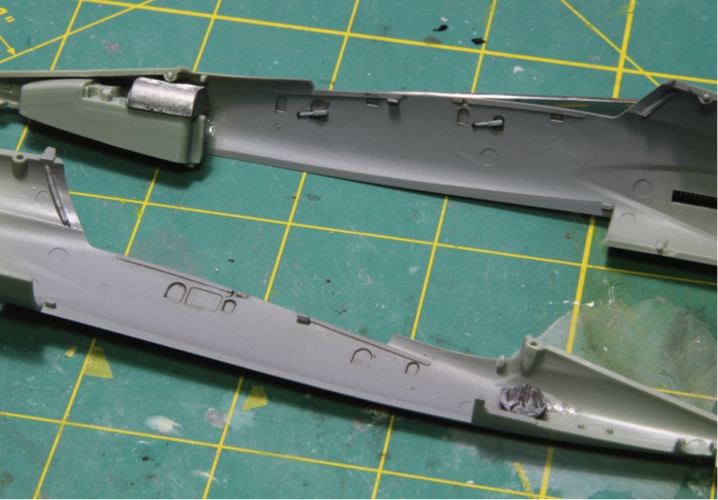
Sidewall detail is molded to the fuselage sides. I’ve read a few build reviews of this kit and one of the issues is that the front of the cockpit sits up to high. A recommended fix was to shave off the mounting tabs for the front of the pit and during assembly only glue the back in until the glare shield is also installed. So that’s how I went. If you look close, you can see the tab shaves off on the bottom half and still present on the top half. I’ve also added the nose landing gear bay at this point.
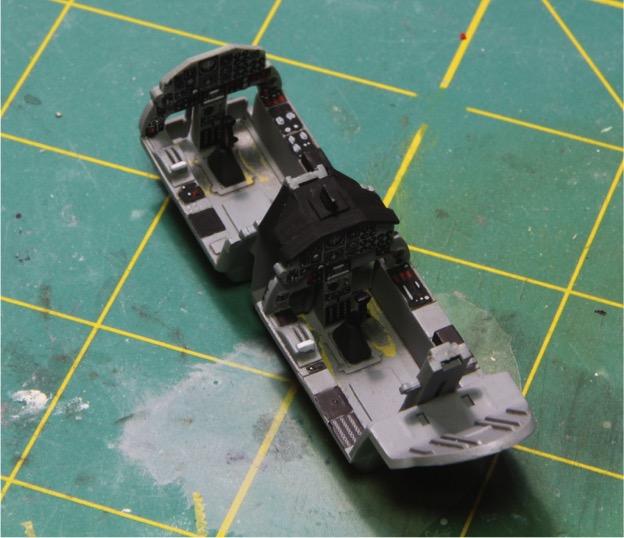
The instrument panels feature raised details that you could choose to paint or use the supplied decals. I choose to use the decals, they are Cartograff so I figured they would settle down just fine. So after a coat of Ammo FS 26173 and a future coat, I laid down the decals with the help of Micro SET and SOL. Turned out perfectly. After the decals set overnight, I flat coated the panels and then added a drop of gloss varnish over each dial to represent the glass.

The rest of the cockpit was finished up. I tired a new techniques for the wear in the tub on this one. First I sprayed the foot wells in Tamiya Metallic Gray followed by a coat of Ammo Scratches Effects. Then I sprayed Ammo Zinc Chromate Primer followed by another coat of the Scratches Effects. Once this dried I painted the whole cockpit, and the sidewalls, in Ammo FS26173. Once the paint dried I used a brush and some water to show the paint wear in the foot wells. I’m pretty happy with how the layers worked out, but I need to refine this technique a little bit. Next step was a future coat followed by a medium gray wash then a flat coat and detail painting. This didn’t take long, there isn’t much to paint here.
I did add a little weight to the nose, around the nose gear well. The instructions do not mention it needing paint, but I figured I would be safe.
One note on the cockpit, the details are very soft here, which did make my detail panting a little tough. This is a kit that would very much benefit from an aftermarket cockpit. The cockpit is large and open, and the canopies are really big putting all that resin detail on display. There is an Eduard update set that I think would be a good improvement. I’ve since ordered it for my other kit.
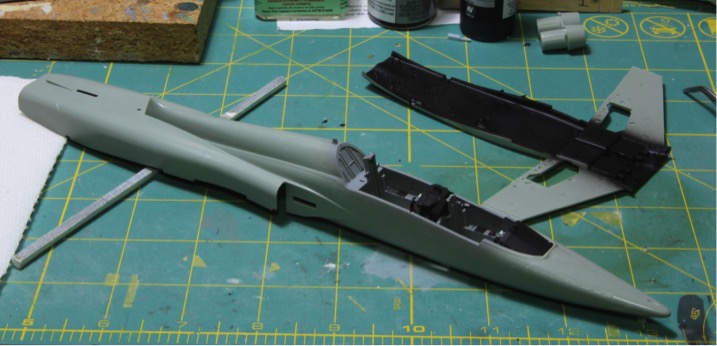
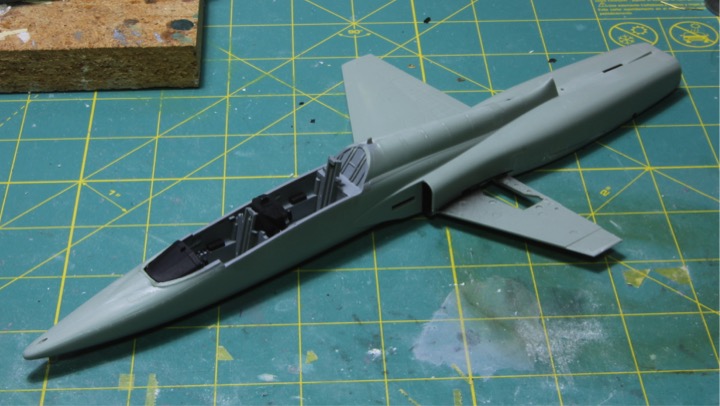
Next step was to install the cockpit, securing only the back, and closing up the fuselage. Once that was set, I added the glare shield and secure the cockpit in place. I also painted the interior of the fuselage and the bottom part in black because there is no trunking for the intakes; they are just open to the interior. I don’t think it will be a problem considering how small they are, but we’ll see.
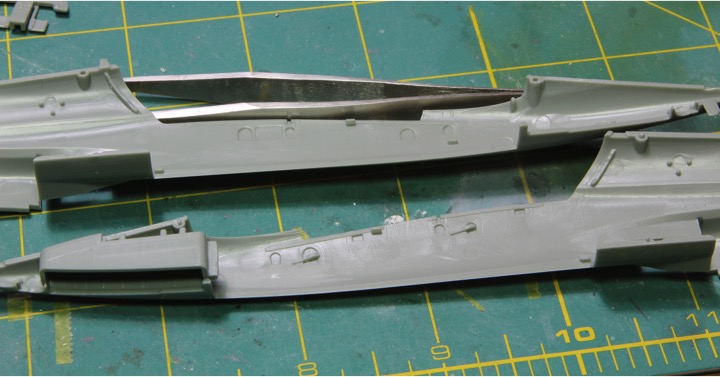
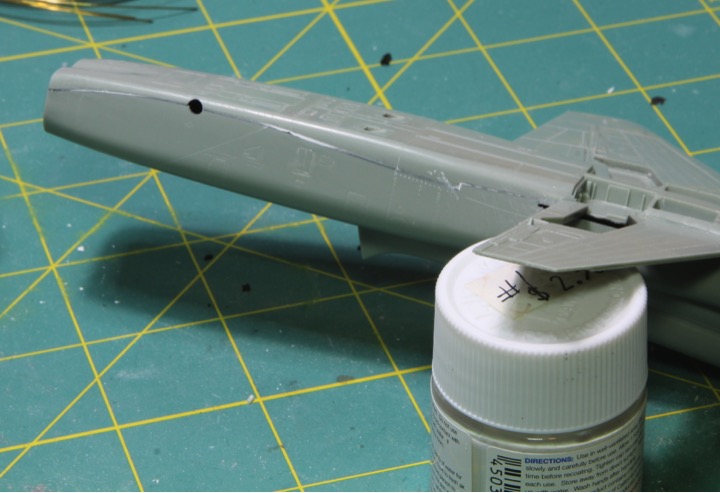
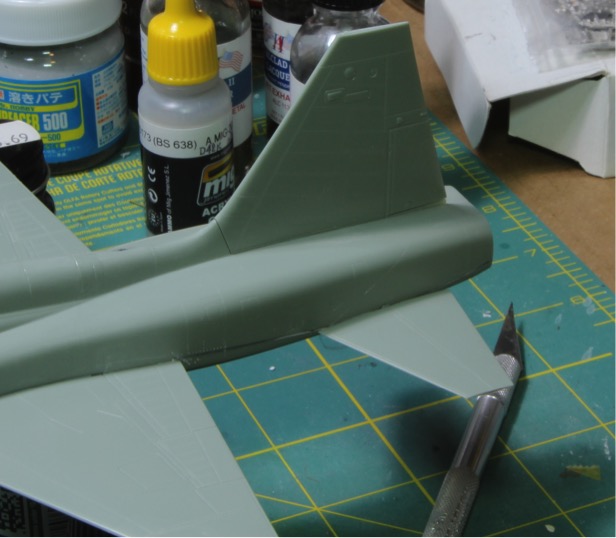
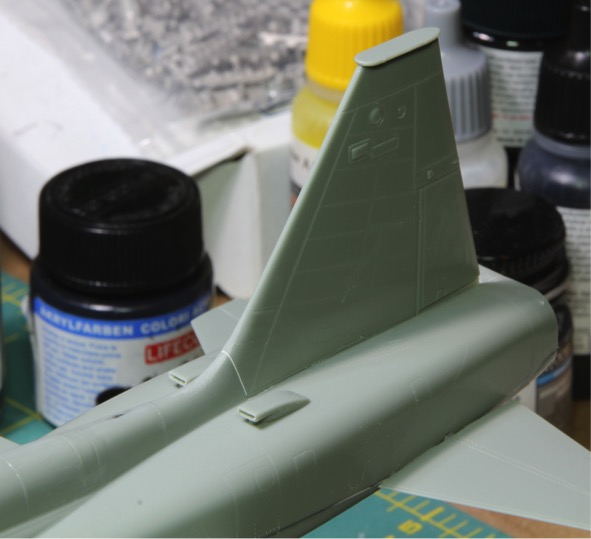
Dry fitting the top and bottom of the fuselages indicated that there was a step at the join. The cross section of the top is smaller then that of the bottom. This is another issue that has already been identified so I was expecting it. I did some measuring and installed some sprue to spread the top to the appropriate width.
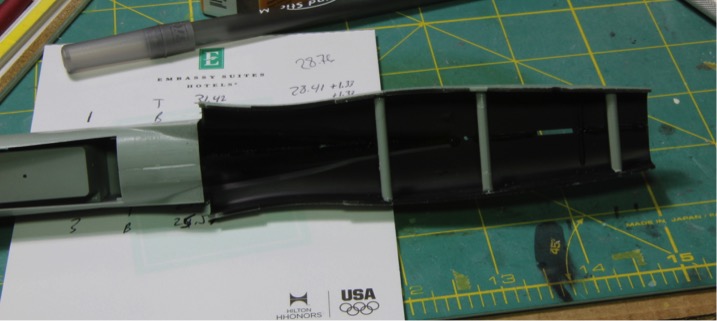
The two forward pieces were secured with some Tamiya cement (the orange capped bottle!) and the one furthest aft wasn’t glued in so I could remove it after the fuselage join was set. This would have interfered with the engines. After that I installed the two lower portions of the fuselage.
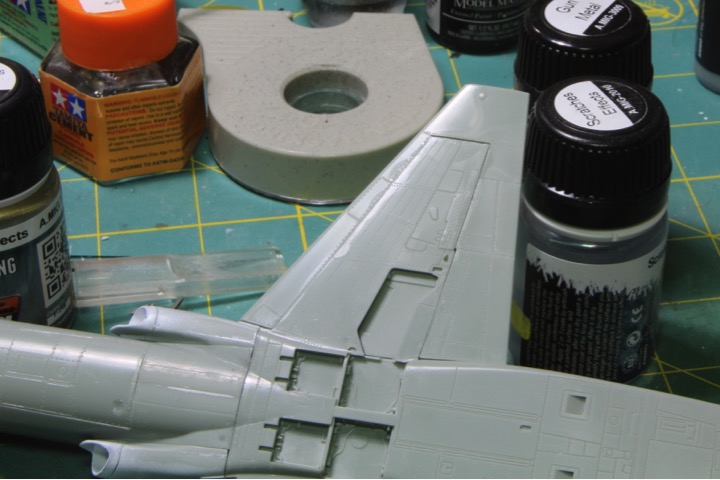
Oddly enough, the fit of the front panel under the fuselage has been identified as a fit issue as well, but I didn’t find that to be the case on my build. The seam on the the sides ended up needing some filler on both, nothing major, but its such a crazy join line that it needs to be taken care of.
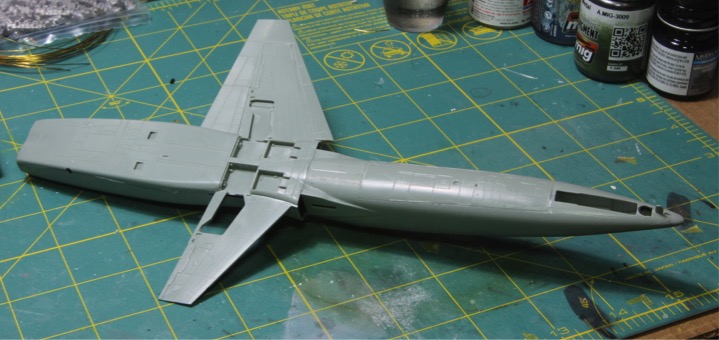
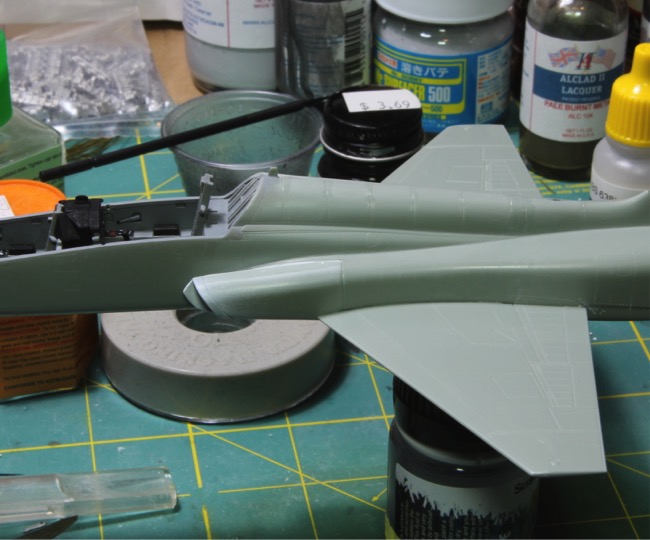
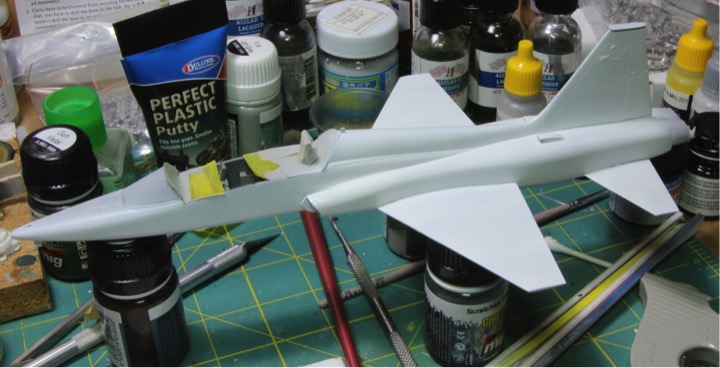
I also added one of the wings. I was going to add the second one, but there is a fit issue that needs some work, plus you need to add the intakes before you add the wings. The directions are not very clear on this, but trust me – you need to. The wing root will need a little filler as well, but I haven’t got there just yet.
Well – that’s about a week’s worth of work. Overall my feelings on this kit are a little bit mixed. The fit is pretty good, but it does require some finesse. Also there are a lot of panel lines and rivet detail, but its all very shallow so every time you need to sand a seam, you lose the details. I’ve read some reviews that have compared this kit to a short run kit and I feel like that’s pretty accurate.
I should have the rest of this put together and in primer tomorrow.
Thanks all for watching. See you soon.
Mike
Here is the standard start up pic. Sorry its blurry, I didn’t realize before I jumped into assembly, but it does say December 18, 2016.
Aftermarket for this kit is pretty limited. I have the Wolfpack update, which includes resin seats and main landing gear wheels, and the KASL flaps set, which I’ve decided not to use on this build. The instructions for the flaps are not very clear, and I really wanted to get in a quick low stress build.
I’ve been home from work for the last week, so I’ve been making some good progress on this build in between all the other chores I’ve been trying to get done. Lets get into it!
As is typical, work starts in the cockpit. The pit is made up of a two-place tub that you add the seat rails and the instrument panels with rubber pedal to. Assembly was pretty straightforward.
Sidewall detail is molded to the fuselage sides. I’ve read a few build reviews of this kit and one of the issues is that the front of the cockpit sits up to high. A recommended fix was to shave off the mounting tabs for the front of the pit and during assembly only glue the back in until the glare shield is also installed. So that’s how I went. If you look close, you can see the tab shaves off on the bottom half and still present on the top half. I’ve also added the nose landing gear bay at this point.
The instrument panels feature raised details that you could choose to paint or use the supplied decals. I choose to use the decals, they are Cartograff so I figured they would settle down just fine. So after a coat of Ammo FS 26173 and a future coat, I laid down the decals with the help of Micro SET and SOL. Turned out perfectly. After the decals set overnight, I flat coated the panels and then added a drop of gloss varnish over each dial to represent the glass.
The rest of the cockpit was finished up. I tired a new techniques for the wear in the tub on this one. First I sprayed the foot wells in Tamiya Metallic Gray followed by a coat of Ammo Scratches Effects. Then I sprayed Ammo Zinc Chromate Primer followed by another coat of the Scratches Effects. Once this dried I painted the whole cockpit, and the sidewalls, in Ammo FS26173. Once the paint dried I used a brush and some water to show the paint wear in the foot wells. I’m pretty happy with how the layers worked out, but I need to refine this technique a little bit. Next step was a future coat followed by a medium gray wash then a flat coat and detail painting. This didn’t take long, there isn’t much to paint here.
I did add a little weight to the nose, around the nose gear well. The instructions do not mention it needing paint, but I figured I would be safe.
One note on the cockpit, the details are very soft here, which did make my detail panting a little tough. This is a kit that would very much benefit from an aftermarket cockpit. The cockpit is large and open, and the canopies are really big putting all that resin detail on display. There is an Eduard update set that I think would be a good improvement. I’ve since ordered it for my other kit.
Next step was to install the cockpit, securing only the back, and closing up the fuselage. Once that was set, I added the glare shield and secure the cockpit in place. I also painted the interior of the fuselage and the bottom part in black because there is no trunking for the intakes; they are just open to the interior. I don’t think it will be a problem considering how small they are, but we’ll see.
Dry fitting the top and bottom of the fuselages indicated that there was a step at the join. The cross section of the top is smaller then that of the bottom. This is another issue that has already been identified so I was expecting it. I did some measuring and installed some sprue to spread the top to the appropriate width.
The two forward pieces were secured with some Tamiya cement (the orange capped bottle!) and the one furthest aft wasn’t glued in so I could remove it after the fuselage join was set. This would have interfered with the engines. After that I installed the two lower portions of the fuselage.
Oddly enough, the fit of the front panel under the fuselage has been identified as a fit issue as well, but I didn’t find that to be the case on my build. The seam on the the sides ended up needing some filler on both, nothing major, but its such a crazy join line that it needs to be taken care of.
I also added one of the wings. I was going to add the second one, but there is a fit issue that needs some work, plus you need to add the intakes before you add the wings. The directions are not very clear on this, but trust me – you need to. The wing root will need a little filler as well, but I haven’t got there just yet.
Well – that’s about a week’s worth of work. Overall my feelings on this kit are a little bit mixed. The fit is pretty good, but it does require some finesse. Also there are a lot of panel lines and rivet detail, but its all very shallow so every time you need to sand a seam, you lose the details. I’ve read some reviews that have compared this kit to a short run kit and I feel like that’s pretty accurate.
I should have the rest of this put together and in primer tomorrow.
Thanks all for watching. See you soon.
Mike


")
 thanks James
 Gloss finishes are tough. And the white show’s every little shadow, making a lot of it look like its unevenly coated in some lights. :gogo